Juicing is a great way to get plenty of servings of fruits and vegetables with lots of nutrients and less of the filling bulk. Whether you juice for breakfasts on the go, healthy snacks or cooking, an electric juicer is an excellent convenience item to have on hand in the kitchen.
Video of the Day
Juicing manually might be a good workout for your arms, but it's tough work and time-consuming. Not to mention there are some foods—think carrots and kale, for example—that don't lend themselves particularly well to manual juicing.
With so many electric juicers on the market, it's not easy to pick one. Obviously, you want a user-friendly appliance that can handle hard veggies like carrots that efficiently extracts the maximum amount of juice and flavor, and doesn't get clogged up. With the right considerations and recommendations, you can find one that's just right for your needs.
What to Consider When Purchasing an Electric Juicer
Style: There are three main types of electric juicers: masticating, centrifugal and citrus juicers. Masticating juicers (aka slow juicers) are best for preserving nutrients and extracting flavor, but they tend to be more expensive. Centrifugal juicers are generally lower priced and designed first and foremost for ease and speed when juicing fruits and veggies. And citrus juicers—as you might guess—are optimal for squeezing citrus fruits like oranges, lemons, limes and grapefruits.
Capacity and Size: As you'd expect, there are compact electric juicers, big ones and many sizes in between. As far as capacity goes, consider whether you just make a glass of juice at a time, or if you want to juice in bulk. Smaller appliances may only have the capacity for 12 or 16 fluid ounces, while large ones can hold more than four times as much. The feeding tube size affects how much chopping is required before feeding the fruits and veggies into the juicer. Also, consider the machine's total footprint and how much counter or storage space you have for it in your kitchen.
Easy to Clean: Electric juicers can have a number of components that get gunked up with use. Look for a model with removable parts, and preferably ones that are dishwasher-safe if you don't want to manually clean them.
Price: You can spend as little as $50 for a budget electric juicer, and as much as several hundred dollars on high-end models—especially for masticating slow juicers. Think about your priorities and your budget, looking for the right balance of capabilities and price. Just don't feel like you have to spring for an expensive appliance to get a good one; that's not the case.
These considerations help you narrow down the extensive selection of electric juicers on the market today and pick one that suits your personal needs.

The Best Masticating Juicer (Slow Juicer)
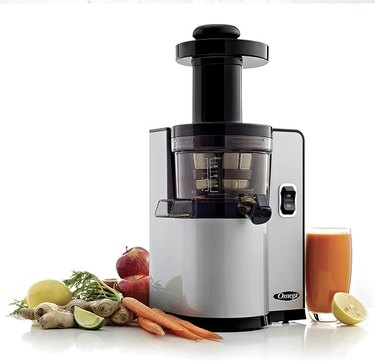
Omega Vertical Slow Masticating Juicer
$304.62 at Amazon
When a countertop appliance comes with a 15-year warranty, you can feel pretty confident about it. This masticating juicer uses a double-edged auger to slowly crush and squeeze produce. It's excellent at maximizing juice extraction and pulp retention, and the output is exceptionally smooth and tasty. This model is also easy to use and to disassemble and hand wash, plus its modular design gives it a relatively small footprint. Note that this slow juicer has a fairly small capacity though, for just one glass of juice at a time.
At a Glance:
- Manufacturer: Omega
- Style: Masticating/Slow
- Capacity: 16 fluid oz.
- Feeding tube size: 2.25" x 1.5"
- Size: 15.51" x 6.97" x 15.47"
- Power: 150 watts
The Best Centrifugal Juicer
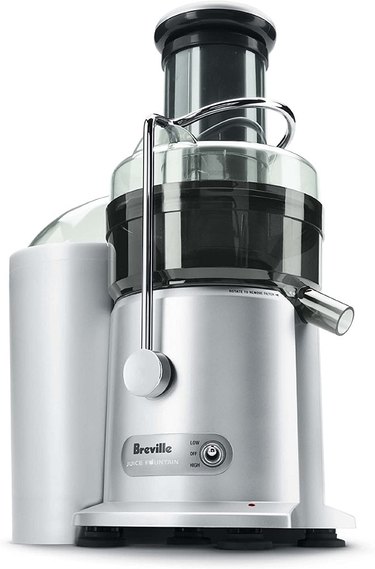
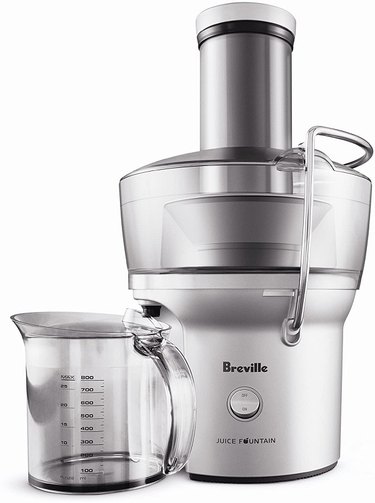
Breville Juice Fountain Plus
$124.46 at Amazon
For fast juicing that extracts maximum liquid and reliably holds back the pulp, this Breville model is a great choice. Its powerful dual-speed motor gets the job done, whether it's on low for softer fruits or leafy veggies or on high for harder and denser foods. Some other features to appreciate include the extra-wide feeding chute for less prep, the built-in froth separator, the ability to wrap the power cord around the base, and the many dishwasher-safe removable parts.
At a Glance:
- Manufacturer: Breville
- Style: Centrifugal
- Capacity: 35.2 fluid oz.
- Feeding tube size: 3" wide
- Size: 13.2" x 16.5" x 18.2"
- Power: 850 watts
The Best Citrus Juicer
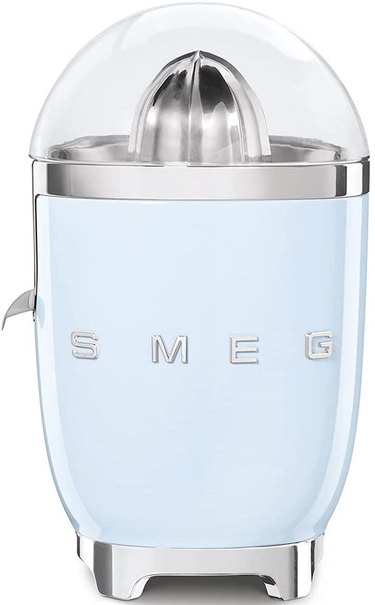
Smeg Citrus Juicer
$189.95 at Amazon
If you're only looking to juice citrus fruits, this is a smart pick. This compact electric citrus juicer doesn't just work amazingly well—it looks amazing, too. It has a sleek, retro design and even comes in a number of different stylish colors. It's very easy to use; simply cut a citrsmeus fruit in half, place it on the extractor, close the lid, let the machine do the work (which it does efficiently), and catch the extracted juice in a glass beneath the spout. This appliance is also easy to wash thanks to dishwasher-safe components.
At a Glance:
- Manufacturer: Smeg
- Style: Citrus
- Capacity: N/A
- Feeding tube size: N/A
- Size: 14" x 9.5" x 8.75"
- Power: 80 watts
The Best Budget Juicer
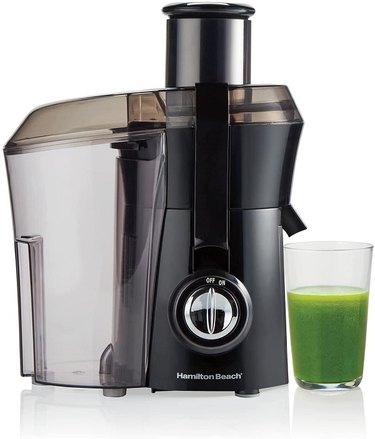
Hamilton Beach Big Mouth Juicer Machine
$64.99 at Amazon
Hamilton Beach is well known for simple, quality kitchen appliances at low prices, and this model of centrifugal juicer is a great example. This affordable option juices quite quickly (thanks to its powerful motor), effectively retains pulp and has an extra-wide feeding tube to minimize prep. The removable parts are dishwasher-safe for easy cleanup, but it also comes with an innovative manual cleaning tool that cleans the entire blade with one motion while protecting your fingers. Note that this juicer doesn't include a receptacle for the juice; just catch the extraction in a glass beneath the spout.
At a Glance:
- Manufacturer: Hamilton Beach
- Style: Centrifugal
- Capacity: N/A
- Feeding tube size: 3" wide
- Size: 7.8" x 11.5" x 14.4"
- Power: 800 watts
The Best Compact Juicer
Breville Compact Juice Fountain
$99.95 at Amazon
For juicing enthusiasts with limited space, this is a small but mighty centrifugal juicer. Its 700-watt motor ably handles harder and denser fruits and vegetables. Even though it's compact, this model has the capacity for two 12-ounce glasses of juice, plus a 1.6-quart pulp receptacle and a relatively wide feeding chute. With few components (and the removable ones can go in the dishwasher), it's easy to assemble and to clean, too. The built-in froth separator is a nice touch, and the low price is a great value for the dependability, quality and durability of this electric juicing appliance.
At a Glance:
- Manufacturer: Breville
- Style: Centrifugal
- Capacity: 25 fluid oz.
- Feeding tube size: 3" wide
- Size: 7.4" x 10.4" x 12.7"
- Power: 700 watts
The Best High-Capacity Juicer
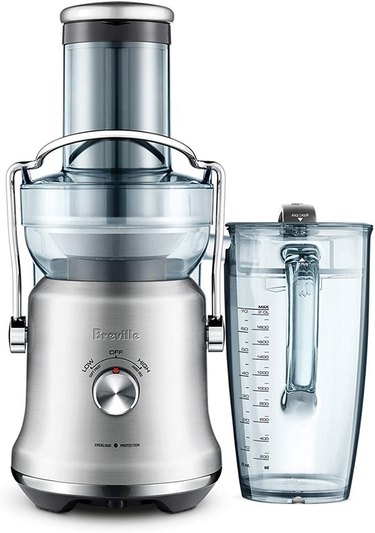
Breville Juice Fountain Cold Plus
$211.59 at Amazon
Another Breville centrifugal juicer makes the list, this time for people who need an extra-large electric juicer. With 70 fluid ounces of capacity, a 3.9-quart pulp container and a luxuriously wide 3.5-inch feeding chute, this model caters to above-average juice needs. And with its 1,000-watt motor and dual-speed settings, it's up to the challenge. One of the best parts is the cold-spin technology, which enhances nutrient transfer by minimizing heat and processing. You can juice straight into a glass, or into the large container that conveniently seals and goes right into the refrigerator. Also, while this is a high-capacity appliance, it features a thoughtful space-saving design that keeps its footprint reasonable.
At a Glance:
- Manufacturer: Breville
- Style: Centrifugal
- Capacity: 70 fluid oz.
- Feeding tube size: 3.5" wide
- Size: 13.15" x 8.6" x 17.64"
- Power: 1,000 watts


 1 of 12
  2 of 12
  3 of 12
  4 of 12
  5 of 12
  6 of 12
  7 of 12
  8 of 12
  9 of 12
  10 of 12
  11 of 12
  12 of 12

 Olives with pimentos
  Paprika
  Pepper plant
  Peppers
  Red bell peppers
 ")