Home Blog

What Is the Difference Between Bratwurst & Metts?

0

Grilling food outdoors Bratwurst and Metts sausages on the grill are a common sight in the summertime. Image Credit: Jupiterimages/Polka Dot/Getty Images

Since the times of the Romans, preserving meat as sausages has been a tradition around the world, with bratwurst and mettwurst, or brats and metts, just two of many varieties. Like all types of sausages, brats and metts come in a range of types, raw and cooked, made with different ingredients, such as pork, beef or veal, or with different ingredients added — for example, cheese-filled metts. That said, there are lots of similarities, but some typical differences between the two sausages.

Video of the Day

Inside the Casing

You can typically find bratwurst fresh in the supermarket, made with both pork and veal; you may also find it precooked and made just with pork. Bratts are typically mild in flavor, with spices such as ginger, nutmeg, and caraway. Metts are made with pork or sometimes beef and pork, and are highly seasoned with pepper and coriander. Metts are cured and smoked so you can eat them either raw or cooked.

On a Bun or a Cracker

Even when bratwurst are precooked, they are always reheated before eating. Metts can either be cooked for the firm, sausage-like types or spread on bread or crackers for soft, liverwurst types. In Cincinnati, a city known for sausages, metts are similar to, or are sometimes confused with, Polish kielbasa sausages, which are firm sausages flavored with garlic, pimento and cloves. The German term for metts is "schmierwurst," because you are able to smear or spread them.

Cook It Right

Bratwurst and the firm type of metts cook in the same ways, either grilled, pan-fried, poached, stewed or baked. Parboiling the wursts in beer for about five minutes before finishing cooking is also a common method. A caution: use tongs when cooking so all the juices remain within the casing, unless you prefer to let the fats in the sausages escape.

Flavorful Pairings

Like all sausages, brats and metts share many of the same accompaniments and condiments. Mustard and sauerkraut are one typical pairing for the sausages. In stews you might see pairings of the sausages with onions, potatoes and tomatoes or with white beans and carrots seasoned with thyme or oregano. In Chicago, a favorite pairing is sausages with either green or red bell peppers and onions.

How to Make Zucchini Chips in the Oven

0

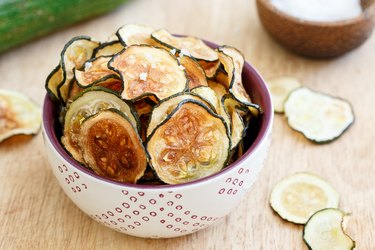
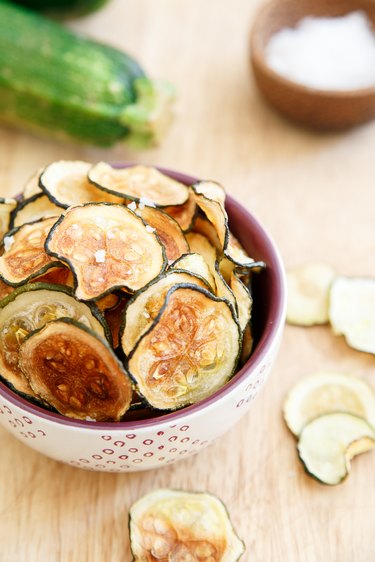
Chips with no guilt? Yes, they exist! Perfectly crispy zucchini chips can happen right in your oven, and there's no better time to make them than at the end of summer when zucchini is overrunning gardens and stock-piled in grocery stores everywhere. Fancy dehydrators need not apply, too — all you need is an oven and a little bit of patience. Add any seasoning you want, or keep things simple with a generous sprinkling of sea salt. Either way, you can eat the tray, and ditch the guilt.

How to make oven baked zucchini chips

Video of the Day

Things You\’ll Need

  • 1 large zucchini, sliced into 1/8 to 1/16 inch thick rounds

  • Extra virgin olive oil, 2 tablespoons

  • Sea salt

  • Parchment paper

oven baked zucchini chips

Step 1: Prepare Zucchini Slices

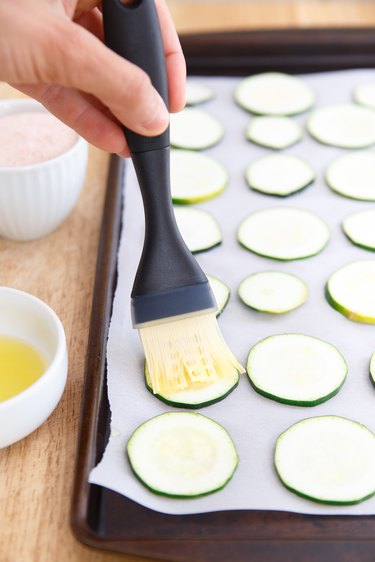
Place zucchini slices on a paper towel, and then blot the tops of the slices with another paper towel to remove as much excess moisture as possible. Put the zucchini slices on parchment-lined baking sheets and lightly brush them with olive oil.

Tip

Don't over-oil the zucchini! Just a light coating is best for crispy chips.

Step 2: Salt Each Slice

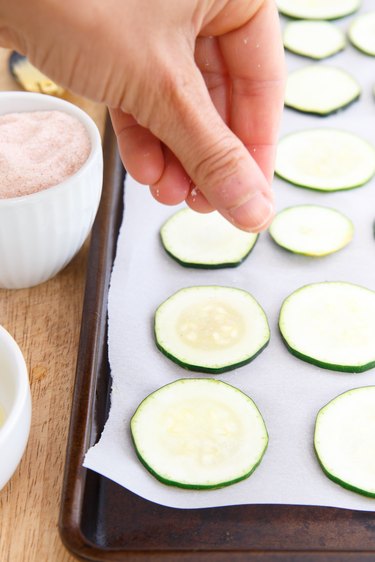
Lightly salt each slice. The salt should stick to the pieces.

crispy zucchini chips

Step 3: Bake the Slices

Place the sheet in a 200-degree Fahrenheit oven for approximately 2 hours, carefully flipping each slice halfway through.

Tip

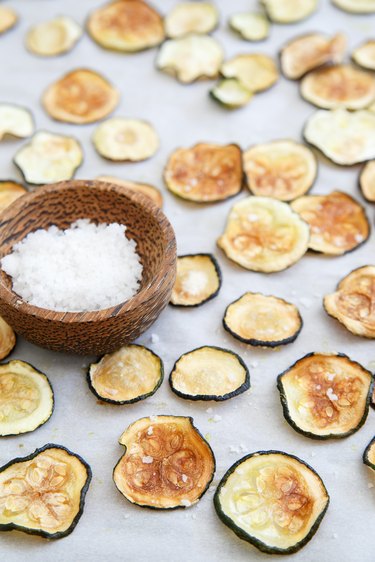
Start checking the chips for doneness around 1.5 hours. Smaller pieces will crisp up faster. Once they start to turn golden brown and are dry to the touch, remove them from the oven.

Crispy oven baked zucchini chips

Step 4: Season the Chips

Season liberally with sea salt immediately after removing the chips from the oven.

How to make crispy zucchini chips in the oven

5 Best Non-Toxic Cookware Sets for Safer Cooking

0

eHow may earn compensation through affiliate links in this article.

Since more people have been spending an increasing amount of time at home (and in the kitchen), it's only logical that they would become more interested in quality cookware. Likewise, growing awareness of the dangers of harmful ingredients in traditional cookware has led to a much-needed rise of non-toxic alternatives. We're all doing our best to stay healthy during these times, and preparing healthy recipes using safe cookware is a big part of that. Here's a list of non-toxic kitchen sets that may make you consider investing in new goodies for your kitchen!

Video of the Day

Xtrema 12-Piece Versa Pot Cookware

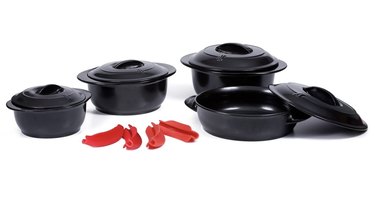
The Xtrema cookware set is 100% ceramic, all-natural, inorganic, and eco-friendly—and according to their website, this makes their set the healthiest option for preparing food. The cookware coating also delivers a smooth, high-gloss non-scratch surface. The set's all-black aesthetic would be a sleek addition to almost anyone's kitchen, and comes with 4 red pot holders exclusive to the set.

Xtrema 12 piece set

Cuisinart Tri-Ply Stainless Steel Cookware Set

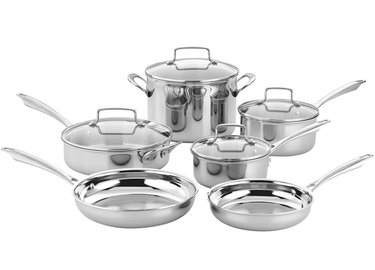
This set by Cuisinart has been very well reviewed on Amazon for good reason. Harmful chemicals leaking into your food will not be a worry with these beauts, and the cookware is also oven-safe for easier cooking options! The stainless steel handles are cool to touch and built to last. Plus, the pieces are dishwasher safe and come with a lifetime warranty. This set would be a great way to introduce non-toxic cookware into one's kitchen while sticking to the classic stainless steel aesthetic.

Cuisinart Tri- Ply Stainless Steel Cookware Set in silver.

Le Creuset Toughened Nonstick PRO Cookware Set

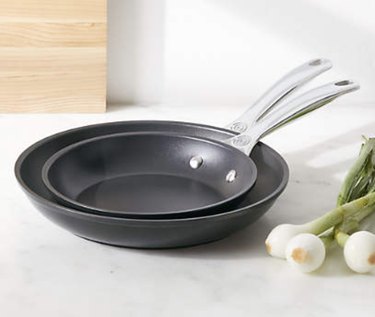
The reviews for this Le Creuset set are all in sync in that the quality is simply exceptional. This is an updated model that is now 4x stronger and triple reinforced with PFOA free materials. The handles are also incorporated with stay cool ergonomic technology which allow for seamless and quick movements as you navigate the kitchen. They're oven and dishwasher safe, and include easy wipe clean surfaces. Who doesn't appreciate an easy clean up?!

Le Creuset  Set

Caraway Cookware

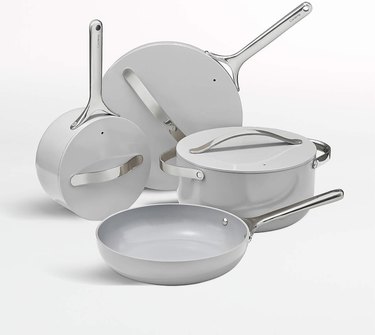
Caraway is a newer cookware brand that has made quite a splash on the internet. Their products are constructed using 60% less CO2 than other typical products with non-stick coating. The pieces are easy to clean, oven safe, and when the entire set is purchased a storage unit is also supplied. The pans also boast of being compatible with any stovetop, which makes them even more alluring.

Caraway cookware in gray.

Always Pan by Our Place

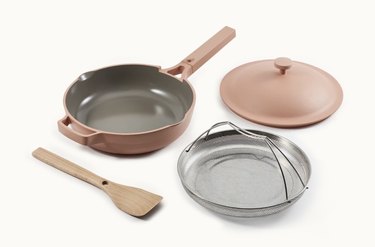
The Always Pan is another internet sensation with product details boasting about being the only pan needed in your kitchen. The Our Place website states that this pan can replace your fry pan, sauté pan, steamer, skillet, saucier, saucepan, non-stick pan, spatula, and spoon rest. This seems like a big order but according to the reviews, it does just that! The Always Pan also doesn't contain any toxic metals, nanoparticles, lead, cadmium, and PFAs. The pan comes in a variety of muted colors that will surely enhance your kitchen space.

Our Place Always Pan in spice

With so many different options, it can seem daunting to make a decision — especially when considering the health of one and one's family. Luckily there are lots of similarities between these non-toxic products so here are two questions to help narrow things down: What do you like, and what do you need? This list comprises full sets and beginner items so hopefully there is something for you, no matter what you're looking for. Happy (non-toxic) cooking!

How to Properly Cook Lentils

0

Lentils are the perfect base to any meal as they are a great source of plant protein, fiber, iron, and several other key nutrients that your body needs. They are super filling and will take on any flavor profile. Properly cooking your lentils can be accomplished in a few easy steps and from there, lentils can be made into a number of yummy recipes that your whole family will love. I promise that you are going to love adding lentils into your weekly meal planning.

How to Properly Cook Lentils

Video of the Day

Things You\’ll Need

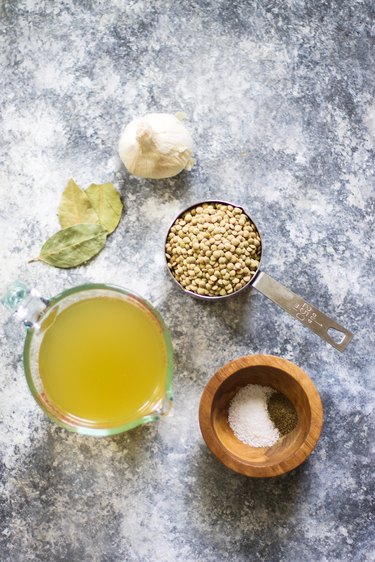
  • 1 cup of lentils, rinsed and picked over

  • 1 peeled and smashed garlic clove (optional)

  • 1 tablespoon salt

  • 1 teaspoon cracked black pepper

  • 5 cups chicken broth or vegetable broth

  • 1 bay leaf (optional)

How to Properly Cook Lentils

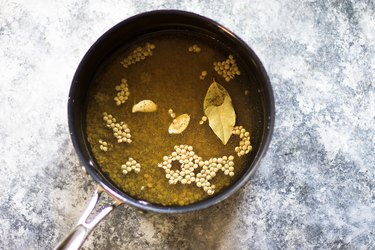
Step 1: Add Lentils and Broth

In a large saucepan, add lentils, 4 cups of the broth, salt, pepper, smashed garlic clove, and bay leaf and bring to a boil.

How to Properly Cook Lentils

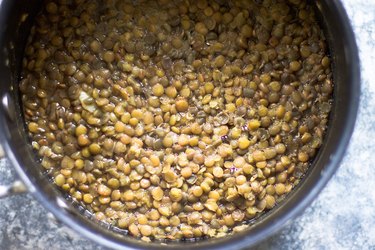
Step 2: Let Simmer

After the liquid comes to a boil, reduce heat and let simmer uncovered for about thirty minutes until lentils are tender.

How to Properly Cook Lentils

Step 3: Add Remaining Broth

After the lentils have simmered for about 15 to 20 minutes, you will notice most of the liquid might have evaporated so at this time add the rest of the broth as needed until lentils have cooked through.

How to Properly Cook Lentils

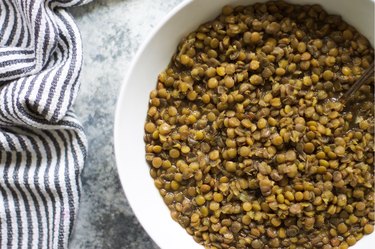
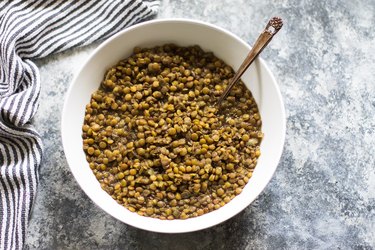
Step 4: Serve Immediately

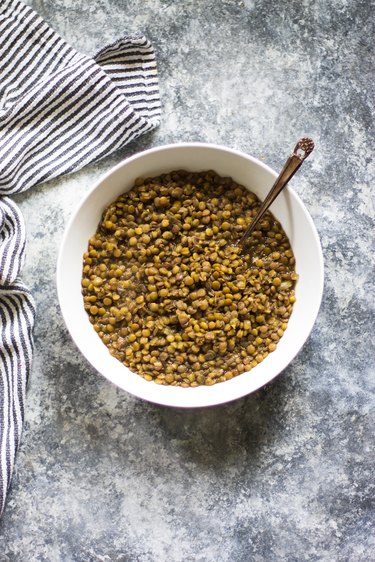
After lentils have cooked though, serve them immediately or freeze for later.

How to Properly Cook Lentils

With this basic lentil recipe, you can add a multitude of flavors to switch your lentils up any night of the week. Some of my favorites include adding Italian spices, onion, and carrot for a tasty Italian lentil stew. Another great idea is adding in fresh herbs and marinara to make a meatless marinara sauce for pasta. You can add other beans, chili powder, cumin, and veggies for a vegetarian chili option which is always delicious. I am also a huge fan of using leftover lentils and turning them into veggie burgers by adding an egg, some bread crumbs, and a little seasoning! The options really are endless and any way you eat them, lentils are delicious.

So why not take a break from meat protein every once in a while and add lentils to your grocery list. These winning recipes are satisfying, and super nutritious. I bet everyone in your family (even meat lovers!) will soon become a fan of this alternate protein source.

How to Soften Yeast

0

Things You\’ll Need

  • Measuring cup or small bowl

  • Milk or water

  • Sugar (optional)

  • Dry active yeast

... Dry yeast must be activated before it is used in bread.

Home bread bakers have a number of options when it comes to yeast. The refrigerator section at the supermarket will have small blocks of fresh yeast, the same kind most professional bread bakers use. This is live, perishable yeast and needs only to be crumbled into wet ingredients. Quick-rising or bread machine yeast, which comes in the form of dry grains, can be sprinkled directly into the dry ingredients. Dry active yeast, the most common form in home kitchens, must be softened in warm milk or water before it is added to dough.

Video of the Day

Step 1

Fill a measuring cup or small bowl with warm water or milk, as directed in the recipe. Most recipes will instruct you to dissolve a small amount of sugar in the warm liquid, as well. The ideal temperature for the liquid is 100 to 110 degrees F, just a little above body temperature.

Step 2

Open your package of active dry yeast and sprinkle it evenly over the surface of the milk or water.

Step 3

Wait 10 minutes, then check the yeast. By this time it should have formed a thick layer of froth on top of the liquid, and have a distinctly yeasty smell. If it hasn't done so, the yeast is too old to be viable and should be discarded.

Step 4

Add the softened yeast to the rest of the ingredients, as directed in the recipe.

10 Ways to Eat Squash

0

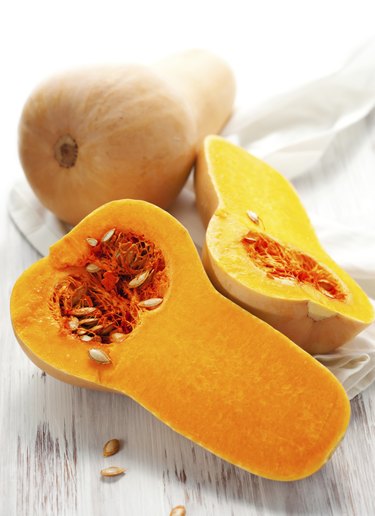
Butternut squash Get cozy with winter squash! Image Credit: SVETLANA KOLPAKOVA/iStock/Getty Images

Winter squash make for comforting and hearty meals that are perfect for enjoying during the colder months. While pumpkin is always a crowd pleaser, there are many other varieties to enjoy. Delicata, acorn, kabocha, butternut, and spaghetti squash are some of the types of winter squash you will commonly see at grocery stores.

Video of the Day

Once you've roasted one winter squash, you've roasted them all, as instructions for baking them is the same across the board. Plus, you can incorporate squash into everything from soup to curry. This video on How to Bake Butternut Squash will get you started.

Related: How to Bake Butternut Squash – eHow

Hearty Soup

... Add any winter squash to your winter soups! Image Credit: With Food and Love

Most of the winter squash varieties can be used in hearty or creamy soups. You can either roast the squash and puree it into a smooth soup, or chop it up and saute it with other vegetables for a chunky stew. This Fennel & Delicata Squash Soup from With Food and Love is the perfect cozy meal on a cold day.

Related: With Food and Love

"Spaghetti" with Pesto Sauce

... In the mood for pasta? Try spaghetti squash! Image Credit: The Roasted Root

While spaghetti squash does not have the same texture or flavor as regular spaghetti, it is a wonderful gluten-free and low-carb alternative to pasta, and makes for a hearty meal. You can whip up your own tomato-based sauce or pesto sauce and serve the squash with vegetables, chicken, and/or shrimp. Spaghetti Squash with Basil-Parsley Pesto and Sauteed Shrimp from The Roasted Root is a filling and healthful meal.

Related: The Roasted Root

Stuffed Squash

... There\’s nothing more satisfying than a carby stuffed squash! Image Credit: The Girl in the Little Red Kitchen

Do you love stuffed vegetables? Chopping a winter squash in half, scooping out the seeds and innards, and roasting the halves makes a bowl for other ingredients. From rice (or other grains), to vegetables and meat, any winter squash can be stuffed with a variety of ingredients. Try out this Sausage and Farro Stuffed Acorn Squash from The Girl in the Little Red Kitchen for a hearty dish.

Related: The Girl in the Little Red Kitchen

Pasta Sauce
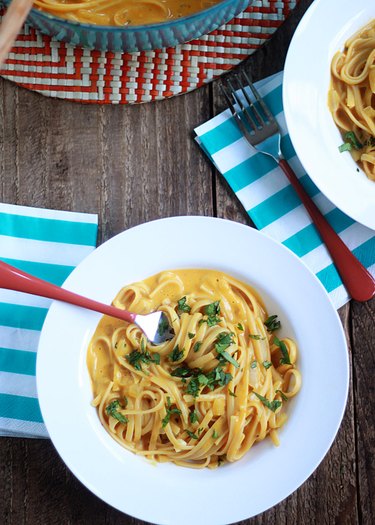
... Because every pasta could use a creamy pumpkin sauce. Image Credit: Kitchen Treaty

Looking for an easy meal that can be made any night of the week? Simply use canned pureed pumpkin to make a creamy and tasty pasta sauce. This One-Pot Creamy Pumpkin Pasta from Kitchen Treaty is a simple yet delicious meal for four!

Related: Kitchen Treaty

Breakfast Hash

... Squash for breakfast! Image Credit: Food Faith Fitness

Looking for a healthier alternative to potatoes? Winter squash has you covered. Food Faith Fitness proves winter squash can be incorporated into any meal, including breakfast! What better way to start the day than with Breakfast Hash with Kale and Kabocha Squash?

Related: Food Faith Fitness

Simply Roasted
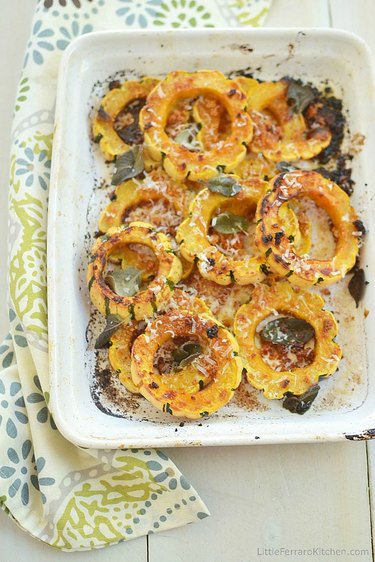
... Simple, flavorful, and healthful Image Credit: Little Ferraro Kitchen

Cutting winter squash into sections and roasting it with oil and a variety of spices is a brilliant (and simple!) way of feeding a crowd. Looking for a great holiday side dish? This recipe from Little Ferraro Kitchen for Roasted Delicata Squash with Sage and Amaretti Cookies is a winner!

Related: Little Ferraro Kitchen

Creamy Soup

... Butternut squash makes one slurp-able soup! Image Credit: Yummy Healthy Easy

In addition to hearty soups, just about any winter squash can be roasted and pureed into a creamy dreamy soup. Try this Thai Butternut Squash Soup from Yummy Healthy Easy for a nutritious yet comforting soup!

Related: Yummy Healthy Easy

Squash Fries

... Healthy fries? Don\’t mind if we do! Image Credit: Beard and Bonnet

Just like sweet potatoes, winter squash offers a healthy version of your favorite fries. Chop your squash into thick wedges or match sticks and roast them in the oven with your favorite flavors for a delicious side dish. Miso and Red Curry Glazed Delicata Squash Fries from Beard and Bonnet are the perfect example of a flavor blasted, yet healthy fry recipe!

Related: Beard and Bonnet

Cinnamon Rolls

... Put pumpkin in your cinnamon rolls! Image Credit: Petite Allergy Treats

As if baked goods weren't delicious enough on their own, you can add sweet creamy winter squash to your favorite treats! From cake to pancakes and brownies, pureed squash can be incorporated into just about any treat. Warm up to these Gluten Free Pumpkin Cinnamon Rolls from Petite Allergy Treats for a delicious healthier version of a classic favorite!

Related: Petite Allergy Treats

Muffins
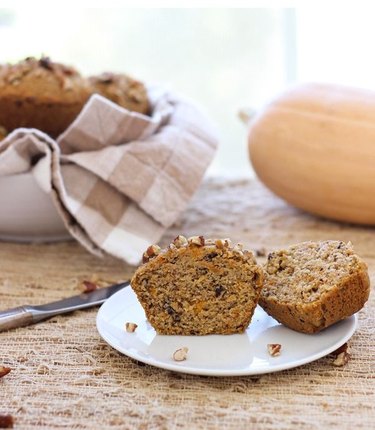
... Portable butternut squash deliciousness! Image Credit: Making Thyme for Health

Mashed or pureed winter squash can be made into sweet or savory muffins for a flavorful fall-inspired treat. Have you ever tried butternut squash pancakes or muffins? Spiced Maple Butternut Squash Muffins from Making Thyme for Health are great to enjoy on a relaxing weekend morning or for a healthy snack on the go.

Related: Making Thyme for Health

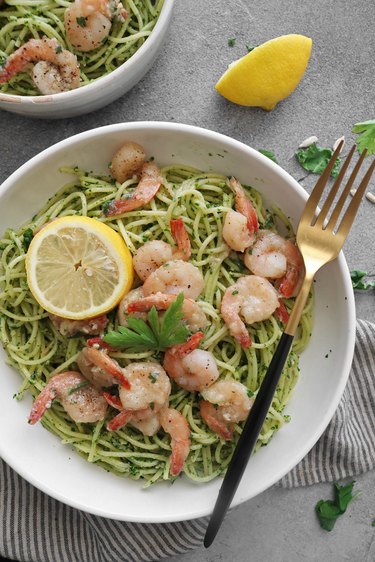
Kale Pesto Pasta With Lemon Garlic Shrimp Recipe

0

Brighten up your weeknight dinner with kale pesto pasta and lemon garlic shirmp. It features a kale-based pesto, which is ideal if you're not a fan of traditional pesto or want to try something new. It's also a great way to sneak in leafy greens! Top things off with lemony garlic shrimp for a meal that sounds fancier than it really is. Read on for the full recipe.

Kale pesto pasta with lemon garlic shrimp

Video of the Day

Kale Pesto

Things You\’ll Need

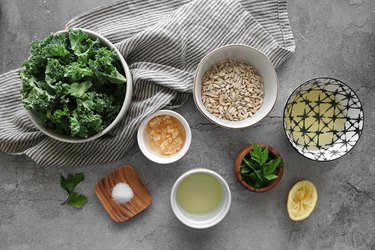
  • 4 cups baby kale, packed, stems removed

  • 3 teaspoons garlic, minced

  • 1/4 teaspoon salt

  • 1/2 cup fresh parsley, packed

  • Juice of 1/2 lemon

  • 1/2 cup olive oil

  • 1/4 cup toasted walnuts or sunflower seeds

  • 1/3 cup grated Parmesan cheese (optional)

Ingredients for kale pesto

Step 1

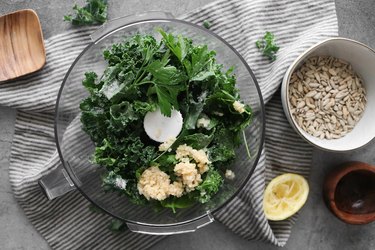
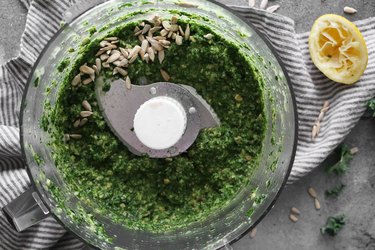
In a food processor, add the kale, parsley, salt, lemon juice and minced garlic. Add the Parmesan cheese, if using.

Combine kale pesto ingredients

Step 2

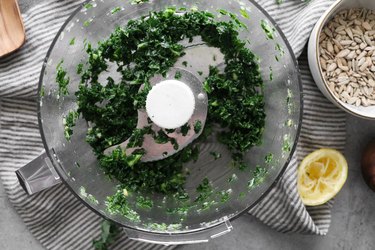
Pulse until the kale is completely chopped up.

Pulse food processor

Step 3

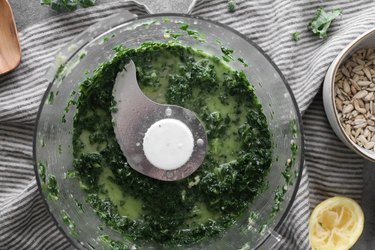
As the food processor is running, slowly add the olive oil.

Pour olive oil

Step 4

Add the toasted walnuts or sunflower seeds. Pulse until the nuts or seeds are finely chopped, pausing to scrape the sides as necessary. Taste the pesto and add more salt or lemon juice, if necessary. Chill in the refrigerator as you cook the shrimp.

Add sunflower seeds

Lemon Garlic Shrimp

Things You\’ll Need

  • 1 pound raw shrimp (frozen or fresh)

  • 4 tablespoons butter or olive oil

  • 1/2 teaspoon salt

  • 1/4 teaspoon ground black pepper

  • Juice from 1 lemon

  • 3 teaspoons minced garlic

  • 2 to 3 tablespoons fresh parsley, chopped

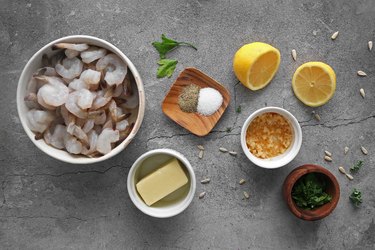
Ingredients for lemon garlic shrimp

Tip

If using frozen shrimp, defrost according to the package's directions.

Step 1

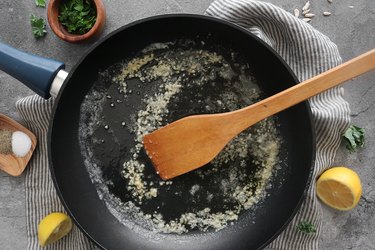
In a large pan over medium-high heat, warm the butter or olive oil. Add the minced garlic and cook for 30 seconds, or until fragrant.

Melt butter and cook garlic

Step 2

Add the shrimp, lemon juice, salt, pepper and parsley. Cook for 2 to 3 minutes on each side, or until pink.

Cook shrimp

Kale Pesto Pasta With Lemon Garlic Shrimp

Things You\’ll Need

  • 8 ounces pasta of choice

  • Kale pesto

  • Lemon garlic shrimp

  • Lemon wedges or slices, for garnish

  • Fresh parsley, for garnish

Kale pesto pasta with lemon garlic shrimp

Tip

If you eat a gluten-free diet, use your favorite gluten-free pasta. You can even use rice instead.

Step 1

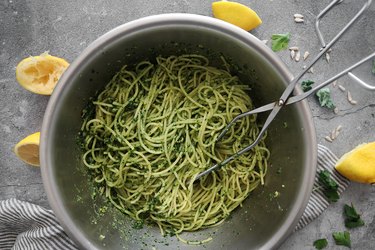
Cook the pasta according to the package's directions. In a large bowl, toss with kale pesto.

Toss pasta with kale pesto

Step 2

To serve, top the kale pesto pasta with lemon garlic shrimp. Alternatively, you can toss the shrimp and pasta together. Garnish with lemon slices (or wedges) and fresh parsley.

Add lemon garlic shirmp

If you'd like to incorporate even more greens, sauté chopped baby kale in olive oil for about 5 minutes. Toss with the finished pasta dish and enjoy.

Kale pesto pasta with lemon garlic shrimp

The Best Waffle Makers in 2022

0

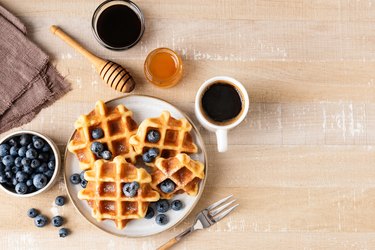
Sweet belgian waffles with blueberries, honey and cup of coffee

There's arguably no better weekend breakfast option than delicious, fluffy waffles. The ideal vessel for pads of butter, gooey syrup, dollops of whipped cream and fresh berries, waffles are as versatile as they are tasty. Those who prefer savory to sweet have countless recipes to choose from, too, including fried chicken and waffles and chili-topped cornbread waffles.

Video of the Day

Regardless of which waffle-loving camp you fall into—light and airy or thin and crispy—there's a waffle maker that can help you achieve perfectly-cooked results nearly every time. Before we dive into the best waffle makers on the market, there are a few things you need to know about these small but hardworking appliances.

What to Consider When Purchasing a Waffle Maker

Waffle Type:​ There are many different types of waffles, from the Dutch stroopwafel to the Italian pizzelle and the Hong Kong-style egg waffle. But the two primary types of waffles that you can create with a waffle maker are classic waffles (sometimes called American waffles) and Belgian waffles, which were brought to the U.S. by Maurice Vermersch in the 1960s. Classic waffles use baking powder as a rising agent, while Belgian waffles are traditionally made with yeast. Ultimately, the type of waffle maker you choose depends on your personal preference.

Flip Versus Standard:​ If you've ever stayed at a hotel with free continental breakfast, you've probably encountered a rotating or 'flip' waffle maker. Some people will argue that a flip model is superior because it better distributes the batter and cooks faster and more evenly—resulting in crispy on the outside, fluffy on the inside waffles. That being said, they can be quite messy and the rotating function could eventually break down. A standard waffle maker can yield equally yummy results, although some experts say they're better for classic waffles than Belgian waffles. If you prefer a waffle maker that requires little effort, doesn't make much of a mess, and is more commercially available (and oftentimes less expensive), a standard waffle maker is the way to go.

Cleaning Method:​ Some waffle makers have removable, nonstick plates that can be thrown in the dishwasher for easy cleaning. Other models feature removable drip trays or moats to catch any batter that spills over the edge. Easy-to-clean waffle makers tend to be more expensive, however, so keep that in mind when deciding on a budget. If you find that your waffle maker is prone to spills, you could also put a sheet of newspaper or wax paper underneath it to catch the drips.

Budget:​ Waffle makers can range from $20 to over $200 if you're seeking a professional-quality appliance. Expect to pay more for coveted features like a steam-release system, multiple browning settings or double-sided waffle grids. If you only make waffles on special occasions, a $40 model might suit you just fine, but if you're an every-weekend "waffleier," investing in a hardwearing model is certainly worth it.

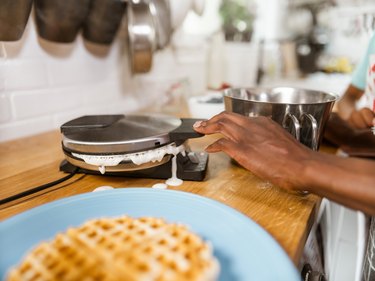
Hands of Mother  making waffles

The Best All-Around Waffle Maker

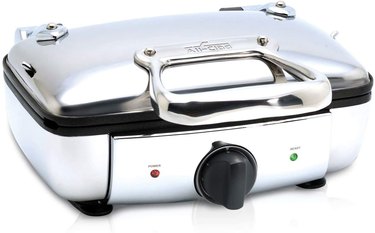
All-Clad Belgian Stainless Steel Waffle Maker

$179.95 at Amazon

Our pick for the best all-around waffle maker is also the most expensive, but here's why it's worth the splurge: the All-Clad Belgian waffle maker features seven browning settings, allowing you to choose your preferred level of doneness. Unlike other waffle makers that trap the steam, often resulting in soggy waffles, this stainless steel model touts a steam-release system for a "delicately crispy" exterior. An LED light indicates when the waffle maker has heated to the desired temperature and a "beep" sound will alert you when your waffle is done cooking. The cooking surface is nonstick and there's a removable drip tray for easy cleaning. It whips up waffles that are 4.5 inches wide with 1-inch-deep crevices for loading on toppings.

At a Glance:

  • Dimensions: 12" x 11.5" x 6"
  • Number of Settings: 7
  • Waffle Type: Belgian
  • Finish: Nonstick
  • Steam-release system
  • Removable drip tray

All-Clad waffle maker

The Best Classic Waffle Maker

Cuisinart Round Classic Brushed Stainless Waffle Maker

$29.92 at Walmart

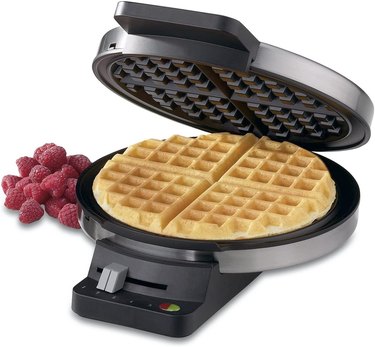
Classic waffles are often overlooked in favor of Belgian waffles, but sometimes a light, crispy version just hits the spot. This affordable waffle maker yields round, classic-style waffles that won't leave you feeling overly full. It has five browning settings and red and green lights that tell you when it's "ready to bake" or "ready to eat." The waffle maker's exterior is stainless steel and the cooking plates are coated in a nonstick finish. Each waffle has four easy-to-separate quarters, so it's great for sharing. When the waffle maker is not in use, it can be stored vertically thanks to a latching-lid feature and special grooves that keep the cord wrapped securely around the base. This Cuisinart model even comes with a recipe book and a limited, three-year warranty.

At a Glance:

  • Dimensions: 9.69" x 7.88" x 3.31"
  • Number of Settings: 5
  • Waffle Type: Classic
  • Finish: Nonstick
  • Cord-wrap feature
  • Includes recipe book

classic waffle maker

The Best Belgian Waffle Maker

Presto Ceramic FlipSide Belgian Waffle Maker

$43.99 at Walmart

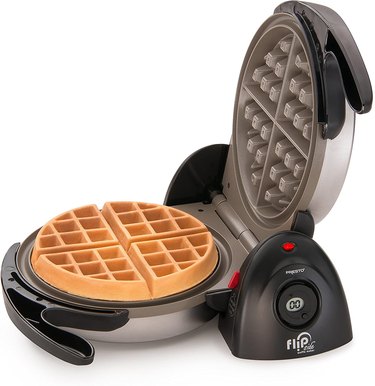
Although our pick for the "Best All-Around Waffle Maker" also creates Belgian waffles, we realize that not everyone wants to spend close to $200 on a small appliance. The Presto Flipside Belgian Waffle Maker rotates 180 degrees to ensure the batter spreads and cooks evenly. Its extra-thick waffles are crispy on both sides and measure 7 inches in diameter. The waffle maker has a ceramic, nonstick grid, so cooking oil is not needed. While there's only one temperature setting, you can use the countdown timer with a digital display to monitor the cooking time. Another benefit of the Presto Belgian waffle maker is that it locks vertically and stands firmly on its base, meaning it won't take up valuable cabinet space.

At a Glance:

  • Dimensions: 11.25" x 11.75" x 4"
  • Number of Settings: 1
  • Waffle Type: Belgian
  • Finish: Ceramic
  • Stores vertically
  • Flip design

ceramic waffle maker

The Best Flip Waffle Maker

Cuisinart Waring Pro WMK200 Belgian Waffle Maker

$59.95 at Amazon

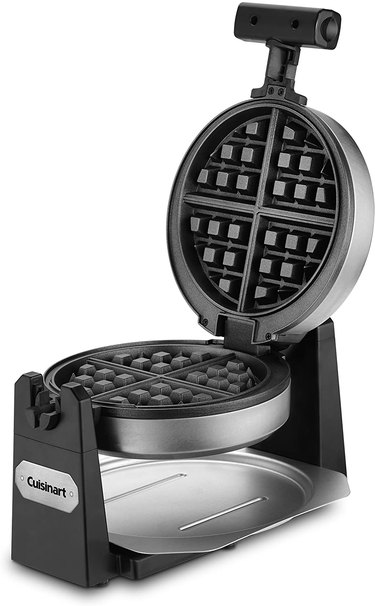
A rotating waffle maker guarantees a soft interior and a crispy exterior by evenly distributing the batter. This stainless steel Cuisinart model comes with a removable drip tray that's dishwasher-safe, which makes clean-up a breeze. There are six browning settings and the nonstick plates create 1-inch-deep pockets in the Belgian waffles. Blue LED lights alert you when the appliance has reached its desired temperature and when your waffle is done cooking. The rotary feature is easy to master and results in round waffles that are crisp on both sides.

At a Glance:

  • Dimensions: 9.75" x 15.63" x 9.63"
  • Number of Settings: 6
  • Waffle Type: Belgian
  • Finish: Nonstick
  • Flip design
  • Removable drip tray

flip waffle maker

The Best Mini Waffle Maker

Dash Mini Waffle Maker

$15.99 at Amazon

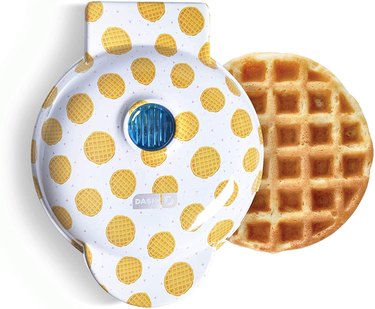
If you've got young kids or like to make snack-sized waffles, this mini waffle maker will be an instant hit. It heats up in just a few minutes and creates 4-inch waffles using about 2 tablespoons of your favorite batter. The small but mighty machine has dual nonstick cooking surfaces that are PFOA-free and non-slip feet to keep it firmly in place. An indicator light comes on when the mini waffle maker is ready to use and again when your waffle is ready to serve. Dash makes mini waffle makers in dozens of patterns and shapes, including skulls, pineapples, snowflakes and hearts, but we like this model with a confetti and waffle motif on the exterior. Beyond waffles, you can use the Dash Mini Waffle Maker for hashbrowns, cookies and 'chaffles,' which are made out of cheese and egg.

At a Glance:

  • Dimensions: 6.4" x 5" x 2.8"
  • Number of Settings: 1
  • Waffle Type: Classic
  • Finish: Nonstick
  • Heats up quickly
  • Includes recipe book

mini waffle maker

The Best Novelty Waffle Maker

The Child 4" Mini Waffle Maker

$27.99 at Amazon

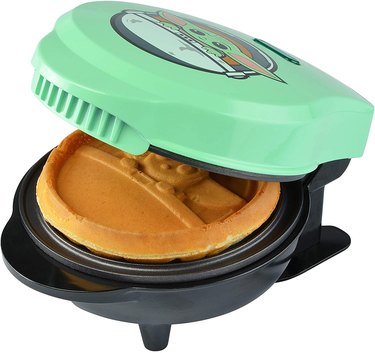
Good news for anyone who "would like to see the baby"—you can catch a glimpse of Baby Yoda every morning in your fluffy, miniature waffles. This Mandalorian-themed waffle maker creates 4-inch waffles that are textured with pockets on one side and an imprint of "The Child" on the other. The cooking plates are nonstick and an indicator light allows you to monitor the status of your adorable waffle. It heats up quickly thanks to its 600 watts of power and makes a great gift for the "Star Wars" fan in your life. If you prefer normal-sized waffles, Amazon also sells a similar version that measures 7.75 inches long, 9.5 inches wide and 4.75 inches high.

At a Glance:

  • Dimensions: 6.69" x 5.16" x 3.58"
  • Number of Settings: 1
  • Waffle Type: Classic
  • Finish: Nonstick
  • Baby Yoda motif
  • Cord wrap feature

Baby Yoda waffle maker

The Best Mess-Free Waffle Maker

Breville BWM520XL No-Mess Waffle Maker

$149.95 at Amazon

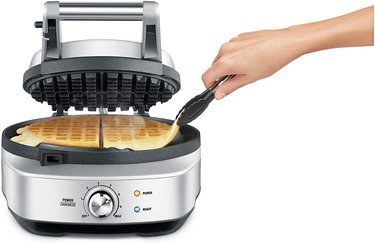
Overflowing batter can take the fun out of your weekend breakfast routine, but this Breville classic-style waffle maker makes clean-up a snap. A wide moat wraps around the PFOA-free, nonstick cooking surface to catch and cook any spillage. While the plates aren't removable, they're easy to wipe off with a damp cloth while the appliance is still warm. The waffle maker has seven browning settings and incorporates "thermally engineered heating elements" to deliver evenly-cooked, crispy waffles. There are power and ready indicator lights, as well as a lid-locking mechanism to prevent any accidents. The appliance makes a beeping noise when it's done cooking, but it's not loud enough to wake up your roommate on a Saturday morning. Although it's an expensive model, the Breville No-Mess Waffle Maker is well worth it in terms of quality and convenience.

At a Glance:

  • Dimensions: 11" x 9" x 5.7"
  • Number of Settings: 7
  • Waffle Type: Classic
  • Finish: Nonstick
  • No-mess moat
  • Secure lock lid

no mess waffle maker

Apple Pie Crumb Cake: 3 Desserts in One

0

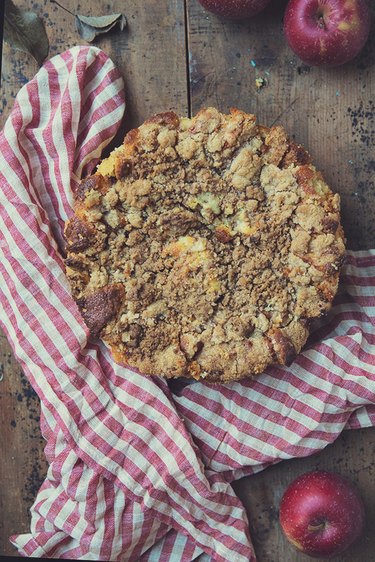
I often have a difficult time choosing my favorite dessert. Is it the classic apple pie, its crisp crust and warm apples tumbling from between the layers? Perhaps it is apple crisp, so easy to put together and yet entirely satisfying with its crumbled cookie goodness and soft cooked apples hiding underneath. And then there's the coffee cake, perfect for both morning or evening activities, the apples dotted throughout the light, moist cake.

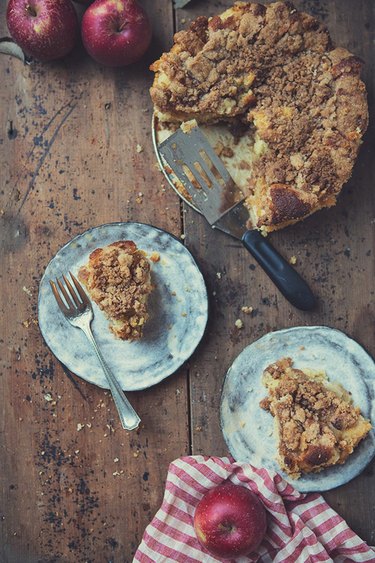
This cake combines all three: the coffee cake with its apple bits, topped by a layer of warm apples dusted lightly with cinnamon and then topped with a apple pie spiced crumble. Serve it with your weekend brunch, or slice it after dinner. It has a home on both ends of the day.

Video of the Day

Apple Pie Crumb Cake

Things You\’ll Need

  • 3/4 cup (1 1/2 sticks) unsalted butter, softened

  • 1 cup granulated sugar

  • 2 teaspoons vanilla extract

  • 2 large eggs

  • 2 cups all-purpose flour

  • 3 teaspoons baking powder

  • 1 teaspoon salt

  • 1 cup whole milk

  • 1 medium apple, peeled and diced

  • 2 medium apples, peeled and sliced

  • 1/4 teaspoon cinnamon

  • 1/4 cup unsalted butter, softened

  • 1/2 cup flour

  • 1/3 cup sugar

  • 1/2 teaspoon cinnamon

  • 1/4 teaspoon grated nutmeg

  • 1/4 teaspoon ground cardamom

Step 1

Preheat the oven to 375 degrees F. Grease the bottoms and sides of a 10-inch cake pan and set aside.

Step 2

In a large bowl, cream together the butter and sugar until light and fluffy. Add in the vanilla and eggs, and beat until well mixed.

Step 3

In a separate bowl, combine the flour, baking powder and salt. Add the flour mixture and stir to combine. Slowly stir in the milk and mix until smooth. Add in the diced apple and stir to combine.

Step 4

Pour the batter into the cake pan. Arrange the sliced apples over the batter, fanning them out and pressing them lightly into the cake.

Step 5

In a separate bowl, combine the remaining butter, flour, sugar, cinnamon, nutmeg and cardamom. Mix with a fork until crumbled. Pour the crumbles evenly over the top of the cake.

Step 6

Bake for 80 minutes, or until the center of the cake is set and the top is golden brown. Remove from oven and cool slightly before serving. Serve warm, or cool completely and store in an airtight container until ready to eat. This recipe makes 8 to 10 servings.

Apple Pie Crumb Cake Apple Pie Crumb Cake Apple Pie Crumb Cake

DIY Fall Tree Cupcakes

0

One of the joys of fall is seeing the changing of the leaves as they turn from green to yellow to red. This annual rite of nature is the inspiration for these autumn tree cupcakes. Each cupcake is topped with a tree whose trunk is actually a chocolate-covered pretzel stick. And the fall leaf sprinkles scattered on the chocolate branches add another edible surprise to these clever treats. As with a real pile of leaves, you'll want to dive right in.

tree cupcakes

Video of the Day

Things You\’ll Need

  • Cupcakes

  • Buttercream frosting

  • Green icing coloring

  • Pastry piping bags

  • Fall leaf sprinkles

  • Chocolate candy melts

  • Pretzel sticks

  • Parchment paper

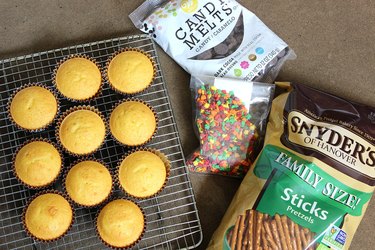
materials

Step 1: Bake Cupcakes

Bake a batch of cupcakes either from scratch or with a box mix. Any flavor will be fine, as the cupcake will be covered by frosting. For the convenience, I made yellow cupcakes from a box mix.

bake cupcakes

Step 2: Prepare the Frosting

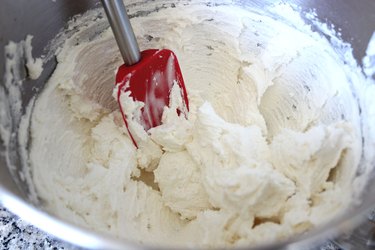
You can use store-bought frosting, but I actually prefer to make my own buttercream frosting for this project. Homemade frosting is stiffer and holds its shape, so it's useful in helping keep the pretzel stick tree trunk in place.

Mix a half pound of butter and a half pound of vegetable shortening, and then add three cups of confectioner's sugar and a teaspoon of vanilla. After mixing well, add a tablespoon of water at a time until the desired consistency is reached.

frosting

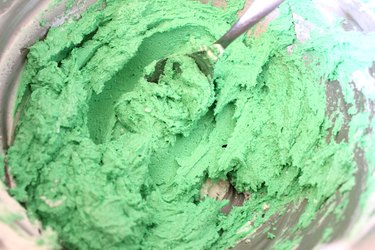
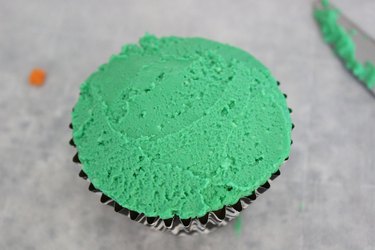
Add a few drops of green icing coloring into the frosting and stir. Continue adding coloring until the frosting is a bright green color.

green color

Step 3: Frost the Cupcakes

Spoon the frosting into a piping bag or a ziplock bag. Cut the tip off leaving about a quarter-inch opening, or use a piping tip with a quarter-inch circle opening. It is not necessary to use a piping bag; you can just spread the frosting directly on the cupcake with a spatula. However, I like the control that the piping bag provides.

piping bag

Distribute the frosting evenly over the cupcake.

frosting

Smooth out the frosting with a spatula.

spatula

Step 4: Add Leaf Sprinkles

The frosting (the grass) needs some fallen leaves on it. Place a few leaf sprinkles on top of the green frosting. To make sure they stay in place, gently press them down with your fingertips. If you don't have leaf sprinkles, look for round sprinkles or jimmies.

sprinkles

Step 5: Melt the Chocolate

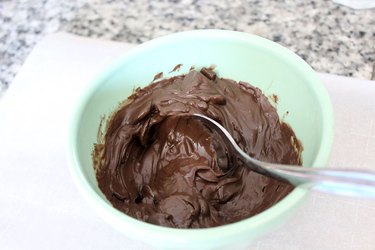
Place chocolate candy melts in a microwave-safe bowl and heat in 30-second intervals. Stir the melted chocolate until it is smooth without any lumps remaining.

candy melts

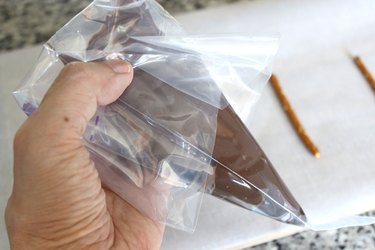
Spoon the melted chocolate into a piping bag or ziplock bag. Cut the tip of the piping bag so there is an opening of about a quarter inch.

piping bag

Step 6: Cover the Pretzel Sticks

To give the chocolate trees a rigid structure, we're using pretzel sticks as the tree trunks. Place the pretzel sticks on a piece of parchment paper on a tray.

pretzel sticks

Squeeze the chocolate from the piping bag on top of the pretzel sticks to cover them in chocolate. When you get to the top tip, continue squeezing chocolate into twisting branch shapes.

branches

Add some leaf sprinkles onto the branches. Place the chocolate trees in the refrigerator to allow the chocolate to harden for about 15 minutes.

leaf sprinkles

When the trees are hardened, flip them over. Then cover the other side of the pretzel stick with more melted chocolate.

other side

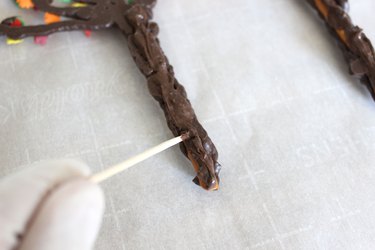
Because the pretzel sticks are cold, the melted chocolate will harden soon after touching them. Use a toothpick to help spread the chocolate over the pretzel. Stick the trees back in the refrigerator for 10 minutes to let them set.

toothpick

Step 7: Insert Trees Into Cupcakes

Position each tree over the center of a cupcake and insert the trunk about three-quarters of the way down so it holds steady.

insert tree

Step 8: Reinforce Tree

To keep the tree from being wobbly, add a little frosting at the base of the tree. Here is where the piping bag comes in handy by directing the flow of frosting. When the frosting hardens, it will lock the tree trunk in place.

frosting at base

The chocolate covered pretzel trees, with their mixture of sweet and salty, take this autumn-themed treat over the top.

autumn tree cupcake

If a chocolate tree falls in a forest of cupcakes, does it make a sound? Yes, the sound is me munching on that tree.

fall tree cupcakes