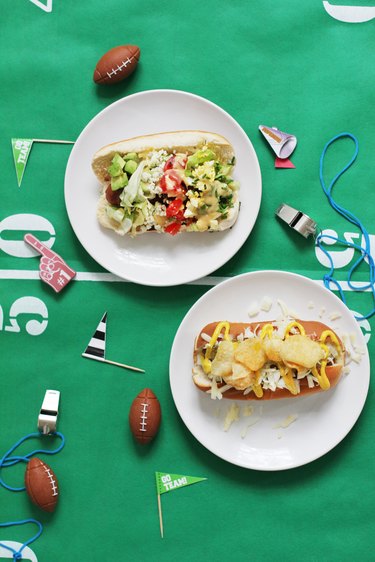
The Los Angeles Rams and New England Patriots will go head-to-head on Super Bowl Sunday, and what better way to bring fun to game day than with a good old-fashioned throw-down? Since hot dogs are a classic football food, we're pitting East Coast versus West Coast versions against each other, featuring toppings that are regional to each team's hometown.
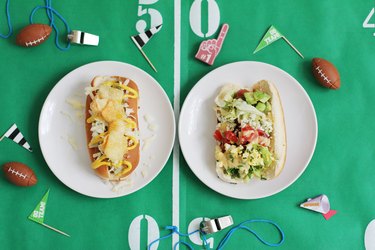
From Los Angeles, we're combining the famous bacon-wrapped hot dog (claimed to be the official one of the city) with a quintessential California Cobb salad, which originated at the Brown Derby in Hollywood. And from New England, we're piling on all the delicious local ingredients from Boston Baked beans to Cape Cod kettle chips—and, of course, the top slit bun. Serve these up hot-dog-bar-style at your party, and let us know who wins!
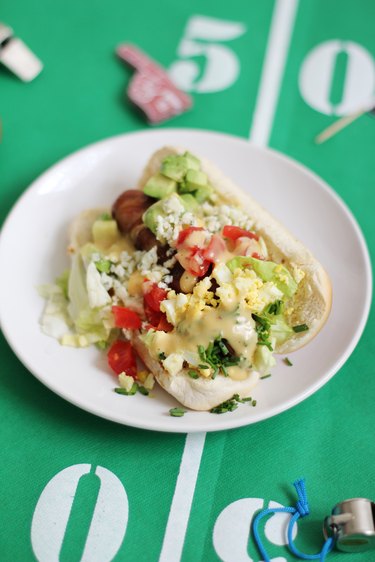
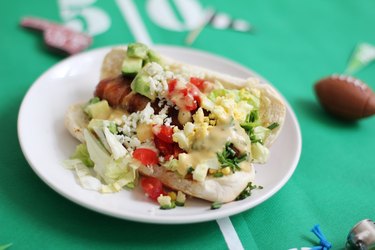
Los Angeles Cobb Salad Dog
Things You\’ll Need
-
Bacon
-
Hot dogs
-
Toothpicks
-
Side slit buns
-
Butter
-
Lettuce, chopped
-
Avocado, diced
-
Blue cheese, crumbled
-
Tomatoes, diced
-
Hard-boiled eggs, crumbled
-
Chives, minced
-
Mustard vinaigrette
Step 1
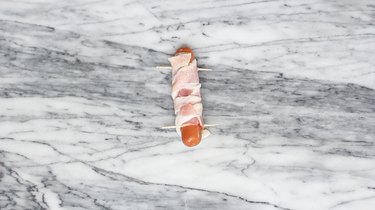
Wrap a slice of bacon around the hot dog, and secure each end with a toothpick.
Step 2
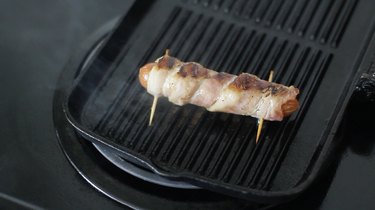
Grill both sides of the hot dog. Then remove the toothpicks and rotate the hot dog to ensure all sides are cooked thoroughly.
Step 3
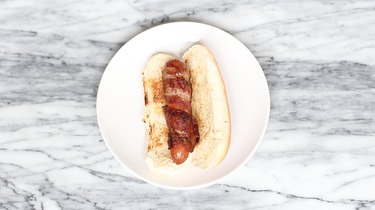
Butter the insides of a side slit bun and toast it. Then place the bacon-wrapped hot dog inside the bun.
Step 4
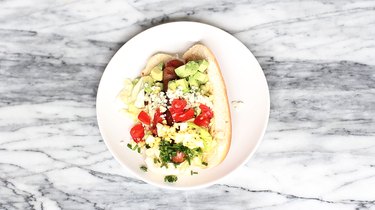
Sprinkle lettuce on top of the hot dog, and then layer on the remaining ingredients in rows (like a Cobb salad is normally served), starting with avocado, blue cheese, tomatoes, hard-boiled eggs and then chives.
Step 5
Finish with a generous drizzle of mustard vinaigrette on top.
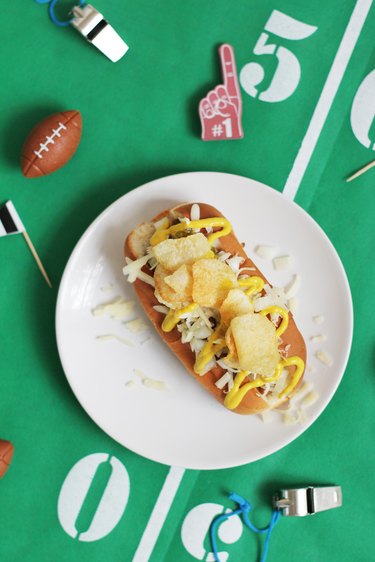
New England Baked Beans Dog
Things You\’ll Need
-
Hot dogs
-
Top slit buns
-
Butter
-
Boston baked beans
-
Vermont cheddar, shredded
-
Onions, diced
-
Relish
-
Yellow mustard
-
Cape Cod kettle chips
Step 1
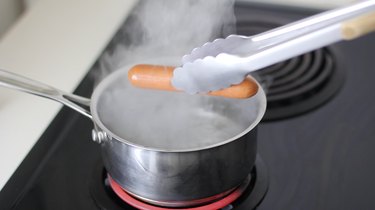
First, boil the hot dog in water for a few minutes, and then grill it on both sides. Boom! This is how Fenway Franks are prepared.
Step 2
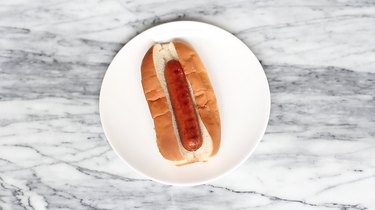
Butter the sides of a top slit bun and toast the sides. Then turn the bun upright and place the hot dog inside.
Step 3
Spoon Boston baked beans on each side of the hot dog.
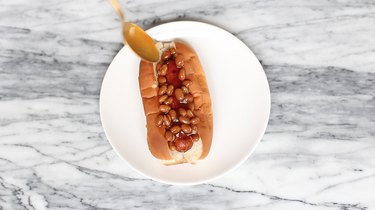
Step 4
Layer on the remaining ingredients, starting with Vermont cheddar, followed by onions and relish. Drizzle yellow mustard on top in a squiggle pattern.
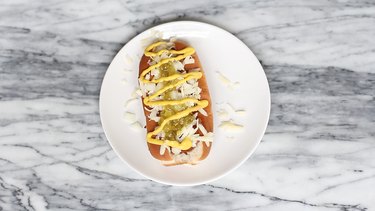
Step 5
Finish by garnishing the hot dog with several Cape Cod kettle chips.

Both equally delicious and both winners in our opinion, but we'd love to know: which one is your favorite?

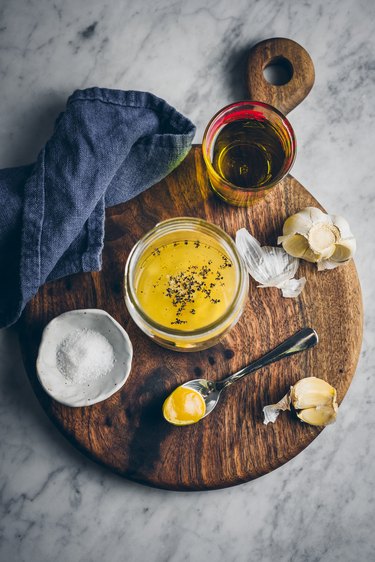 Prepping dressing
 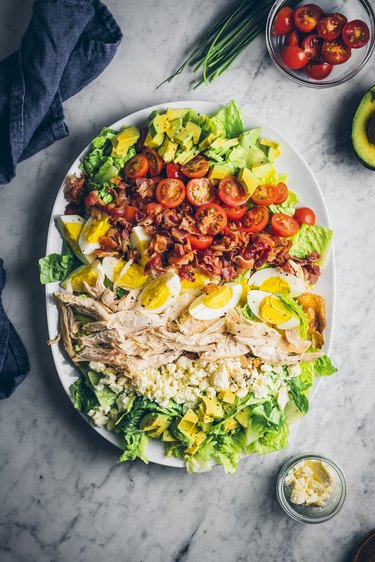 Garnishing salad
 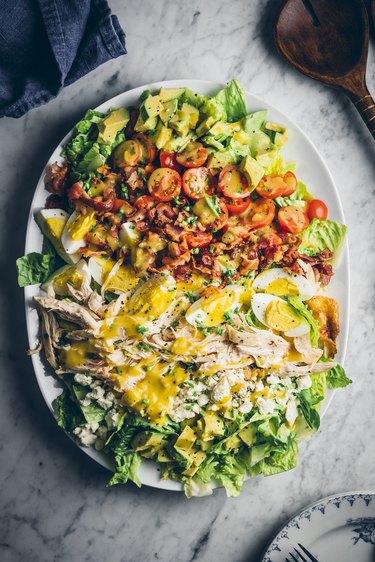 Final Salad