Home Blog Page 88

Easy Recipe to Brine Chicken for a Barbecue

0

Brining chicken before barbecuing is the best method of ensuring that your chicken will stay moist and juicy without fail. It can be done as early as 24 hours in advance. Whatever the amount of prep time you have, even if it's just two hours, brining your chicken ensures your meat will stay juicy while locking in tons of flavor beneath the skin.

Follow this simple method and recipe and I guarantee you will never barbecue chicken without brining it first again!

Video of the Day

Easy Recipe to Brine Chicken for a Barbecue

Things You\’ll Need

  • 4 cups of water

  • 1/4 cup granulated sugar

  • 1/2 cup of kosher salt

  • 1 tablespoon peppercorns

  • 10 sprigs of thyme

  • 4 garlic cloves

Easy Recipe to Brine Chicken for a Barbecue

Step 1: Combine brining ingredients.

Combine water, sugar, salt, peppercorns, thyme, and garlic cloves in a large bowl and stir to combine

Step 2: Place chicken in a large plastic bag or large bowl.

Place your chicken into a large gallon sized plastic bag or a large glass or stainless steel bowl that allows enough room for the brining liquid.

Step 3: Pour brining liquid over chicken.

Pour the brining liquid over the chicken and make sure the chicken or chicken pieces are submerged.

Easy Recipe to Brine Chicken for a Barbecue

Step 4: Let marinate and then pat dry.

Let your chicken sit in the brine for at least 2 hours but up to 24 hours. When ready to cook, remove the chicken from the brine and pat dry with paper towels.

Step 5: Barbecue chicken.

Preheat the grill to 425 degrees. Place the chicken on direct heat for 5 to 7 minutes per side with the lid closed, and then transfer to indirect heat and cook, turning once, for 30 to 40 minutes until the chicken reaches 165 degrees Fahrenheit on the inside. Brush with your favorite barbecue sauce for the last few minutes of cooking and allow the sauce to caramelize on the outside of the chicken. Serve immediately.

Easy Recipe to Brine Chicken for a Barbecue

Tip

Don't be a afraid of a little flame when you first put your chicken on the grill. That gives it the nice char flavor and it's only on direct heat for a few minutes before moving off the flame!

This chicken is seriously some of the most delicious I have ever eaten and I know you are going to love using this method the next time you are barbecuing chicken!

What Does It Mean if a Coconut Smells Like Alcohol?

0

Coconuts If it\’s not completely fresh, the water inside your coconut might begin to ferment. Image Credit: Ablestock.com/AbleStock.com/Getty Images

Dried, shredded coconut is readily available at any supermarket, but starting your recipe with a whole, fresh coconut can improve the flavor dramatically. Opening the large, hairy nuts requires a small investment of effort but yields a gush of mildly sweet coconut water and a quantity of rich, snowy-white flesh. Unfortunately, sometimes the coconut water has a strong smell of alcohol, which indicates that the coconut is spoiled or very old.

Video of the Day

It\’s the Mileage

Coconuts are a tropical nut; in fact, coconut palms are one of the iconic symbols of the tropics. So, if you live in a temperate region, the nuts at your market have come a long way. This is an important consideration since the storage life of a ripened coconut is only two to three months. Much of that time can be spent just in coming to the grocer's, so it's all too easy to get a nut that's past its prime and beginning to ferment. Like most other kinds of fresh produce, picking a good one is mostly about knowing what to look for.

Look It In the Eye

Pick up several coconuts and compare them. The best and freshest will be heavy for their size, so you can quickly narrow your choices. Give each one a shake, and listen to the sound it makes. Good coconuts usually contain lots of coconut water, which slowly evaporates as the nut ages. Finally, look at the three "eyes" at the pointy end of the nut. In a fresh coconut, they'll be about the same color as the rest of the husk. In old coconuts, they begin to soften and darken, sometimes showing visible mold.

No More Tears

One of the surest signs of a damaged or fermenting coconut is the appearance of moisture at one of its eyes, where it can give a disconcerting impression that it's weeping. This means the nut has been punctured or cracked, which allows oxygen and naturally occurring yeasts to enter the nut. The water inside is likely to be fermented, and the flesh spoiled, by these intruders. Often you'll be able to smell alcohol if you hold the affected area close to your nose.

Open It Up

You can improve your chances of getting a good nut by following those basic pointers, but you won't know for sure until you get it home. Opening the nut is easier if you first drain the coconut water, so tap a drainage hole and an air hole into the nut with a sterilized screwdriver or large nail. Pour out the water and smell it. If it's got a strong smell of alcohol, your coconut has fermented and should be discarded. If it smells and tastes sweet, wrap the nut in a clean kitchen towel and crack it sharply with a hammer or the back of a heavy cleaver. It should split easily, giving you access to the sweet, snowy meat.

How to Flavor Buttercream

Things You\’ll Need

  • 1 cup of butter

  • Standing mixer or large glass bowl

  • Hand mixer

  • 8 cups of confectioner's sugar

  • 2 1/2 tsp. of vanilla extract

  • 1/2 cup of milk

... Light and airy, buttercream can be piped on or applied with a spatula.

Buttercream is sweet and smooth but without added flavoring it tastes like sugary butter. Adding flavor to this creamed combination gives your confection a satisfying, big flavor. You can flavor a homemade buttercream or enhance a plain frosting that you've purchased. Some recipes even call for a combination of ingredients to make a delicious icing. Jazz up a plain buttercream recipe by adding extracts that will bring loads of mouth-watering flavor to your dessert.

Video of the Day

Step 1

Take 1 cup of butter out of the refrigerator. Allow it to come to room temperature about 30 minutes before using.

Step 2

Pour 1 cup of butter into a standing mixer or large bowl. Turn on the mixer and 1 cup of confectioner's sugar. If using a hand mixer, dump the cup of sugar in, then hold the bowl with one hand while mixing with the other.

Step 3

Continue to pour in cups of confectioner's sugar until 8 cups total have been creamed with the butter. Pour in 2 1/2 teaspoon of vanilla extract. Alternatively, you can add amaretto, caramel or pecan extract instead.

Step 4

Mix in 1/4 cup of milk. Once this amount is mixed well into the icing, add the remaining 1/4 cup. Continue to mix until the icing is smooth but slightly stiff.

Tip

Scoop pre-made buttercream frosting into a large mixer. Add 2 teaspoons of the desired extract into the mixer. Mix well for three to five minutes.

Warning

Do not use butter substitutes like margarine when making buttercream.

The Best Fruity Red Wines

0

...

Red wine is an acquired taste; the tannic and acidic flavors are often difficult to enjoy upon the first sip. Therefore, beginning with the right wines are important. Fruity wines are the most-palatable for beginners in the genre. They are light and will not cause your nose to crinkle up from bitterness. As well as a catalyst to richer varieties of red wine, fruity wines are perfects pairs to dessert and lighter dishes. While "best" may be difficult to define, there are those that rank higher on the fruity scale.

Video of the Day

Merlot

...

Merlot is usually considered among the sweetest of red wines as it is both low in acidity an tannin count. Tannins are responsible for the woody and bitter puckering sensation found in many full bodied dry red wines (such as Cabernet Sauvignon), therefore wines lacking in tannins appear sweeter as the fruit is more pronounced. The Merlot grape is a very sweet grape usually identified with flavors of plum, cherries and blackberries. As one of the fruitiest wines, it is usually used in blends to soften stronger wine varieties.

Pinot Noir

...

The level of fruitiness of a Pinot Noir depends on the age of the bottle. Very young bottles of Pinot Noir are light and fruity, and are usually described as having berry flavors sch as raspberry and cherry. However, as Pinot Noir ages, it takes on more spicy earthy flavors.

Beaujolais

...

For those venturing into red wines for the first time, wine expert April Eichmeier suggests beginning with fruity wines to make the transition and introduction easier. She suggests trying a French Beaujolais, a young fruity wine that is perhaps the lightest red table wine out there. Beaujolais comes from the Beaujolais region in Burgundy, thus it is strictly produced in France. However, it is an easy red to find in the United States, look specifically for George DeBouf Beaujolais or Louis-Jadot Beaujolais at most wine shops or specialty grocery stores around the country.

Red Zinfandel

...

Red Zinfandel is primarily a California produced wine, though the Zinfandel grape is used widely to produce white Zinfandels and port wines. The Zinfandel grape is a very fruity grape and is therefore used to sweeten blends. Red Zinfandel is considered a very sweet and powerfully fruity wine, though as with the Pinot Noir, the flavor varies depending on the variety.

Know the characteristics of the particular bottle of red Zinfandel (and all fruity wines) you are buying before you make the purchase. Consult the advice of the wine specialist at the shop you are browsing at and ask whether or not a bottle you are considering is high in tannins for a particular year (i.e do the 1998s have more tannins than the 1997s?) there are likely to know.

What Makes Fudge Greasy on Top?

0

Fudge Pour the milk mixture over the chocolate and stir gently. Image Credit: Jupiterimages/Photos.com/Getty Images

Fudge seems simple enough. After all, people have been making it for generations. If yours is greasy on the top, the probable cause is overcooking or stirring. Use a slow, gentle approach and make sure your ingredients are at room temperature. If possible, make fudge on a dry day. Moisture — and even humidity in the air — can cause problems.

Video of the Day

The Problem

Fudge is an emulsion — the blending of two seemingly incompatible ingredients, sugar and butter — to make a creamy product. Greasy fudge indicates that the fat solids have separated from the liquid and the sugar.

Watch the Heat

Fudge separates, becoming grainy and greasy, if the temperature of the milk and sugar rises above 234 degrees Fahrenheit. To ensure this doesn't happen, use a candy thermometer. The traditional-style thermometers tend to be more accurate than dial thermometers. Attach the thermometer to the side of the pan, making sure its base doesn't touch the bottom of the pan. Bend down to read the thermometer at eye level, and pull the sugar mixture off the stove as soon as it reaches 234 F. At this temperature, it will be slightly golden-brown. At high altitude, reduce the temperature by 2 degrees for each 1,000 feet you live above sea level. For example, cook the fudge to 224 F if you live 5,000 feet above sea level.

Put Down the Spoon

Some recipes suggest stirring the sugar-milk mixture constantly until it reaches 234 F. This vigorous stirring can cause the mixture to curdle or break, which can result in greasy fudge. Spray a wooden spoon with nonstick spray before you begin. Stir the sugar-milk mixture constantly to bring it to a boil. At this point, turn off the heat, cover the pan and allow it to sit for 30 minutes. This resting period ensures the sugar has dissolved completely so you get a creamier fudge. Once the sugar has completely dissolved, bring the mixture to a boil again, but this time, do not stir it at all. Allow it to reach the correct temperature and remove it from the heat. This gentle approach should eliminate most problems with greasiness.

The Right Ingredients

The ingredients you use — and how you store them — can also play a role in fudge-making success. Use regular evaporated milk, rather than low-fat or nonfat, which are more likely to separate when heated. A pinch of cream of tartar added to the sugar and milk mixture can help reduce graininess. Cut the butter in cubes and add it to the sugar-milk mixture after you've boiled it. Cooking the butter with the sugar and milk can break down the milk solids in the butter, causing greasiness. Finally, don't store the butter or chocolate in the freezer. Moisture condensation from the freezer can add water to the fudge, causing seizing and separating.

Krups Proaroma Coffee Maker Instructions

Krups is an international company that manufactures coffee and espresso machines. The Krups ProAroma Coffee Maker is an automatic drip machine that makes coffee by running hot water through ground coffee beans. Follow these instructions to make the perfect cup of coffee for your specific tastes.

Setting Up

Remove the carafe and fill it will water equivalent to the the number of cups of coffee you want to make. Open the lid on top of the ProAroma and pour in the amount of water you desire for your coffee. The coffee grounds will absorb a small amount of water, so pour in slightly more water than the number of cups of coffee you would like to make.

Video of the Day

Using the Filter

Open the filter holder and insert a paper filter (Krups size 4). Spoon ground coffee into the paper filter. Use one Krups spoonfull (about 1 1/2 tbsp.) for each cup of coffee. Use the Aroma selector button to select your desired brewing method. "Pro" brewing results in a medium, mellow flavor. The "4-12" selection results in stronger, more stimulating coffee. The "1-3" setting is for 1 to 3 cups of coffee and results full flavor and aroma.

Brewing Coffee

Make sure the carafe is back on the warming plate. Press the on/off button to begin brewing the coffee. A light will appear to indicate the ProAroma has begun the brewing cycle. After the brewing cycle is complete, take the carafe off the warming plate and pour the coffee.

10 Delicious Ways to Use Yogurt to Cook Almost Anything

0

Close-Up Of Yogurt On Spoon 1 of 11

Yogurt is always there for you. When you're running out the door in the morning, or too tired at night to prepare a proper dinner, or the hot items on the hotel breakfast buffet look questionable at best… yogurt will always do in a pinch. But if you're only eating yogurt by the spoonful, you're missing out. This protein-packed dairy product belongs in more recipes than you might realize.

Image Credit: Wanwisa Hernandez / EyeEm/EyeEm/GettyImages Sweet potato soup with curcuma, coriander and pistazio 2 of 11

In Soups and Stews

So, it's important to get this out of the way first: Strawberry yogurt does not belong in chicken noodle soup. We're not suggesting that when we suggest adding yogurt to soups and stews. Plain yogurt, on the other hand, delivers creaminess and tang and cuts the heat in spicy dishes. Swirl in a spoonful to creamy tomato or butternut squash soup, or use plain Greek yogurt in chili.

Image Credit: Westend61/Westend61/GettyImages Pancakes with yogurt and blueberries 3 of 11

As a Sub for Buttermilk

Yogurt and buttermilk are basically siblings. So the next time you get halfway into a recipe before realizing your buttermilk has curdled, reach for a container of plain yogurt instead. If your yogurt is thick, water it down a little to better match the consistency of buttermilk. Then use it as an equal swap; that is, if the recipe calls for half a cup of buttermilk, add half a cup of the yogurt instead.

Image Credit: Arx0nt/Moment/GettyImages
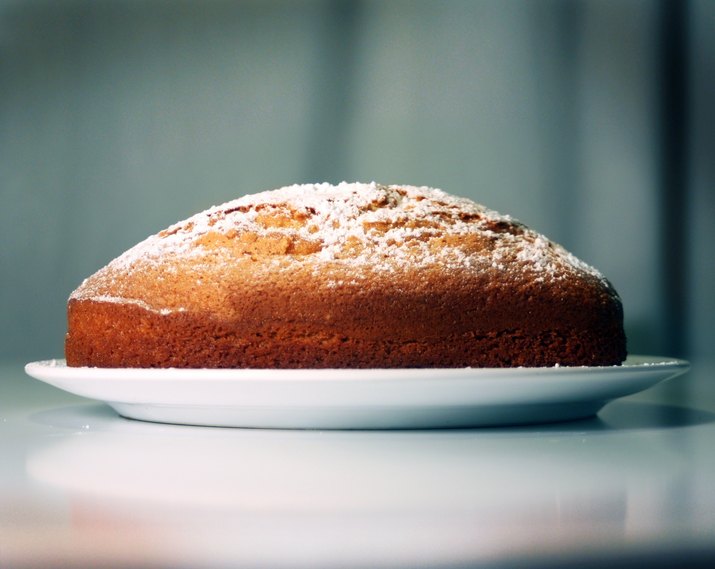
 Cake 4 of 11

As a Sub for Butter

If yogurt is buttermilk's sibling, it's butter's first cousin once removed. They have enough similar qualities that yogurt can be subbed for some of the butter in your baked goods without anyone knowing. Try swapping half the butter in a basic cake or muffin recipe for plain Green yogurt. It's a simple way to slash cholesterol and up the protein in your favorite treats.

Image Credit: retales botijero/Moment/GettyImages Pomegranate apricot cream cheese spread on cracker 5 of 11

To Make Cheese

Are you sensing a pattern here? Yup, yogurt's so versatile you can actually transform it into a kind of soft, spreadable cheese. Place cheesecloth in a strainer, pour in the yogurt, cover it and let it drain over a bowl in the refrigerator overnight. When the excess liquid drains away, you'll have a good substitute for cream cheese or goat cheese.

Image Credit: Cappi Thompson/Moment Open/GettyImages Glazed spicy chicken wings with sesame seeds served in cast iron skillets 6 of 11

In Salad Dressing or Dip

Creamy ranch that comes out of a bottle is so good, but sometimes you just need to impress the crowd with homemade dressing. Yogurt makes the perfect base for a variety of flavor profiles. Mix plain yogurt with garlic, lemon juice and fresh herbs to make a simple dressing for a green salad. Make a sweet version with fruit-flavored yogurt, fruit juice and honey to drizzle over fruit salad.

Image Credit: istetiana/Moment/GettyImages Homemade Beef Biryani Served With Raita Yogurt Dip, Overhead View 7 of 11

To Make Crispy Rice

Yogurt and crispy aren't two words that typically go together, but they can. Yogurt is a key ingredient in a Persian rice dish called tahdig. Mix yogurt and spices with cooked rice and pack the rice into a hot, oiled pan. After about 15 minutes on the stove, the bottom of the rice will turn into a crispy golden crust.

Image Credit: Vrinda Thamara Valappil / 500px/500Px Plus/GettyImages
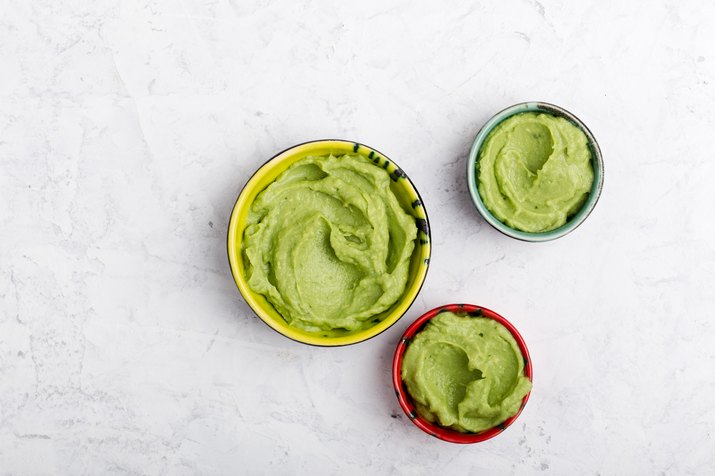
 Green guacamole sauce 8 of 11

In Guacamole

Guacamole purists may be horrified by the idea of yogurt stirred into this luscious avocado mixture. But considering the price and fat content of avocados, filling out your guacamole with yogurt is just plain brilliant. Add a big spoonful of tangy Greek yogurt and mix it in until the white disappears. If the guacamole snobs don't want it, all the more for you.

Image Credit: istetiana/Moment/GettyImages Curcuma Lassi, Superfood 9 of 11

As a Decadent Dessert Drink

It's sweet, creamy and refreshing. The next time you're craving a smoothie, make lassi instead. It's a yogurt drink popular in India, and it's easy to make your own version at home. Blend yogurt with water or milk, fresh or frozen fruit and honey as a sweetener.

Image Credit: Westend61/Westend61/GettyImages Indian Food: Naan Bread Dish with Butter 10 of 11

In Two-Ingredient Flatbreads

The only thing better than a recipe with only three ingredients? A recipe with only two ingredients. Equal parts plain Greek yogurt and self-rising flour is all you need to make a basic flatbread dough. Roll pieces into thin disks and cook each one for a few minutes in a dry pan over medium heat. Flip the flatbread halfway through to brown each side.

Image Credit: Alexandre Morin-Laprise/Moment/GettyImages Pulled Chicken Tostada with Slaw 11 of 11

In Coleslaw

Yogurt brings to coleslaw all the tang and creaminess you could want, without the oil content of mayonnaise. As a bonus, using yogurt will make your coleslaw appealing to the picnic guests who can't stand mayo in any context! Use Greek yogurt as a one-to-one swap, or substitute it for just half the mayo. As long as you load the slaw with plenty of flavor, some diners might not even notice the switch.

Image Credit: BRETT STEVENS/Image Source/GettyImages

Make Peanut Butter Cookies From Scratch With This Easy Recipe

0

Fresh-from-the oven cookies are nearly impossible to beat, and homemade peanut butter cookies are an all-time classic that most people enjoy. This recipe can easily be adapted to incorporate any type of nut butter, including cashew, almond, or hazelnut to fit any dietary needs or palate preferences. One of the best parts about baking cookies at home is the dough can easily be refrigerated or frozen right up until you're ready to bake the cookies, ensuring your cookies are fresh-out-of-the-oven every time.

Stack of peanut butter cookies How to make peanut butter cookies Image Credit: Julia Mueller

Video of the Day

Things You\’ll Need

  • 1/2 cup (1 stick, or 8 tablespoons) unsalted butter, softened

  • 1/2 cup granulated sugar

  • 1/2 cup light brown sugar, packed

  • 1/2 cup peanut butter (see note)

  • 1 large egg

  • 1-1/4 cups all-purpose flour (see note)

  • 1/2 teaspoon baking soda

  • 1/2 teaspoon baking powder

  • 1/4 teaspoon ground cinnamon, optional

  • 1/4 teaspoon sea salt

Tip

  • You can use creamy or crunchy peanut butter, and alsounsweetened or sweetened. Avoid using peanut butter that has a great deal ofoil separation to avoid the need to stir the peanut butter.
  • For gluten-free cookies, use gluten-free all-purposeflour for this recipe.
  • If you don’t have brown sugar on hand, you can replace itwith regular granulated cane sugar.
  • Replace the sugars with coconut sugar to make this recipe refined sugar-free.
  • Substitute 7 tablespoons of softened coconut oil for the butter in order to make this recipe dairy-free.

Step 1: Gather Your Ingredients

Collect the ingredients you need for the recipe, using any substitutions as noted above.

measuring cups of ingredients for cookies 
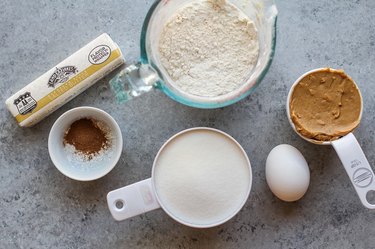
peanut butter cookies ingredients Image Credit: Julia Mueller

Step 2: Cream the Butter and Sugar

Add the softened butter and sugars to a stand mixer, or a mixing bowl. Beat until creamy.

Creamed butter and sugar in a mixer 
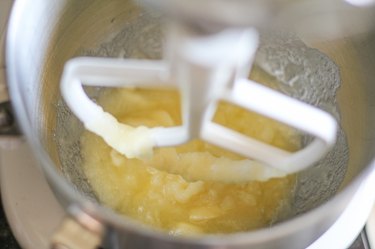
mix the butter and sugar Image Credit: Julia Mueller

Add the peanut butter and beat until well combined and creamy.

creamed butter, sugar, and peanut butter in a mixer 
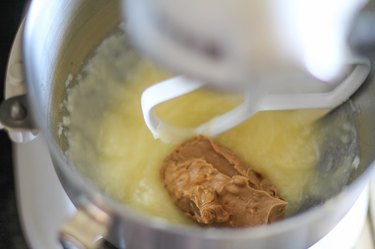
add the peanut butter Image Credit: Julia Mueller mixer beating peanut butter into batter mix peanut butter into butter and sugar Image Credit: Julia Mueller

Add the egg and mix just until combined.

peanut butter cookie ingredients in a mixer Add the egg and mix Image Credit: Julia Mueller

Step 3: Add the Dry Ingredients

Combine the flour, baking soda, baking powder, cinnamon, and sea salt and stir well so that the dry ingredients are well incorporated.

flour, baking soda, salt in a measuring cup 
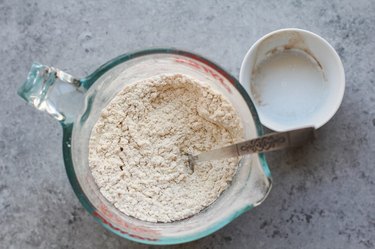
Combine the dry ingredients Image Credit: Julia Mueller

Pour half of the dry mixture into the mixer with the wet ingredients. Beat just until combined, then repeat for the remaining half of the dry ingredients.

Mixer with wet ingredients and measuring cup with dry ingredients Mix in the dry ingredients to complete the cookie dough. Image Credit: Julia Mueller Mixer mixing peanut butter cookie dough 
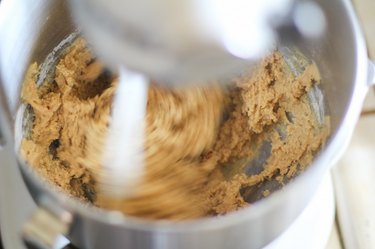
dough should be thick yet moist Image Credit: Julia Mueller

Step 4: Refrigerate the Dough

Transfer the cookie dough to a sealable container. Cover and refrigerate for at least 3 hours, up to 12 hours.

Cookie dough in a tupperware container 
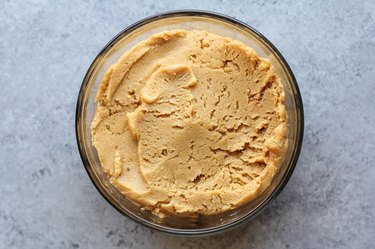
Refrigerate cookie dough for 3 hours Image Credit: Julia Mueller

Step 5: Prepare the Cookies

Preheat the oven to 350 degrees Fahrenheit and line a large baking sheet with parchment paper. Form small balls out of the dough and place on the parchment-lined baking sheet.

Balls of cookie dough on  a baking sheet Roll cookie dough into balls Image Credit: Julia Mueller

Using a fork, flatten the balls by scoring the dough with a fork twice with a crisscross pattern.

Fork making crisscross on cookie dough balls flatten the dough with a fork Image Credit: Julia Mueller Tray of peanut butter cookie dough Flatten all of the balls of dough Image Credit: Julia Mueller

Step 6: Bake the Cookies

Place the tray of cookie dough on the center rack of the oven. Bake for 10 to 14 minutes, or until cookies reach desired level of crisp. For chewy cookies, bake 8 to 9 minutes.

Tray of peanut butter cookies Bake until cookies reach desired done-ness Image Credit: Julia Mueller

Remove cookies from the oven and allow them to sit 5 minutes before transferring them to a wire rack to cool. Serve and enjoy.

Stack of peanut butter cookies Allow cookies to cool Image Credit: Julia Mueller Plate of peanut butter cookies Serve and enjoy! Image Credit: Julia Mueller

How to Make a Funfetti Mug Cake

0

Cake for one? Um, yes please! Make any day feel like a festive celebration with this colorfully delicious funfetti mug cake. The best part is it takes less than five minutes to make.

funfetti mug cake with sprinkles

Things You\’ll Need

  • 1/4 cup flour

  • 1/2 teaspoon baking powder

  • 2 tablespoons sugar

  • Pinch of salt

  • 1 tablespoon milk

  • 2 tablespoons melted butter

  • 2 tablespoons beaten egg or egg substitute

  • 1/2 teaspoon vanilla extract

  • 2 tablespoons sprinkles (plus more for garnish)

  • 2 tablespoons vanilla frosting

Step 1: Combine the Dry Ingredients

Spray the inside of the mug lightly with cooking spray or grease with butter. Add the flour, baking powder, sugar and salt.

adding dry ingredients

Step 2: Add the Wet Ingredients

Add the milk, butter, egg and vanilla extract. Stir to combine until a smooth batter forms.

adding wet ingredients stirring to combine cake batter

Step 3: Add the Sprinkles

Add the sprinkles and stir until they are evenly distributed throughout the batter.

adding sprinkles to batter stirring sprinkles into cake batter

Step 4: Microwave the Cake

Place the mug inside the microwave and cook for 45 seconds. Check for doneness. If needed, cook in additional 15-second increments until center is done.

cooked funfetti mug cake

Top the finished cake with a dollop of vanilla frosting and garnish with additional sprinkles on top.

frosting the mug cake garnishing mug cake with sprinkles finished funfetti mug cake

Can You Make a Pie Shell Using Pancake Mix?

0

Pumpkin pie With a few modifications, you can use pancake mix to make a pie shell. Image Credit: Jupiterimages/liquidlibrary/Getty Images

Pancake mixes have evolved from the basic combination of flour, sugar, salt and a leavening ingredient to sometimes include shortening and dried eggs. Since a conventional pie crust is made with flour, shortening and salt, with a few adjustments, a traditional-style pancake mix can be used to make the shell for your next lemon meringue or coconut cream.

Video of the Day

You Don\’t Complete Me

Pancake mix comes in two basic varieties — original and complete. The original version contains fewer ingredients, namely flour, salt, sugar and baking soda. The complete style usually contains some type of shelf-stable shortening and dried eggs. Using the complete package to make pancakes, you only need to add water to the complete mix. With the original, you need to add shortening, eggs and water. Because most pie shells become too fluffy and soft with the addition of eggs, use the original mix to make pie crusts.

Mix It Up

When making a pie crust using pancake mix, measure the mix equal to the amount of flour called for in the recipe. Add the same amount of shortening and liquid as the recipe calls for but omit the salt, sugar and any leavening ingredients. In a food processor or mixing bowl, blend together until crumbly.

Stick With Me

One of the secrets to great pie crusts may be in how the shortening is mixed into the dry ingredients. When mixed properly, the butter coats the flour to prevent it from attracting too much water. When the flour absorbs too much of the water, it forms gluten which makes the final product more tough. For flaky pie crust, mix the butter with the pancake mix until it forms crumbs. Large clumps of dough means it may be too wet or has not been incorporated enough, while a creamy paste means it has been over-mixed. After mixing, chill the dough for a minimum of 45 minutes before rolling.

The Trade-Offs

While pastry flour is recommended for the flakiest crusts because of its lower gluten content, most pancake mixes use higher-gluten all-purpose flour, which can make crusts made from a mix tougher than your standard crust. Also, pancake mixes may use more sugar than is called for when making a traditional pie crust, so the shell may be sweeter than usual, even without the addition of more sugar.