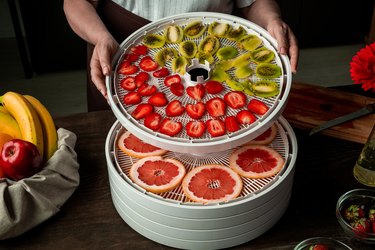
If one of your goals is to snack more healthily, purchasing a food dehydrator may be one of the best investments you make all year. These countertop kitchen appliances suck the moisture out of foods like meat, fruits and vegetables to make snacks like jerky, fruit leather, dried fruit, vegetable chips and more. The dehydrating process retains the nutritional value of foods while preserving them far beyond their ordinary shelf life.
Video of the Day
While you don't necessarily need a food dehydrator to experiment with dehydrating foods (our ancestors dried foods directly in the sun, for example), a food dehydrator takes all the guesswork out of the process. A food dehydrator is easier to use and far more convenient than using a traditional oven, which requires constant monitoring. If you're interested in buying fewer snacks from name-brands and making your own, a food dehydrator is a healthier alternative that can save you money in the long run.
What to Consider When Purchasing a Food Dehydrator
Tray Versus Shelf: There are two main types of food dehydrators: tray and shelf. Tray dehydrators have trays that stack on top of each other and are the most common and affordable. The trays have holes so air can flow through them. Because trays closest to the heat source tend to dry more quickly, you may want to rotate the trays to compensate for uneven drying.
Shelf dehydrators look like miniature ovens with multiple racks inside. Their heaters are located at the back so hot air is distributed evenly. You can put thicker foods into a shelf dehydrator, such as a whole banana, and because there's no air channel in the center, you can also dehydrate liquids like sauces. They tend to be pricer, larger and harder to clean than tray dehydrators. The delineation between tray and shelf dehydrators isn't always clear, but the type of heat distribution and air flow (more on that below) can give you a clue.
Capacity: A food dehydrator's capacity depends not only on the number of trays or shelves it has, but also their size. If you're only going to dehydrate foods occasionally, such as to make snacks for camping trips, a smaller model is probably sufficient. If you plan on dehydrating in large batches, such as for your home-based snack business, a larger model makes more sense.
Temperature: Some cheap food dehydrators don't come with temperature controls at all—something you'll want to avoid. Without the ability to adjust the temperature, you'll be limited in the number of recipes you can make. Most dehydrators will reach temperatures of 140 degrees Fahrenheit, but if you want to make jerky, look for one that goes up to 155 degrees Fahrenheit or higher.
Air Flow and Heat Distribution: Tray dehydrators utilize a vertical flow of air and typically place the heater at the bottom, which can lead to uneven dehydration unless you rotate the trays. Shelf dehydrators utilize horizontal air flow and usually place the heater in the back, which is ideal for drying meat. This style is easier to use, but more expensive.
Noise Level: Noise level probably doesn't matter as much unless you live with people or pets who are sensitive to loud sounds, but good food dehydrators will often list the decibel level. A range of 70 to 80 decibels approaches the noise level of most vacuum cleaners, as a reference point.
Other Features: Some nice but not absolutely necessary features include clear shelves to make it easier to check on trays, timers and automatic shutoff functions, the ability to program multiple temperatures during a set amount of time, and dishwasher-safe trays or shelves.
With these considerations in mind, here's our list of the best food dehydrators in 2021.
The Best Overall Food Dehydrator
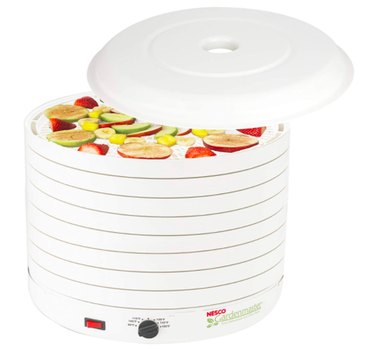
Nesco Gardenmaster Pro Food Dehydrator
$133.78 at Amazon
When factoring in what you get for the price, the Nesco Gardenmaster Pro comes out on top. It boasts 1,000 watts of drying power and utilizes a Converga-Flow drying system to push heated air up and across each tray, so it's really a hybrid of vertical and horizontal air flow. The results are evenly dehydrated foods, every time. It comes with eight dishwasher-safe stackable trays (but can accommodate as many as 30) with no tray rotation required, thanks to the Converga-Flow drying system. You can adjust the temperature between 95 degrees Fahrenheit and 160 degrees Fahrenheit, so it gets hot enough to make jerky. It comes with free accessories like eight fruit roll-up sheets, eight "clean-a-screens," a recipe book and a jerky spice pack with cure to get you started.
The Best Food Dehydrator for Fruits and Vegetables
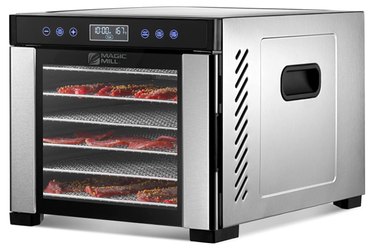
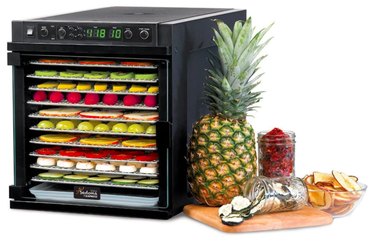
Magic Mill Food Dehydrator
$159.99 at Amazon
The Magic Mill food dehydrator excels at making fruit leather, dried fruit and vegetable chips, but also handles things like jerky and granola reasonably well. It's equipped with a rear-mounted drying fan and air circulation technology to promote even drying—there's no need to rotate the shelves, like some other models require. Plus, its transparent door window allows you to easily monitor your food. The dehydrator also features a digital thermostat, an adjustable timer and an automatic shutoff when finished. It also comes with seven adjustable stainless steel trays (each 13 inches by 12 inches) so you can dehydrate a variety of foods at once in large quantities.
The Best Food Dehydrator for Meat
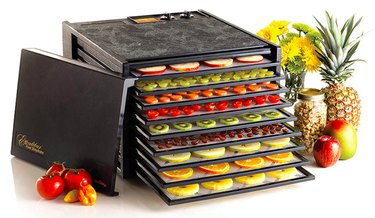
Excalibur 9-Tray Food Dehydrator
$295.00 at Amazon
If you're especially interested in making jerky, you can't go wrong with the Excalibur 9-Tray Food Dehydrator. It offers nine trays that total 15 square feet of dehydrating surface area and features a user-friendly thermostat that reaches up to 165 degrees Fahrenheit, the ideal temperature for making jerky. Another feature is the 26-hour timer so you can multitask without having to keep checking on your food. The dehydrator heats and distributes air flow from the back of the appliance so you don't need to rotate the trays to get even results. It shuts itself off once finished as a safety precaution and to prevent over-drying.
The Best High-End Food Dehydrator
Tribest Sedona Express 11-Tray Digital Dehydrator
$549.95 at Amazon (with stainless steel trays)
$449.95 at Bed Bath & Beyond (with plastic trays)
If you want something fancy, the Tribest® Sedona Express Digital Dehydrator offers numerous controls for getting things just right, such as the ability to set your drying temperature manually or choose from a number of preset programs, including options for raw foods and extra-fast dehydrating. Another useful feature is its advanced two-stage temperature timer, which allows you to begin dehydrating at a higher temperature before lowering the temperature to preserve the food's nutritional value. The dehydrator boasts a wide temperature range of 77 degrees Fahrenheit to 167 degrees Fahrenheit and comes with 11 trays (available in stainless steel or plastic) that total roughly 10 square feet of dehydrating surface area. It operates quietly and features an internal LED light.
The Best Budget-Friendly Food Dehydrator
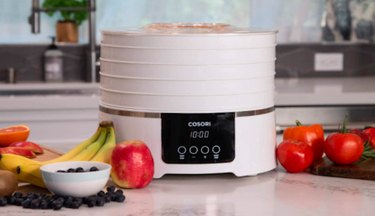
COSORI Food Dehydrator
$71.41 at Amazon
This compact and affordable model from COSORI is a great place to start if you're new to dehydrating foods or don't need a ton of capacity. While it can't accommodate as much food at once as some other models, it still offers five BPA-free plastic trays (but can expand to fit seven), in addition to a mesh screen and a fruit roll sheet. It boasts a temperature range of 95 degrees Fahrenheit to 165 degrees Fahrenheit and adjustable timers (in half-hour increments) between 30 minutes and 48 hours. At less than 48 decibels, it's quiet and features an automatic shutoff function to prevent over-drying. You can easily hand-wash the trays with a damp sponge or put them in the top rack of your dishwasher.
The Best Compact Food Dehydrator
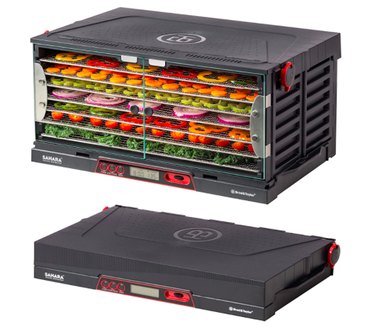
Brod & Taylor SAHARA Folding Food Dehydrator
$395.00 at Amazon (with stainless steel shelves)
$325.00 at Amazon (with polypropylene shelves)
Did you ever think you'd come across a food dehydrator that folds down? Well, now you have. The Brod & Taylor SAHARA model folds down to a third of its size in seconds to save space. When it's fully extended, it measures 22 inches long, 14 inches wide and 11 inches tall; folded, it measures 22 inches long, 12 1/4 inches wide and just 3 3/4 inches tall. It comes with seven shelves in either stainless steel or polypropylene (the latter choice saves you quite a bit of money), totaling 11 square feet of drying area. You can use the automated dual-time temperature control to start at a higher temperature and then switch to a lower temperature to preserve the food's nutrients, and you can set the timer to last up to 99 hours. It comes with a free zippered nylon shelf case for storage.

 pack a perfect beer cooler

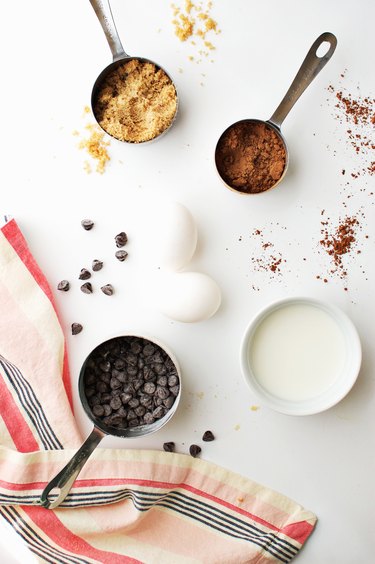
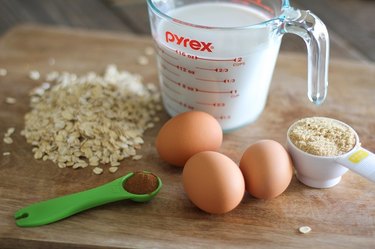 Gather all of your ingredents before you begin mixing.
  Begin with the liquid ingredients.
 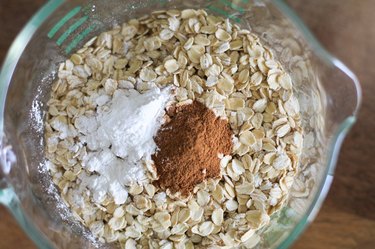 Mix together the dry ingredients.
 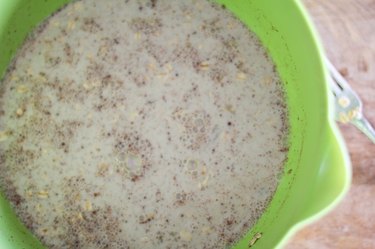 Add dry to wet and mix well.
 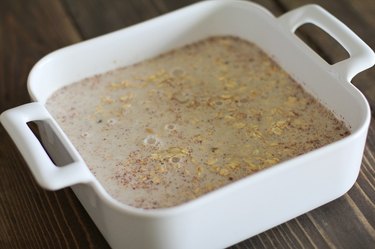 Julia Mueller/Demand Media
 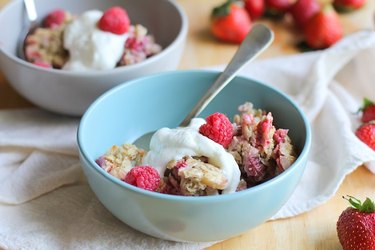 Top mixed berry baked oatmeal with whipped cream or yogurt.
 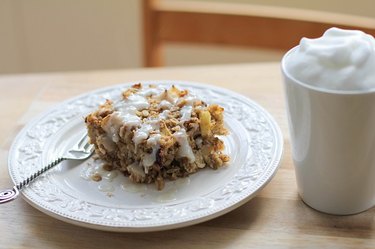 A powdered sugar glaze completes apple walnut baked oatmeal.