Home Blog Page 80

How to Make an Energy Drink with Ginger

0

Gingerroot Gingerroot offers a natural energy boost. Image Credit: Digital Vision./Photodisc/Getty Images

Start to Finish: 15 minutes Servings: 2 Difficulty Level: Beginner

Video of the Day

Simply glance at the nutrition label of a store-bought energy drink and you'll soon realize you don't recognize half of the listed ingredients. To ensure you know exactly what you're putting in your body, forgo adding any excess sugar and fillers by creating a simple and nutritional energy drink with natural ingredients such as ginger and lemon. In addition to boosting energy, ginger may also help to ease muscle pain and soreness.

Ingredients

  • Gingerroot
  • 2 lemons
  • Fresh mint
  • Honey

Directions

Step 1

Peel the gingerroot with a sharp paring knife to remove the tough outer skin. Cut the gingerroot into small chunks before placing it into the base of a pot. Cover the gingerroot with 4 to 5 cups of water and bring it to a boil.

Step 2

Boil for around 5 to 7 minutes to ensure the gingerroot infuses with the water. Remove from heat and allow the water to cool. Pour the mixture through a fine strainer and into a serving container to remove the chunks of gingerroot.

Step 3

Cut 2 lemons in half and squeeze the juice into the serving container with the ginger-infused water. Stir the mixture with a large spoon to ensure the lemon juice disperses evenly throughout the container. Place 5 to 7 mint leaves into the container to create a fresh flavor profile.

Step 4

Stir in 2 large tablespoons of honey to add sweetness. Cover the serving container and place in the refrigerator to cool. Serve the ginger-infused energy drink over ice for a quick pick-me-up or pre-workout boost.

Tip

Combine your energy drink with green tea to boost the antioxidants.

When consuming your ginger energy drink after a tough workout, add a pinch of sea salt to replenish your electrolytes.

How to Roast Beets Perfectly Every Time

0

Many grocery stores sell packaged, ready-to-serve roasted beets in the produce aisle. These are a wonderful convenience product, but they're overpriced considering how easy and inexpensive it is to roast beets at home. Roasted beets are incredibly healthy, mildly sweet, and they add a beautiful color and appealing texture to so many meals. Add them to salads, pickle them, or serve them as a side dish tossed with some olive oil, vinegar or citrus juice, fresh herbs such as basil or mint, and some crumbled goat or feta cheese.

How to Roast Beets | eHow

Video of the Day

Things You\’ll Need

  • Beets (purple, golden, any variety will work)

  • Extra virgin olive oil

  • A sharp knife

  • Vegetable scrubber and/or vegetable peeler

  • Aluminum foil

  • Baking sheet

Step 1: Separate the Bulb from the Stem and Greens

Preheat the oven to 400 degrees Fahrenheit. Slice off the beet stems and greens, reserving them for another use.

Tip

Did you know that the entire beet is edible? Beet greens are very similar to Swiss chard. They're wonderful sautéed with some olive oil, salt and pepper.

How to Roast Beets | eHow

Step 2: Scrub or Peel the Beets

Beets are a root vegetable, meaning they're grown in the ground. They're often quite dirty, and need to be cleaned thoroughly. Use a vegetable scrubber to remove any grit. If you don't have a vegetable scrubber, you can peel the beets.

How to Roast Beets | eHow

Step 3: Prepare for Roasting

Lightly brush the beets with olive oil and wrap each one with aluminum foil. Place in a baking sheet and roast for 45 to 60 minutes (the time will vary depending on the size of the beets). The beets are ready when a fork or toothpick easily slides through the center.

How to Roast Beets | eHow

Step 4: Peel the Beets

Allow the beets cool briefly until they can be handled. Unwrap the foil. The easiest way to remove the peels without making a mess is to place one in a paper towel and gently rub it back and forth without applying much pressure. The peel should come right off. If a vegetable peeler was used in step 2, this step can be skipped.

How to Roast Beets | eHow

Step 5: Slice and Serve

Quarter or slice the beets. The can be served immediately or stored in the refrigerator for up to one week.

How to Roast Beets | eHow

How to Get Fudge Not to Be Gritty

0

Things You\’ll Need

  • Candy thermometer

  • Pastry brush

  • Marshmallow cream

... The key to successful fudge is controlling the formation of sugar crystals.

For chocolate lovers, few things are better than the smooth, creamy taste of chocolate fudge. This indulgent treat is a candy confection that requires the right conditions and temperatures to form properly. Fudge starts off as sugar and chocolate boiled into a syrup until micro sugar crystals start to form, giving the fudge its smooth texture. You can easily end up with coarse, grainy fudge however, if you don't cook it to the right temperature, or even if you stir it at the wrong time. Timing and temperature are the key factors in making smooth, creamy fudge.

Video of the Day

Step 1

Don't stir the fudge while it is cooking. During the cooking process, very tiny crystals form from the sugar, giving the fudge its smooth texture. When you stir the fudge it encourages the sugar crystals to attach to each other and get bigger, or crystallize, which is what causes the fudge to become grainy.

Step 2

Avoid scraping the bottom and sides of the pan during cooking. You may think you are helping to prevent burning by scraping the bottom, or avoiding waste by scraping the chocolate from the sides, but this chocolate has already developed a different texture than the loose, melted chocolate in the pot and will become lumpy and grainy if you try to stir it in. However, you should use a pastry brush dipped in warm water to wipe away any sugar crystals that are forming on the sides of the pan.

Step 3

Use a candy thermometer to avoid overcooking fudge. A candy thermometer is crucial in achieving the right texture for fudge. The fudge should be cooked to between 235 and 240 degrees Fahrenheit in order to reach the soft-ball stage, meaning it will form a flexible ball when dropped in water and melt in your hand. Cooking it further will cause it to become firmer, drier and more like hard candy, resulting in a grainy, chocolate mess. A simple clip-on candy thermometer will help you keep an eye on the temperature.

Step 4

Add marshmallow creme to the fudge. Some fudge recipes for call for marshmallow creme because it contains corn syrup and egg whites, both of which prevent the sugar from crystallizing and becoming grainy. The added fat from the marshmallow cream also helps make the texture of the fudge extra smooth.

Tip

When making fudge, always choose high-quality chocolate because it tends to be smoother in texture.

Can You Heat Aioli?

0

Cloves of garlic Garlic is the main ingredient in aioli. Image Credit: Thinkstock Images/Stockbyte/Getty Images

Heating aioli is possible, but not necessarily recommended because of the way the sauce is traditionally made. Aioli is one of the classic "grand sauces" of French cooking; it's a thick, pungent sauce composed of garlic, eggs and oil. Although described as a mayonnaise by some experts, aioli differs from mayonnaise in that it uses lots of garlic and olive oil, while mayonnaise uses more vegetable oils and eggs only.

Video of the Day

Temperature and Time Are Key

Hailing from France's Provence region, traditional aioli is made by grinding garlic cloves with salt and olive oil using a mortar and pestle. The garlic acts as an emulsifier to thicken the sauce. Today's standard versions of aioli also include Dijon mustard and egg yolks. Whether it's made with traditional or contemporary ingredients, expert chefs say there are two key elements to making aioli: temperature and time. All the ingredients must be at room temperature before combining. The cook then grinds them together patiently, adding the oil slowly until the sauce thickens. If too much oil is added too quickly, the sauce won't emulsify properly.

Heat Aioli Slowly

Contemporary cooks have looked for shortcuts to the laborious process of making aioli, which may be the motivation behind one recipe that calls for heating the sauce to thicken it. This alternative recommends combining the ingredients in a food processor, then slowly heating the mixture, whisking constantly, until it thickens. When making aioli using this method, it's recommended that you use heat-tolerant oil such as safflower in place of olive oil. Once again, be careful not to heat the sauce too fast, as heat will make it separate. If the sauce separates, try whisking one egg yolk in a bowl, then add the separated sauce and whisk the sauce until it emulsifies again.

Variations

Often aioli is served with cut raw vegetables known as crudité. In these globe-trotting times, aioli can be found accompanying various foods, from cold meats in Spain to french fries in Australia. In Provence, aioli is spread on baguettes that are made into croutons and served with the region's popular fish soup. Variations on classic aioli include adding minced fresh rosemary or chipotle peppers. Another version includes a pinch of saffron with a tablespoon of honey.

Beware the Eggs

Once caution with aioli: its use of raw eggs makes it hazardous for some people. As with any sauce or dressing made with raw eggs, aioli probably shouldn't be eaten by children, the elderly or pregnant women to avoid the possibility of food-borne illnesses that might harm the fetus. This danger can be compounded because aioli, even when heated to thicken it, is usually served at room temperature. That's within the "danger zone" between 40 and 145 degrees Fahrenheit where bacteria can grow in food.

How to Troubleshoot Watery Pumpkin Pies

0

Pumpkin pie is a staple of the fall holiday season. It doesn't feel like Thanksgiving without one. While it's technically a straightforward recipe, pumpkin pie can be tricky. At some point, most bakers fall victim to a soggy, curdled-looking filling that seeps liquid. Here are some tips for avoiding this sad pie experience.

How to Troubleshoot Watery Pumpkin Pies | eHow

Video of the Day

Reasons Why Your Pumpkin Pie Might Be Watery:

  • You used fresh pumpkin instead of canned pumpkin
  • Your recipe needs more eggs
  • You docked your pie crust
  • Refrigeration before cooling
  • The pie was baked for too long

How to Troubleshoot Watery Pumpkin Pies | eHow

Canned Pumpkin vs. Fresh Pumpkin

There's nothing wrong with using either canned pumpkin or a fresh sugar pumpkin. Each has its pluses and minuses, and both are great options for pumpkin pie. However, it's important to understand that fresh pumpkin has a higher water content than canned pumpkin puree.

How to Troubleshoot Watery Pumpkin Pies | eHow

Strain or Reduce Fresh Pumpkin Puree

If you want to use fresh pumpkin, roast and then strain it overnight before baking it into a pie. Roasting is a better option than boiling since boiling has the potential to add even more water content. After roasting the pumpkin, briefly puree it in a food processor, then place it in a fine mesh strainer (or a colander lined with cheesecloth), and allow it to drain in the refrigerator overnight. This will remove any excess water before baking. If you're pressed for time, you can also place the puree in a saucepan and reduce it.

How to Troubleshoot Watery Pumpkin Pies | eHow

Add More Eggs

Pumpkin pie filling is essentially a custard. Eggs are what hold custards together. Adding an extra egg or egg yolk will help solidify a pumpkin pie recipe that is runny and won't hold its shape.

How to Troubleshoot Watery Pumpkin Pies | eHow

Don\’t Dock the Dough

Most pie recipes call for "blind baking" the dough, which means baking it before any pie filling has been added. These recipes also suggest docking the dough, which means adding numerous small holes to prevent air bubbles from forming. Pumpkin pie dough is not typically blind baked, and docking the dough will cause liquid to seep into the dough. This will create a soggy crust with liquid on the bottom.

How to Troubleshoot Watery Pumpkin Pies | eHow

Blot the Moisture

If the pie is placed in the refrigerator before it has completely cooled, moisture will rise to the top. This is sometimes referred to as "weeping." Simply use a paper towel or clean cloth to blot away the excess moisture.

How to Troubleshoot Watery Pumpkin Pies | eHow

Over-baking/High Heat

As with any custard, over-baking or baking at too high of a temperature can cause the pie to become watery and curdled. Remove the pie from the oven when it is still slightly jiggly in the center. It will continue to set as it cools.

How to Troubleshoot Watery Pumpkin Pies | eHow

Pumpkin Pie Punch Recipe

0

It's baaaack. Ready or not, autumn has descended once again, and with it — pumpkin palooza! Not that we're complaining. If you're like us, you readily embrace everything pumpkin spice with open arms (and stomachs). I mean, is there anything more comforting than a big bite of pumpkin pie? We think not. So why stop at just eating your favorite fall treat when you can drink it up, too? This boozy (or not!) beverage will give you all the flavor of pumpkin pie in just a fraction of the time it takes to bake one. It's sure to be a hit at all your fall and winter gatherings — from Halloween to the yuletide season.

Pumpkin Pie Punch with whipped topping

Video of the Day

Things You\’ll Need

  • 1/2 gallon apple juice

  • 2 cups ginger ale

  • 1 can pumpkin pie filling (not pumpkin puree)

  • 1 or 2 apples

  • vodka to taste (optional)

  • whipped topping & pumpkin pie spice (optional)

  • blender or whisk

Ingredients for Pumpkin Pie Punch Recipe

Step 1: Mix Ingredients

In a large bowl or electric blender, add apple juice, ginger ale and pumpkin pie filling.

Adding ginger ale to blender for Pumpkin Pie Punch Recipe Adding pumpkin pie filling to blender for Pumpkin Pie Punch Recipe

Optional: For an alcoholic beverage, add as much vodka as desired.

Step 2: Blend Well

If not using a blender, whisk vigorously until the pumpkin pie mix is well blended. If using a blender, mix at low speed.

Blending ingredients for Pumpkin Pie Punch Recipe

Step 3: Pour Into Punch Bowl or Dispenser

Pour your punch into a bowl or beverage dispenser. We used an easy-to-make pumpkin keg! Check out our DIY Pumpkin Keg tutorial to make a keg of your own.

Pouring Pumpkin Pie Punch into DIY pumpkin keg

Tip

Some pumpkin pie mix will eventually settle to the bottom, but that's normal. We suggest you keep a whisk nearby and give the punch a stir before serving up a round of drinks.

Step 4: Add Sliced Apples

Slice up your apple(s) and toss them into the punch bowl.

Slicing apples for Pumpkin Pie Punch Recipe Adding sliced apples to Pumpkin Pie Punch

Tip

If you'd like ice-cold punch, we suggest adding ice to glasses before serving rather than adding ice directly into the bowl with the punch. This will prevent your rich, yummy punch from getting over-diluted.

For those desiring an extra bit of decadence, add a dollop of whipped topping and a sprinkle of pumpkin pie spice to their glass right before serving.

Pumpkin Pie Punch with whipped topping

Now it's time to get your cozy fall feels on. It's easy! Just sit back, relax, and sip a luscious glass of pumpkin pie punch in the company of those you love.

Pumpkin Pie Punch with DIY Pumpkin Keg

9 Foods That Wake You Up and Give You Energy

0

Young woman eating healthy breakfast 1 of 10

Introduction

Maybe you're dealing with a mid-afternoon slump, or maybe it's one of those mornings. Either way, you need an energy boost, stat. And while you could just visit the coffee machine every half-hour, you'll get more lasting energy if you eat energizing foods instead — plus, you'll avoid the caffeine headaches. Plenty of healthy foods not only provide fuel to support your active lifestyle, but also come loaded with nutrients that gently wake you up and increase your alertness. Choose one of these ultra-healthy choices the next time you need an energy boost.

Image Credit: Jacob Ammentorp Lund/iStock/GettyImages
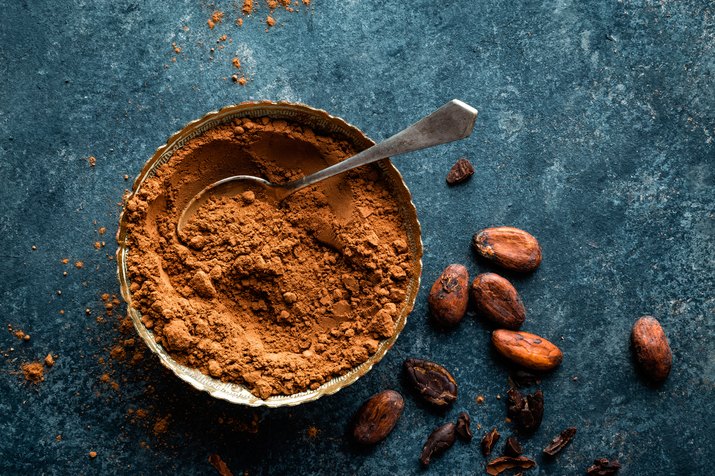
 Cocoa powder and cacao beans on dark background, top view 2 of 10

Cocoa Powder

Chocolate — is there anything it can't do?! When it comes to energizing foods, it's tough to beat good ol' cocoa powder. For one thing, it's a natural source of caffeine, so you'll get a modest caffeine buzz without the coffee. And cocoa powder's intense flavor can also perk up your taste buds — and, by extension, your mind. Plus, researchers have found that chocolate boosts the levels of feel-good hormones like serotonin, and that may rev you up to take on the day. Stir a spoonful of cocoa powder into your Greek yogurt in the morning — adding a little honey to make it palatable, if needed — or blend it into your smoothie or smoothie bowl.

Image Credit: YelenaYemchuk/iStock/GettyImages
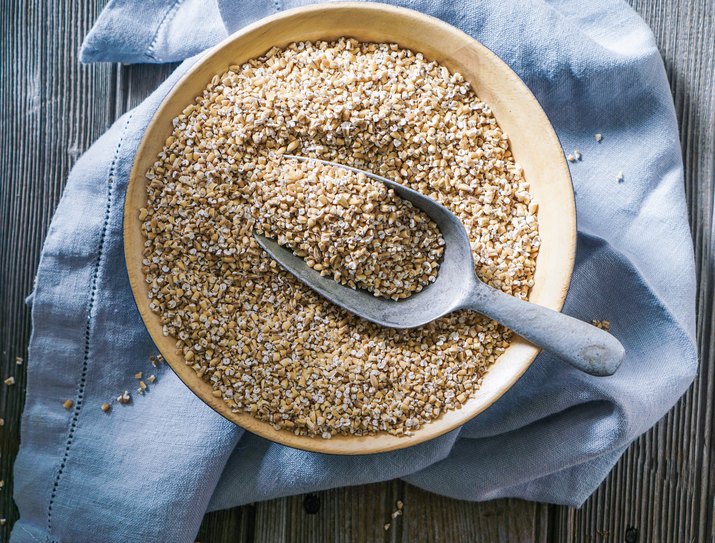
 Raw Organic Steel Cut Oats in a Bowl. 3 of 10

Steel-Cut Oats

Oats might be an old-fashioned breakfast, but that doesn't mean they're dull or boring. In fact, carb-loading with steel cut oats might be just what you need to perk up and feel alert for the rest of the day. Steel-cut oats are a great source of dietary fiber, an absolute must when you're eating to feel more energized. Fiber not only keeps you full — staving off those hunger pangs that can leave you feeling fatigued — but also keeps your blood sugar levels more stable to help you avoid a blood sugar crash that leaves you feeling drained of your energy. Eat traditional steel-cut oats with fruit in the morning, or cook your oats in chicken broth and add frozen veggies for savory version.

Image Credit: anakopa/iStock/GettyImages
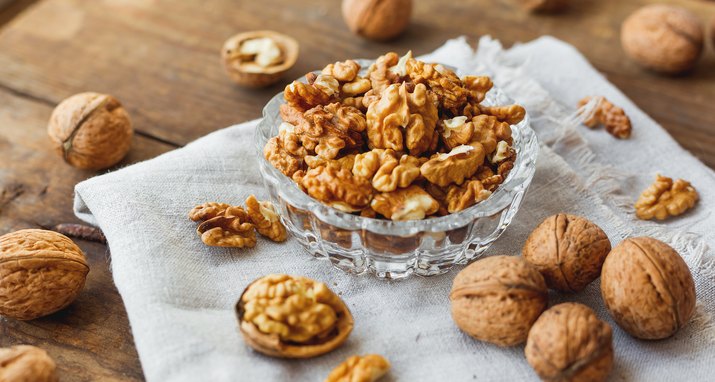
 Glass bowl with walnuts on rustic homespun napkin. Healthy snack. 4 of 10

Walnuts

Healthy fats are a must when you're trying to keep your energy levels up, and as a source of unsaturated fats and omega-3 fatty acids, walnuts are one of your best options. Fat in general is a great source of calories, so it literally provides energy you need to get through a busy day. But the omega-3 fatty acids offer added benefits — they nourish your nervous system to keep your brain sharp, and help you avoid the depression and fatigue that can stem from an omega-3 fatty acid deficiency. Add a handful of chopped walnuts to your steel-cut oats, snack on 'em on their own or add them to salads.

Image Credit: Aksenovko/iStock/GettyImages
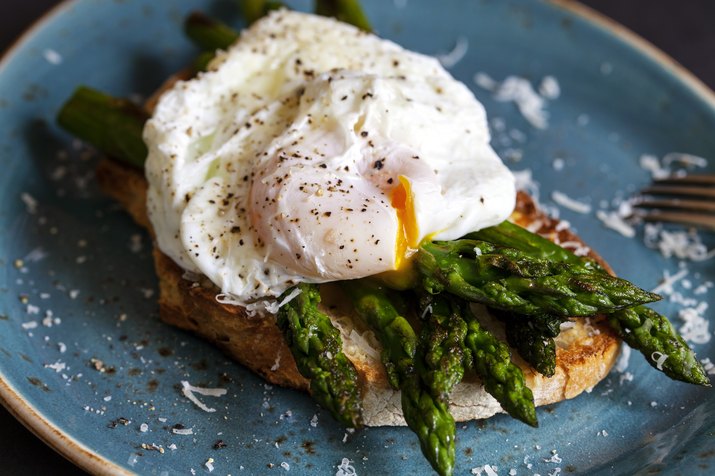
 Breakfast with poached egg and asparagus 5 of 10

Eggs

If it's been awhile since you started your day with some scrambled (or fried, or poached, or hard-boiled…) eggs, it's time to give them another chance. Not only do eggs supply energy from their healthy fats and protein, but they're also packed with another energy-boosting nutrient — vitamin B-12. Getting enough B-12 is absolutely crucial for feeling energized, because it's important for the growth and function of your red blood cells, the cells that supply your tissues with oxygen. Without oxygen, your cells can't produce energy — and without enough healthy red blood cells, you'll develop an anemia that can leave you extremely fatigued. B-12 is found in most animal-derived foods, so eat your eggs with a glass of milk on the side for an added boost. Here are 8 easy ways to make eggs.

Image Credit: magdanatka/iStock/GettyImages Cup of oolong tea and accessories 6 of 10

Oolong Tea

Green tea might get plenty of attention for its many health benefits, but if you're looking for more energy, consider giving oolong tea a try. Oolong tea is made from leaves that are partially fermented, but not as fermented as the leaves in black tea. That means it occupies a niche between green tea and black tea is flavor and, more importantly, health benefits. You'll get slightly more energy-boosting caffeine than you would with green tea, and more beneficial antioxidants (like catechins) than you do with black tea — not to mention plenty of deliciousness. Steep a mug of oolong for an all-natural pick-me-up, and add a slice of fresh fig for added flavor.

Image Credit: GuidoVrola/iStock/GettyImages
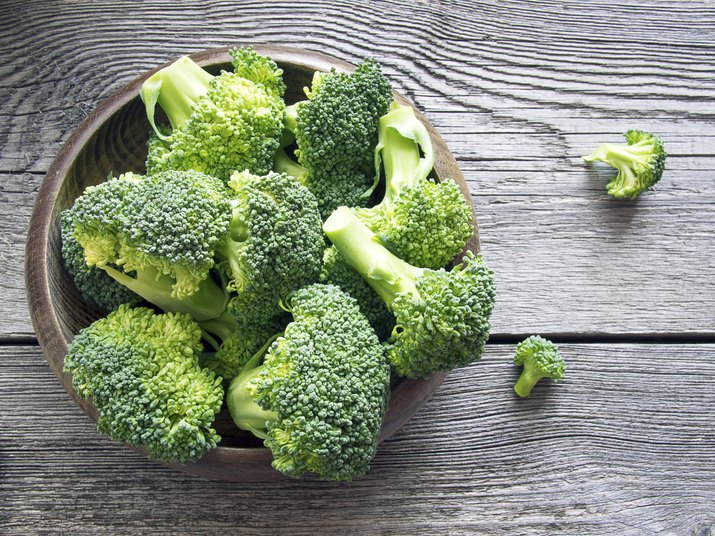
 Raw broccoli on wooden background 7 of 10

Broccoli

If you've ever temporarily fallen off the "clean eating" wagon and felt the bloating and fatigue that comes along with it, you already know a diet packed with veggies is essential for feeling your best. But some vegetables are more beneficial than others, and broccoli is one of the best. That's because it's loaded with folate, also called vitamin B-9. Like vitamin B-12, folate plays an important role in helping your body make new red blood cells — and low levels of folate can cause anemia that will make you tired 24/7. Lentils and spinach are also great sources of this nutrient, so make your meal a triple threat by combining them in a spicy and comforting broccoli dal.

Image Credit: canyonos/iStock/GettyImages
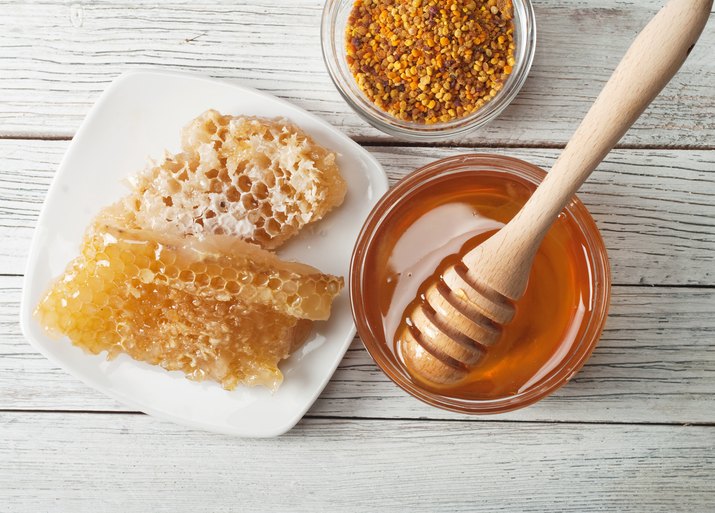
 honey 8 of 10

Honey

Managing your sugar intake is important for staying alert and energized, since too much sugar can make you feel drained. But if you need a quick little burst of energy, a little bit is OK. Simple sugars, like honey, are your cells' preferred source of energy, and they digest quickly for an almost-instant energy lift. The trick is to combine simple sugars with complex carbs, fat or protein, which will sustain the energy boost. So add some honey to your steel-cut oats or your smoothie, or use it to make a homemade dressing for a chicken and kale salad.

Image Credit: aaboikis/iStock/GettyImages Ground hot red pepper in a glass jar 9 of 10

Cayenne (and Other Spicy Foods)

If you need to wake up, it's time to turn up the heat — in your food, that is. Spicy fare gets your adrenaline pumping, which is why you might notice that your heart rate increases, you break a slight sweat and you're suddenly much more alert. Cayenne, spicy red pepper flakes and hot sauces are the best seasonings to get capsaicin (the spicy compound with those energizing benefits), so include them in your meals whenever you need a boost. Add red pepper flakes to your avo toast in the morning, serve poached eggs with sriracha or add hot sauce to your favorite salad dressing to feel more alert ASAP.

Image Credit: 5PH/iStock/GettyImages Ripe tangerines on white background 10 of 10

Oranges

If you're looking for an afternoon snack that's both simple and energizing, you can't go wrong with a tangerine. Like most fruits, tangerines are intensely hydrating — so they can pick up your energy if you're feeling sluggish from mild dehydration. They're also high in vitamin C, a nutrient your cells use to create energy. More than that, though, the scent of citrus gives you a natural pick-me-up. Researchers have found that citrus scents stimulate your nervous system, so taking time the savor the scent of your tangerine should leave you feeling more alert and happy. Tangerines taste amazing on their own, but you can also add tangerine sections to your favorite salad for a burst of sunny flavor.

Image Credit: mashimara/iStock/GettyImages

How to Boil Corn on the Cob Perfectly

0

All of the food I love comes into season in the summer, and corn happens to be at the top of that list. I love any corn dish to be honest, but corn on the cob holds a special place in my heart: I like it grilled, roasted, raw (yep, even raw), and boiled. Boiling corn is one of the simplest ways to prepare it without losing any of its natural flavor, and my no-fail method will give you juicy, perfectly cooked corn on the cob every time.

Perfect Boiled Corn on the Cob

Video of the Day

Things You\’ll Need

  • 4 to 6 ears of fresh corn

  • 8 cups of water

  • 6 tablespoons unsalted butter (optional)

  • 1 tablespoon kosher salt

  • 1/2 teaspoon cracked black pepper

Ingredients for Boiled Corn on the Cob

Step 1

Remove the husks and silks from the corn and rinse.

Step 2

Bring 8 cups of water to a boil and add 1/2 tablespoon of salt.

Step 3

Add corn on the cob to boiling water and boil for 10 minutes until corn is just tender.

Step 4

Remove the corn on the cob from the water, immediately spread butter on top, and sprinkle with the other 1/2 tablespoon of salt and cracked pepper. Serve immediately.

Easy Boiled Corn on the Cob

This recipe is fool-proof and you will love knowing that you can have delicious corn on the cob all summer long without any fuss!

Problems with Mini Kegs

0

... Problems with Mini Kegs

When talking about mini kegs and the problems encountered by beer drinkers, there are two distinct discussions necessary. One is the commercially produced mini kegs now offered by many commercial and even micro-breweries. The other requiring discussion is the in the home brewing field, of which there are untold numbers. The biggest problem seemingly shared by both is carbonation but there are other problems, particularly for home brewers.

Video of the Day

Commercial Mini Kegs

There is an amazing number of beer resources available at bookstores, local libraries and on the Internet. The most current information is largely anecdotal and found on blogs, both commercial and private, because of the relatively recent introduction of mini kegs. Mini kegs can range in both physical size (short and squat to elongated and tall), to the amounts of beer they contain. Most commercial mini kegs come in 1.33 gallon sizes. Because of the uneven results reported on both commercial and private blogs, it's difficult to determine how much of the problem is production based and how much is user based.

Reports on Commercial Produced Mini Kegs

Many beer aficionados report that they have not experienced problem with either leakage or over-carbonation while others complain of leakage in the dispensing system and over-carbonation. The largest number of complaints of the commercially-produced mini kegs refer to over-carbonation, particularly when discussing Heineken brand mini kegs (perhaps it's because there are the most popular and widely purchased, that's difficult to determine). Few have reported problems with dispensing leakage. It's difficult to say definitively whether the over-carbonation is due to jostling from transport or a sufficient amount of time the mini keg may need to settle before dispensing. Most reports relate to pouring one-to-several glasses of mostly foam before getting a pub-style pour of a nice head and drinkable beer.

Home Brewing and Mini Kegs

Home brewing introduces many more variables and uncertainties than commercially brewed beer. While commercial beer has many checks and balances along the way to insure a uniform product, home brewing has basically just one–the home-brewer himself. The uneven results can start from the beginning of the process with inadequate sanitation to over-cooking the wert to introducing yeast while the wert is too hot, thus killing the yeast and preventing fermentation. Some home brewers report increasing the sugars during the secondary fermentation to increase the carbonation produced little difference and yet others have found that the increased sugars in the secondary fermentation have produced satisfactory results. It's difficult to troubleshoot with all the varied methodologies and equipment that are particular to each home brewer. At minimum it's safe to say at its present state, the results of using a mini keg are uneven in home brewing while bottling the same batch of beer has produced satisfactory results.

Cost: Commercial and Home Brewed

Commercially, the cost per draft is about the same as you would expect at your local pub. Depending on the pub and taxes and overhead and how upscale the establishment, the cost may work out to be less than buying the beer by the bottle because it is slightly cheaper for the commercial brewery to produce and sell beer in larger containers than it is by the bottle or by the case. (Hence the cheaper cost per draft of buying beer by the keg.) For the home brewer, expect to pay $8–$10 for the mini kegs themselves, which is about on par with the cost of bottling because of the extra equipment. In the end, it's pretty much a wash. The advantage to home brewers is the time savings in filling a larger container rather than sanitizing bottles, caps and use of capping equipment.

The Jury is Out

One can only imagine that commercial brewers will respond with better techniques to satisfy their customers. Over time, the results are likely to become more consistent. For home brewers there are three options, each with its benefits and drawbacks. There is the tried and true bottling method but it requires more time and effort. There is the option of using commercial soda dispensers, which work very well, but the initial investment can be costly. That cost, however, when amortized over the useful life of metal soda canisters, becomes minimal. The third option is to continue experimenting with mini kegs because the problem may be more one of methodology in brewing using an unfamiliar format than in the components themselves.

Homemade Coffee Creamer Recipes (5 Flavors)

0

There's nothing better than starting the day with a fresh cup of coffee. And thanks to flavored creamers, you can turn your daily cup into a tasty treat! However, store-bought flavored coffee creamers are often full of added sugars, artificial flavorings and preservatives. They also contain dairy, which can be disappointing if you're allergic to dairy, lactose intolerant or vegan. So, why not make it yourself? It's surprisingly easy (and cheap) to whip up flavored coffee creamers at home. This way, you can customize the ingredients and flavors according to your preferences and dietary needs. Keep reading to learn how to make a basic coffee creamer, plus five ways to add flavor.

Homemade coffee creamer recipes

Video of the Day

Basic Coffee Creamer Recipe

Things You\’ll Need

  • 1 cup milk of choice

  • 1 cup heavy cream, half and half, plant-based creamer, or condensed milk

  • 1 to 2 tablespoons maple syrup or honey

Ingredients for basic coffee creamer

Step 1

In a small pot over low heat, combine all three ingredients. Mix for 3 to 5 minutes or until combined. And just like that, you have two cups of homemade creamer!

Basic coffee creamer

To make a flavored version, simply add extra ingredients. Here are five delicious ideas to get you started:

Peanut Butter Cup Coffee Creamer

Things You\’ll Need

  • 2 cups plain creamer

  • 1/4 cup peanut butter

  • 1/4 cup chocolate chips or shavings

Step 1

Make the basic coffee creamer over low heat. Add the peanut butter and chocolate chips. Whisk until melted.

Step 2

Let cool and blend in a blender until smooth.

Peanut butter cup coffee creamer

Tip

If you're allergic to peanuts, replace the peanut butter with cashew, almond, or sunflower seed butter. You can also use cocoa powder if you don't have chocolate chips or shavings.

French Vanilla Coffee Creamer

Things You\’ll Need

  • 2 cups plain creamer

  • 1 tablespoon pure vanilla extract

Step 1

Make the basic coffee creamer. Add an extra tablespoon of vanilla extract and mix well.

French vanilla coffee creamer

Toasted Marshmallow Coconut Coffee Creamer

Things You\’ll Need

  • 2 cups plain coconut creamer, warm

  • 15 regular marshmallows

  • 1/3 cup white, brown, or coconut sugar

  • 1 teaspoon pure vanilla extract

Step 1

Make the basic coffee creamer.

Step 2

Pre-heat the oven to 400 degrees Fahrenheit. Line a metal cookie sheet with parchment paper (this will make cleanup much easier). Place 15 marshmallows on the sheet.

Place marshmallows on parchment paper

Step 3

Toast the marshmallows for 3 to 5 minutes. They will toast quickly, so keep an eye on them.

Toast marshmallows

Step 4

Place a pot over low heat. Spoon the melted marshmallows into the pot. This will be messy, so work quickly. If the marshmallows toughen up, pop them back in the oven for another 15 to 30 seconds.

Step 5

Add the sugar. Mix until the marshmallows and sugar melt together. Add the vanilla extract and warm coconut creamer. Stir until all of the ingredients are combined.

Toasted marshmallow coconut creamer

Tip

To make a basic coconut creamer, use coconut milk and/or canned coconut cream. However, if you're allergic to coconut or don't like the taste, feel free to make a basic creamer with milk and cream of your choice. Next, follow the above recipe as usual. The result will be a toasted marshmallow creamer without the coconut flavor.

Pumpkin Spice Coffee Creamer

Things You\’ll Need

  • 2 cups plain coffee creamer

  • 1/3 to 1/2 cup pumpkin puree

  • 1 teaspoon pumpkin pie spice

  • 1/2 teaspoon ground cinnamon

  • 1/4 teaspoon ground nutmeg

  • 1 teaspoon pure vanilla extract

Step 1

Make the basic coffee creamer over low heat. Add the pumpkin puree, spices and vanilla extract. Mix until the pumpkin puree dissolves.

Pumpkin spice coffee creamer

Peppermint Mocha Coffee Creamer

Things You\’ll Need

  • 2 cups plain coffee creamer

  • 1/3 to 1/2 cup chocolate chips (or 1/3 cup cocoa powder)

  • 1/4 teaspoon espresso powder

  • 1/2 – 1 teaspoon peppermint extract, to taste

Step 1

Make the basic coffee creamer over low heat. Add the chocolate chips, espresso powder and peppermint extract. Mix until the chocolate completely melts. If you're using cocoa powder, you might need to use a blender to fully combine the ingredients.

Peppermint mocha coffee creamer

Remember, these recipes are simply guides. Don't hesitate to adjust the ingredients according to your taste buds or what you have on hand.

Homemade coffee creamer recipes

Your homemade coffee creamer will last for 1 week in the refrigerator. Some versions, like the toasted marshmallow creamer, will need a good mix or shake before using. Enjoy!