Home Blog Page 8

What Is the Difference Between Dinner Spoons and Teaspoons?

0

table setting 
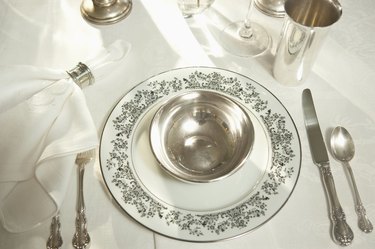
Choose between a teaspoon or dinner spoon when setting a table. Image Credit: Comstock Images/Stockbyte/Getty Images

While the modern teaspoon has taken the place of the dinner spoon in newer flatware sets, the dinner spoon remains a mainstay in classic sets of silver flatware. The larger dinner spoon, though becoming more obsolete in place settings, still has a spot at the table — just to the right of the knife.

Video of the Day

Teaspoon Basics

When a dinner spoon is not included in a place setting, a teaspoon stands in its place. Along with a knife and fork, a teaspoon is the third piece of flatware in a place setting and is often placed simply to finish the place setting, even if it has no use for a particular meal. Positioned to the right of a knife, the teaspoon can be used for eating cereal and soups, as well as stirring coffee and tea.

Behind Dinner Spoons

Larger than a teaspoon, the dinner spoon is also used for eating soups, cereals and desserts. Positioned to the right of the knife, the dinner spoon is not used together with the teaspoon in casual dining, but only in its absence. The exception to this is only in formal dining where the two spoons are often used together with the dinner spoon being situated to the right of the teaspoon in the place setting. In this case, the dinner spoon is used for soup or dessert, while the teaspoon is used for stirring coffee or tea.

A Matter of Size

While size varies substantially by manufacturer, a dinner spoon is always larger than a teaspoon. A typical teaspoon measures 5 1/2 to 6 1/2 inches in length, while a dinner spoon measures around 7 to 7 1/2 inches in length. In the place of a dinner spoon, the similar sized dessert spoon or place spoon often complete modern place settings. Both roughly the same length and spoon size as the dinner spoon, these spoons can be used to eat soup, cereal or desserts.

Caring for Flatware

Flatware should be washed in warm, soapy water after each use and thoroughly dried to prevent spots and tarnishing. While stainless steel is relatively easy to care for, silver and silver-plated flatware requires more care. Silver flatware benefits from buffing using a soft cloth or towel to bring out its luster and diminish tarnishing. Store silver or silver-plated flatware away from heat and sunlight to prevent tarnishing. Avoid washing silver and stainless steel flatware together to prevent pitting in the silver flatware.

How to Host a Beer Tasting Fundraiser

0

close-up of head of a beer in a glass

Beer is best appreciated in the company of others. Let this fun drink become a way to make your cause or organization a little extra money by having a beer-tasting fundraiser. You can hire a caterer or rent out a bar or restaurant for the event—or hold it at your own home. With a little advance planning, you can contact a local brewery, or even a big, nationwide manufacturer, and encourage them to donate beer for your particular cause. A beer-tasting fundraiser is an enjoyable way to hold a social event and raise money for a good cause.

Video of the Day

Step 1

Find a space to host the event. You'll either want to find a house to use, obtain the necessary permits to hold your beer-tasting fundraiser in a park, or rent out a restaurant or bar. If you rent out a bar or restaurant, even if the owner is sympathetic to your cause, you will probably have to pay a lot.

Step 2

Line up beer for the fundraiser. If you are holding the event at a bar or restaurant, this is already taken care of. Otherwise, write a donation letter a couple of months in advance to breweries asking for beer for the tasting. Donation letters are most effective when written on official letterhead with the your nonprofit number (if you have one) included. A brewery may be happy to comply, since this is a great advertising opportunity for it. You can also ask each guest to bring some beer to contribute.

Step 3

Use a donation letter to encourage local grocery stores to donate snacks. Eating between tastes of beer will help clear the palate, and prevent guests from drinking alcohol on an empty stomach.

Step 4

Research the types of beer you'll serve. Call the brewery for a description, or look up information online. If you don't know what kinds of beer will be at the event, get a general beer guide or be sure to have your computer close at hand for easy referencing.

Step 5

Advertise the event. Make sure that everyone who attends is 21 or older. In any advertising material, detail what the fundraiser is for and how much money you want to raise.

Step 6

You can calculate how much to charge each person by dividing how much you'd like to make, plus expenses, by how many people you expect to show up. Include the ticket price on the advertising material, or suggest a sliding scale donation.

Step 7

Be sure to state that this is a donation-based event, and that you are not selling alcohol—unless you have a license to sell alcohol. Check your local laws to see what permits, if any, you need.

Step 8

Collect money at the door, or ask for it in advance. You may sell tickets to the beer tasting, or you may choose to collect money as people arrive.

Step 9

Serving small tastes of each beer, possibly in shot glasses, so that no one gets too drunk.

Warning

Make sure you obtain all the permits necessary for holding a beer-tasting fundraiser.

How to Make Soft and Chewy Rice Krispie Treats

0

The ultimate no-bake dessert, rice krispie treats are a much-loved classic. Laden with a few additional ingredients, such as peanut butter chocolate chips, extra marshmallows and vanilla, the recipe for these rice krispie treats yields the most soft, chewy and delicious edibles imaginable.

These Rice Krispie Treats are Soft, Chewy & Delicious!

Video of the Day

Things You\’ll Need

  • 6 cups puffed rice cereal

  • 6 cups marshmallows

  • 4 tablespoons unsalted butter

  • 1 teaspoon vanilla bean extract

  • 1/4 teaspoon sea salt

  • 2 cups peanut butter chips (optional)

Tip

If you aren't a fan of peanut butter, feel free to experiment with other additions. Some of our faves include Oreo cookie crumbs, crushed malt balls, potato chips, sprinkles, dark or milk chocolate chips, nuts, or cut up candy bars… even crumbled bacon!

Step 1: Prepare Your Ingredients

Begin by preparing your ingredients. Grease and line the top and sides of a 9 inch (or 22 centimeter) square baking dish and set aside.

A greased and lined baking dish.

Step 2: Prepare the Dry Ingredients

Place the cereal in a large mixing bowl and set aside.

Puffed rice cereal in a large bowl.

Step 3: Melt Butter and Marshmallows

In a medium sized saucepan set over a low heat, combine the butter and marshmallows. With a rubber spatula, stir continuously until the mixture is combined, smooth and shiny then remove from the heat and stir in the vanilla extract and salt.

Marshmallows and butter placed in a large saucepan.

Step 4: Combine With the Cereal

Pour the melted mixture over the cereal, stirring to uniformly combine, and then fold in the peanut butter chips or your choice of additions if you are using them.

Mixing together all the ingredients.

Step 5: Pour Into the Pan

Pour the mixture into the prepared baking dish and press down with the spatula to create a firm and even layer. Place the dish in the refrigerator and let chill for 15 minutes.

Mixture spread into an even layer.

Step 6: Cut and Serve

Once the rice krispie treats are set, cut them into your desired size and thickness before serving and enjoying.

Sliced Rice Krispie Treats.

Storing Tips

Rice Krispie Treats are best eaten as soon as possible after being made, though they can be stored and covered in an air tight container for up to three days.

Serve and enjoy your delicious Soft and Chewy Rice Krispy Treats!

What Products Does Coca-Cola Make?

Coca-Cola Co. Prepares To Release Quarterly Earnings Numbers Coca-Cola soda can case Image Credit: Tom Pennington/Getty Images News/Getty Images

The Coca-Cola Company had humble beginnings in Atlanta, where pharmacist, John Pemberton sold a mixture of syrup and carbonated water for 5 cents a glass. What began as a one-product company in 1886 has grown to more than 500 brands as of 2011, with products available in more than 200 countries.

Video of the Day

Soft Drinks

Coca-Cola Post Strong Earnings Coca-Cola drinks for sale Image Credit: Scott Olson/Getty Images News/Getty Images

The product that started it all is Coca-Cola itself. Atlanta pharmacist John Pemberton was inspired by curiosity and mixed together a caramel-colored liquid that he carried to Jacob's Pharmacy. He combined it with carbonated water, and the people who sampled it knew it was special. The drink sold at a rate of nine glasses a day. Pemberton died in 1888 before the company saw any great success. Today there are several varieties of Coke, including Diet Coke, Coke Zero and Cherry Coke. Other soft drinks are Sprite, orange and grape Fanta and A&W Root Beer.

Coffees and Teas

Honest Tea Erects 30-Ft Recycling Bin In Times Square To Launch The Great Recycle 
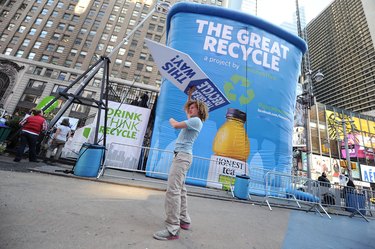
A 30ft. recycling bin erected by Honest Tea during \’The Great Recycle\’ event in TImes Square, New York City, NY. Image Credit: Jason Kempin/Getty Images Entertainment/Getty Images

Caribou Coffee is a ready-to-drink iced coffee product available in the United States. Flavor varieties are regular coffee and vanilla. Coke also owns the Nestea brand that is available in the following flavors: Green Tea Apple, Honey Mixed Berry, Lemon, Tangerine, Peach and Citrus Blend. There are diet versions available, too. Honest Tea is an organic product made with tea leaves and cane sugar. It also comes in decaf and is under 50 calories.

Waters

Coca-Cola Refreshes Mercedes Benz Fashion Week Fall 2009 Collections Day 5 
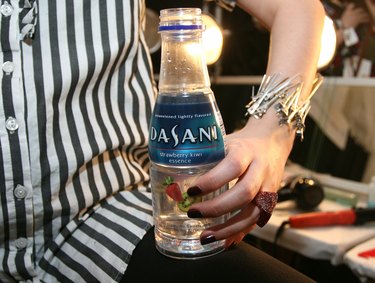
A model holds a bottle of Dasani water Image Credit: Donald Bowers/Getty Images Entertainment/Getty Images

The Coca-Cola Company bottles several types of water. Dasani comes in naturally flavored, lightly sweetened varieties like Peach, Lemon, Raspberry and Strawberry. Aquarius Spring water is bottled in the United States at protected springs and is unflavored.

Juices

Fungicide Found In Orange Juice 
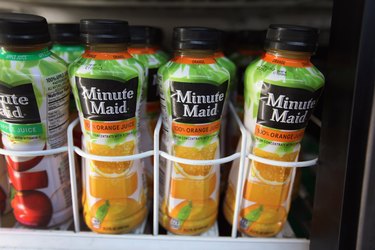
Minute Maid orange juice drink on store shelf Image Credit: Joe Raedle/Getty Images News/Getty Images

Minute Maid is a Coke product that comes in carton form and convenient plastic bottles for on-the-go use. Flavors include Fruit Punch, Grape, Apple, Orange and Apple-Cranberry.

Hi-C is another popular brand that appeals to kids. It boasts high amounts of vitamin C and comes in small one-serving juice boxes with an attached straw. Popular flavor varieties are Tropical Fruit Punch, Orange, Strawberry, Berry and Apple.

Energy and Sports Drinks

28th Annual Nightclub & Bar Convention And Trade Show - Day 2 Coca-Cola beverages being served at convention center Image Credit: David Becker/Getty Images Entertainment/Getty Images

Burn is an invigorating drink that contains potent energizing ingredients. It is available in Apple, Pineapple and Apple Kiwi. Aquarius is a mineral drink for sports enthusiasts. It was the official drink for the 1992 Olympic Games in Barcelona. Flavors are Berry, Honey Lemon, Tropical Fruit Punch, Grape and Orange.

A Brita Water Filter\’s Light Won\’t Work

0

Brita's Smart Pitchers are capable of filtering your water with every pour. At the top of the units are electric indicator lights in red, yellow and green that tell you when the filter should be changed. It takes a series of steps to get the lights working properly, but once configured, the device will do all the work.

Step 1

Hold the Smart Pitcher's "Start" button until all four bars appear and blink in sync.

Video of the Day

Step 2

Release the "Start" button, and a small dot should flash in the lower right corner.

Step 3

Obtain a new filter when the bars disappear.

Step 4

Clean the lid, pitcher and reservoir with detergent. Change the filter by soaking it in water for 15 minutes, then insert the cartridge into the corresponding hole in the top of the filter reservoir. Fill the pitcher twice and discard the water before beginning to serve with the third full pitcher.

Step 5

Repeat Steps 1 through 4 after every filter change.

How to Juice Blackberries

0

Things You\’ll Need

  • Saucepan

  • Potato masher or fork

  • Cheesecloth or fine mesh sieve

  • Colander

  • Mixing bowl

Fresh blackberries in a bowl Each blackberry is a cluster of smaller fruits, known as a drupelet. Image Credit: Teleginatania/iStock/Getty Images

Blackberries might be small, but they're bursting with flavorful juice that can be used for fruity desserts or enjoyed by the glass. The delicateness of blackberries makes them easy to juice, and you don't even need a pricey juicing machine. You only need to heat the berries to soften them further and press them through a sieve or cheesecloth to extract juice from this tasty fruit.

Video of the Day

Step 1

Add blackberries and water to a large saucepan. For every two quarts of blackberries, use 1/2 cup of water.

Step 2

Place the saucepan over high heat on the stove and bring it to a boil, and then reduce the heat to low. Simmer until the berries are soft, about 5 minutes.

Step 3

Mash the blackberries with a potato masher or a fork. Bring the mixture to a boil, and then remove it from the heat. Let it cool slightly.

Step 4

Line a colander with at least two layers of cheesecloth and set it in a large mixing bowl. If you don't have cheesecloth, use a fine mesh sieve, holding it above the mixing bowl.

Step 5

Pour the mashed berries into the lined colander or the fine mesh sieve. The juices will collect in the mixing bowl. Press the blackberries against the colander with the back of a spoon to squeeze out as much juice as possible.

Step 6

Gather the corners of the cheesecloth together and squeeze to get out any remaining juice. Discard the remaining pulp.

Step 7

Use juice immediately in a recipe or cool in the refrigerator and drink within 24 hours. If you wish to store it longer, freeze it or can it using sterilized canning jars and following the USDA's safe canning guidelines for fruit juices.

Tip

If you wish to drink the blackberry juice, add a little sweetener, such as sugar or honey to your taste. You may also wish to dilute it with water to your taste, since the fruit juice is highly concentrated in this state.

Use a masticating juicing machine to juice blackberries and other berries; it presses the fruit slowly to yield the most juice. Centrifugal juicers use high-speed blades and are better for hard fruits and vegetables.

What Type of Grind Should You Have for Regular Coffee in a Keurig?

... Keurig coffee machine and flavor cups

The plethora of whole coffee beans and various grinds available can make choosing a coffee for your Keurig K-Cup difficult. You can grind your own coffee beans or buy your favorite brand for use in the Keurig K-Cup, a specially designed reusable mesh coffee filter basket. Although Keurig suggests a French press grind, other coffee grinds also work well with a Keurig K-Cup.

Video of the Day

French Press

... Woman pouring coffee beans into grinder at supermarket

French press is a coarse coffee grind. Keurig suggests French press in the K-Cup, though other types work, as well. Very few name brand coffees come in a French press grind, so to attain this grind you may need to purchase whole beans and use a coffee grinder with variable settings.

Medium to Medium Fine

... Coffee grounds being poured into container

A medium to medium fine coffee grind is the most popular option for Keurig owners. Many brands of coffee offer this coffee grind, or you can grind it yourself. A medium to medium fine grind will be somewhat thin in texture and gritty like sand. This allows the water to flow rapidly through the coffee grounds. If you enjoy a stronger cup of coffee, you may want to entirely fill the K-Cup, which holds 12 grams of coffee grind, for robust flavor. Additionally, flavored coffees require the full 12 grams in the K-Cup if this coffee grind is used. For less flavor or milder coffee, less coffee may be used.

Fine

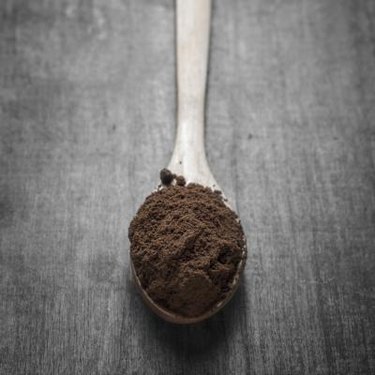
... Fine coffee grounds on wooden spoon

Fine grind coffee has the consistency of salt or sugar. It is very thin. Although finely ground coffee may cause sediment to slip through into your coffee mug, it is possible to use this coffee grind with your Keurig. Most espresso coffees come in fine grind. Popular name brand coffees come in fine grind coffee, so it's easy to get your favorites. Very fine and extra fine grinds should be avoided as they may slips through the mesh in the K-Cup basket.

Tips

... Close-up on Keurig coffee system

K-Cups hold approximately 12 grams of ground coffee. The finer the grind, the more coffee is needed. Coarser grinds require only about 6 grams of coffee. Always wash your K-Cup after each use to prevent buildup on the mesh. Be certain that the K-Cup plastic lid is securely screwed on the top of the basket or you will end up with a coffee mug full of grounds. If coffee grounds do slip through, they are easily removed with a spoon.

How to Make Butter Rum Flavoring

0

Things You\’ll Need

  • Light brown sugar

  • Butter

  • Honey

  • Rum extract

  • Nutmeg

  • Allspice

  • Cinnamon

Hot buttered rum is a warm, sweet drink that is particularly popular during the winter, but the flavor of the seasonal cocktail also adds a rich, decadent taste to several baked goods like hot butter rum cake. The flavors can also be made into an icing and drizzled on cookies. It's easy to make butter rum flavoring yourself, using a few ingredients you may already have in the pantry. The flavoring is great to have on hand during the winter any time you want to prepare a cocktail or dessert.

Step 1

Mix half a cup of light brown sugar and one-fourth cup of butter (salted, if possible) in a mixing bowl until the two ingredients are evenly blended.

Video of the Day

Step 2

Add 1/2 tbsp.of honey and 1/2 tbsp.of rum extract to the mixture of butter and sugar.

Step 3

Place 1/2 tbsp. each of cinnamon, allspice, and nutmeg into the bowl with the other ingredients. Use an electric mixture to combine the ingredients for about three minutes, or until completely smooth.

Step 4

Store the flavoring in the refrigerator until you're ready to use it. It will keep for up to six months, so you can mix a tablespoon of the flavoring with an ounce or two of rum and boiling hot water to create the hot butter rum cocktail. Or, include the buttery brown mixture in your cake batters or cookie doughs to give them extra sweetness and butter flavor.

How to Make Sheet Pan Pancakes

0

What if I told you that there is a faster and easier way to make pancakes? In a few simple steps you can make seriously fluffy and delicious sheet pan pancakes in fifteen minutes. With this no-fail sheet pan method, you don't have to worry about burning half the pancakes, forgetting about them on the griddle, or ending up with flat pancakes. Plus it's an easy way to serve a crowd. All you need to do it mix together your ingredients, bake in the oven, and then slice and serve away! You may never go back to making pancakes the traditional way ever again.

How to Make Sheet Pan Pancakes

Video of the Day

Things You\’ll Need

  • 2 cups all-purpose flour

  • 2 tablespoons baking powder

  • 1/4 teaspoon salt

  • 2 tablespoons granulated sugar

  • 1 teaspoon baking soda

  • 2 cups buttermilk

  • 2 eggs (lightly beaten)

  • 1 teaspoon vanilla

  • 1/4 cup vegetable oil

  • Powdered sugar for topping

  • Fresh berries for topping

  • Maple syrup or honey for topping

  • Butter for topping

How to Make Sheet Pan Pancakes

Step 1: Combine Wet and Dry Ingredients

Preheat oven to 350 degrees.

In one large bowl, add the flour, baking powder, salt, sugar, and baking soda and whisk to combine. In another bowl combine buttermilk, eggs, vanilla, and vegetable oil and whisk well. Slowly incorporate the wet ingredients into the dry ingredients and fold together until well combined.

How to Make Sheet Pan Pancakes

Step 2: Pour Batter Onto a Baking Sheet

Once the batter is combined, pour onto a parchment paper lined baking sheet (one with an inch or more edge on it) and spread into an even layer.

How to Make Sheet Pan Pancakes How to Make Sheet Pan Pancakes

Step 3: Bake

Bake the pancakes for 15 to 17 minutes or until cooked through.

How to Make Sheet Pan Pancakes

Tip

Insert a toothpick into the middle of the pancakes to see if it comes out clean or not. If it comes out clean, your pancakes are done; if not continue cooking for another couple of minutes.

Step 4: Add Toppings

Sprinkle the top of the pancakes with powdered sugar, fresh berries and butter, and then drizzle with maple syrup or honey and serve immediately.

How to Make Sheet Pan Pancakes How to Make Sheet Pan Pancakes How to Make Sheet Pan Pancakes

I can't wait for you to try out this new and improved way to whip up a breakfast classic!

Tip

Make a batch and freeze into individual portions for an even easier breakfast.

The Best Deals to Score from Sur La Table’s 2021 Anniversary Sale

0

kitchen rack with utensils

Once a year—and just in time for Thanksgiving—Sur La Table celebrates the anniversary of its founding with a can't-miss sale on kitchen and entertaining essentials. This year, the brand turns 49 and is offering up to 60% off cookware, serving pieces, bakeware, tools, linens and more. The sale is taking place from October 7th through the 19th and shoppers can expect big savings from Sur La Table's in-house brand and French cookware manufacturer Cristel.

Video of the Day

Ready to stock your kitchen drawers or get a head start on holiday shopping? Here's a breakdown of all the deals you can expect from Sur La Table's 2021 Anniversary Sale:

  • 20% off Sur La Table stainless steel tools
  • 20% off Sur La Table whiteware and porcelain serving pieces
  • 20% off Sur La Table white porcelain bakers and cocottes
  • 20% off towel sets
  • 20% off tile mitts and signature aprons
  • Over 20% off Cristel
  • Buy 2 get 1 free soaps and lotions
  • Up to 60% off select cookware

Now that we've piqued your interest, here are seven on-sale items worth adding to your online shopping cart.

1. Cristel Strate Roaster With Rack

$183.96 – $199.96 (save $45.99 – $49.99) at Sur La Table

With a month and a half to go until Thanksgiving, now is the time to invest in a high-quality roaster that can cook a 20-pound turkey to perfection. Choose from a 17-by-13-inch or 15-by-12.5-inch stainless steel roaster, complete with an adjustable folding rack and a meat thermometer. The three-ply base features an aluminum center to ensure even cooking and the large handles make it easy to lift a heavy bird in and out of the oven. The folding rack has five positions to accommodate a variety of dishes and the curved edges of the roaster make pouring out liquids less of a mess.

roasting pan with rack

2. Sur La Table Spice Measuring Spoons, Set Of 6

$12.96 (save $3.54) at Sur La Table

Listen, it's time to make the switch from round to rectangular measuring spoons. This set of six is narrow enough to fit in just about any spice jar—even the plastic ones you pick up from the grocery store. They're easy to remove from the ring and are made of dishwasher-safe stainless steel. The measurements range from ⅛ teaspoon to 1 tablespoon and the shape of each spoon makes it easy to level off dry ingredients. Buy them for yourself or gift them to a friend who understands the importance of seasoning!

rectangular measuring spoons

3. Assorted Twill Kitchen Towels, 28" X 20", Set Of 3

$15.96 (save $4.04) at Sur La Table

These 100% cotton towels are super absorbent and come in eight eye-catching colors. Each 28-by-20-inch towel features a loop for hang-drying, although they're also safe to use in the washer and dryer. There are three patterns in each set, two plaid and one striped. Use them to dry dishes, wipe your countertops or clean up a spill on the floor. With so many different options to choose from, you'll want to pick up a set in each color.

absorbent kitchen towels

4. Rectangular Porcelain Baker

$9.56 – $47.96 (save $2.44 – $12.04) at Sur La Table

Porcelain bakers tout a variety of uses—think lasagnas, casseroles, scalloped potatoes, enchiladas and more. This crisp white dish with sturdy handles comes in six sizes, ranging from half a quart to six quarts. Plus, if you buy multiple sizes they nest inside each other for seamless storage. The glaze is cadmium- and lead-free and the durable porcelain material helps to retain heat. The bakers are dishwasher and microwave safe and can withstand temperatures between 0° and 500° Farenheight.

casserole dish

5. Italian Whiteware Round Cheese Platter

$27.86 (save $7.09) at Sur La Table

It's not Thanksgiving unless you gorge yourself on hors d'oeuvres while watching The National Dog Show, right? This year, present your meats, cheeses, nuts and fruit on this 15-inch earthenware platter with gently rounded edges to prevent spills. It's handcrafted in Italy and allows charcuterie ingredients to pop against the white finish. The cheese platter is dishwasher safe and could also be used for serving cake, pizza, meat or fish—the opportunities are endless!

round serving tray

6. Sur La Table Stainless Steel Dough Scraper

$7.96 (save $2.04) at Sur La Table

Even if you're not a baker, you could certainly use a dough scraper in your kitchen. Use it to scoop up minced garlic or separate ingredients on your cutting board. If you are a baker, however, this small but mighty tool makes easy work of measuring, dividing and lifting dough. It's crafted from stainless steel and has a square edge, and it's also safe to use in the dishwasher. For only $8, it would be a fantastic stocking stuffer for the home chef or baker in your life.

dough cutter

7. Cristel Castel’Pro ULTRALU Nonstick Skillets, 8" And 9.5" Set

$105.96 (save $119.04) at Sur La Table

Get two nonstick skillets at an attractive price, guaranteeing easy cleanup and food release. This set comes with an 8-inch and a 9.5-inch skillet that features three coats of Exceliss+ PFOA-free nonstick. Cristel's French-made skillets were designed by chefs with aluminum and anodized aluminum layers to promote even heating. The large handles are comfortable to grip and won't overheat when you're cooking with multiple burners. This set is dishwasher safe and oven safe up to 350° Farenheight. It also boasts a limited 10-year warranty against manufacturing defects for added peace of mind.

nonstick skillet set