Home Blog Page 76

How to Cook Duck Breast (An Easy Tutorial)

0

"Oh this? It's no big deal. It's just pan seared duck breast with crispy skin. I just whipped it up." Even when you downplay it for your guests, they'll still never guess how easy it is. Just three ingredients and about 15 minutes and it's perfect every time. Just make sure to start with a cold pan, and no additional oils or fats and you'll get that beautifully crispy skin every time. Need a way to serve it? Try a simple salad or risotto on the side and top the duck with a drizzle of balsamic glaze or some fig jam.

How to Cook Duck Breast

Video of the Day

How to Cook Duck Breast

Things You\’ll Need

  • Duck breasts, skin-on (1 per person)

  • Salt

  • Pepper

Step 1: Score the Fat

Pat the duck breasts dry. Score lines in the fat (not the meat) with a sharp knife about an inch apart in each direction to make a diamond crosshatch pattern.

How to Cook Duck Breast

Step 2: Season

Liberally salt and pepper the duck on all sides.

How to Cook Duck Breast

Step 3: Add to a Cold Pan

Add the duck, skin side down, to a cast iron skillet off heat. Add to medium heat and cook until the skin is crispy and most of the fat has rendered.

How to Cook Duck Breast

Tip

Starting duck in a cold pan and cooking on medium heat will render more fat and crisp the skin much better than starting in a hot pan. The duck will render so much fat, in fact, that you will not need any additional oil or butter when cooking.

Step 4: Flip the Duck

Flip the duck and cook on the other side until the duck is cooked through but still has a hint of pink in the center. Although the FDA recommends cooking until 170 degrees Fahrenheit, most chefs only cook to 135 degrees Fahrenheit for best results.

How to Cook Duck Breast

Tip

Save the fat! You will render so much fat that you'll have enough to save for roasting potatoes or making duck confit. Just save in an air tight container in the fridge.

Step 5: Rest

Remove the duck from the pan and allow to rest for 5 minutes. Slice, plate, and serve.

How to Cook Duck Breast How to Cook Duck Breast

How to Cook Salmon on the Stove

0

Eating healthy doesn't have to be complicated. In fact, most of the time it's the simplest of meals that can be the best for your body. Salmon is one of those dishes that I try to incorporate into my weekly meal planning because of how amazing it is for you. On top of it's health benefits, salmon happens to be easy to prepare also. There are a variety of ways to cook salmon, but one of my favorite ways is to make it on the stove. You will love this method of cooking and will end up with the perfect piece of fish every time!

How to Cook Salmon on the Stove

Video of the Day

Things You\’ll Need

  • 3 pieces of salmon with skin on (5 to 6 ounces a piece; I used wild sockeye salmon)

  • 3 lemon wedges

  • 1 tablespoon olive oil

  • 1 teaspoon kosher salt

  • 1 teaspoon cracked black pepper

  • Iron skillet (or another heavy bottomed skillet)

Salmon Ingredients

Step 1: Prep the Salmon

Remove the pin bones from the fish and liberally season both sides of the salmon with salt and pepper.

Tip

Substitute any of your favorite seasonings using the same cooking method.

Seasoned Salmon

Step 2: Heat the Skillet

Heat an iron skillet over medium high heat and add olive oil to the pan.

Step 3: Cook the Salmon

Add salmon, skin side down, to the pan and cook for 6 minutes. Flip the salmon carefully and cook for another 5 to 6 minutes on the second side. Carefully remove the fish from the skillet.

Salmon Cooked on the Stove

Tip

You can remove the skin after cooking if you choose.

Step 4: Finish with Fresh Lemon

After the salmon is cooked through, squeeze fresh lemon over top before serving.

How to cook Salmon on the Stove Salmon Cooked on the Stove

This salmon is simple, but I promise it is so delicious! You are going to love using this no-fail cooking method any night of the week.

We Love This Fish! Other Ways to Cook Salmon

Stuffed salmon…

Stuffed Salmon Recipe

Made with a pistachio crust…

Pistachio Crusted Salmon Recipe

Grilled with it's skin on…

Grilled salmon

Baked in the oven…

Baked salmon

11 Secret Grilling Hacks You\’ll Wish You Knew Sooner

0

No summer is complete without a few long, lazy afternoons spent grilling on the patio or in the back yard. It's not exactly rocket science — heating food over a flame goes back a long, long way — but like any other form of cooking, there are definitely ways to improve your grilling game. Here are a few of our favorites.

Close-Up Of Person Preparing Food On Barbecue Grill

Video of the Day

1. Soak Your Skewers

Some grilling enthusiasts invest in a set of heavy-duty steel skewers for their grill, but most of us are happy to make do with the inexpensive disposable wooden or bamboo variety. The only problem is that these are both flammable, and they're going to go directly onto a source of open flame. Before you make up your kebabs, prepare for this by soaking your skewers in cold water for 20 or 30 minutes. They'll be wet enough to resist burning, and won't fall apart when you try to lift them from the grill.

Lamb kebab skewers on a ceramic bbq at a summer garden party. Close-up. Soaking your skewers in water for 20 to 30 minutes will keep them from igniting. Image Credit: Hugo Goudswaard/Photodisc/GettyImages

2. Clean Your Grill With an Onion

The traditional way to clean your grill before (or after) each use is with a wire brush. Unfortunately those get dirty themselves, and can be downright hazardous if the wire bristles detach and find their way into your food. Just cut an onion in half, and rub it vigorously across the grate with your hand or (if it's still hot) a set of tongs or a cloth. The onion's moisture and acidity will help cut through the stuck-on gunk, and leave behind a mild hint of onion flavor for the foods you grill.

Close-Up Of Dirty used Barbecue Grill and scrubber Instead of the dirty and dangerous wire brush, clean your grill with an onion. Image Credit: Stefka Pavlova/Moment/GettyImages

3. Spiral Cut Your Hot Dogs

There's nothing wrong with a plain hot dog, it's just kind of…plain. Before you start piling on the toppings, though, there's a way to make them more special even before they hit the grill: Giving them a spiral cut. The dogs will expand into a long corkscrew shape as they grill, making them look bigger and creating extra space for your condiments and toppings. You can buy dog-cutting gizmos at the department store, or just thread one onto a skewer and then rotate the skewer as you cut it into a spiral with your paring knife.

unhealthy Food 
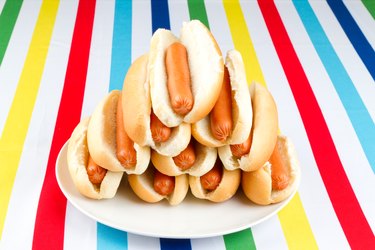
Why settle for plain? Spiral-cutting your hot dogs makes them special. Image Credit: ncognet0/E+/GettyImages

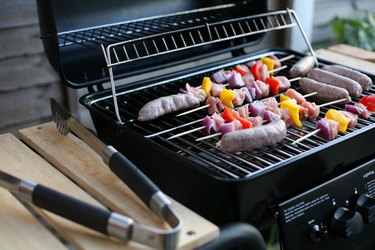
4. Skewer Meat and Veggies Separately

Kebabs made with bright, colorful veggies threaded between the cubes of meat are appealing to the eye, but they often disappoint on the plate. Many vegetables take longer to cook than your meat does, so you'll have to choose between under-cooked vegetables or over-cooked meats. Instead, create separate skewers of meat and vegetables, so you can cook them separately until they're done. They'll still look beautiful once they're paired on a plate, and they'll taste better.

Chicken and Vegetable Kebab 
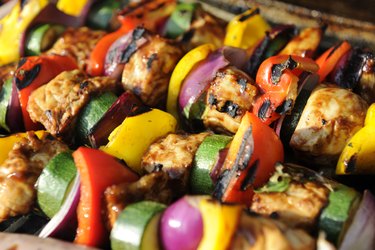
These skewers are pretty, but cooking the meat and veggies separately is more practical. Image Credit: OwenPrice/E+/GettyImages

5. Master Indirect Heat

Grills are often marketed on how much heat they generate, but you don't necessarily want to apply that heat directly. Serious grill masters often use indirect or "two zone" cooking to get the result they want. In a charcoal grill that means mounding the coals on one side, and on a gas grill it means lighting one side but not the other. Placing your meat over the unheated side and closing the lid creates a gentle cooking environment that's ideal for ribs or a pork butt, or for cooking a thick steak without burning the outside. Then, once it's almost done, transfer it to the hot side for a quick sear (and a splash of barbecue sauce, if that's how you roll).

BBQ Pork Learning to use indirect heat is an important step toward "grill master" status. Image Credit: Robert Lowdon/Moment/GettyImages

6. Turn Your Grill Into a Smoker

One of the best things about mastering indirect heat on your grill is that you can use that skill to turn your grill into a smoker. Set up for indirect cooking as you normally would, but before you put your meat on the grate place some hardwood pieces into a smoker box or foil pouch, and place it at the edge of the flame or coals. Load the cool side of the grill with your meats, close the lid, and then wait while the smoke infuses your foods with flavor. Even a few minutes will make a difference on a steak, chop, or piece of fish, though pulled pork or brisket takes hours of low-temperature cooking.

BBQ with smoke 
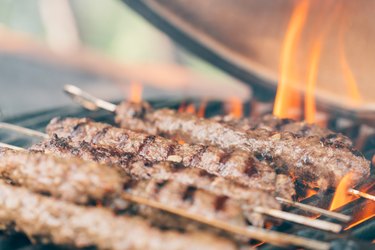
Any grill can be a smoker, once you\’ve mastered the necessary skills. Image Credit: mikroman6/Moment/GettyImages

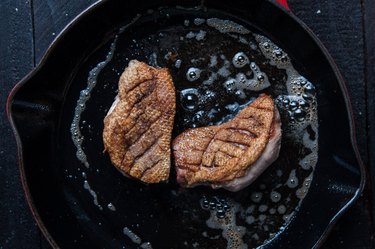
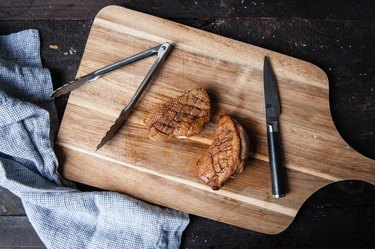
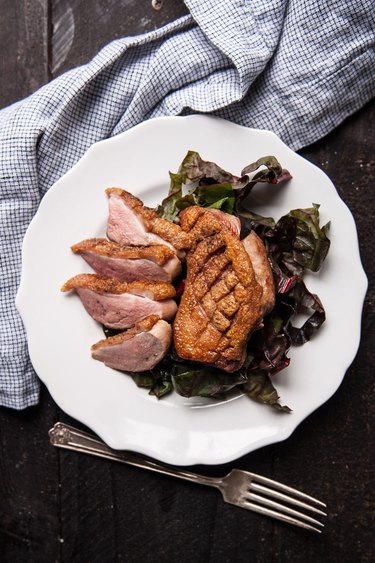
7. Par-Cook Your Meats When Appropriate

Burgers and chops grill pretty quickly, but ribs and larger cuts like a pork butt or whole bird may take longer than you'd like, especially when it's too hot to hover over the grill. You can shorten your cooking time by starting your "cook" indoors in the oven, a toaster oven or slow cooker (don't boil them, which leaches flavor from the meat). Sausages are a notable exception to the rule about wet cooking: Poaching them gently, then finishing them on the grill, is the best way to keep them juicy and flavorful.

sausages, sausages are grilled, smoke is visible 
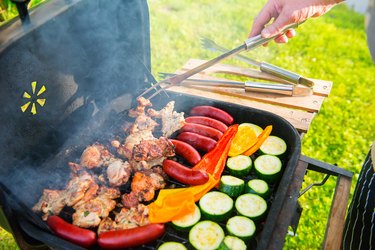
Poaching sausages before finishing them on the grill keeps them juicy and moist. Image Credit: Yulia Naumenko/Moment/GettyImages

8. Improvise a Warming Rack

Many grills, especially gas grills, include a heating rack above the main grate. It's a handy place to keep cooked foods warm until you're ready to serve, and it's also a good spot to pre-warm your hot dog or burger buns. If your grill didn't include one, don't sweat it: It's easy to DIY your own. Just find a wire cooling rack that's smaller than your grill, and balance it on top of a few empty cans from your pantry or your beverage of choice. If you'd rather have something a bit less visibly improvised, you can buy add-on warming racks with fold-down feet from online and physical retailers.

Bar-B-Q If your grill didn\’t come with a warming rack, you can easily improvise one. Image Credit: Nicholas Free/E+/GettyImages

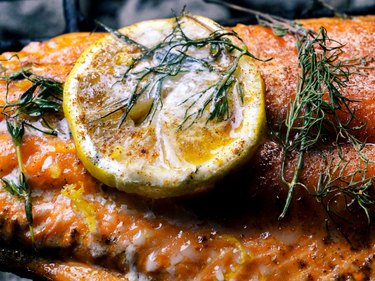
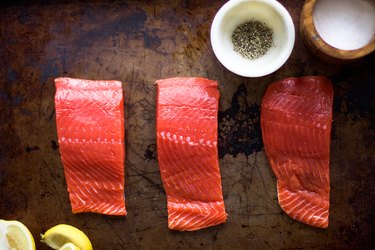
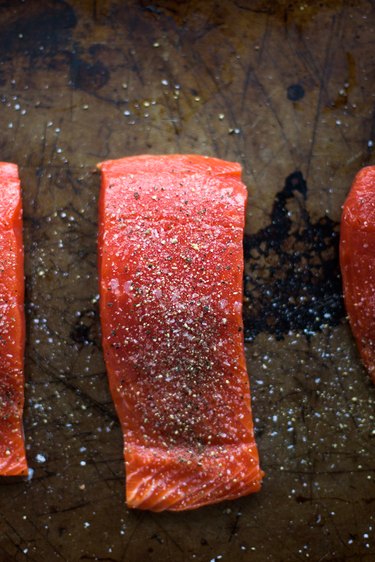
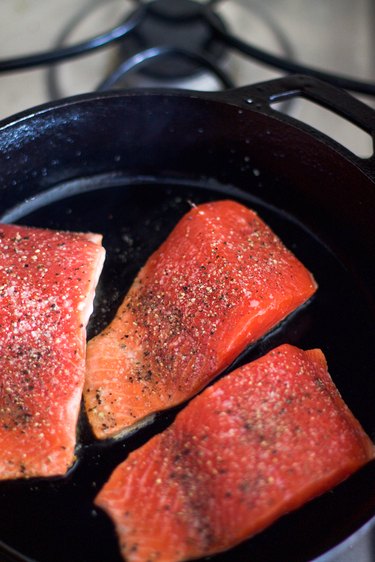
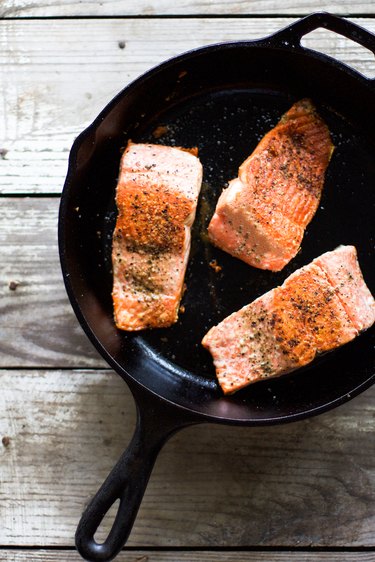
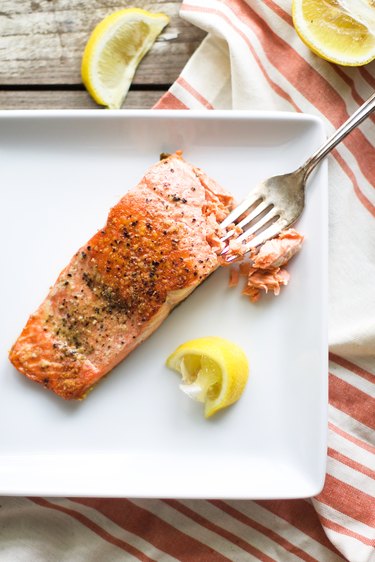
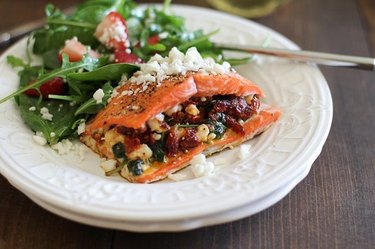
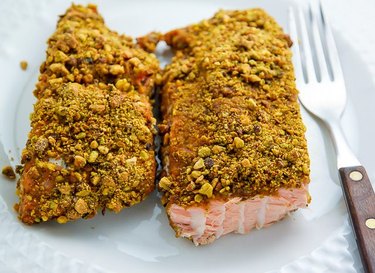
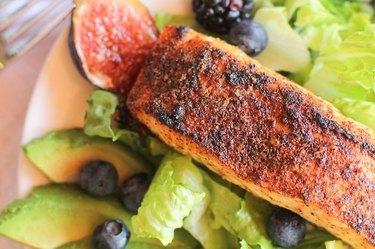
9. Grill Your Fish on Citrus Slices

Squeezing lemon or lime ​over​ a grilled fish is traditional, but there's a lot to be said for grilling fish ​on​ citrus slices as well. Fish is naturally delicate, and has the nasty habit of breaking up or sticking to the grates when you try to turn it. When you cook it on top of the citrus slices, fish won't stick to the grates, and as a result it's much easier to turn. It also gets infused with those beautiful citrus flavors, lightly perfumed with smoke. As a bonus, the grilled lemon or lime slices make a great garnish for the finished dish.

Cedar Plank Salmon with Lemon and Herbs

10. Use Bread to Master Your Grill's Hot Spots

It's no secret that every grill cooks differently. Mastering the peculiarities of your own grill is an important step in getting the results you want, every time, and a plain old loaf of sandwich bread can help you get there. To start, count out as many slices as you'll need to cover the entire grill. Preheat your grill on high for 15 minutes, then turn it down to medium and lay out your bread to cover the entire cooking surface. Close the lid for one minute, then open the lid and turn off the heat. When you flip the bread over, you'll have a perfect guide to where your grill is hottest and coolest.

sliced toast bread 
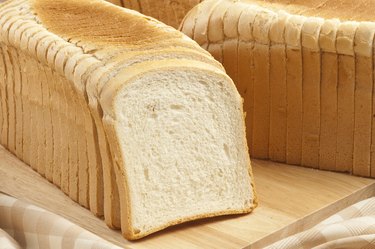
A plain or sandwich loaf can help you learn where your grill\’s hot spots are. Image Credit: Sinan Kocaslan/E+/GettyImages

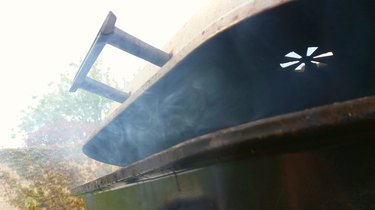
11. Check the Gas in Your Tank

It's downright irritating to run out of propane when you're cooking, especially if the nearest place to get it refilled is inconveniently far away. Unlike your car, the propane tank on your grill doesn't usually come with a gauge to let you know how much gas you've got left. It's easy enough to check, though. While your grill is still turned off and everything is cool, pour a stream of hot or boiling water down the side of your tank. Now feel the side of the tank with your hand: Where it's warm it's empty; and where it's cool to the touch you have propane.

LP Tank on Deck Most tanks don\’t have gauges, but you can easily check how full it is. Image Credit: DonNichols/E+/GettyImages

How to Make Skinny Cherry Lime Margaritas

0

How can you not love these skinny cherry lime margaritas? They have just 140 calories each, are simple to make, and dangerously delicious. Plus, they're the perfect drinks for your next backyard get together, or even a Zoom happy hour!

Skinny Cherry Lime Margaritas 140 calories

Video of the Day

Things You\’ll Need

  • 6 ounces (3/4 cup) silver tequila

  • 8 ounces (about 6 large limes) freshly squeezed lime juice

  • 1 ½ cups (10 0z) frozen pitted dark sweet cherries

  • 2 tablespoons monkfruit sweetener (or 1 teaspoon liquid Stevia)

  • 1 ½ cups ice cubes

Skinny Cherry Lime Margaritas 140 calories

Step 1

Juice the limes until you have 1 cup of lime juice.

Skinny Cherry Lime Margaritas 140 calories

Step 2

Add all of the ingredients to a high powdered blender.

Skinny Cherry Lime Margaritas 140 calories

Step 3

Add additional ice for a thicker margarita, if desired.

Skinny Cherry Lime Margaritas 140 calories

Step 4

Blend until smooth.

Skinny Cherry Lime Margaritas 140 calories

Step 5

Pour into 4 glasses and serve immediately.

Skinny Cherry Lime Margaritas 140 calories

Homemade Apple Pie Bread Recipe

0

While apple pie is an all-time favorite, it can be time-consuming to make from scratch. Why not make this homemade apple pie bread instead? Between the fresh apple chunks and generous dose of cinnamon, this moist quick bread tastes just like apple pie! Whip up a loaf (or three) and enjoy it with coffee, milk or hot apple cider. If you're craving an extra-decadent snack, top off the bread with a classic crumble topping.

Homemade apple pie bread

Video of the Day

Apple Pie Bread

Things You\’ll Need

  • 1 1/2 cups all-purpose flour

  • 1/2 cup granulated sugar

  • 1/2 cup brown sugar

  • 2 teaspoons baking powder

  • 2 teaspoons vanilla extract

  • 2 eggs, beaten

  • 1/3 cup milk of choice

  • 1/2 cup (1 stick) unsalted butter, softened

  • 2 small apples, peeled and diced

  • 2 teaspoons ground cinnamon

  • 1/2 teaspoon ground nutmeg

  • 1/2 teaspoon salt

Ingredients for apple pie bread

Step 1

Preheat the oven to 350° Fahrenheit. Generously grease a standard loaf pan with butter or cooking spray.

In a large bowl, combine the flour, baking soda, cinnamon, nutmeg and salt. Mix together and set aside.

Combine dry ingredients

Step 2

In a separate bowl, combine the sugars, vanilla extract, eggs, milk and butter.

Combine sugar and butter

With a hand mixer, mix until creamy and combined.

Mix ingredients together

Step 3

Slowly add the dry ingredients, stirring frequently.

Add the dry ingredients

Stir until the batter is uniform and thick.

Mix batter

Step 4

Fold in the diced apples.

Add the diced apples

Step 5

Pour the batter into the greased loaf pan.

Pour batter into the loaf pan

Crumble Topping (Optional)

Things You\’ll Need

  • 1/4 cup all-purpose flour

  • 1/3 cup brown sugar

  • 2 tablespoons butter, melted

  • 1/4 teaspoon ground cinnamon

Ingredients for crumble topping

Step 1

In a small bowl, combine all the ingredients.

Combine topping ingredients

Step 2

Stir until crumbly, using a fork to break up clumps of butter that may form.

Mix ingredients together

Step 3

Sprinkle an even layer of crumble topping on the batter.

Add crumble topping

Step 4

Bake for 50 to 55 minutes, or until a toothpick in the center comes out clean and the crumble is dark brown.

Bake apple pie bread

Tip

Check the bread around the 40-minute mark. If the crumble topping is browning too quickly, place a piece of foil on top.

Let the bread cool slightly before serving.

Homemade apple pie bread

To remove the bread from the loaf pan, let cool and run a butter knife across all four sides. Flip the pan upside down on a cutting board. Slice and serve with butter, cream cheese or ice cream.

Homemade apple pie bread

11 Delicious Classic French Desserts

0

4 French Desserts 1 of 12

Bring the magic of a Parisian patisserie into your kitchen by creating any or all of these classic French desserts. With the simple instructions from each recipe, you'll learn time-honored French techniques and create some rich and sophisticated desserts and pastries like croissants, creme brulee and soufflés. Bon apetit!

Image Credit: Demand Media Chocolate stout and mixed berry galette in a silver pie plate. 2 of 12

1. Chocolate Stout and Mixed Berry Galette

If you've been too intimidated to attempt making this pastry in the past, you're in luck! This recipe for chocolate stout and mixed berry galettes breaks down the process into simple steps. You can use the basic galette recipe and concept your own fillings, but do try the chocolate stout and mixed berry–it's a fantastically rich, sweet and tart combination.

Image Credit: Jackie Dodd Crepe filled with strawberry and banana slices. 3 of 12

2. Traditional Crepes

Thin and delicate crepes are like French pancakes that you can stuff with sweet or savory filling. Crepes traditionally use wheat or buckwheat flour, but this version simplifies the process by using pancake mix for crepes. With a myriad of filling options, crepes are perfect for breakfast, lunch or dinner.

Image Credit: Angela Wenum/Demand Media Crepe cake 4 of 12

3. Nutella Crepe Cake

Blow your guests away with an elegant, sweet and light Nutella crepe cake. Whipped Nutella frosting holds this delicate cake together and adds to its delightful fluffiness. The most time-consuming portion of this recipe is in making the crepes, but you can always buy ready-made crepes from the freezer section at the grocery store. Either way, you'll end up with a beautiful, sophisticated and delicious cake.

Image Credit: Jennifer Farley Classic croissants on a grey dish. 5 of 12

4. Classic Croissant

Reward your family and yourself after a long, hard week with classic croissants from scratch. If working in the kitchen relaxes you after a stressful day, this recipe is just for you. Due to the time it takes to pre-ferment and chill the risen dough, it requires a few days to prepare these croissants. But fear not! Each step is broken down with easy instructions so even a novice cook can make mouthwatering, rich, buttery and flaky croissants at home.

Image Credit: Thalia Ho Plate with almond croissant. 6 of 12

5. Almond Croissant

Traditional almond croissants, or croissant aux amandes, are made out of day-old or stale croissants — so this is the perfect way to use up any leftover classic croissants. A sweet and buttery frangipane cream filling, a dusting of powdered sugar and a few brushes of brandy syrup make this a divine and indulgent delight.

Image Credit: Thalia Ho Chocolate soufflé in a ramekin. 7 of 12

6. Chocolate Soufflé

Competitive cooking shows would have you believe that soufflés are incredibly difficult to make. Although timing is very important in the execution of this dessert, the process is actually very simple. Follow this guide on how to make chocolate soufflé for a light, fluffy and superbly decadent dessert.

Image Credit: Pamela Follett/Demand Media Two creme brulees in white ramekins. 8 of 12

7. Creme Brulée

Four ingredients is all you need for an irresistibly creamy and rich creme brulee. The beauty of this dessert lies in the textural difference between the smooth custard underneath a layer of brittle, caramelized sugar. Try to use real vanilla beans for a deep vanilla flavor.

Image Credit: kayako sareen/Demand Media Two chocolate croissants on a plate. 9 of 12

8. Pain au Chocolat

You can make chocolate croissants, or pain au chocolat, from scratch or by using ready-made puff pastry. Either option will result in a sinfully decadent treat. Dark chocolate provides a lush, complex and bittersweet finish to this delightfully flaky and buttery pastry.

Image Credit: Thalia Ho A pile of chocolate macarons. 10 of 12

9. Chocolate Macarons

Sophisticated and utterly charming chocolate macarons are surprisingly easy to make at home. The textural contrast between the crisp, chewy chocolate-and-almond meringue cookies and the luscious dark chocolate ganache will make you giddy for this classic French confection. The hardest part will be waiting for the macarons to chill before serving.

Image Credit: Thalia Ho Four white ramekins filled with butterscotch pots de creme. 11 of 12

10. Butterscotch Pots de Creme

Butterscotch pots de creme present a beautifully silky cross between pudding and custard. Humble ingredients compose this creamy, rich and ultra-decadent dessert that is ready to serve with 12 simple steps. Finish it off with a dollop of tart creme fraiche and a sprinkle of sea salt to balance the sweetness of the butterscotch.

Image Credit: Thalia Ho Plate of several elephant ears. 12 of 12

11. Palmiers

A palmier or elephant ear is a classic French cookie made of puff pastry and filled with anything from a sprinkling of sugar to fruit jam or Nutella. These caramelized cookies have a satisfying crunch to its bite and a lovely finish as the browned sugar dissolves on your tongue.

Image Credit: Thalia Ho

How to Freeze Beets

0

Things You\’ll Need

  • 1 to 2 lbs. fresh beets

  • Plastic or nylon scrubbing brush

  • Paper towel

  • Cutting board

  • Sharp knife

  • Large pot

  • Large bowl

  • Vegetable peeler

  • Gallon-sized plastic freezer bag

Beets are a type of root vegetable that grows in cool temperatures, especially the fall and spring. Although canned beets are available in grocery stores all year long, they don't have the same freshness and sweet taste of in-season beets. If you want to enjoy fresh, unprocessed beets any time of the year, you can freeze them. Beets keep most of their texture and taste if you prepare them correctly beforehand and use the correct freezer preservation technique.

Step 1

Place 1 to 2 lbs. of fresh beets underneath cold running water. Clean the outsides of the beets with a plastic or nylon scrubbing brush to loosen any dirt, then thoroughly rinse them. Pat them dry with a clean paper towel.

Video of the Day

Step 2

Lay the beets on a cutting board. Slice off the tops of the green leafy stems horizontally, making sure to leave about 1/2 inch of the stem intact. If the beets are different sizes, separate them into piles of small beets and medium to large beets because they will have different heating times.

Step 3

Fill a large pot with approximately 3 cups of water and set your stove to high. Heat the water until it starts to boil, then gently place the medium to large beets into the boiling water. Let them heat for 20 minutes, then add the small beets.

Step 4

Boil all of the beets together for about 25 minutes, or until they are softened. Fill a large bowl with cold water, then transfer the boiled beets directly into the water so that they can immediately cool down and stop cooking. The sudden chill will also preserve the beets' rich color.

Step 5

Remove the beets from the cold water once they are completely chilled. Drag a vegetable peeler lightly across the beets to remove the skin, then slice off the stem. Chop the beets into uniform-sized chunks about 1/2 inch wide.

Step 6

Transfer the beet chunks into the bottom of a gallon-sized plastic freezer bag. Squeeze out all of the excess air from the bag, then close it tightly. Store the beets in the freezer for no longer than six months for the best flavor and texture.

Tip

Thaw the frozen beet pieces and roast them in the oven until they are tender. The high heat will melt the beets’ natural sugars and make them taste even sweeter and more flavorful.

Warning

Do not skip the cold water bath, and transfer the beets to the freezing while they are warm, because the drastic change in temperature will cause the beets to freeze unevenly.

DIY Mini Donut Eyeballs

0

Your guests won't be able to take their eyes off of these creepy sweet treats. The flavor combination of classic powdered donuts and sweet candies makes these mini dessert eyeballs the perfect finger food for your Halloween celebration. Follow these simple steps to make your own in just a few minutes!

DIY Donut Eyeballs

Things You\’ll Need

  • Powdered mini donuts

  • M&Ms

  • Lifesaver gummies

  • Red gel icing

things you\'ll need

Step 1

Create the eye pupil and iris by stretching a Lifesaver gummy around an M&M. Then place it on top of the mini donut. If chocolate isn't your thing, feel free to use fruitier alternatives such as Skittles!

create pupil and iris

Use the gel icing as a glue to bond the candies to the donut, if you'd like.

add to donut

Step 2

Use the red gel icing to draw squiggly lines around the donut, creating the look of eye vessels.

create bloodshot eye vessels

It's easy to see that these treats will be the stars of your snack table.

donut eyeballs mini donut eyeballs

How to Make Bloody Vampire Cocktails

0

For a ghoulishly good time, serve up a creepy cocktail your guests can really sink their teeth into on All Hallows' Eve. Cranberry juice and raspberry vodka give it some bite (pun intended), while grenadine adds that signature blood-red color guaranteed to transport your guests straight to Transylvania. The vampire fangs and dripping "blood" may make this drink look deadly, but we assure you it's as tasty as it is terrifying.

Bloody vampire cocktails with fangs as garnish

Things You\’ll Need

  • 1/2 cup corn syrup

  • 1 teaspoon red food coloring

  • Ice

  • 2 ounces cranberry juice

  • 1 ounce raspberry vodka

  • Grenadine

  • Lime juice

  • Plastic vampire fangs

Bloody vampire cocktails for Halloween

Step 1

Add 1/2 cup corn syrup and 1 teaspoon of red food coloring to a shallow bowl. Whisk together until the syrup turns a bright "blood" red.

Whisking corn syrup and food coloring

Step 2

Dip the rim of a martini glass into the syrup, lightly coating the entire rim. You don't need too much syrup to create the most realistic blood drips. Let some of the syrup drip off back into the bowl before turning the glass upright.

Dipping rim in red syrup

Step 3

Place the glass upright on a plate or some parchment paper until the syrup is done dripping down the sides.

Red corn syrup dripping down rim of glass

Step 4

Add 1/2 cup ice, 2 ounces cranberry juice, 1 ounce raspberry vodka, a splash of grenadine, and a squeeze of lime juice to a cocktail shaker. Shake all of the ingredients together.

Pouring cranberry juice into cocktail shaker

Step 5

Strain the mixture into the syrup-rimmed martini glass. The trick is to not fill the glass too high, so you can still see some of the blood drips around the rim.

Straining drink into martini glass

Step 6

Garnish the drink with a set of plastic vampire fangs placed on the rim.

Garnishing drink with fake vampire fangs

You might want to wear some garlic around your neck to keep the vampires away because this cocktail is guaranteed to be frightfully delicious.

Bloody vampire cocktail Halloween vampire cocktail with blood dripping

How to Grill Portobello Mushrooms

0

Summer is go-time when it comes to the grill: from fruit and pizza to burgers and ribs, it gets quite the workout this time of year! Maybe you've grilled typical vegetables like corn, eggplant and peppers before, but now portobello mushrooms can be added to your fired-up menu, too. Place hearty mushrooms on the grill to give them the perfect smoky char, and then whip up a bright caprese salad — made with cherry tomatoes, mozzarella and basil — to place inside their caps. The textured, colorful dish makes for a beautiful appetizer that's perfect for an al fresco meal with friends and family.

Caprese Stuffed Grilled Portobello Mushrooms

Video of the Day

Things You\’ll Need

  • 6 portobello mushroom caps

  • 1/3 cup balsamic vinegar

  • 2 tablespoons extra virgin olive oil

  • 1 tablespoon minced garlic

  • 1/2 teaspoon kosher salt

  • 1/4 teaspoon black pepper

How to Grill Portobello Mushrooms

Step 1: Prep Mushrooms

Mushrooms should never be submersed in water when cleaning — they're like sponges and will become soggy. Simply dampen a paper towel and gently wipe off any dirt on the exterior caps of the mushrooms. After, flip the mushroom caps over and remove the stem, leaving the gills intact.

Marinade for grilled portobello mushrooms

Step 2: Make the Marinade

While you can certainly grill the portobellos plain, this simple balsamic-based marinade gives them a ton of flavor for relatively little work. Whisk the ingredients together in a small bowl and liberally brush the mixture onto both sides of the mushrooms. Let them sit in the marinade while you preheat the grill.

Marinating portobello mushrooms for the grill

Step 3: Grill the Mushrooms

Heat an outdoor grill or indoor grill pan to medium-high heat, or about 450–500 degrees. Place the mushrooms on the grill with the gill sides down and cook for about 3 to 4 minutes, until grill lines appear around the edges. Flip and cook another 3 to 4 minutes. Brush the mushrooms with any leftover marinade while cooking.

Tip

Mushrooms will release a lot of their moisture while cooking. If excess water pools in the caps, pour the water out and continue cooking.

Grilled portobello mushrooms

Step 4: Prepare the Topping

You can definitely eat the grilled mushrooms plain, but what fun would that be? A simple caprese salad is the perfect summer topping.

Things You\’ll Need

  • 1 1/4 cups sliced grape or cherry tomatoes

  • 2/3 cup mini mozzarella balls, drained of any excess water

  • 2 tablespoons thinly sliced basil

  • 1 tablespoon extra virgin olive oil

  • Salt and pepper, to taste

Caprese topping for grilled portobello mushrooms

Step 5: Toss the Caprese Salad and Fill the Mushrooms

Combine all the caprese salad ingredients in a bowl and toss to combine. Spoon into the grilled portobello mushrooms and serve.

Caprese salad stuffed grilled portobello mushrooms