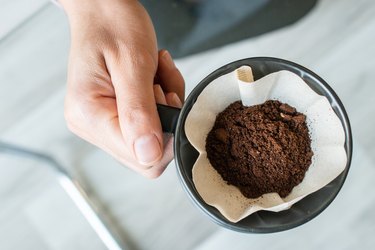
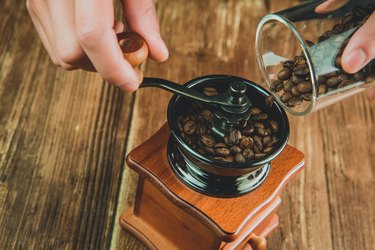
If you ask a coffee connoisseur why they prefer to grind their own coffee beans instead of using a store-bought bag of coffee grounds, they'll likely say that it makes a world of difference in the coffee's taste. For one, that bag of pre-ground coffee probably went stale long ago because coffee immediately begins to release aromas the minute it's ground.
Video of the Day
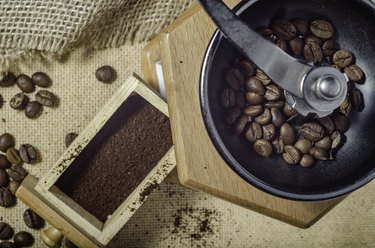
Additionally, the grind size of coffee beans directly affects the extraction of soluble molecules from the coffee beans, which affects coffee's taste. Having the right grind size for the type of coffee you're brewing allows you to take what's rich and flavorful from the beans and leave behind undesirable soluble molecules that cause coffee to taste bitter, sour or stale. By grinding your own coffee beans, you have more control over how your coffee turns out.
With a variety of coffee grinders on the market and multiple ways to brew coffee, it can be tricky to figure out which grinder is best for your needs. But one thing is clear: whether you're brewing drip coffee, French press coffee or using another method, having the ideal size and consistency of coffee grounds will elevate your cup of joe above the Average Joe cup of joe, so to speak. We've laid out what to look for in a coffee grinder and selected the best coffee grinders in 2022 to make your decision easier.
What to Consider When Purchasing a Coffee Grinder
Blade Versus Burr: There are two main types of coffee grinders: those that use blades to chop and slice, and those that use burrs, which are grinding discs that crush coffee beans instead of chopping them up. Most coffee experts discourage using blade coffee grinders because of their inconsistent results, producing a broad range of grind sizes from large pieces (boulders) to tiny particles (fines), most of which will not be suitable. Burr grinders are typically sharper and more capable of producing consistent grind sizes, but also tend to be pricier.
Flat Burr Versus Conical Burr: If you're opting for a burr grinder (which coffee pros would suggest), there are also two different types: flat and conical. Flat burrs run parallel and use centrifugal force to propel coffee beans toward the burr teeth, and you can usually adjust your grind profile by moving the discs closer together or further apart. Conical burrs, on the other hand, provide a cutting angle of around 60 degrees and are more precise because you can adjust them by degrees. Flat burrs are cheaper than conical burrs, but need replacing considerably sooner.
Burr Materials: The most common burr materials are stainless steel and ceramic. One isn't necessarily better than the other. Steel tends to heat up but also cool down more quickly, while ceramic takes longer to heat up and longer to cool down. Ceramic burrs usually have a longer lifespan but are also more brittle—and more expensive.
Manual Versus Automatic: Manual coffee grinders require you to use a hand crank to crush your coffee beans, whereas an automatic grinder is electrically powered and does the job for you. If you don't mind a bit of an arm workout each time you make coffee, manual grinders are much quieter and less expensive, but take much longer to use. Manual grinders are often smaller than automatic grinders as well—useful if you're tight on kitchen space, but potentially a downside because they have smaller capacities.
Adjustable Grind Settings: Look for a grinder that provides a wide range of grind sizes so you can adjust the coarseness or fineness of your coffee grounds depending on what type of coffee you're making. Grinders with 40 or more settings will allow you to brew nearly every style of coffee except for Turkish coffee, while grinders with around 30 settings will be enough for most popular styles with room for experimentation. Twenty settings or fewer will suffice for the standard styles like French press, pour-over and drip coffee.
Grind Functions: Most automatic burr grinders will have a pulse function, which requires you to keep your finger on the button in order to grind, but it can be handy to have additional grinding functions. For example, some grinders have an "auto-grind" function that lets you do other tasks while the grinder is at work. Other grinders might have a timed grinding function and even programmable dosing so you can input the right amount for your style of coffee. These features aren't essential, but can be useful if you plan on preparing multiple cups of coffee per day.
Capacity: Capacity really depends on your needs. If you tend to make just one cup of coffee at a time, a single-person grinder that holds around seven to 10 grams of coffee beans would suffice. However, the more coffee you want to make each day, the more convenient a higher capacity will be. You'll need roughly 10 grams for each cup of coffee. Some coffee grinders come with a hopper, which is a container that holds the beans before they're ground. Most hoppers hold anywhere from 30 grams to 1 pound of beans.
Convenience: Convenience encompasses many factors, but apart from a high capacity and versatility, look for materials that are easy and intuitive to assemble and take apart for cleaning. Some high-end grinders seem needlessly complex on the inside and can be difficult to maintain, while some less expensive options are easier. Speed is another thing to consider; while it's not a must, a grinder that gets the job done in 30 seconds can be particularly convenient on busy mornings, for example.
With these factors and criteria in mind, here's our list of the best coffee grinders in 2022.
The Best Overall Coffee Grinder for Coffee Conoisseurs
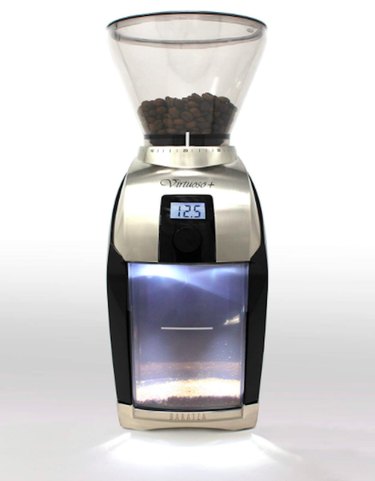
Baratza Virtuoso+ Conical Burr Coffee Grinder
$249.95 at Amazon
The Baratza Virtuoso+ is a favorite among coffee connoisseurs, and for good reason. It's not ridiculously expensive (but not cheap, either), it's sturdily built using metal and plastic, and most importantly, its well-crafted 40-millimeter steel conical burrs provide extremely consistent results in a wide range of grind sizes. You can choose from 40 grind settings ranging from very fine to very coarse, suitable for nearly all of your coffee needs. Its 8-ounce hopper sits above a 5-ounce coffee grounds bin, which is illuminated by LED lights.
The Virtuoso+ features an LCD display and a digital timer that allows you to adjust the grind time from one to 40 seconds, down to one-tenth of a second for ultimate precision. Or, if you prefer, you can use the pulse mode instead by holding the button down for a few seconds. This advanced grinder is perfect for coffee experts who are familiar with concepts like flow rate, brewing time and extraction level and everything in between, as well as anyone who enjoys robust coffee flavor and is willing to experiment.
Runner-Up for Best Overall Coffee Grinder
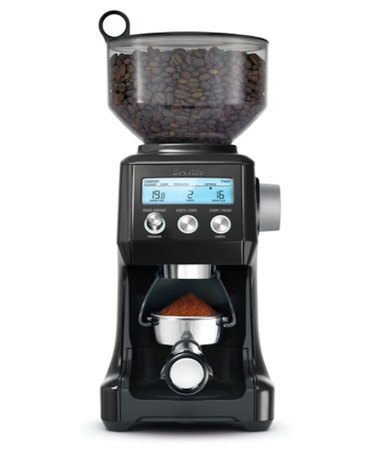
Breville Smart Grinder Pro
$199.95 at Amazon
Another excellent choice is the Breville Smart Grinder Pro, which costs less than the Baratza Virtuoso+ but still produces consistent results. Featuring a generous 60 grind settings, its grind tends to be even finer than that of the Virtuoso+, and its coarsest setting is probably more in line with the medium setting of other machines. This can make it less suited to making cold brew and French press coffee, but is ideal for most other brewing methods—even espresso, which requires very fine coffee grounds. Most home coffee grinders can't double as an espresso grinder, but the Breville Smart Pro comes quite close.
Other points in its favor include stainless steel conical burrs, an LCD display, an electronic timer that utilizes Dosing IQ technology to be adjustable down to 0.2 seconds, and the ability to grind directly into whatever appropriately-sized container you choose. It includes a 16-ounce hopper with a locking mechanism for security and easy removal. If you're a coffee enthusiast who isn't as likely to make French press or cold brew coffee, you can't go wrong with the Breville Smart Grinder Pro.
The Best Budget-Friendly Grinder for Coffee Conoisseurs
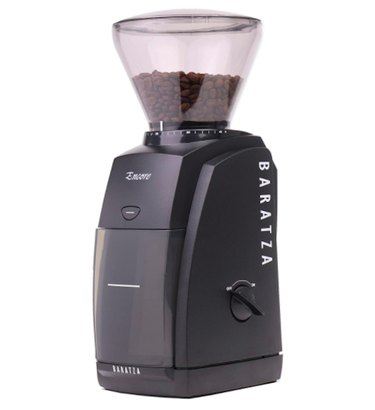
Baratza Encore Conical Burr Coffee Grinder
$169.95 at Amazon
For coffee geeks who aren't ready to shell out lots of cash, Baratza has another impressive option that's more affordable but covers most of your grinding needs quite skillfully. It uses the same motor as the Virtuoso+, but its burr set is slightly less effective and grinds more slowly. However, we're talking a matter of seconds, not minutes, so it's efficient enough for most people. You can adjust its 40-millimeter steel conical burrs to 40 different grind settings, allowing you to experiment with most brewing methods. It features an intuitive on/off switch for continuous grinding, as well as a pulse button on the front. The hopper holds up to 8 ounces of beans, and the clear coffee grounds bin below it has a fill line to indicate when it needs emptying. Overall, it's a lot of bang for your buck and not far off from the Virtuoso+ in efficiency and quality.
The Best Mid-Level Burr Grinder
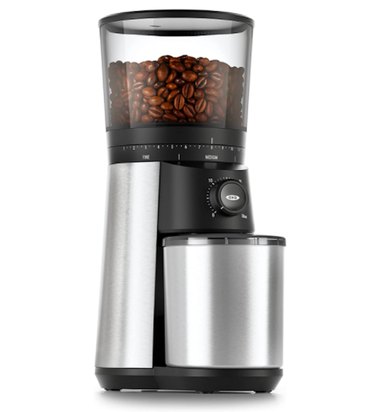
OXO Brew Conical Burr Coffee Grinder
$104.18 at Amazon
This mid-level grinder is perfect for avid coffee drinkers who want to explore the world of home brewing but don't consider themselves experts and aren't ready to commit to a higher price tag. Its design is simple and easy to use, consisting of an adjuster with 15 settings (plus micro settings) and a one-touch start timer that keeps your last setting. The hopper holds 12 ounces of beans and the coffee grounds container below holds up to 110 grams—enough for up to 12 cups of coffee. The grinder features stainless steel conical burrs that produce admirably consistent results. When it comes to automatic burr grinders, it doesn't get much more inexpensive before the quality starts to noticeably drop off.
The Best Budget Burr Grinder
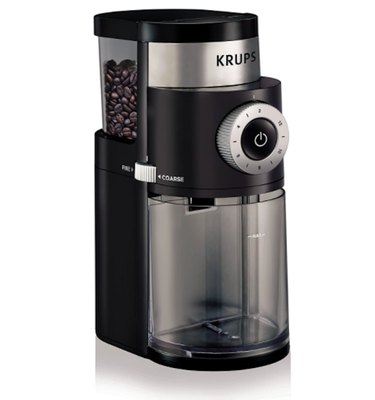
KRUPS Professional Electric Burr Coffee Grinder
$58.99 at Amazon
This grinder can't compete with the likes of the Virtuoso+, but it's still a solid choice for coffee drinkers who aren't super picky when it comes to their brewing and don't want to spend a lot. In part because it features flat burrs instead of conical burrs, its grind isn't as consistent as that of previous entries on this list. Even so, its nine different grinding levels still offer you a decent amount of control over your coffee and it's a big step up from using a blade grinder. One neat feature is the ability to select from two to 12 cups to grind the exact amount you need. The clear bean container holds up to 8 ounces of coffee beans. It's easy to clean the removable burr part and the grinder comes with a cleaning brush.
The Best Manual Burr Grinder
MITBAK Manual Coffee Grinder With Adjustable Settings
$34.99 at Amazon
Automatic grinders may be significantly faster, but this manual grinder provides great value for the price point and is the best non-specialized manual grinder we found. While it requires a little elbow grease and around five minutes of cranking, it produces consistent results each time. Plus, it's easy to adjust the grind settings—simply turn the adjusting ring clockwise for finer grinding and counterclockwise for coarser grinding. Not to mention, it's quite elegant-looking for a coffee grinder, and quiet, too. Though it takes longer to use than an electric grinder, it's much less likely to overheat and affect the taste of your coffee grounds, ensuring a richer, cleaner taste. Its coffee grounds container is also clear so you can easily see when it's time to empty it.

The Best Grinder for Turkish Coffee
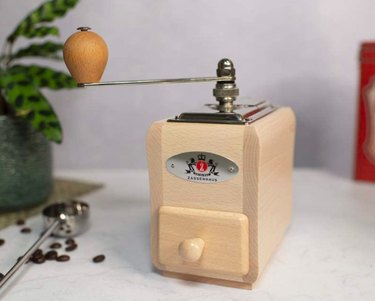
Zassenhaus Santiago Coffee Mill Grinder
$101.75 at Amazon
Turkish coffee requires extremely fine coffee grounds—even finer than for espresso—so not many coffee grinders are equipped for the task. Fortunately, Zassenhaus designed this coffee grinder especially with Turkish coffee in mind. Its German-made, carbon steel conical burr grinding mechanism requires effort on your part (it's a manual grinder with a crank), but it yields seriously fine and consistent results. To operate the grinder, in a seated position, place the grinder in your lap between your thighs and turn the ergonomically-designed hand crank. You can use the adjustable knob below for a coarser or finer grind. Crafted from natural varnish beechwood and steel, the grinder is also quite a sight to behold. For coffee lovers who long to brew their own Turkish coffee, this is an excellent and effective choice.
The Best Blade Grinder
KRUPS Silent Vortex Electric Grinder
$35.91 at Amazon
While some coffee experts frown upon blade grinders, if you prefer a blade grinder for its lower cost or versatility (as you can use it to grind spices and other ingredients), the KRUPS Silent Vortex is the way to go. It's quiet, powerful and fast. All it takes is 15 seconds to grind enough coffee beans for 12 cups of drip coffee. And if you're not worried about cross-taste contamination, you can use it to grind hard spices like peppercorns and dry herbs, as well. With its quick and easy one-touch operation for continuous or pulse grinding, it doesn't get much more convenient than this. The downside is that you can't adjust grind settings and the results won't be as uniform as those of a burr grinder, leaving you with more boulders and fines that may be unusable. However, for its speed and versatility, it's worth it for the coffee brewing novice.

 A healthy diet combats depression-causing nutrient deficiencies. Image Credit: XiXinXing/XiXinXing/Getty Images

 Turnips
  Sweet corn
  Brocoli, cabbage, cauliflower
  Asparagus
 Chill a Cocktail Glass")