Home Blog Page 73

Top 5 Sweet Red Wines

0

Decanter and Glasses Sweet red wines aren\’t just for dessert. Image Credit: Scott Cartwright/iStock/Getty Images

Not all red wines are dry, and not all sweet wines are white. Although they can be difficult to find, sweet red wines are worth exploring. They are often served as dessert wines but can pair with a wide variety of foods. The very best sweet reds are complex and intriguing and worth showcasing with a well-considered meal.

Video of the Day

Port

Port originates in Portugal and is perhaps the most famous of all sweet red varieties. Port is a fortified red wine, meaning that during aging brandy spirits are added to the fermenting grape blend base. The result is a complex spirit with both nutty and fruity notes. The best port is very expensive and aged for many years; it's also the least sweet. Beginners should start with ruby port, which is widely available, affordable and also pleasantly sweet. Port is often served as a dessert wine and pairs extremely well with dark chocolate, but you can also try it with savory dishes. Duck, game, aged cheeses and charcuterie all fare well with port.

Lambrusco

Lambrusco is a sparkling Italian sweet wine. The most imported wine to the United States in the 1970s and 1980s, it fell out of style in subsequent decades but, according to Culinate.com, it's made a recent comeback. Its effervescence makes it a satisfying wine for summer meals; lambrusco tastes particularly good chilled and is low in alcohol to boot. Some styles of lambrusco, labeled "secco," are dry; look for semisweet varieties labeled "amabile" instead. Pair it with all sorts of pasta dishes, of course, as well as an antipasti plate of salami and Parmesan cheese; it can even accompany pizza without a hitch.

Late-Harvest Red Zinfandel

The later the harvest, the longer wine grapes have had a chance to mature and develop their sugars, so late-harvest red wines such as Zinfandel end up with a sweeter finish than other vintages. These late-harvest wines also tend to be more expensive, in part because the winery risks losing its crop entirely to mold or other disaster the longer it delays the harvest. Late-harvest Zinfandels are big and fruity and pair well with rich desserts such as cheesecake, fruit pies and tarts and chocolate.

Brachetto d\’Acqui

This sweet and slightly fizzy red wine from the Piedmont region of Italy has earned a DOGC guarantee of origin label — Italy's strictest quality assurance ranking, enforced by government inspection — thanks to its unique characteristics, including a distinctive bouquet of roses and berries. Like many other sweet reds, Brachetto d'Acqui is also low in alcohol. Its limited production can make it hard to find in the United States but it is worth seeking out. Pair Brachetto d'Acqui with fruit desserts, amaretti cookies or chocolate.

Red Ice Wine

Ice wines, also known as Eiswein, are dessert wines made from grapes that have been frozen before being harvested. Freezing concentrates the sugars in the grape, resulting in a sweeter wine with a rich flavor. The grapes must be harvested immediately, making ice wines fairly rare and expensive. Canada and Germany are the primary producers of ice wines thanks to their suitable climate. Ice wines can be either red or white; reds are rarer. Pair red ice wine with aged cheese, pate, foie gras, nuts and chocolate.

Caramel Apple Monkey Bread Recipe

0

Monkey bread is a much-loved indulgent classic made up of mounds of enriched dough that are pillowy, soft, gooey, spiced and sugared. This rendition features pockets of apple, which turn soft and caramelized between folds of gooey caramel. Monkey bread is pull-apart style too, and makes the most perfect breakfast or dessert to share.

This Caramel Apple Monkey Bread is the most perfect dessert for fall!

Video of the Day

Things You\’ll Need

  • 3/4 cup | 5.3 ounces | 150 grams granulated sugar

  • 3/4 packed cup + 1 teaspoon | 6 ounces | 170 grams light brown sugar

  • 1 tablespoon ground cinnamon

  • 1 teaspoon ground nutmeg

  • 1/4 teaspoon ground ginger

  • 1/4 teaspoon kosher salt

  • 2 pounds | 910 grams refrigerated buttermilk biscuit dough (or other favorite yeasted dough of choice)

  • 1/2 cup | 4 ounces | 113 grams unsalted butter, melted

  • 2 large baking apples, peeled, cored and chopped into 1/2 inch dice

  • 1 cup | 4.3 ounces | 120 grams powdered sugar, sifted

  • 1 -2 tablespoons whole milk

  • 1/2 teaspoon vanilla extract

  • Pinch of salt

Step 1

Generously grease a large 12-cup nonstick bundt pan and place it onto a baking sheet. Set aside.

In a medium bowl, whisk together the sugar, brown sugar, cinnamon, nutmeg, ginger, and salt until evenly combined.

Mix the filling.

Step 2

Place the dough onto a lightly floured workspace and divide it into 36 even pieces. Use your hands to roll each piece into a small dough ball. Place the balls onto a baking sheet lined with non-stick parchment paper.

Portion out the dough.

Step 3

Dip the dough balls into the melted butter and then roll them in the spiced sugar mixture until well coated.

Coat the dough in the melted butter and sugar mixture.

Step 4

Arrange a third of the sugar-coated dough balls into the bottom of the prepared bundt pan. Scatter over half the diced apples. Top with another third of the dough balls followed by the last half of the apples. Arrange over the remaining dough balls and add any remaining butter of sugar over the top.

Arrange in the prepared pan.

Cover with a layer of plastic wrap and set aside in a warm place to rise until doubled in size, about 1 hour. Meanwhile, pre-heat the oven to 350° Fahrenheit (180° Celsius).

Step 5

Bake for 35 to 40 minutes or until golden brown, fragrant and the caramel is bubbling. Remove from the oven and allow the monkey bread to cool in its pan for 5 minutes before carefully turning it out and onto a serving plate.

Bake until the top is golden brown.

Step 6

Whisk the powdered sugar, milk, vanilla and salt in a small bowl until smooth and glossy. Pour the glaze over the top of the bread.

Whisk the glaze until it is smooth.

Step 7

This Caramel Apple Monkey Bread is best eaten while it is still warm on the day of making.

Serve while the bread is still warm.

It can be kept sealed in an airtight container in a dark place for up to 2 days. Re-heat before serving.

It is best eaten on the day of making.

Thin Mint Cookies Recipe

0

Now you can get your thin mint cookies fix any time of year! All it takes is a few simple ingredients to create a copycat version at home.

Homemade thin mint cookies

Video of the Day

Things You\’ll Need

  • 3/4 cup butter, softened to room temperature

  • 1 cup granulated sugar

  • 1 teaspoon pure vanilla extract

  • One egg

  • 1/2 teaspoon peppermint extract, divided

  • 1 1/2 cups all-purpose flour

  • 3/4 cup unsweetened cocoa powder

  • 1 teaspoon baking powder

  • 1/2 teaspoon salt

  • 14 ounces good quality chocolate

  • 1/2 teaspoon canola oil

Tip

Use any varieties of chocolate that you like — milk or dark — or mix more than one.

ingredients for Thin Mint cookies

Step 1: Cream Butter and Sugar

Using a standing mixture with a paddle attachment, cream butter until fluffy, about 2 minutes. Add sugar and continue mixing on medium speed for another 2 minutes.

cream butter and sugar

Step 2: Mix Cocoa

In a large mixing bowl, whisk together the cocoa powder, flour, baking powder and salt.

chocolate mixture

Step 3: Combine Butter and Cocoa

To the butter mixture, add your vanilla, egg and 1/4 teaspoon of peppermint extract and mix on medium speed until combined. Then incorporate the cocoa mixture a little at a time, mixing on low speed.

cocoa and butter mixtures combined

Step 4: Roll and Chill

Divide your dough into two balls. Working with one ball at a time, roll out the dough in between 2 sheets of parchment paper, about 1/4 inch thick.

Chill in the refrigerator for 1 hour.

rolling out dough

Step 5: Cut Circles

Once both sheets of dough have been chilled, cut circles with a 2-inch cookie cutter.

cutting circles

Step 6: Bake

Bake on a parchment lined baking sheet at 350 F for 8 minutes. Cool completely on a wire rack before moving on to the next step.

baked cookies

Step 7: Create Chocolate Dipping Sauce

Break up your chocolate into small pieces and microwave in 15 second intervals until it melts completely, about 1 minute total.

chocolate to melt

Add canola oil and remaining peppermint extract, mixing thoroughly.

adding canola oil

Step 8: Dip Cookies in Chocolate

Use a fork to dip each cookie in chocolate, wiping off the excess on the side of your bowl.

cookies and chocolate

Step 9: Cool and Serve

Refrigerate for at least one hour before serving. After cooling completely, Thin Mint Cookies store best in the freezer, inside a zip-top bag.

Thin mint cookie recipe

How to Make Fresh Grape Juice

When grapes ripen, they usually do so at the same time, leaving you with a large harvest and only a limited time during which the grapes are usable. Whether they're from your own garden, the farmers market or they were on sale at the store, make the most of grapes when they're at their peak. You can make great-tasting, all-natural grape juice from fresh grapes. Each 1 pound of grapes will make slightly less than 1 cup of juice. You might find more intricate and detailed processes, but a basic method still gets the job done.

Chilled Red Grape Juice Serve the grape juice chilled. Image Credit: HandmadePictures/iStock/Getty Images

Video of the Day

Things You\’ll Need

  • Large Spoon

  • Pitcher

  • Colander

  • Large Bowl

  • Potato Masher

  • Cheesecloth Or Jelly Strainer

  • Large Pot

  • Sugar (Optional)

Step 1

Remove the stems from the grapes, rinse the grapes in cold water in a colander and let them drain well.

Step 2

Put the grapes in a large bowl and mash them well with a potato masher.

Step 3

Put the mash into a large pot and add just enough water to cover the grapes. Heat on medium-high until it reaches a boil. Immediately reduce the heat to medium-low and simmer for 10 minutes. Constantly stir so no grapes stick to the bottom of the pot. Add sugar to taste, if you wish. Add 1 tablespoon at a time, then stir and taste each time.

Step 4

Empty the mixture into a piece of cheesecloth and strain it directly into your serving pitcher. Put the grape juice in the refrigerator to cool.

Tip

Use this juice within 24 hours. Concord is the classic grape variety for juice, but you can also use muscadines and scuppernongs.

Homemade Chickpea Brownies Recipe

0

There is no arguing the mouth-watering decadence of a homemade fudge brownie. While classic brownies are tough to beat, they can also be made healthier (and gluten-free) by using… beans! It may seam strange, but rest assured you can't taste the beans in the recipe, and the consistency turns out nice and moist. Using a blender, the batter for these chickpea brownies takes seconds to make, and the brownies themselves only need about 25 minutes of bake time. Delicious dessert in 30 minutes? Epic win.

Plate of chickpea brownies How to Make Chickpea Brownies Image Credit: Julia Mueller

Video of the Day

Things You\’ll Need

  • 1 (14-ounce) can chickpeas, drained and rinsed

  • 2 large eggs

  • 1/3 cup unsweetened cocoa powder

  • 2/3 cup cane sugar

  • 2 tablespoons olive oil

  • 1 teaspoon vanilla extract

  • 2 teaspoons baking powder

  • 1/4 teaspoon sea salt

  • 1/2 cup semi-sweet chocolate chips

Tip

  • To make this recipe naturally sweetened, replace the cane sugar with coconut sugar.
  • Add a small amount of ground cinnamon or coffee grinds to add a unique richness to the brownies.
  • Top the brownies with a sprinkle of powdered sugar, or homemade fudge frosting.
  • You can also make this recipe using 1 (14-ounce) can of black beans instead of chickpeas.

Step 1: Prepare the Brownie Batter

Preheat the oven to 350 degrees Fahrenheit. Lightly oil an 8" x 8" baking dish and line with parchment paper. Drain and rinse the chickpeas in a colander.

chickpeas in a colander 
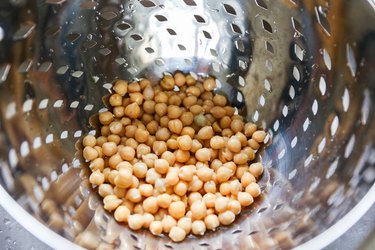
Rinse the chickpeas well Image Credit: Julia Mueller

Transfer all ingredients except for the chocolate chips to a blender. Blend until completely smooth.

Brownie ingredients in a blender 
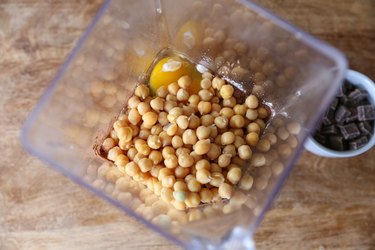
Add ingredients to a blender Image Credit: Julia Mueller

Add the chocolate chips to the brownie batter and stir well.

Blender with brownie batter and chocolate chips 
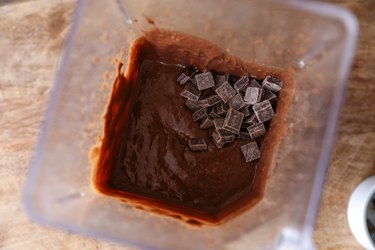
Stir in the chocolate chips Image Credit: Julia Mueller

Step 2: Prepare to Bake

Pour the brownie batter into the prepared baking dish.

Brownie batter being poured into a baking dish Transfer batter to a baking dish. Image Credit: Julia Mueller

Smooth the brownie batter into an even layer using a rubber spatula or spoon.

Baking dish with brownie batter in it Smooth out the batter Image Credit: Julia Mueller

Step 3: Bake the Brownies!

Place the batter on the center rack of the preheated oven and bake for 24 to 28 minutes, until center and sides feel firm. Allow the brownies to rest for 1 hour.

Baking dish of chickpea brownies Bake the brownies Image Credit: Julia Mueller

After the brownies have cooled for an hour, remove them from the baking dish by pulling on the sides of the parchment paper. Transfer to a cutting board. Use a sharp knife to cut brownie squares and serve!

Stack of brownies Cut brownies and serve Image Credit: Julia Mueller

How to Make Mango Infused Tequila

0

Things You\’ll Need

  • 3 1/2 cups peeled and sliced mango

  • Large pitcher

  • Plastic wrap

  • 750 mL tequila

  • Clean 750 mL bottle

  • Re-usable coffee filter

  • Paper or plastic label

... Fresh halved mango

Mango infused tequila is sweet and fruity, and it can be used to spice up a variety of traditional cocktails, as well as helping you to discover new, creative drinks on your own. Used in a classic summer cocktail like the Mai Tai or Madras, mango infused tequila can add new, intriguing flavor to the ubiquitous cocktails, and used to make a vodka martini, the liquor can add a totally fresh perspective on a classic drink. This recipe makes one full 750 mL bottle of infused tequila.

Video of the Day

Step 1

Place the peeled and sliced mangoes in a large pitcher and tightly cover the top with plastic wrap.

Step 2

Put the infused tequila in a dark, cool place for 30 days, shaking the pitcher gently once every day.

Step 3

Strain the mango pieces out of the tequila using a re-usable coffee filter, catching the infused tequila in a clean 750 mL bottle.

Step 4

Put a label on the outside of the bottle to identify that it is mango infused tequila. Place a date on the label and store away from direct sunlight for up to one year.

Tip

If you want to give the tequila more mango flavor, increase the amount of mango used to 5 cups.

If you want to make the infused tequila sweeter, add 1/4 cup simple syrup to the pitcher with the mango slices.

How Long Can You Leave Goat Milk Unrefrigerated?

Low Angle Shot of Goat Milk from goats is a staple in places like Africa and India. Image Credit: Digital Vision./Photodisc/Getty Images

Leaving goat milk unrefrigerated for more than two hours is not recommended. Even pasteurized milk is susceptible to the growth of harmful bacteria and food-borne pathogens, all of which thrive on milk's many nutrients and natural sugar. When serving goat milk with breakfast or during any occasion at the table, it is best to use it promptly and return it to your refrigerator at once.

Video of the Day

Unrefrigerated Shelf Life

Goat milk contains several macro- and micronutrients essential for human health, including calcium, protein and fat. Like cow's milk, goat milk also provides sugar in the form of lactose. This nutrient-dense environment allows bacteria and pathogens to flourish rapidly, especially if the milk's temperature rises beyond the ideal temperature for storing, which is usually as cold as your refrigerator. This is why milk tends to spoil quickly, almost as soon as it approaches room temperature.

Best Storage Temperature and Conditions

The optimal temperature window at which goat milk remains freshest up to and for some time after its best-by date is 35 F to 40 F. For every 5 F rise in temperature over 39 F, its shelf life is shortened by 50 percent. The lower end of 35 F is recommended for food-service providers. This lower temperature allows some leeway in case the milk must sit out and away from any source of cold for a time before service, such as in a cafeteria or during buffet-style catering.

Buying and Keeping Goat Milk Fresh

When purchasing goat milk, opt for products sold in enclosed cabinets. If your supermarket's dairy section features open shelves, select cartons closest to the back of the shelf. These cartons have been maintained at cooler temperatures more consistently and have not been exposed to as much light, another form of heat. Transport any goat milk-based products immediately and refrigerate them as soon as possible. Milk picks up other smells easily, so store your goat milk away from foods with strong odors. Because home refrigerators are typically set at 40 F, keep your milk in the main compartment and not in the door to protect it from temperature fluctuations.

Good Versus Bad Bacteria

It is particularly important to store raw, unpasteurized goat milk at 35 to 40 F or as close to this temperature as possible. Raw, unpasteurized goat milk retains all of its strains of good bacteria like Lactobacillus acidophilus, but the belief that these bacteria are capable of fighting off bad bacteria and protecting the freshness of any unrefrigerated dairy is unsubstantiated by science. Raw, unpasteurized goat milk is more likely to also contain harmful bacteria, such as salmonella and Escherichia coli, and these are quite capable of multiplying to critical masses sufficient to cause illness when their host environment is allowed to warm.

Instant Pot Recipe: Vanilla Extract

0

eHow may earn compensation through affiliate links in this article.

If you regularly bake, you've likely noticed that prices of quality vanilla extract have drastically increased. The good news is you can make your own from scratch, and it's much more affordable (and tasty)! The flavor is richer and can be adjusted to your liking. Follow the instructions below to learn how to easily and quickly make vanilla extract in the Instant Pot.

Video of the Day

instant pot vanilla extract

Things You\’ll Need

  • Instant Pot

  • 2 vanilla beans (Grade A or B is best for maximum flavor)

  • 2 cups vodka

  • 1 cup water

  • Mason jars with lids

ingredients

Step 1: Prepare Jars

Pour vodka into a mason jar. Slit vanilla beans down the middle and place in the jar. Secure lid so it is "fingertip tight" and set aside.

Place steamer rack in the Instant Pot and pour in water. Sit the jar on the rack. Close lid, seal the valve, and cook on manual high pressure for 45 minutes. Let it completely natural release, about 30 minutes.

Tip

"Fingertip tight" is a canning term that means screwing the lid on until it is barely tight. This allows air bubbles to still escape in the heat and pressure. Make sure that you only make vanilla extract in an electric pressure cooker.

prepare jars

Step 2: Remove Jars

Remove jars with tongs or heat-proof gloves. Let rest for 24 hours to develop flavor. The longer you leave in vanilla beans, the more robust and rich the flavor will become. The extract is ready to use after cooling. Store in a glass container at room temperature. Enjoy!

instant pot vanilla extract

How to Make and Preserve Strawberry Jam

0

Ruby red and mouth-watering sweet, strawberry jam is a summertime treat! Slather it on warm, buttery toast first thing in the morning or pair it with your favorite peanut butter for a special PB&J sandwich lunch. You can even make the berry season last throughout the winter by preserving some of this yummy homemade jam. These little jars of deliciousness would make great gifts or party favors and imagine everyone's delight when they find out you made them yourself. Let's get jammin'.

Ruby red and mouth-watering sweet, strawberry jam is a summertime treat! Ruby red and mouth-watering sweet, strawberry jam is a summertime treat!

Things You\’ll Need

  • 5 cups crushed strawberries

  • 1 box Sure Jell Fruit Pectin

  • 1/2 teaspoon butter

  • 7 cups sugar

  • Jars with 2-piece lids

Ruby red and mouth-watering sweet, strawberry jam is a summertime treat!

Step 1

Wash and remove the hulls of the strawberries.

Ruby red and mouth-watering sweet, strawberry jam is a summertime treat!

Tip

You could use a small sharp knife to remove the hulls, but another way to easily remove the strawberry hulls is by using a straw. Simply run the straw through the strawberry from the bottom and push the hull out.

Ruby red and mouth-watering sweet, strawberry jam is a summertime treat! Ruby red and mouth-watering sweet, strawberry jam is a summertime treat!

Step 2

Crush the washed and hulled strawberries.

Ruby red and mouth-watering sweet, strawberry jam is a summertime treat!

Step 3

Place the crushed berries into a large saucepan. Add a 1/2 teaspoon of butter to keep the jam from foaming. Add one package of the fruit pectin and stir to combine. Bring this mixture to a full rolling boil. Be sure to continue to stir so the bottom doesn't get scorched.

Ruby red and mouth-watering sweet, strawberry jam is a summertime treat! Ruby red and mouth-watering sweet, strawberry jam is a summertime treat! Ruby red and mouth-watering sweet, strawberry jam is a summertime treat!

Step 4

Next, add the 7 cups of sugar all at once. Stir and bring to a full rolling boil again. Boil and stir constantly for one minute. Turn the heat off.

Ruby red and mouth-watering sweet, strawberry jam is a summertime treat! Ruby red and mouth-watering sweet, strawberry jam is a summertime treat!

Step 5

Use a ladle and a canning funnel to fill the sterilized jars to 1/4 inch from the top. Remove the funnel and wipe the jar rim with a wet cloth. Cover the jars with sterilized 2-piece lids.

Ruby red and mouth-watering sweet, strawberry jam is a summertime treat! Ruby red and mouth-watering sweet, strawberry jam is a summertime treat! Ruby red and mouth-watering sweet, strawberry jam is a summertime treat! Ruby red and mouth-watering sweet, strawberry jam is a summertime treat!

Step 6

Place the jars onto the steamer canner shelf. Place the canner lid over the jars and turn on high heat. Once the steam starts to come out of the hole in the front of the canner, start the timer. Process the jars for 10 minutes.

Ruby red and mouth-watering sweet, strawberry jam is a summertime treat! Ruby red and mouth-watering sweet, strawberry jam is a summertime treat! Ruby red and mouth-watering sweet, strawberry jam is a summertime treat!

Step 7

After 10 minutes, remove the canner lid and use an oven mitt to take the hot jars off the shelf. Place the jars on a clean towel. You will start to hear the jars ping and that means they are sealing. Let the jars sit still for 24 hours. After they cool, check to see if they sealed by pressing the center of the lid. If it springs back, the jar didn't seal and will have to be placed in the refrigerator. The sealed jars of jam will last up to a year in a cool dark place. An unsealed jar of jam will last in the refrigerator up to 3 weeks.

Ruby red and mouth-watering sweet, strawberry jam is a summertime treat!

Time to get your jam on!

Ruby red and mouth-watering sweet, strawberry jam is a summertime treat! Ruby red and mouth-watering sweet, strawberry jam is a summertime treat! Ruby red and mouth-watering sweet, strawberry jam is a summertime treat!

Homemade Ricotta Cheese Recipe

0

Homemade ricotta cheese is much different than what you'll find at the store, and it's surprisingly easy to prepare at home! I often hear people say that they don't care for the texture of ricotta, and I can pretty much guarantee they're referring to the mass produced versions, which can be grainy and flavorless. Homemade ricotta is delicate, milky, slightly salty, and comes together in less than 30 minutes. It's perfect for both sweet and savory applications.

Homemade Ricotta Cheese Recipe | eHow

Video of the Day

Things You\’ll Need

  • 8 cups pasteurized whole milk (not ultra-pasteurized or UHT, see Step 1)

  • 1/4 cup distilled white vinegar

  • 2 tablespoons fresh squeezed lemon juice

  • 1 teaspoon kosher salt

  • Colander

  • Cheesecloth

  • Stockpot or Dutch oven

  • Thermometer

Step 1: Gather Your Ingredients and Tools

While whole milk is suggested in the ingredient list, you can increase or decrease the richness a bit depending on the desired outcome. This recipe will work with 2% milk in place of whole milk for a less rich ricotta. Or, for a bit more decadence, try swapping out 1 to 2 cups of whole milk with heavy cream. However, in both instances, make sure to use dairy that is not ultra-pasteurized or UHT.

Warning

You always want to use the freshest milk possible for the best tasting cheese. However, this recipe will not work if the milk has been ultra-pasteurized or ultra-heat-treated (UHT). Unfortunately, most organic milks are ultra-pasteurized, so be sure to check the labels. Even more importantly, check the sell-by date. Dairies are not legally required to label their products as ultra-pasteurized or UHT. Be suspicious of anything with a sell-by date past 2 weeks. There are also online resources for seeking out good milk.

Homemade Ricotta Cheese Recipe | eHow

Step 2: Prepare the Ingredients and Heat the Milk

Line a colander with a double layer of cheesecloth and place in the sink. Combine the vinegar and lemon juice in a liquid measuring cup and set aside. Add the milk and salt to the stockpot and turn the heat to medium. Heat the milk to 185 degrees Fahrenheit, stirring almost constantly to prevent scorching on the bottom of the pot.

Homemade Ricotta Cheese Recipe | eHow

Step 3: Add the Vinegar and Lemon Juice

Once the milk reaches 185 degrees Fahrenheit, remove the pot from the heat. Slowly stir in the vinegar mixture, and then allow the mixture to sit undisturbed for 3 to 5 minutes. The curds will separate from the whey.

Homemade Ricotta Cheese Recipe | eHow

Step 4: Strain the Curds

Slowly pour the curds and whey through the prepared colander.

Homemade Ricotta Cheese Recipe | eHow

Step 5: Drain the Curds

Allow the whey to drain for 10 to 15 minutes. The longer the mixture drains, the thicker the ricotta will be.

Homemade Ricotta Cheese Recipe | eHow

Step 6: Refrigerate

Fresh ricotta can be stored in the refrigerator in an airtight container for up to 5 days.

Homemade Ricotta Cheese Recipe | eHow