Home Blog Page 72

How to Make Pear Cider at Home

0

Start to Finish: 2 hours to 10 weeks

Servings: 6

Video of the Day

Difficulty Level: Intermediate

Cider is juice that has not been filtered to remove particles of fruit. Making pear cider is just like creating apple cider. It is even common for homemade ciders to contain pear-apple blends to add depth of flavor or to achieve the requisite volumes of fruit juice for the recipes. Substituting apples or apple juice for up to 25 percent of the recommended volume of pears in this recipe — adapted from the National Center for Home Food Preservation — can give your cider a more complex taste while keeping the pear flavor prominent. Ferment the fresh-squeezed beverage for 2 to 10 weeks to create "hard" pear cider.

Ingredients

Unseasoned Pear Cider

  • 18 pounds fresh pears

Spiced Pear Cider

  • 18 pounds fresh pears
  • 2 to 6 cinnamon sticks
  • 1 whole nutmeg or 1/4 teaspoon ground nutmeg

Fermented "Hard" Pear Cider

  • 18 pounds fresh pears
  • 1 to 1 1/2 pounds honey or granulated sugar
  • 1 packet cider yeast

Directions

Prepare Unseasoned Pear Cider

Sanitize a 1-gallon glass jar or bottle — or multiple glass jars and bottles with a combined capacity of 1 gallon — in hot, soapy water. Rinse and dry the glass thoroughly to remove any traces of soap.

Remove cores, stems and seeds from the pears. Trim away any bruised, discolored or damaged spots on the fruit flesh with a paring knife. Cut the pears into smaller pieces. Leave the skin intact.

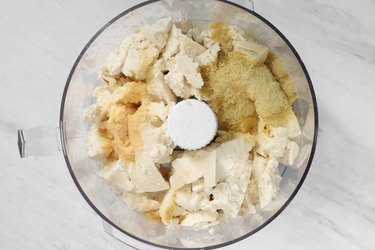
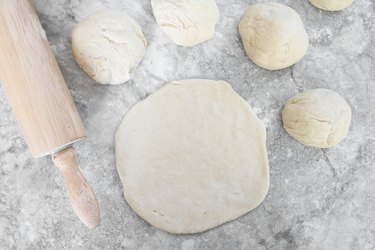
Transfer a portion of the pears to a device that can reduce them to pulp, such as a blender or food processor. The volume of pear pieces in each "portion" should be dictated by the capacity of your device.

Process the fruit until it is a juicy pulp. The consistency does not need to be uniform, but it should not be chunkier than applesauce. Transfer the pulverized portion of fruit with juice to a large bowl while crushing the remaining pear pieces. Continue processing the fruit until all of the pieces have been rendered to pulp.

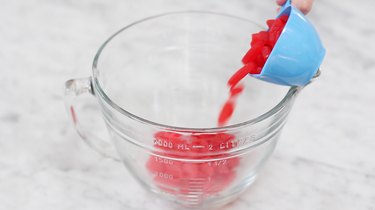
Scoop a portion of the pear pulp into a muslin sack or jelly bag. Squeeze juice from the bagged pulp over a large bowl or pitcher. Wring the fruit-filled cloth as tight as you can to extract the maximum volume of juice. Some particles of pear pulp may pass through the material with the juice, which is fine.

Discard the pulp when you cannot squeeze any more juice from it. Refill the sack or bag with another scoop of pulp, repeating the process until you have juiced all of the crushed pears. Eighteen pounds of pears should yield about 1 gallon of pear cider.

Tip

Crush pear pieces and squeeze juice out of the pulp with a fruit press or cider press if you have one available. You can use a clean cotton pillowcase instead of a muslin sack or jelly bag, if necessary.

Pasteurize the Cider

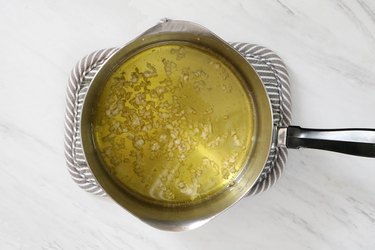
Transfer pear cider to a large stock pot to pasteurize the liquid before you bottle it. Fresh-squeezed cider can contain illness-causing contaminants, such as E. coli or Salmonella.

Heat the cider to at least 160 degrees Fahrenheit. Gauge the temperature with a food thermometer. Do not allow the liquid to exceed 185 degrees F. The hotter the liquid becomes, the more likely it is to develop a "cooked" flavor.

Skim off any foam that develops while you heat the cider. Keep it at or above 160 degrees F for about 5 to 10 minutes before removing it from the heat.

Pour the liquid into sanitized glass jars or bottles if you want plain, unfermented cider. Refrigerate the bottled cider immediately.

Tip

Store boiled cider in glass canning jars, then process the jarred cider in a boiling water canner if you want to keep the cider at room temperature for a prolonged period of time (up to 1 year). Refrigerate canned cider as soon as you open the jar.

Season Cider to Create a Spiced Beverage

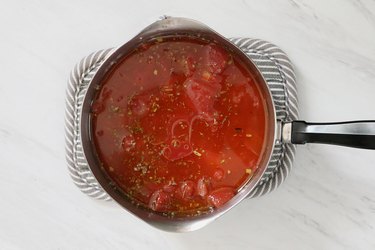
Leave pasteurized cider in the stock pot if you want to season it to make a spiced drink. Reduce the heat to low.

Place cinnamon sticks and nutmeg in a coffee filter or clean cheesecloth. Pull the edges of the filter or cheesecloth together to form a pouch or sachet of spices. Secure the pouch with a piece of kitchen twine.

Place the spice sachet in the stock pot. Heat the cider on low for 2 to 4 hours.

Remove and discard the sachet. Transfer the spiced cider to sanitized jars or bottles for immediate refrigeration, or serve it immediately.

Ferment Hard Cider

Leave pasteurized plain cider in the stock pot to sweeten it before bottling it for fermentation.

  • Dissolve 1 cup of honey or granulated sugar in the cider to make a "dry" or not-very-sweet beverage.
  • Dissolve 1 1/2 cups of honey or sugar in the cider to make a sweet beverage.

Transfer pasteurized plain cider to a large sanitized glass jar or bottle with a narrow opening, similar to a 1-gallon milk jug. Leave at least 1 cup of empty space in the jar, even if you have to discard 1 cup of cider to make room.

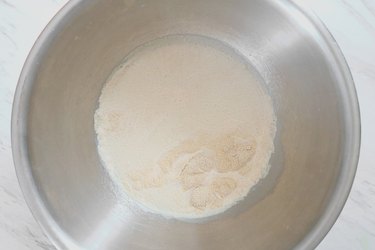
Add 1 packet of cider yeast to the container. Insert a glass airlock — also known as a "curlicue glass stopper" — into the opening of the container. It should be snug enough to remain upright, but don't force it down to make it exceptionally tight. The airlock allows gas to escape as the cider ferments and blocks oxygen and bacteria from entering.

Store the container in a cool, dark environment for about 2 weeks at room temperature (about 70 degrees F is ideal). The cider will become foamy as it ferments. It's fine if foam escapes from the container. Just wipe it off the glass.

Transfer the cider to another sanitized container once it stops generating foam, after about 2 weeks. Leave the dead yeast — which should have sunk to the bottom of the jar — in the original container so it doesn't affect the flavor of the beverage. Seal the new container with the airlock.

Store the fermented cider in a 65 degree F environment for up to 8 weeks to age it. Aging hard cider isn't necessary, but it yields a deeper, more rounded flavor.

Refrigerate cider once it reaches the age you desire. Consume it within 24 hours of opening it for optimal flavor.

Warning

Store fermented or “hard” pear cider in sturdy glass containers. Bottles made for holding fizzy or carbonated beverages are preferable because they tend to be slightly thicker than average glass vessels. The gases that develop during fermentation can cause thinner glass to break.

Tips for Ingredients: Pear Types and Additional Spices

Choose a pear variety or blend of varieties that are juicy and not exceptionally firm. Bartlett, Taylor's Gold and Comice pears are all juicy varieties. Firmer, less juicy pears are acceptable, but may require more work or greater volumes of whole fruit.

Substitute store-bought plain pear cider — which may be labeled "unfiltered pear juice" — to save time if you're making spiced pear cider or hard cider. Farmer's markets are also worthwhile sources for fresh pear cider.

  • Choose pear cider or juice that is preservative-free if you're making hard cider. Preservatives will prevent fermentation, which is the process that transforms cider into hard cider.
  • Select pasteurized cider or juice if you plan to ferment it. Pasteurization should eliminate any wild yeast particles that could interfere with the cider yeast added to the liquid.

Allspice, cardamom, cloves, ginger, orange and vanilla also complement pears, cinnamon and nutmeg. Star anise and juniper berries would impart unexpected flavors that are also complementary. Include additional flavorings in the spice sachet if desired:

  • Add 6 to 10 whole allspice.
  • Use 6 to 8 crushed cardamom pods.
  • Include 8 to 12 whole cloves.
  • Add a 1-inch piece of fresh ginger, peeled and sliced.
  • Use strips of fresh orange peel — only the orange part of the peel.
  • Include 1 split vanilla bean pod.
  • Add 2 to 6 star anise.
  • Use 4 to 6 dried juniper berries.

Limit your seasoning blend to four or fewer ingredients to avoid having too many competing flavors.

Garnish a mug of spiced cider with a cinnamon stick, dusting of nutmeg, curl of orange peel or head of star anise.

Vegan Mini Calzones Recipe

0

It's safe to say that calzones are pockets of heaven. After all, they're basically folded pizzas, which makes them even more fun to eat. And with the right ingredients, it's possible to make them with zero animal products! This is perfect if you follow a vegan lifestyle, can't digest dairy, or simply want to eat more nutritious meals. Better yet, it's surprisingly easy to make adorable vegan mini calzones that fit in the palm of your hand.

Vegan mini calzones

Video of the Day

Vegan Pizza Dough

Things You\’ll Need

  • 2 1/4 cups all-purpose flour

  • 1 cup warm non-dairy milk

  • 2 1/4 teaspoons active dry yeast

  • 1 tablespoon olive oil

  • 1/4 teaspoon salt

Ingredients for vegan pizza dough

Tip

To make even healthier calzones, use whole wheat flour or your favorite gluten-free kind. Just be aware that many other flours are more fibrous than all-purpose, so you'll likely have to use more liquid. Double check the package's directions or look online for pizza dough recipes.

Step 1

In a small pot over very low heat, warm the milk. Make sure it does not boil or bubble; hot liquid will kill the yeast. You can also pop it in the microwave for a few seconds.

Sprinkle the yeast into the milk. Let sit until the yeast puffs up, about 2 to 3 minutes.

Combine yeast and milk

Step 2

Add the olive oil, salt, and 1 cup flour. Mix with a spoon.

Add flour to yeast mixture

Step 3

Add the last 1 1/4 cup flour and combine until the mixture forms a sticky dough.

Dust your hands with flour. On a floured surface, knead the dough until it is smooth yet slightly tacky. Gradually sprinkle in more flour as needed.

Transfer the dough to a large greased bowl and cover with a damp kitchen towel. Place in a warm area for about 1 hour, or until it doubles in size.

Pizza dough before rising

Tofu Ricotta

Things You\’ll Need

  • 14 ounces firm tofu

  • 2 to 3 tablespoons nutritional yeast

  • 1/2 teaspoon onion powder

  • 1 teaspoon garlic powder

  • 1 tablespoon lemon juice

Ingredients for tofu ricotta

Step 1

With a fork, break up the tofu into smaller pieces. Combine all of the ingredients in a food processor.

Tofu ricotta

Step 2

Blend until combined.

Give it a taste. If needed, add more nutritional yeast, lemon juice, onion powder, or garlic powder.

Tofu ricotta

Tip

For silkier tofu ricotta, add 1 or 2 tablespoons of non-dairy milk.

Marinara Sauce

Things You\’ll Need

  • 14 ounces diced tomatoes

  • 1/2 cup water or vegetable broth

  • 1/8 to 1/4 cup olive oil

  • 1/4 teaspoon dried oregano

  • 1 teaspoon salt

  • 1 tablespoon minced garlic

Ingredients for marinara sauce

Step 1

In a small pot over medium heat, combine the garlic and olive oil. Cook until fragrant, about 3 to 5 minutes. Make sure the garlic doesn't brown or burn.

Cook garlic in olive oil

Tip

Use 1/8 cup olive oil for a thinner sauce and 1/4 cup for a thicker sauce.

Step 2

Add the diced tomatoes, water, oregano, and salt. Over medium heat, simmer for 20 to 25 minutes until the sauce thickens. Mix frequently.

After the sauce cools down, toss it in the blender. Puree until it reaches your ideal consistency. On the other hand, you can leave it as is if you want a chunky sauce.

Cooking marinara sauce

Tip

For extra flavor, add more spices like black pepper, paprika, or a bay leaf. Don't forget to remove the leaf after the sauce has simmered.

Vegan Mini Calzones

Things You\’ll Need

  • Pizza dough

  • Marinara sauce

  • Tofu ricotta

  • Meatless meatballs, cooked spinach, etc.

Ingredients for mini vegan calzones

Step 1

Pre-heat the oven to 480° Fahrenheit.

Once the dough has doubled in size, lightly punch it to deflate. Separate into six equal-sized balls.

Pizza dough balls

Tip

To make even smaller calzones, separate the dough into eight or 10 balls. You can also make a few bigger calzones. Regardless of how many you need, make sure the balls of dough are about the same size.

Step 2

Lightly dust your work surface and rolling pin with flour. Flatten each ball into a circle, about 5 to 6 inches wide.

Roll out pizza dough

Step 3

Add marinara, tofu ricotta, and any other of your favorite fillings. This batch of mini calzones includes vegan meatballs and cooked spinach.

Fill calzones

Step 4

Fold over the dough. To secure the edges, press down and roll up, or flatten with a fork.

Repeat with the remaining dough.

Stuffed mini calzone

Step 5

Place the finished calzones on a greased metal baking sheet. Brush with olive oil and add a sprinkling of spices. Bake for 15 to 20 minutes or until the dough turns golden brown.

Vegan mini calzones

Tip

Use the extra marinara as a dipping sauce!

These mini calzones are freezer friendly. They also double as awesome grab-n-go lunches and excellent appetizers.

As you can imagine, this recipe can be customized to your heart's desire. Don't be afraid to experiment with tasty fillings, such as mushrooms, broccoli, olives, artichokes, or cooked onions. The possibilities are endless and delicious.

Vegan mini calzones and marinara

Sparkling Strawberry Rose Cake Recipe

0

This Sparkling Strawberry Rosé Cake is fit for a celebration! It's a sky-high cake, comprised of three vanilla bean layers, fresh strawberries, rosé sugar syrup and a perfectly pink hued buttercream. There's sparkling rosé wine throughout each component, too! It's a decadent cake perfect for your next celebration!

Sparkling Strawberry Rosé Cake is perfect for any celebration!

Video of the Day

Step 1: Bake the Cake

Things You\’ll Need

  • 10.6 ounces (300 grams) granulated sugar

  • 13.4 ounces (380 grams) all-purpose flour

  • 1 tablespoon baking powder

  • 1/2 teaspoon salt

  • 7.6 ounces (215 grams) unsalted butter, softened at room temperature

  • 9.2 ounces (260 grams) egg whites, at room temperature

  • 11.5 ounces (325 grams) sour cream, at room temperature

  • 1 teaspoon vanilla bean extract

  • 3/4 teaspoon rose water

  • 2 tablespoons rosé wine

Pre-heat the oven to 350° f (180° c). Grease and line 3 x 6 inch (15 centimeter) cake pans with non-stick parchment paper. Set aside.

In the bowl of a stand mixer, whisk together the granulated sugar, all-purpose flour, baking powder and salt.

Whisk together the dry ingredients.

Set the mixer speed to medium. Add in the unsalted butter, a tablespoon at a time, until it is all used up. Beat for another 5 minutes or until combined. The mixture should begin to form something that resembles a coarse and sandy meal-like texture.

The mixture should be very sandy and rough.

In a separate large pouring jug or bowl, whisk together the egg whites, sour cream, vanilla bean extract, rose water and rosé wine.

Set the mixer speed to medium-low. Pour in half the liquid ingredients. Beat until combined then pour in the remaining mixture. Pause mixing to scrape down the bottom and sides of the bowl as needed. Increase the mixer speed to medium-high and beat until light and fluffy for 3 more minutes.

Divide the batter between the prepared cake pans, making sure to use a rubber spatula to smooth out the top.

Bake for 30 to 35 minutes (or until risen) until lightly brown. Insert a skewer into the middle to see if it comes out clean, meaning the cakes are ready. Remove the cakes from the oven and let the cakes cool in their pans for 15 minutes before carefully turning out and onto a wire rack to cool completely. Once cool, level off any domed tops with a large serrated knife or cake leveller.

Bake until the cakes are evenly golden brown.

Step 2: Make the Syrup

Things You\’ll Need

  • 1.7 fluid ounces (50 millilitres) rosé wine

  • 1.7 fluid ounces (50 millilitres) water

  • 3.5 ounces (100 grams) granulated sugar

In a small saucepan, combine the rosé wine, water and granulated sugar. Set the saucepan over low-heat, stirring until the sugar has completely dissolved. Increase the heat to medium, and let the mixture come to a light simmer.

Stir until the sugar is completely dissolved before using the syrup.

Remove from the heat and use a pastry brush to evenly glaze the tops of the cakes in the syrup. Set them aside.

Glaze the cake layers in the syrup.

Step 3: Make the Buttercream

Things You\’ll Need

  • 8.8 ounces (250 grams) unsalted butter, softened at room temperature

  • 1 pound (450 grams) powdered sugar

  • 2 tablespoons rosé wine

  • 1/2 teaspoon rose water

  • 1/4 teaspoon salt

  • A few drops of pink food color, optional

To make the buttercream, place the unsalted butter into the bowl of a stand mixer fitted with the beater attachment. Beat on low speed until the butter is soft and malleable for about 1 minute. Add in the powdered sugar. Beat on medium speed until the mixture is light and fluffy for about 5 more minutes. Pause mixing to scrape down the bottom and sides of the bowl. Add in the rosé wine, rose water, salt and four drops of pink food coloring. Beat until well incorporated. Stop mixing and set the bowl aside for assembly.

Beat until the buttercream is evenly colored a light pink.

Step 4: Assemble the Cake

Things You\’ll Need

  • 8.8 ounces (250 grams) fresh strawberries, cleaned, hulled and halved

  • Decorations (optional): fresh or chocolate dipped strawberries, funfetti, white chocolate chips, pesticide free roses etc.

To assemble the cake, place the first cake layer cut side facing up onto a serving plate or cake stand. Use an offset spatula to spread about 3 tablespoons of the buttercream over the top of the cake, making sure that it reaches all the way to the edges and down the sides.

Spread over the buttercream.

Spread over half the strawberries on top. Gently press on the second cake layer, cut side facing down and repeat the layering process as above.

Scatter over the fresh strawberries.

Press on the last remaining cake layer, cut side facing down. Cover the top and sides of the cake with a thick layer of the buttercream, spreading it until smooth. Set the cake in the refrigerator to chill for about 30 minutes, until the buttercream has set. Once set, remove the cake from the refrigerator and use the offset spatula to thickly spread on a final layer of buttercream.

At this stage, you can decorate the cake however you desire! We used additional fresh strawberries to adorn the top of the cake. Set the cake back in the refrigerator to set the final layer of buttercream.

Thickly frost the cake and decorate it as desired!

Step 5: Serve!

Slice and serve the cake!

Slice and serve!

It is best eaten on the day of making but will keep stored in an airtight container in the refrigerator for up to 3 days. Let the cake come to room temperature before serving!

Serve a slice alongside a glass of rosé! A slice of Sparkling Strawberry Rosé Cake is both delicious and beautiful.

Can You Just Thaw & Eat Edamame?

0

Edamame Tuck frozen edamame in a lunch box to thaw by noon. Image Credit: Image Source/Stockbyte/Getty Images

Edamame means "beans on a branch" in Japanese, but in American kitchens the word refers to immature soybeans. You can't eat the fuzzy pods, but the beans inside are tender and flavorful. Use a light hand when you prepare edamame; overcooking makes it tough.

Video of the Day

Fast Food

Rarely available fresh in the U.S., edamame is more often sold frozen, with or without the shell. Frozen edamame has been parboiled to preserve its freshness, so it's already partially cooked. You can thaw it in the refrigerator or pop it in the microwave for a few seconds before you eat it. Toss shelled edamame directly in soups and salads, where they'll thaw quickly.

Heat It Up

Edamame, unlike other dry beans that need long periods of soaking, is soft, tender and easy to digest. Because of this, you can safely thaw and eat it without further cooking. However, if you want to cook edamame, place it in a steamer or a saucepan with a bit of water and simmer the pods for five to 10 minutes. For even faster results, heat edamame in the microwave on the high setting for one to two minutes. Add a bit of water to a microwave-safe bowl and cover the bowl with a microwave-safe lid or plate. After cooking the edamame, drain the water and enjoy.

Simple Solutions

Edamame is available frozen in a variety of packaging, from bulk bags of pods to convenient microwaveable bags. Toss one of these bags in the microwave for a minute to heat it, or thaw the bags in the fridge or at room temperature. Regardless of your preparation method, edamame is ready in less than five minutes.

Savory Servings

Whether you thaw edamame or cook it before serving, the tender, fuzzy pods need little embellishment. Toss the pods with salt or sprinkle them with soy sauce. Clasp the pods between your teeth to squeeze the beans out. Add the shelled beans to almost any green salad, but in particular, edamame is delicious in an Asian-inspired green salad. Toss soy-seasoned salmon with baby greens, edamame, chopped pecans, strawberries and red pepper and drizzle with a soy or ginger-based dressing.

How to Make Edible Slime

0

Make like a mad scientist this Halloween and experiment with this edible slime recipe featuring ooey gooey body parts. Eyes, brains, bloody toes – it's icky, sticky and wickedly tasty. Now you can play with your food and eat it, too.

Stretching edible slime with gummy eyeball in the center

Video of the Day

Things You\’ll Need

  • Swedish fish

  • Powdered sugar

  • Body parts gummy candy

  • Coconut oil (optional)

Stretching edible slime

Step 1

Add 1 cup of Swedish fish to a microwave-safe bowl and nuke for 10 to 15 seconds.

Adding Swedish fish to bowl

Step 2

Remove the bowl from the microwave and stir the Swedish fish with a non-stick spatula. It should be pretty gooey at this point — and very sticky.

Stirring melted Swedish fish

Step 3

Add 2 tablespoons of powdered sugar to the melted Swedish fish and stir. If needed, you can add a little more sugar to make it less sticky. But remember the more sugar you add, the less stretchy the slime will be.

Stirring powdered sugar into melted Swedish fish

Step 4

Once the Swedish fish mixture is cool enough to touch, dust your work surface with powdered sugar and knead the slime slightly to create more of a dough consistency. If your dough is a little too stiff, add a few drops of coconut oil to make it stretchier.

Tip: Heated sugar can really burn you, so only handle once you're sure it's cooled.

Kneading slime dough

Step 5

Add the gummy body parts to the slime and have fun mixing/stretching them into the dough.

Stretching edible slime with body parts

Watch as the body parts stretch with the slime and then snap back together!

Stretching edible slime with gummy ear

Don't forget this slime is totally edible, so give it a taste if you dare!

Tasting edible slime while wearing gummy vampire teeth

How to Make a Neapolitan Ice Cream Cake

0

This Neapolitan ice cream cake is the most perfect and delicious cake for summer, or any time really! It contains three delicious layers of chocolate, strawberry and vanilla ice cream, along with layers of graham cracker crumbs and ice cream sandwiches. The cake is coated in a super-sweet chocolate fudge sauce, which takes it to another level completely. It's an incredibly easy cake to make, which is always ideal for entertaining. You could even create it using your favorite store-bought ice cream flavors and cookies, too. Make this decadent cake by following the simple instructions below!

A slice of Neapolitan ice cream cake

Watch the video tutorial

Things You\’ll Need

  • 9 ice cream sandwiches

  • 1/2 cup graham cracker crumbs

  • 3 scoops strawberry ice cream, slightly thawed

  • 3 scoops chocolate ice cream, slightly thawed

  • 3 scoops vanilla bean ice cream, slightly thawed

  • 7 ounces (200 grams) dark chocolate, finely chopped

  • 1.4 ounces (40 grams) unsalted butter, cubed

  • 4.6 fluid ounces (130 milliliters) heavy cream

  • Whipped cream (optional)

  • Chocolate shavings (optional)

  • Fresh cherries (optional)

  • Berries (optional)

Step 1: Assemble the ice cream cake

Begin by lightly greasing and lining a 8-inch (20-centimeter) springform cake pan with non-stick parchment paper. .

Use a sharp knife to cut each ice cream sandwich into quarters.

Carefully cut each ice cream sandwich in half.

Then, arrange the quarters, cut side facing up, around the edges of the prepared cake pan to form a circle.

Neatly arrange the ice cream sandwiches into a circle around the edges of the cake pan.

Place a handful of the graham cracker crumbs into the center. Then, using a non-stick spatula or spoon, spread the chocolate ice cream over the top until it is smooth.

Spread the chocolate ice cream until it is smooth.

Next, build the second layer. Top the chocolate ice cream with another handful of graham cracker crumbs, then, spread over the strawberry ice cream, until smooth.

Spread over the strawberry ice cream.

Again, cover the strawberry ice cream with a handful of the graham cracker crumbs. Spread over the vanilla bean ice cream. Spread until smooth.

Cover the entire cake with a layer of vanilla ice cream.

Set the cake in the freezer to freeze until very firm, about two hours, but preferably overnight.

Step 2: Make the chocolate fudge sauce

Set the finely chopped dark chocolate into a medium-sized bowl. Place the heavy cream and butter in a medium-sized saucepan set over medium-high heat. Heat until the butter has melted and the mixture begins to reach a steady, rolling boil, about three to four minutes. Remove from heat and pour the hot liquid mixture into the bowl with the chocolate. Let it stand for one minute to acclimate, then, stir until smooth and glossy. Let the chocolate fudge sauce cool until room temperature before pouring over the cake.

The chocolate fudge sauce will be shiny and smooth.

Step 3: Decorate

When the ice cream cake has set and you are ready to serve, remove it from the freezer and un-mold it from the springform pan, making sure to remove any remaining parchment paper. Set the cake out and onto a serving plate or cake stand. Drizzle the chocolate fudge sauce over the top and decorate with whipped cream, chocolate shavings or fresh cherries, if desired.

Pour the chocolate fudge sauce over the cake. Make sure that the chocolate fudge sauce drips down the sides of the ice cream cake!

Step 4: Serve

Use a slightly warm knife to slice and serve your Neapolitan ice cream cake! You can serve it with any extra drizzle of any remaining chocolate fudge too, for something even more decadent. The Neapolitan ice cream cake will keep in the freezer for up to three months, let it stand on the kitchen counter for about 10 minutes to thaw slightly before serving.

A slice of this Neapolitan ice cream cake is truly delicious!

How to Distill With a Pumpkin

Things You\’ll Need

  • Several large pumpkins

  • 2 buckets

  • Sugar

  • Yeast

  • Plastic wrap

  • Pot still

  • Oak barrel

... Pumpkins can be used to make a sweet-tasting brandy.

Pumpkins have several uses. Around Halloween, they are used to make Jack-o-lanterns and pies. Pumpkins can also be used to make a sweet-tasting brandy through the distillation of fermented pumpkin wine. Depending on how long you want to age your pumpkin brandy, the process will take at least two weeks. However, at the end of the process, you will have pumpkin liquor that you can enjoy. All you need is a few basic supplies and you can be ready to distill your own pumpkin brandy.

Video of the Day

Step 1

Remove the meat from inside the pumpkin. Put the pumpkin meat in a pot with a small amount of water. Add enough water to completely cover the pumpkin meat. Boil the pumpkin meat until it dissolves into a thin soup. Help dissolve the pumpkin by mashing the pumpkin meat while the soup is boiling.

Step 2

Remove the soup from heat and allow the pumpkin soup to cool to 75 degrees Fahrenheit. Pour the pumpkin soup into a bucket or sanitary vessel able to hold the soup. Mix granulated sugar and champagne yeast to the soup. You should add 1 pound of sugar and 5 grams of yeast for every 4 pounds of pumpkin meat. Stir the soup well. Cover the bucket with plastic wrap. Poke holes in the plastic wrap to allow the mixture to breathe.

Step 3

Allow the mixture to sit overnight. Inspect the mixture the next morning. There should be a cap formed on top of the mixture. Skim the top of the mixture, remove the cap and discard it. Stir the mixture well and reapply the plastic wrap.

Step 4

Continue this process every day for at least two weeks. Every day, remove the plastic wrap, skim the cap and stir the mixture. Note the level of the mixture in the bucket. Add more water if the mixture level drops. After two weeks, the mixture should be done fermenting.

Step 5

Run the mixture through a pot still. You may want to run the pumpkin wine through the still at least two times. The first time, distill the pumpkin wine fast. Collect the mixture in a separate bucket. The second time, distill the pumpkin wine slowly. The remaining product is pumpkin brandy ready to drink, though it may taste too strong to enjoy.

Step 6

Pour the product into a natural uncharred oak barrel. Seal the barrel. Age the product to suit your taste. The longer you allow the brandy to age, the stronger the pumpkin taste.

Warning

It is illegal to distill pumpkin brandy without a liquor license.

One-Pot Stroganoff

0

This one-pot update makes the classic eastern European dish even easier to create at home, with all the same creamy, tangy and satisfying flavors of the original.

one-pot beef stroganoff

Video of the Day

Things You\’ll Need

  • 3 tablespoons butter

  • 8 ounces button mushrooms, sliced

  • 1 medium onion, diced

  • 2 garlic cloves, diced

  • 1 pound ground beef

  • 2 teaspoons paprika

  • 1/4 cup dry white wine

  • 4 cups (1 quart) beef broth or stock

  • 1 1/2 teaspoons salt

  • 1/2 teaspoon pepper

  • 8 ounces dried egg noodles

  • 1 tablespoon cornstarch

  • 3/4 cup whole milk Greek yogurt

  • 1 tablespoon finely chopped fresh parsley

ingredients for beef stroganoff

Step 1: Cook the Mushrooms

Melt 2 tablespoons of butter in a large sauté pan and add mushrooms, plus a 1/2 teaspoon of salt. Cook for about 5 minutes until soft and tender. Set aside on a separate dish.

cook mushrooms

Step 2: Brown the Onions and Beef

Using the same pan, add the remaining 1 tablespoon of butter along with the onion and garlic, cooking on medium heat for about 5 minutes until soft. Add the beef and brown for about 5 minutes.

cook beef with onions

Once the beef had been browned, add wine, paprika and remaining salt and pepper. Cook for about 2 minutes until the wine is reduced by at least half.

browned beef

Step 3: Add Noodles

Pour 4 cups of stock into the pan, and add the mushrooms along with noodles. Bring to a simmer and cook about 6 minutes.

add noodles

Step 4: Thicken as Needed

If your sauce is not thick enough, scoop out about 1/4 cup into a measuring cup. Stir in the cornstarch then return the whole thing to your pan.

cornstarch

Step 5: Finish with Yogurt and Parsley

Once the noodles are soft, stir in the yogurt and sprinkle with parsley.

finished stroganoff

How to Never Miss Breakfast Again

0

Ugh, it's morning again. Did you hit the snooze button one too many times and now you're trying to get ready in record time? When you have to decide between wearing an acceptable outfit and getting a nutritious meal in your belly, breakfast usually gets left in the dust. Well, not anymore. Whether you make a big batch of granola on Sunday nights to munch on all week or you whip up a quick green smoothie, these easy and delicious recipes will help you take full advantage of the most important meal of the day.

Breakfast Recipes

Video of the Day

Apple Streusel Muffins for When You Need to Get Outta Bed

Getting out of bed in the morning won't feel so brutal when you know there's a tasty apple muffin (or two) waiting on the counter for you. Made with diced sweet apples and topped with a brown sugar streusel, these muffins will cure even the worst case of the Mondays.

Apple Streusel Muffins

Heart-Healthy Granola for When You Need Options

Whip up a big batch of this granola and you'll be able to make yummy, healthy breakfasts all week long. Sprinkle it on your yogurt, have it with milk or even spread it on apple slices covered in peanut butter. The possibilities are endlessly delicious.

Heart-Healthy Granola

Creamy Greek Yogurt for Your A.M. Workouts

Packed with protein and a definite kitchen staple, Greek yogurt will give you all the energy you need to get through that early morning workout. Start this recipe the night before, since the yogurt needs to rest on the counter for 8 to 12 hours. Store the finished product in an airtight container (or in a few small mason jars for a grab-and-go breakfast) and enjoy for up to a week.

Homemade Greek Yogurt

Blueberry Pancakes for Your Saturday Errand Run

Save this one for Saturday morning, when you have a little extra time but still need a nutritious breakfast to nosh on before taking care of errands. Since these blueberry pancakes are made with protein-rich almond flour and almond milk, they're vegan, gluten-free and totally delicious.

Blueberry Pancakes

A Green Smoothie for Your Workweek Grind

Are you running late this morning and think there's no time for breakfast? Think again! Don't settle for a bagel on the way to the office that'll just leave you hungry again in an hour. Instead, you should start your day with a quick and easy green smoothie that's full of nutrient-dense fruits and vegetables.

Healthy Green Breakfast Smoothie

Chocolate Chip Scones for When You\’re Feeling Blue

It's almost impossible to have a bad morning when you take a moment to enjoy a fluffy, buttery scone loaded with chocolate chunks and malted milk powder. This is a no-fuss recipe that can be thrown together in just a few minutes — and you don't even have to dig out your rolling pin or cookie cutters.

Chocolate Chip Scones

Homemade Pop Tarts for a Nostalgic Throwback

When we say you can have pop tarts for breakfast, we aren't talking about the store-bought ones in the shiny silver wrappers. This homemade version is not only adorable, it's totally customizable, too. Whether you use raspberry, strawberry or fig jam filling, you'll never put the other kind on your shopping list again.

Homemade Pop Tarts

Classic Coffee Cake for Your Everyday Caffeine Fix

Nothing pairs better with your morning cup of coffee than a slice of coffee cake. Once you master this classic recipe, you'll be whipping up a batch every weekend. Stick to the basics, or go for a citrusy twist by adding fresh berries, lemon juice and a powdered sugar glaze. Either way, this one's a keeper.

Classic Coffee Cake

Homemade Almond Milk for When You Just Want Cereal

Almond milk is all the rage these days, and by making it yourself you can avoid the preservatives found in the store-bought varieties. Since you only need two ingredients (almonds and water), you can fill a glass in no time. Just let the almonds soak overnight, and then blend them with filtered water. Strain and enjoy with your favorite cereal.

Homemade Almond Milk

Baked Oatmeal for When You\’re Double-Tasking

Having oatmeal for breakfast doesn't have to mean eating a warm bowl of mush. This baked version is just as filling and nutritious, and it can be customized with chopped apples and whipped cream. Pop the tray of oatmeal in the oven for an hour while you get ready for the day, and it'll be done when you're set to leave.

Baked Oatmeal

Coconut Breakfast Cookies for a Power Boost

Yes, you can have cookies for breakfast. These aren't just ordinary cookies, though. Filled with fiber and healthy fats from ingredients like raw cacao nibs and ripe bananas, these coconut cookies have everything you need to power through your day.

Coconut Breakfast Cookies

Breakfast Pizza for When You Want to Go All Out

First cookies and now pizza for breakfast? Don't bother pinching yourself because no, it's not a dream. From a basic bacon, egg and cheese pizza to the ultra-fancy balsamic caramelized onion, prosciutto, spinach and parmesan pizza, breakfast will never be the same again.

Breakfast Pizzas

Cinnamon Roll French Toast for When You Want to Impress

If you're having guests over, don't default to cold cereal or a dozen donuts. Instead, put together this make-ahead cinnamon roll French toast and you'll be able to enjoy your guests and a delicious breakfast at the same time. Combine the crusty bread and custard mixture and let it sit in your refrigerator overnight. In the morning, pop it in the oven for a quick 30 minutes and breakfast will be ready before you know it.

Make-Ahead Cinnamon Roll French Toast

How to Bake Crispy, Salty Kale Chips

0

Who doesn't love a good chip? There is something about that salty and crunchy bite that has me craving it on a regular basis. Luckily, there happens to be the perfect healthy substitute for my salty cravings so that I can indulge whenever I want: kale chips to the rescue! Kale is an amazing superfood and if you haven't hopped onto this leafy green's bandwagon yet, now is the time. Kale chips are easy to make and really delicious, too! If you're not one yet, get ready to become a kale convert.

How to Bake Kale Chips

Video of the Day

Things You\’ll Need

  • 1 bunch of fresh kale

  • 1 tablespoon olive oil

  • 1/2 teaspoon salt

  • 1/2 teaspoon black pepper

Tip

Add additional seasonings such as garlic powder, red chili flake, cumin, and so forth. The options are endless!

Step 1: Preheat the Oven

Preheat the oven to 350 degrees Fahrenheit.

Step 2: Wash Kale and Remove Stems

Wash the kale by submerging it in a water bath in the sink, allowing the sand and dirt to sink to the bottom. Remove kale from the water and pull the leaves off from the stems, breaking the leaves up into medium-sized pieces. (Discard stems as they are too tough to eat.) Let dry.

Fresh Kale Kale Chips

Step 3: Season the Kale

After the kale is thoroughly dry, drizzle with olive oil, salt, and pepper and massage into leaves until just moistened. Lay the kale in a single layer on a baking sheet lined with parchment paper and/or a cooling rack on top of the pan.

Tip

The cooling rack will allow a crispier kale chip because the air can distribute on top and bottom of the chip while it cooks. If just using simply parchment paper, flip the kale chips halfway through the cook time.

How to Bake Kale Chips

Step 4: Bake

Bake the kale chips for 11 to 12 minutes until just browned and crispy. Let cool completely and then serve immediately or store for up to 3 days in an airtight container.

How to Bake Kale Chips

If you are looking for the perfect snack that is guilt free and satisfying, kale chips are just for you. Try this no fail recipe and see just how delicious a healthy chip can be!