Home Blog Page 7

Can You Freeze Cream Cheese Tortilla Pin Wheels?

0

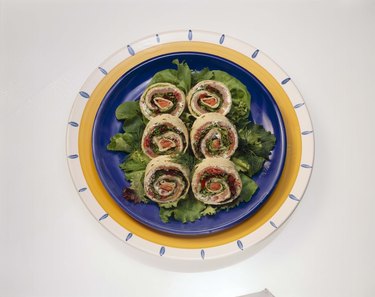
Cream cheese and salmon rolls Frozen pinwheels won\’t spoil, but may lose quality if stored for too long. Image Credit: Jupiterimages/Stockbyte/Getty Images

Tortilla pinwheels made with cream cheese provide a quick snack or a simple appetizer. You can further simplify the process by making and freezing them ahead of time. The cream cheese filling freezes well if you choose the other ingredients carefully to ensure the best storage ability.

Video of the Day

Ingredient Selection

Although the main ingredients in tortilla pinwheels freeze well, take care when selecting additional ingredients to ensure they also can survive freezer storage. Ham and deli meats, most raw diced vegetables and other cheeses are all suitable additions if you plan to freeze your pinwheels. Lettuce, fresh herbs and other leafy greens, however, will wilt, darken or become limp if you attempt to freeze them. Instead of placing these items inside the pinwheels, use them to garnish the pinwheels instead when you are ready to thaw and serve.

Preparation Tips

Softened cream cheese spreads better and mixes more easily with other ingredients. Bring the cream cheese to room temperature in a bowl, and then mix in shredded hard cheeses, deli meats or diced onions, peppers or other vegetables. You can season the cream cheese with dried herbs and spices if desired. Spread the cream cheese evenly over the tortilla before rolling the tortilla up into a tight log. Alternatively, layer thin-sliced deli meats on top the cream cheese filling before rolling. Cut the log into ¾-inch-wide pinwheel slices.

The Big Freeze

Freezing the pinwheels on a tray makes it simpler to only pull out what you need from the freezer because this way, the pinwheels won't stick together. Line a tray with wax paper or parchment and lay the pinwheel rounds on the paper so they aren't touching each other. Freeze the pinwheels in a 0-degree Fahrenheit freezer for one to two hours, or until they are frozen completely. Transfer the pinwheels to a freezer-safe storage bag. Press out as much air as you can before sealing the bag. You can store cream cheese pinwheels for up to two months.

Defrost and Serve

Tortilla pinwheels taste best when served cold. Defrost the pinwheels overnight in the refrigerator. You can arrange them on the serving tray before defrosting to speed preparation the following day, but cover the pinwheels so they don't dry out in the refrigerator. Garnish the defrosted pinwheels by placing them on a bed of leafy greens, or topping them with slivered carrots, red peppers, pimentos, olives or a sprig of parsley.

How to Make 3-Ingredient Banana Ice Cream

0

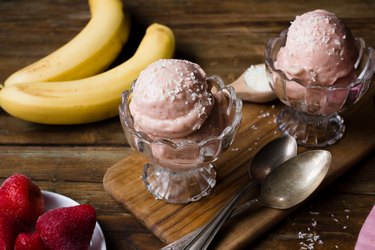
Sometimes, a simple recipe is the best recipe, wouldn't you agree? This three-ingredient banana ice cream is such a recipe — it's satisfying and incredibly easy to make at home. Made from a base of blended frozen bananas, which creates a smooth, ice cream-like texture, this dessert is extremely versatile and it will definitely satisfy just about anyone's sweet tooth. Here are three banana ice cream recipes to try.

How to Make 3-Ingredient Banana Ice Cream

Video of the Day

Strawberry Banana Ice Cream

Create a smooth, creamy ice cream with a deliciously classic combo: strawberries and bananas.
How to Make 3-Ingredient Banana Ice Cream

Things You\’ll Need

  • 3 ripe bananas, sliced and frozen

  • 4 strawberries, frozen

  • Honey, or other sweetener, to taste

  • 2 tablespoons shredded coconut, plus more for garnishing

  • Food processor or bender

Step 1

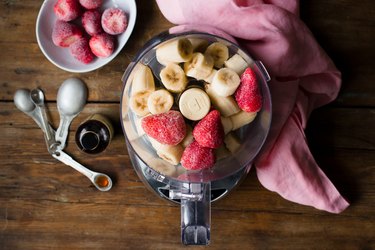
Place the frozen banana slices and strawberries into a food processor or blender.

How to Make 3-Ingredient Banana Ice Cream

Tip

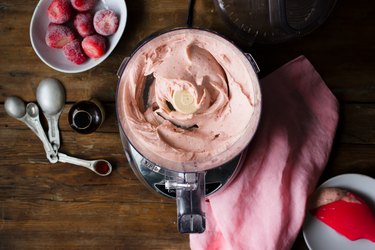
The bananas will go through stages as you begin to blend them. Just keep blending until their texture becomes smooth and ice cream like.

Step 2

Blend until a creamy texture is achieved. Taste and add any sweetener, if needed, blending a few additional times to incorporate.

How to Make 3-Ingredient Banana Ice Cream

Step 3

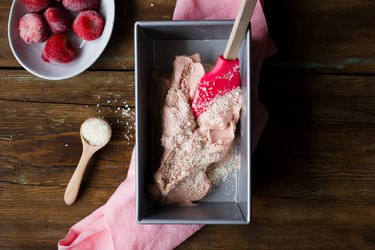
Transfer the banana and strawberry ice cream into a separate container, and mix in 2 tablespoons of shredded coconut. If the ice cream is a bit too soft to enjoy right away cover with plastic wrap, and place in the freezer until slightly firm.

How to Make 3-Ingredient Banana Ice Cream

Tip

If wrapping with plastic, make sure that one layer of the plastic wrap touches the banana ice cream. This will help prevent crystallization.

Step 4

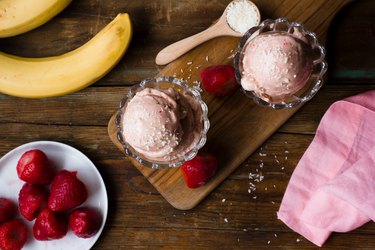
Scoop the ice cream into 2-3 serving dishes, garnish with a bit of coconut flakes, and serve immediately.

Matcha Chocolate Chip Banana Ice Cream

Matcha is having a moment right now. While you could simply make a classic matcha latte to fulfill your taste buds' cravings, enjoy this green tea's flavor with this delicious ice cream.

How to Make 3-Ingredient Banana Ice Cream

Things You\’ll Need

  • 3 bananas, sliced and frozen

  • 1 teaspoon matcha powder, sifted

  • 3 teaspoons coconut milk, or other liquid of choice

  • Honey, or other sweetener to taste

  • 2 1/2 tablespoons chocolate chips, plus more for garnishing

  • Food processor or bender

Step 1

Whisk together the matcha powder and the coconut milk until smooth.

Step 2

Add the match mixture to a food processor or blender along with the frozen bananas, blending until smooth. Taste, and add any sweetener, if needed, and blend a few times to combine.

Step 3

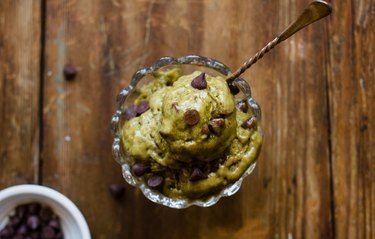
Transfer the ice cream to a separate container and fold in the chocolate chips. Serve right away, or store in the freezer until slightly firm.

Chocolate Peanut Butter Banana Ice Cream

Blend up a mouthwatering dessert featuring this classic trio of flavors: chocolate, peanut butter and banana.

How to Make 3-Ingredient Banana Ice Cream

Things You\’ll Need

  • 3 bananas, sliced and frozen

  • 3 tablespoons cocoa powder

  • 3 tablespoons creamy peanut butter

  • Roughly chopped roasted peanuts, for garnish

  • Food processor or bender

Step 1

Place the frozen banana slices, cocoa powder, and peanut butter in a blender or food processor and blend until a smooth ice cream like texture is achieved.

Step 2

If too soft, place in a separate container and freezer until slightly firm.

Step 3

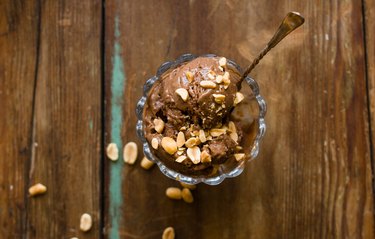
Garnish with chopped peanuts before serving.

How to Make Iced Coffee

0

Things You\’ll Need

  • Ground coffee

  • Tablespoon

  • Heat-resistant glass

  • Ice

...

Making iced coffee at home is not only considerably cheaper than buying it from coffeehouse chains, but also allows you to experiment with strength and flavor. The key is to create a brew that is much stronger and more robust than regular coffee.

Video of the Day

Cold Brew

Step 1

...

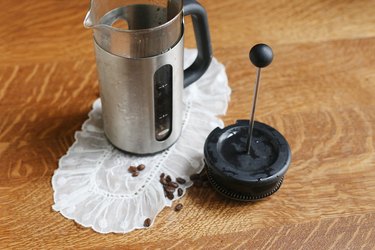
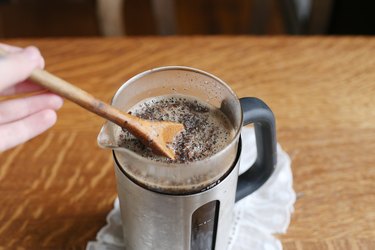
Mix medium to fine coffee grounds with filtered or bottled water in a French press. One part coffee grounds to 4 parts water — certainly nothing less — will give the required strength, but some connoisseurs use even more coffee. Cold brewing results in a lighter, less acidic iced coffee, but sacrifices some of the more distinctive aromas.

Step 2

...

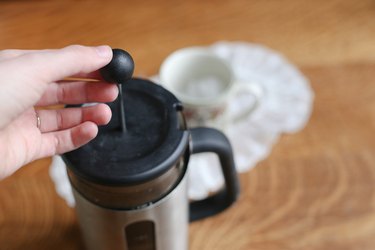
Stir the cold brew thoroughly to mix the grounds, but leave the plunger raised. Place the entire French press in the refrigerator and leave overnight.

Step 3

...

Remove the press from the refrigerator, press down the plunger and pour the steeped coffee into a glass filled with ice cubes.

Step 4

...

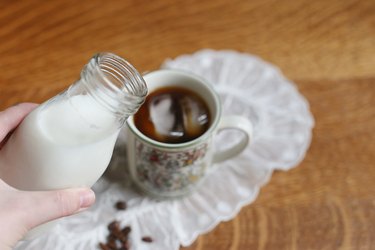
Add milk and sugar according to taste, and stir.

Japanese Brew

Step 1

...

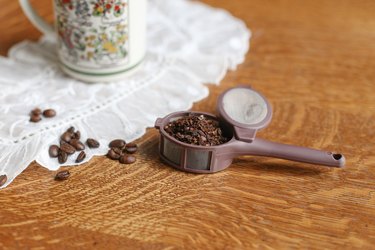
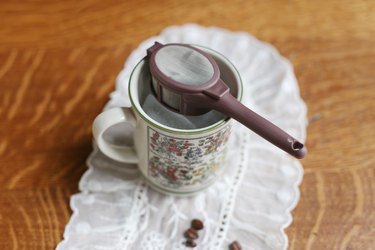
Place a filter paper inside a matching plastic filter cup, such as those used for making single-cup brews, and add roughly 5 tablespoons of ground coffee, about double the amount you would use to make standard hot coffee.

Step 2

...

Place the filter cup above a heat-resistant glass filled with ice cubes.

Step 3

...

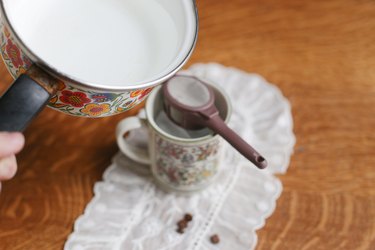
Bring a pan of filtered or bottled water to near-boiling point, removing it from the heat before the boil starts to roll, and pour over the coffee grounds slowly. The volume of water should equal the volume of ice. Using hot water releases all the oils and aromas from the coffee, but produces a more bitter brew.

Step 4

...

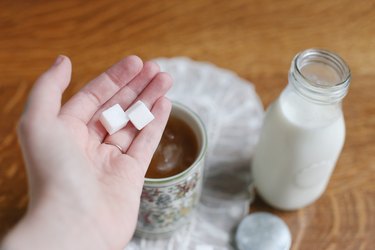
Allow the coffee to percolate onto the ice. Once it has finished, add milk and sugar to taste and stir. Leave the liquid to cool while the ice melts, and then serve.

Tip

Top off an iced coffee with a dollop of whipped cream dusted with cinnamon powder for a more indulgent version, or add ginger and nutmeg to the brew for a spicier alternative.

Warning

Use only heat-resistant glass for the Japanese brew, since adding near-boiling liquid to a near-freezing container would otherwise risk cracking.

Directions for Cold-Pack Canning of Carrots

0

Broccoli; Carrots & Potatoes

Cold-pack canning, also know as raw-pack canning, involves pouring boiling water over raw vegetables packed into canning jars. Cold-pack canning saves you the step of precooking the vegetables. You'll need a pressure canner to can carrots and other low-acid vegetables. Only tomatoes may be safely canned with a hot water bath. You can preserve whole baby carrots or sliced carrots with this method.

Video of the Day

Preparation

Choose unblemished carrots with no bad spots. Wash and peel the carrots, then slice into 1/4-inch slices or into long sticks. Baby carrots may be canned whole, standing upright in the jar, but be sure to cut off the ends and scrub the peels well before canning.

Wash and sterilize your canning jars by boiling them for 10 minutes. You can also sterilize the jars by running them through a cycle of the dishwasher and using them while they're still hot.

Set a small pot of water on the burner and bring the water to a simmer, then add jar lids. Set aside enough clean, unbent jar rings for the lids.

Put 3 inches of water in your pressure canner and set it, uncovered, to simmer.

Cold-Pack Method

Place the sliced or whole carrots in the clean, hot canning jars. Don't pack the carrots too tightly. You need to leave room for the water to flow around them. Add ½ teaspoon uniodized salt (also called canning salt) to each pint jar of carrots.

Bring water to a boil. You can boil the water in any pan, but it's easiest to pour over the carrots if it's in a tea kettle. Pour the boiling water over the carrots and salt, filling the jars to within one-half inch of the top of the jar.

Use tongs to pull a hot lid from the saucepan where they've been simmering. Wipe the rim of the jar with a clean, dry cloth, then set the lid in place. Screw on the lid just until tight. Don't overtighten the lid.

Processing

Arrange the jars in your pressure canner, put on the lid and close the vents. Turn the heat to high and bring the canner up to the appropriate pressure. Process at pressure for 10 minutes. Consult a canning guide for the appropriate amount of pressure for your altitude.

Turn off the burner and remove the pressure cooker from the heat. Allow the pressure to drop to zero before opening the lid. Remove the jars from the canner and set on a towel on the counter to cool. Label and store in a cool, dry place.

Add This Homemade Orange Liqueur Recipe to Your Bar Cart

0

Preparing homemade infused liqueurs is a fun DIY project that can yield tasty, unique results. It's an impressive treat to offer up at parties or as a housewarming gift. There's also a lot of room for creativity. This recipe is for a basic orange liqueur that can be used as a starting point that leads to a world of possibilities. While I recommend preparing the basic recipe at least once to get a feel for it, on subsequent tries you can add in whole spices such as cinnamon sticks, or try swapping the orange zest for tangerines. Grand Marnier, one of the most popular orange liqueurs, is prepared using a Cognac base. I recommend using Cognac (or regular brandy) for a similar liqueur. Grain alcohol such as Everclear will create a much more intense liqueur.

How to Make Homemade Orange Liqueur | eHow

Video of the Day

Tip

This process takes several weeks, so be sure to plan in advance if you're making this to give as a gift or for a specific celebration.

Things You\’ll Need

  • 4 to 5 large naval oranges

  • 2 cups cognac, brandy or Everclear

  • 1 ½ cups granulated sugar

  • 1 ½ cups water

  • Vegetable peeler

  • Cutting board

  • Paring knife

  • Quart-sized container or jar with a tight fitting lid

Step 1: Gather Your Ingredients and Tools

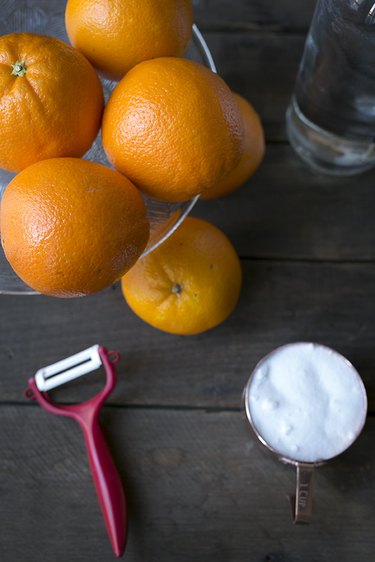
Since this process takes several weeks, you only need the oranges, alcohol, vegetable peeler, cutting board, paring knife and jar to get started. The sugar and water come later.

How to Make Homemade Orange Liqueur | eHow

Step 2: Peel the Oranges

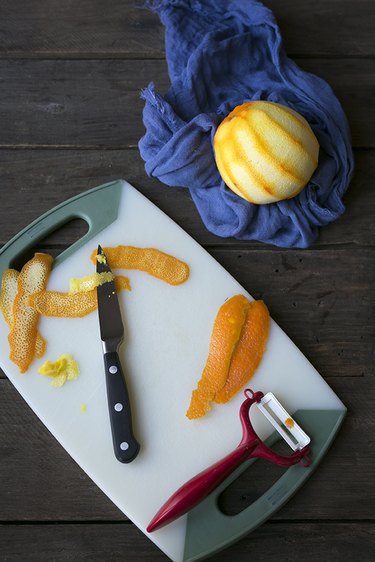
After rinsing and drying the oranges, peel them and set aside the fruit for another use. You only want to use the orange zest for this recipe, not the white pith, which is very bitter.

How to Make Homemade Orange Liqueur | eHow

Step 3: Remove the White Pith

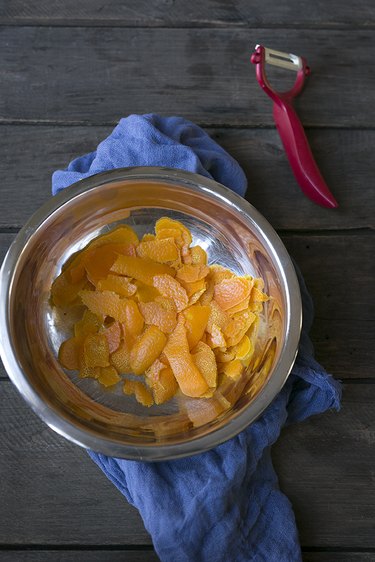
To remove any excess white pith, place the peel zest-side down on a cutting board. Press a paring knife flat against the zest and gently slice/scrape away the white bits. This process takes some patience.

How to Make Homemade Orange Liqueur | eHow

Step 4: Combine the Zest and Alcohol

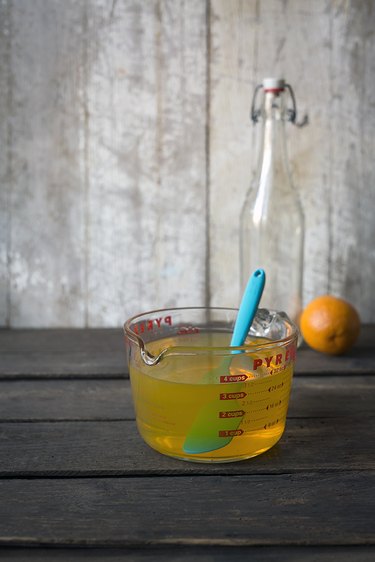
Once all of the white pith has been removed, place the zest in the container along with the alcohol and secure with a lid. Set aside for 3 to 4 weeks (the longer, the better).

How to Make Homemade Orange Liqueur | eHow

Step 5: Prepare the Simple Syrup

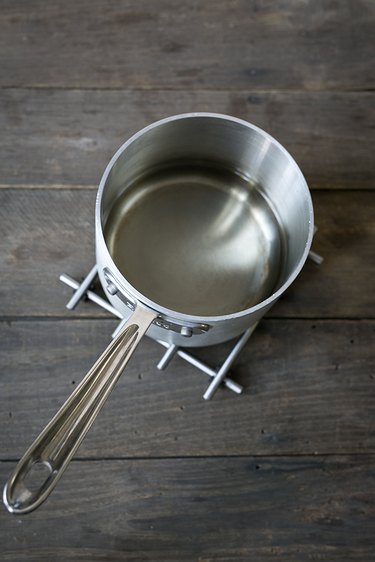
After 3 to 4 weeks have passed, it's time to finish the liqueur. Place 1 ½ cups of granulated sugar and 1 ½ cups of water in a medium-sized saucepan and bring to a simmer over medium-high heat. Once the sugar has completely dissolved, remove from the heat and allow to cool.

How to Make Homemade Orange Liqueur | eHow

Step 6: Strain the Zest

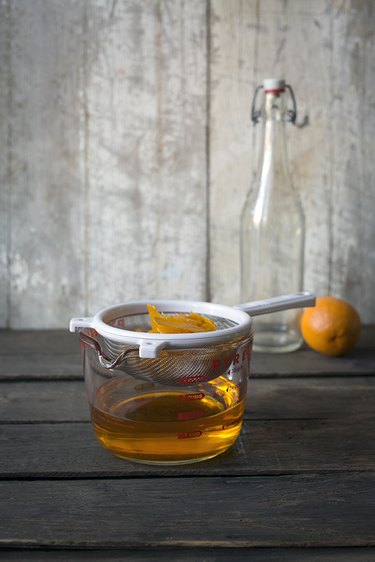
Strain and discard the orange zest, leaving only the infused alcohol.

How to Make Homemade Orange Liqueur | eHow

Step 7: Add the Simple Syrup

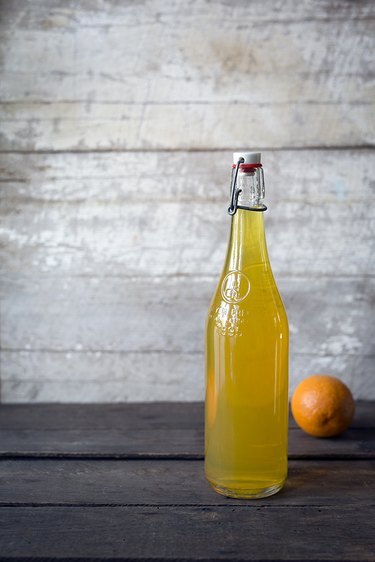
Stir in the simple syrup. And now it's ready for you to enjoy!

How to Make Homemade Orange Liqueur | eHow

This recipe yields approximately 4 cups of orange liqueur.

How to Make Homemade Orange Liqueur | eHow

Easy Recipe Ideas

Now that you have your orange liqueur, how are you going to use it? Mix up some of these delicious cocktails.

Note: They will work better with the cognac or brandy versions, and can all be garnished with an orange wedge or shaved orange peel. Each yields 1 drink.

  • Combine 1 ounce orange liqueur with 4 ounces Champagne or good quality sparkling wine.
  • Combine 2 ounces orange liqueur, 2 ounces fresh squeezed orange juice and 4 ounces club soda.
  • Combine 6 ounces hot chocolate with 2 ounces orange liqueur. Optional: top with whipped cream.

Cast Iron Skillet Recipe: Calzone

0

This cast iron skillet calzone is delicious. It's a versatile, quick and easy meal that comes together in no time, and is bursting with cheesy, comforting flavor. It's the perfect weeknight dinner to have in your repertoire.

This calzone is an easy and delicious weeknight dinner.

Video of the Day

Things You\’ll Need

  • 2 tablespoons olive oil

  • 1/2 small onion, chopped

  • 2 cloves of garlic, minced

  • 1 tablespoon dried oregano

  • 1 pound (450 grams) ground beef

  • 1 cup marinara sauce

  • 1 pound (450 grams) fresh pizza dough, or frozen pizza dough thawed

  • 1 cup mozzarella cheese, shredded

  • 1 cup finely chopped vegetables, e.g. peppers, zucchini, mushrooms

  • 1 small egg, lightly beaten for the egg wash

  • 1/4 cup parmesan cheese, grated

  • Salt and pepper

  • Fresh herbs for garnishing (optional)

Step 1: Cook the Filling

Pre-heat the oven to 400 degrees Fahrenheit (200 degrees Celsius).

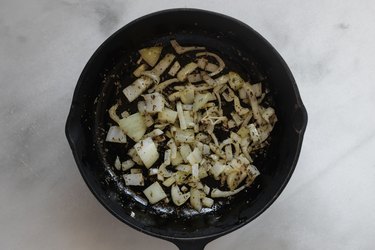
In a large cast iron skillet, heat the oil until warm and shining. Add the onion, garlic and oregano. Cook, stirring often, until translucent for about 5 minutes.

Cook until translucent.

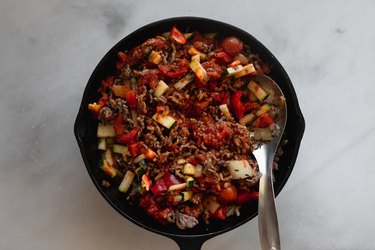
Add the ground beef and cook until browned, a further 5 minutes. Make sure to use a wooden spoon to break up the meat as it cooks. Stir in the marinara sauce and vegetables. Season with a little salt and pepper.

Remove the mixture from the skillet and place it into a separate bowl. Wipe out the skillet with a paper towel. Set aside.

Combine the filling then set aside.

Step 2: Roll Out the Dough

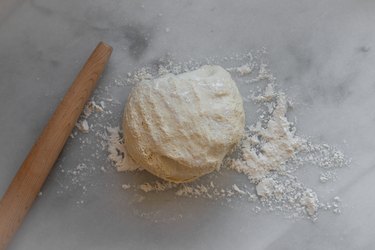
Divide the pizza dough in half and set it onto a lightly floured work surface. Roll each half of the dough out and into a rough circle, a few inches larger in size than the skillet you are using.

Roll out the dough on a lightly floured surface.

Step 3: Assemble the Calzone

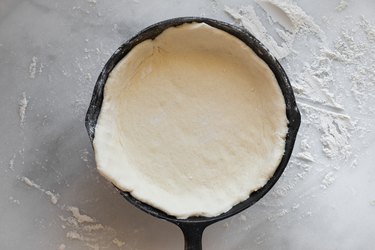
Place one of the dough circles into the base of the skillet, making sure to gently press around the sides and into the edges.

Press half of the dough into the base of the skillet.

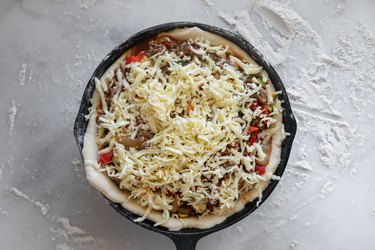
Sprinkle half of the mozzarella cheese over the dough. Top with filling, then sprinkle over the remaining mozzarella cheese. Season with a pinch of salt and pepper.

Add the filling and cheese.

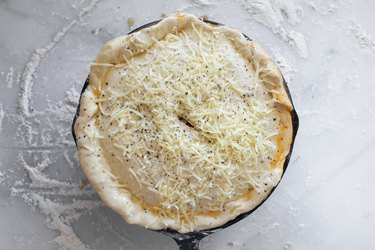
Place the remaining dough circle over the top of the skillet. Pinch and roll the edges of the dough halves together to seal. Brush the top with a little of the egg wash, then sprinkle over the parmesan cheese. Use a knife to slice a small vent into the top crust.

Sprinkle the top with cheese.

Step 4: Bake

Bake the calzone for 25 to 30 minutes, or until golden brown, fragrant, and the filling is bubbling.

Bake until golden brown.

Step 5: Serve & Enjoy

Remove from the oven and let it stand for 10 minutes before garnishing with fresh herbs, slicing, and serving.

Slice, serve, and enjoy the calzone!

How to Make Biscuits on the Grill

0

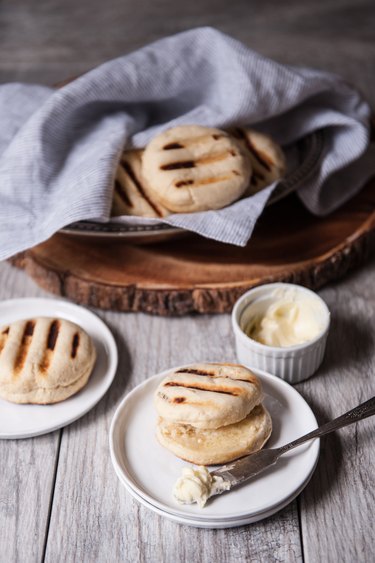
From cooking peaches to pork chops to pizza, there is no end to what a grill can do for you. But, can you grill biscuits? Yes you can! Biscuits are best cooked over fairly high heat (higher than the standard 350 degrees Fahrenheit that most baking recipes call for), making the grill a fantastic choice. The nice smokey char of a grill is a beautiful contrast to the buttery comfort flavors of a warm biscuit. Want to up the game a bit? Add some compound butter to put those biscuits over the top.

How to Make Biscuits on the Grill

Video of the Day

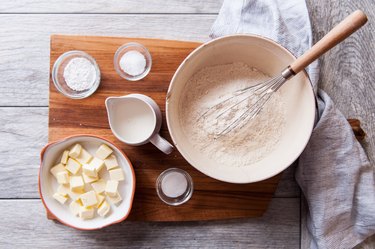
Things You\’ll Need

  • 2 cups all-purpose flour, sifted

  • 2 teaspoons sugar

  • 1 tablespoon baking powder

  • 1 teaspoon salt

  • 6 tablespoons cold unsalted butter

  • 1 cup whole milk (or buttermilk)

How to Make Biscuits on the Grill

Tip

Cold butter works best! Make sure your butter is super cold when you start making biscuits. Cut into cubes and place back in the fridge while you prep everything else.

Step 1: Cut in the Butter With the Dry Ingredients

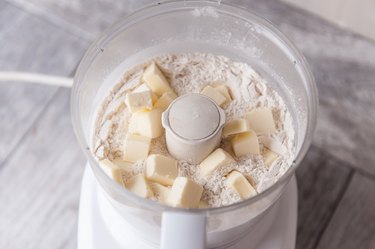
Add flour, sugar, baking powder and salt to a food processor. Pulse a few times to combine. Add the cold cubes of butter and process until well combined with the flour.

How to Make Biscuits on the Grill

Tip

Cutting in the cold butter quickly is the key to great biscuits — and food processors do this well. Alternately, you can combine the dry ingredients in a large bowl and cut the butter in by hand.

Step 2: Add the Milk

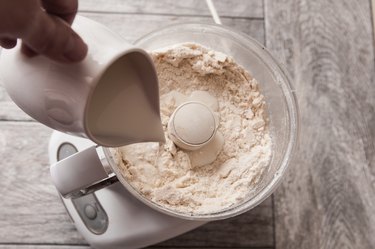
Pour the milk into the food processor and pulse until just combined. Do not overmix.

How to Make Biscuits on the Grill

Step 3: Form the Dough

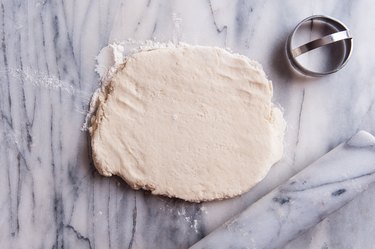
Using either a cold marble rolling pin, or your hands, form the dough into a rectangle. If using a rolling pin, use as few strokes as possible.

How to Make Biscuits on the Grill

Step 4: Cut the Biscuits

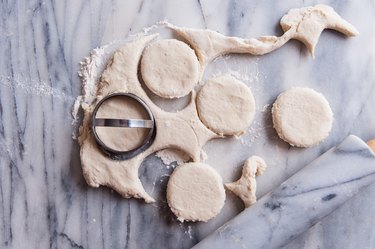
Using a circle biscuit cutter, cut out six to eight biscuits.

How to Make Biscuits on the Grill

Tip

Resist the twist! Although it's a natural instinct to want to twist the biscuit cutter, resist the urge! The twisting motion will seal the edges making it harder for the dough to rise, resulting in dense biscuits. Push straight down, and come straight back up.

Step 5: Place the Biscuits on a Hot Grill

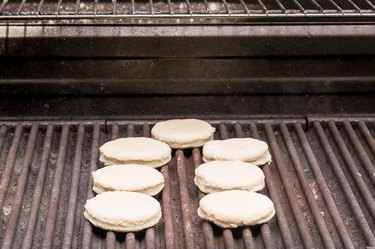
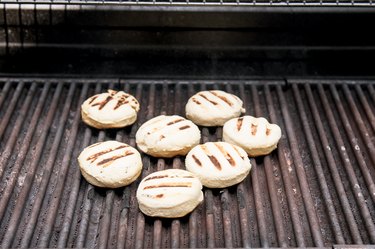
Preheat the grill to medium-low. Place the biscuits on the grill, close the lid and allow to cook until the underside has grill marks and dough releases from the grates, about 3 minutes.

How to Make Biscuits on the Grill

Tip

Watch the heat! Grills generally heat up between 500 degrees F and 800 degrees F. Most grilling recipes call for the heat to be about 600 degrees F. Biscuits are best at around 500 degrees F so keep the heat low to avoid burning your biscuits before the center is cooked.

Step 6: Flip and Finish Cooking

Flip the biscuits and allow to cook until the center is cooked through, about 2 minutes.

How to Make Biscuits on the Grill

Tip

If your biscuits start to burn before the center is cooked, move them to the warming rack of the grill, close the lid and continue cooking until done.

How to Make Biscuits on the Grill

Butter \’Em Up!

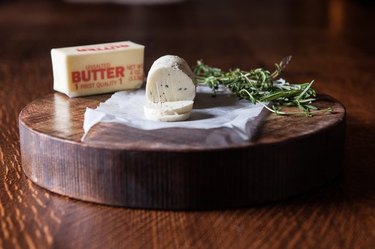
This compound butter recipe is the perfect pairing for grilled biscuits — and it's so easy to make!

Homemade compound butter recipe

Can You Substitute Irish Oatmeal for Oatmeal?

0

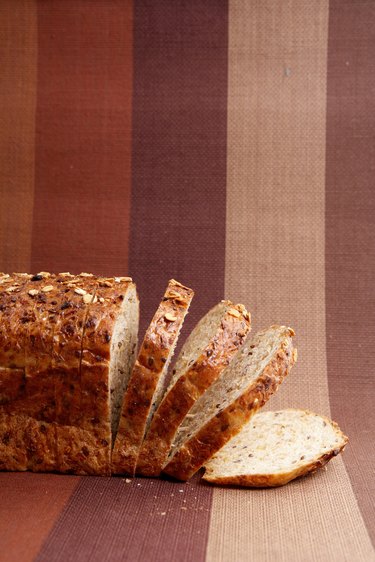
Sliced loaf of bread Irish oatmeal produces a chewy texture in baked goods. Image Credit: Jupiterimages/Photos.com/Getty Images

Irish oatmeal, also known as steel-cut oatmeal or pin oatmeal, produces a coarser, nuttier porridge than traditional American rolled oats. This form of oatmeal is produced by hulling the oat and slicing it into multiple pieces rather than flattening it between rollers. Most cooks use Irish oatmeal to make hot breakfast cereals, but you can also use it as a substitute for other kinds of oats. This form of oatmeal can change the texture and cooking time of your baked goods slightly, but it's still an effective addition to many recipes.

Video of the Day

Old-Fashioned Rolled Oats

Rolled oats undergo a flattening process during which they are steamed and pressed between two rollers. This makes the oats easier to digest and causes them to cook more quickly. If your recipe calls for this kind of oatmeal, substitute Irish oatmeal cup for cup, but increase the cooking time by 10 to 15 minutes. Check the recipe frequently to keep the food from burning. You can also allow batters and doughs to rest for an hour in order to let the oats absorb more water — this works better for cookies and other recipes that have a very short cooking time. After resting, bake the recipe according to the directions.

Oat Groats

The term "groat" refers to the whole, hulled oat grain. Sometimes used to make very sturdy porridges and baked goods, this kind of oat also works well in soups. You can substitute Irish oatmeal directly for oat groats, but you should expect a slightly different texture. The smaller size of Irish oatmeal causes it to cook more quickly and produce a softer texture overall.

Quick Oats

Quick oats are a form of rolled oat that has been treated to make it cook even faster. They have been pressed thinner than old-fashioned rolled oats. Some brands also undergo chopping to speed up the cooking process. It can be difficult to substitute Irish oatmeal for this product without significantly changing the texture of the final recipe. You can pulse Irish oatmeal in a coffee or spice grinder to reduce the size of the particles and bring cooking times closer to that of quick oats.

Instant Oats

Also called instant oatmeal, this product is composed of very thin, broken rolled oats. Some brands use steam heat to partially pre-cook the oats, making it possible to produce a breakfast porridge with just hot water. Instant oatmeal products usually contain flavorings and sweetener. When reconstituted, they produce a fine porridge with no identifiable grains. In recipes, instant oatmeal thickens and flavors but adds relatively little texture. To substitute Irish oatmeal for this product, grind the oats to a coarse powder in a food processor or coffee grinder.

Twix Candy Bar Cake Recipe

0

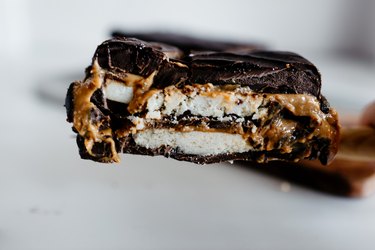
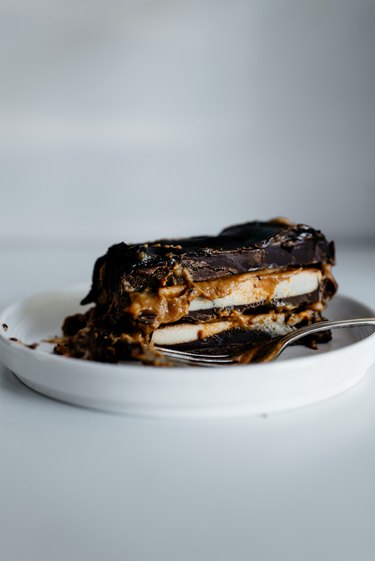
This giant Twix Candy Bar Cake is a delicious, decadent and easy dessert to make. Not only does it look impressive, but it doesn't take long to create and only requires 3 simple ingredients. Just look at those gooey caramel and chocolate-y layers! It's the perfect cake for any celebration.

This giant Twix Candy Bar Cake is such an impressive dessert that is simple to make!

Things You\’ll Need

  • 28 ounce / 800 grams milk chocolate

  • 14 ounce / 400 grams thickened caramel sauce or dulce de leche

  • 20 shortbread biscuits

  • Flaked salt, cacao nibs, crushed peanuts (or other decorations of choice), optional

Step 1: Chop and melt the milk chocolate.

Grease and line a 8 x 5 inch (21 x 12 centimetre) loaf tin. Let the parchment paper slightly overhang the sides. Set aside.

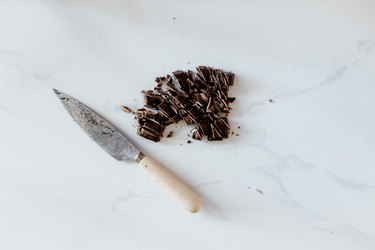
Finely chop the milk chocolate and place it into a heat-proof bowl set over a saucepan of barely simmering water. Do not let the base of the bowl touch the water.

Finely chop the milk chocolate.

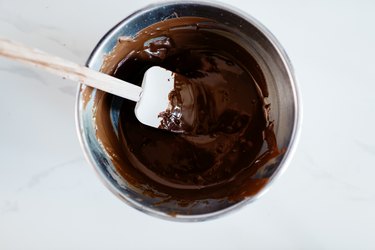
Heat, stirring the chocolate often, until it is melted and smooth. Pour the melted chocolate into a large pouring jug or measuring glass.

Heat the chocolate until it it smooth and glossy.

Step 2: Make the cake.

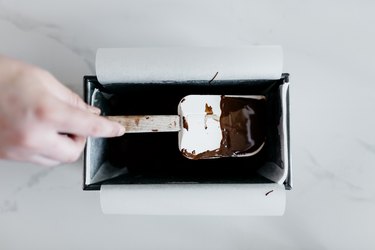
Pour ¼ of the melted milk chocolate into the bottom of the loaf tin. Use a rubber spatula to smooth it into an even layer. Set the tin in the freezer to set the chocolate until firm, about 10 minutes.

Spread the melted milk chocolate into an even layer.

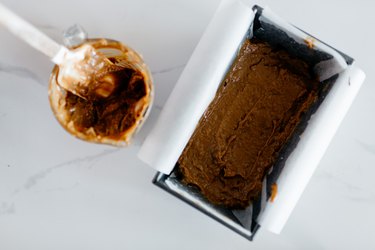
Remove the loaf tin from the freezer. Pour half the caramel sauce (or dulce de leche) over the solid chocolate base, using a rubber spatula or the back of a spoon to spread it until smooth.

Spread the caramel over the frozen chocolate layer.

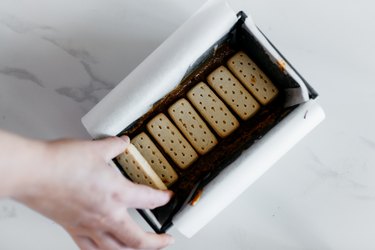
Gently press half of the shortbread biscuits into the caramel layer, making sure that the biscuits evenly touch. Return the tin to the freezer and freeze until just firm, about 10 minutes

Press the shortbread biscuits into the caramel in an even layer.

Once firm, remove the tin from the freezer and repeat the layering process above. Again, pour ¼ of the melted milk chocolate over the shortbread layer and smooth until even. Freeze until firm. Then, spread over the remaining caramel and press in the shortbread biscuits. Freeze until firm. Then, pour 1/4 of the melted milk chocolate over for a final layer. Freeze the cake until very firm, 20 minutes before glazing with the remaining melted milk chocolate.

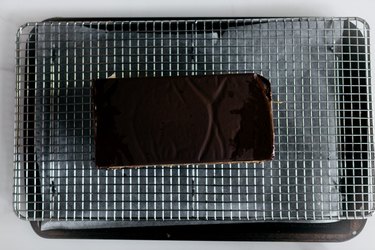
Once firm, carefully unmold the cake out and onto a wire cooling rack set over a lined baking tray. Pour the remaining melted milk chocolate over the entire cake to coat the top and sides, letting any excess drip down and onto the baking tray. Use a spoon to make a few, rough, swirl indentations on top of the cake.

Place the cake onto a cooling rack set over a lined baking tray for no mess.

Tip

At this point, while the chocolate is still soft, you can now decorate the cake with whatever you might desire!

Return the cake to the freezer and freezer until the coating is just set before slicing and serving, about 10 to 15 minutes.

Step 3: Slice and serve!

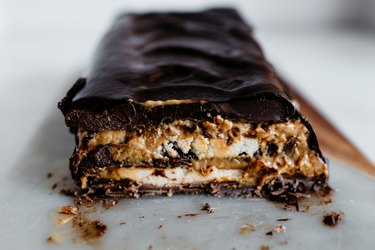
Set the cake out and onto a serving platter. Then, using a just warm knife, carefully cut even, horizontal slices. When sliced, the cake should reveal gooey, distinct and delicious layers!

This cake has the most beautiful and delicious interior!

Store the cake in the refrigerator for up to 5 days, or in the freezer, for up to 1 month. Let the cake come to a temperature that's just cooler than room heat before serving.

Serve and enjoy your giant Twix Candy Bar Cake!

Smoky Chickpea Buddha Bowl with Tahini Sauce Recipe

0

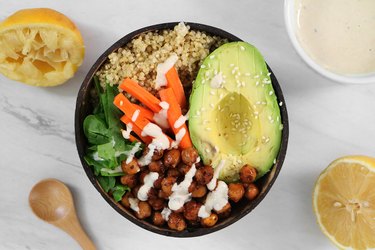
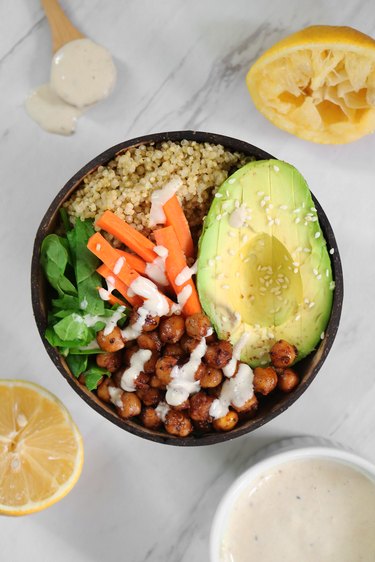
Buddha bowls are big right now, and it's easy to see why. They're delicious, nutritious and fun to make. It doesn't hurt that they look beautiful, too! Typically, a Buddha bowl includes whole grains, protein, healthy fats and lots of veggies. The result is a complete meal that's both tasty and wholesome. To make one for yourself, try this smoky chickpea Buddha bowl with lemon tahini sauce. From the flavorful spices to the nutty notes, you'll adore this mouthwatering recipe.

Smoky chickpea Buddha bowl

Video of the Day

Baked Smoky Chickpeas

Things You\’ll Need

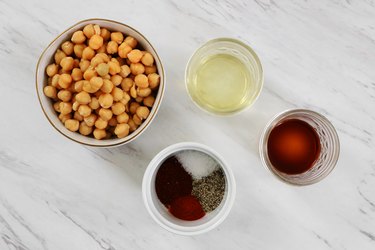
  • 1 1/2 cup chickpeas (15.5 ounce can)

  • 2 tablespoons olive oil

  • 1/2 to 1 tablespoon liquid smoke

  • 1/2 teaspoon fine sea salt

  • 1 teaspoon ground black pepper

  • 1 teaspoon chili powder

  • 1/2 teaspoon smoked paprika

Ingredients for baked smoky chickpeas

Step 1

Pre-heat the oven to 425° Fahrenheit.

In a bowl, toss the chickpeas with the oil, liquid smoke, and spices. Add more or less liquid smoke based on your preference.

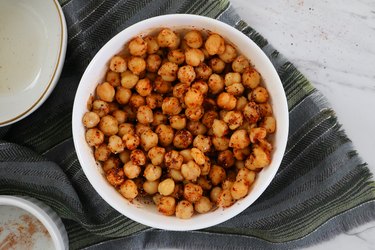
Smoky chickpeas

Step 2

Transfer the chickpeas on to a baking sheet. Bake for 20 minutes or until crispy, tossing once halfway through.

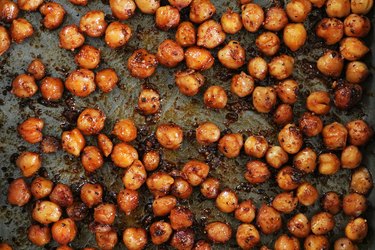
Baked smoky chickpeas

Lemon Tahini Sauce

Things You\’ll Need

  • 3/4 cup tahini

  • 2/3 to 3/4 cup water

  • 3 to 4 tablespoons lemon juice

  • 1 tablespoon olive oil

  • 1 tablespoon minced garlic

  • Salt and pepper, to taste

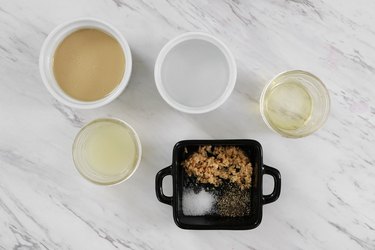
Ingredients for lemon tahini sauce

Step 1

Combine all of the ingredients in a high-powered blender. For a thicker sauce, use 2/3 cup water. For a thinner sauce, use 3/4 cup or more. You can also adjust the lemon juice, garlic and spices according to your taste buds.

Blend until smooth. To store leftover tahini sauce, use an air-tight container and keep in the refrigerator.

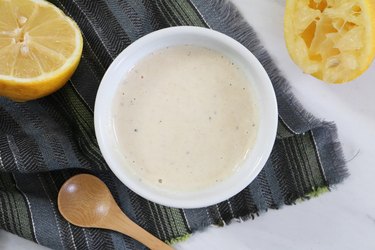
Lemon tahini sauce

Tip

This tahini sauce is easy to customize. For example, you can add less lemon juice and more garlic. Make a thicker sauce by mixing equal parts tahini sauce and yogurt. Add fresh herbs like cilantro, oregano or dill for even more flavor.

Smoky Chickpea Buddha bowl

Things You\’ll Need

  • Whole grains (quinoa, brown rice, etc.)

  • Smoky chickpeas

  • Vegetables

  • Healthy fats (avocado, almonds, etc.)

  • Lemon tahini sauce

To construct your Buddha bowl, combine whole grains, healthy fats and vegetables of your choice. Ideas for veggies include leafy greens, carrots, broccoli and sprouts. Add the smoky chickpeas, tahini sauce and a sprinkle of sesame seeds (optional).

Remember, when it comes to Buddha bowls, the possibilities are endless. The smoky chickpeas and tahini sauce pair well with so many types of vegetables.

Enjoy!

Smoky chickpea Buddha bowl with tahini sauce