Home Blog Page 56

How to Freeze Green Peppers for Stuffed Peppers

0

Things You\’ll Need

  • Towel

  • Knife

  • Pot

  • Bowl

  • Baking sheet

  • Storage bag

... Stuffed peppers don\’t require fresh peppers.

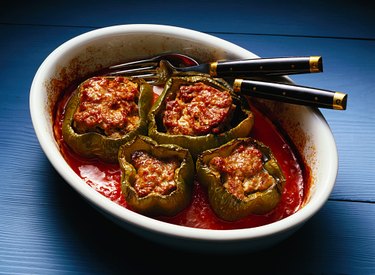
Green peppers stuffed with meat, rice, breading or other vegetables makes an appetizing main course. Freezing excess peppers for later stuffing ensures you always have ingredients on hand. Peppers are typically frozen without blanching, but stuffed peppers become soggy if unblanched frozen peppers are used as the shell. Blanching stops the enzyme process in the pepper flesh so the peppers retain more of their color and flavor when later baked with the stuffing.

Video of the Day

Step 1

Wash the green pepper under cool-running water. Do not soak the pepper or it absorbs moisture, which causes freezer burn. Dry the surface of the pepper with a towel.

Step 2

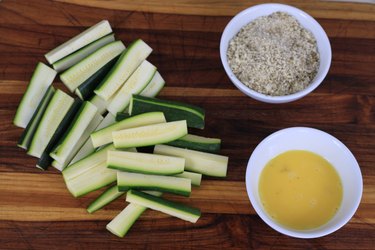
Cut the top off the pepper with a sharp knife. Remove the seeds from the interior of the pepper and dispose of them.

Step 3

Bring a large pot of water to a boil. Set bowl of ice water next to the boiling water.

Step 4

Plunge one pepper into the boiling water and boil for 1 minute. Remove the pepper from the water with a slotted spoon and place it in the ice water for 30 to 60 seconds.

Step 5

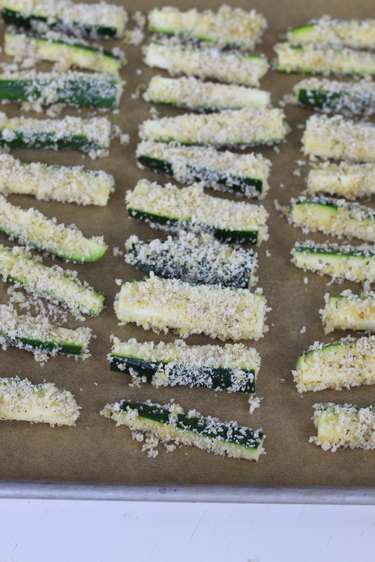
Dry the pepper with a towel and set it upright on a baking sheet. Arrange the peppers so they are not touching one another.

Step 6

Place the peppers inside the freezer. Freeze for 2 to 4 hours or until they are frozen solid.

Step 7

Transfer the frozen peppers to a storage bag. Pack the peppers in the bag loosely so they don't become crushed or broken.

Tip

You can also stuff your peppers with your favorite filling before freezing. Thaw and cook the stuffed peppers as directed in your recipe.

Cut the peppers in half lengthwise before blanching if you prefer smaller stuffed peppers.

Difference Between Japanese & Chinese Mandarin Oranges

0

... There are two common varieties of mandarin oranges: Japanese and Chinese mandarin oranges.

Mandarin orange is one variety of citrus fruit which can be eaten plainly or used as fruit salad ingredient. Mandarin oranges may also be used to give a flavorful twist to other recipes like cakes and viands. There are two common varieties of mandarin oranges: Japanese and Chinese. Japanese mandarin oranges and Chinese mandarin oranges are generally the same. There are just a few form, production, marketing and taste differences.

Video of the Day

Peels

Both Japanese and Chinese mandarin oranges became highly marketable in other countries especially during holiday seasons. Both have a sweet and delicate flavor which contributes to the fruit's marketability. The difference between Japanese and Chinese mandarin oranges is the peels. Japanese mandarin orange has a thick peel covering the top of the fruit giving it a strong resistance to cold conditions. Chinese mandarin orange has a tender peel which makes it delicate to ship. Between these two, it would be easier to export Japanese mandarin oranges because they do not over ripen quickly making it a better choice for mandarin orange canning businesses.

Canned Production

Canned mandarin orange is well received in the country today. Prior to canning, the white piths are peeled to remove the bitter taste. Chinese mandarin orange has few fruit seeds and thicker white pith than other oranges. On the other hand, Japanese mandarin orange is used by more manufacturing firms because it is a seedless variety of mandarin orange with thinner white pith.

Appearance Fruit Rind

Japanese and Chinese mandarin oranges can be easily peeled without using utensils. The difference between the two can be seen in the fruit rind and stem. Japanese mandarin oranges are covered with a thicker rind with clear stems while Chinese mandarin oranges have loose rinds and a few thorns on the stem. Japanese mandarin oranges can also be divided into equal segments without squeezing the juice out.

Taste

There is a minor taste difference between Japanese and Chinese mandarin oranges. This slight taste difference between the two varieties of mandarin orange could sometimes be unnoticed. Japanese mandarin oranges have a fuller flavor which is sweet but with a minor sour taste. Chinese mandarin oranges is also called "honey citrus of Wenzhou" because of its sweet taste. Other than the minor sour taste present in Japanese mandarin oranges, the two do not have any other taste difference.

How to Store Fresh Cranberries

0

Things You\’ll Need

  • Clean towel

  • Sealed plastic bag or airtight container

  • Paper towels

  • Cookie sheet

  • Wax paper

... Store cranberries properly to keep them fresh.

Once cranberries ripen, they appear bright red in color and have a sweet and tart flavor. If you have an excess of cranberries, you can store them in your refrigerator or freezer and use them in recipes over time. Storing the cranberries in the refrigerator provides short-term storage of up to two months, while freezing the cranberries will yield a storage life of up to one year.

Video of the Day

Store in Refrigerator

Step 1

Rinse fresh cranberries under cool water to remove debris and dirt.

Step 2

Dry the cranberries on a clean towel.

Step 3

Place the fresh cranberries in a sealed plastic bag or airtight container.

Store in Freezer

Step 1

Inspect the cranberries carefully. Remove any that do not feel firm, appear wrinkled or have splits.

Step 2

Remove the stems from the cranberries. Rinse the cranberries under cool water and dry them off with paper towels.

Step 3

Line a cookie sheet with wax paper. Place the cranberries on the cookie sheet in a single layer and then freeze them.

Step 4

Remove the cranberries once they are frozen. Place them in a plastic zipper-sealed bag or an airtight container. Freeze one cup at a time for best results.

Warning

Do not thaw frozen cranberries. Rinse them in cold water and use them as directed by the recipe.

Healthy & Delicious Oven Baked Veggie Fries 3 Ways (Plus Dip!)

0

From green beans to zucchini, oregano to cumin, the flavor combinations for oven baked veggie fries are endless but the results are always the same: deliciously nutritious!

baked veggie fries 3 ways

Video of the Day

Zucchini Fries

Zucchini Fries

Things You\’ll Need

  • 2 medium zucchini

  • 1/2 teaspoon salt

  • 1/4 teaspoon pepper

  • 1 teaspoon dried oregano

  • 1/2 cup panko breadcrumbs

  • 1 egg, beaten

Step 1

First, slice the zucchini into long, thin wedges. Then combine the spices with your breadcrumbs.

ingredients for zucchini fries

Step 2

Next dip each wedge in the beaten egg, then the breadcrumb mixture until it's fully coated.

coating zucchini fries

Step 3

Bake at 425 degrees F on the top rack for 15 minutes until golden brown.

zucchini fries on parchment

Sweet Potato Fries

sweet potato fries

Things You\’ll Need

  • 2 medium-large sweet potatoes

  • 3 tablespoons olive oil

  • 1 teaspoon salt

  • 1 teaspoon cinnamon

  • 1/2 teaspoon cumin

  • 1/2 teaspoon fresh parsley, finely chopped

Tip

No need to peel your sweet potato. The skins add extra flavor and fiber!

Step 1

Slice the sweet potatoes into fries and place them on a parchment lined baking sheet. Use your hands to coat every fry with oil and spices.

making sweet potato fries

Step 2

Bake at 425 degrees F for 20-25 minutes until crisp.

baking sweet potato fries

Green Bean Fries

green bean fries

Things You\’ll Need

  • 1 pound fresh green beans, washed and trimmed

  • 1 egg, beaten

  • 1/4 cup Parmesan cheese

  • 1 teaspoon dried garlic

  • 1/2 teaspoon salt

  • 1/2 cup ground nuts (almonds, cashews or walnuts)

Step 1

Use a food processor to grind the nuts or buy almond meal, usually in the flour section.

ingredients for bean fries

Step 2

Combine egg, spices and parmesan and coat every bean. Sprinkle with ground nuts and use your hands to make sure each bean is evenly coated.

green bean fries seasoning

Tip

Depending on the freshness of your green beans, you could also spray them with olive oil at this step. Beans that have dried out over time will be more delicious with the added moisture.

Step 3

Move to a parchment lined baking sheet, allowing space in between every green bean fry. Bake at 425 degrees F for 15 minutes.

baking green bean fries

The Best Dip for Veggie Fries

With all the savory flavors of these veggie fries, a yogurt based dip works perfectly.

dip with zucchini fries

Things You\’ll Need

  • 1 cup whole Greek yogurt

  • 1/4 cup fresh lime juice (juice from 1 or 2 limes)

  • 1/2 teaspoon salt

  • 1/4 teaspoon pepper

  • 2 teaspoons fresh parsley, finely chopped

Step 1

Just mix all the ingredients together and serve with any of these fries.

Tip

For added creaminess, include a tablespoon of extra virgin olive oil or puree half an avocado!

Sheet Pan Cauliflower Fajitas Recipe

0

Are you looking for a delicious, no-fuss weeknight meal? Try these sheet pan cauliflower fajitas. Not only is this vegetarian and vegan meal easy to make but it calls for minimal cleanup too. It's also perfect for meal prep; just whip up a batch before the work week and enjoy it over the next few days.

Sheet pan cauliflower fajitas

Video of the Day

Things You\’ll Need

  • 1 small head cauliflower, chopped into florets

  • 3 medium bell peppers, deseeded and sliced

  • 1 medium yellow or white onion, sliced

  • 4 to 6 tablespoons avocado oil

  • 1 tablespoon chili powder

  • 1 to 2 teaspoons cumin

  • 1 teaspoon onion powder

  • 1/2 teaspoon garlic powder

  • 1/2 teaspoon smoked paprika

  • 1/2 teaspoon ground black pepper

  • 1 teaspoon salt

  • 1 teaspoon dried oregano

  • Cilantro, avocado and/or fresh lime juice (for garnish)

  • 10 (6-inch) whole wheat or corn tortillas

Ingredients for sheet pan cauliflower fajitas

Tip

To make these fajitas vegan, use vegan tortillas. (Most tortillas are vegan, but it's always a good idea to double-check the product packaging.)

Step 1

Preheat the oven to 400°F. Line a large baking sheet with aluminum foil or a silicone baking mat. In a small bowl, combine all the spices. Mix well.

Mix spices together

Tip

You may need to use an extra-large baking sheet depending on the size of your vegetables.

Step 2

Transfer the cauliflower, bell peppers and onions to a large bowl. Toss with oil and spices until the vegetables are completely coated, adding more oil as necessary.

Toss vegetables with oil and spices

Step 3

Transfer the cauliflower, bell peppers and onions to the baking sheet. Try to spread the vegetables in a single, mostly even layer.

Transfer the vegetables to a large baking sheet

Step 4

Bake for 20 to 23 minutes, tossing once halfway. The vegetables are ready once they become slightly crispy, and the edges turn black.

Bake cauliflower, bell peppers and onions

Tip

The cauliflower in this recipe will have some crunch. If you prefer more tender cauliflower florets, add them to the sheet first (without the other veggies). Bake them for 10 minutes and then add the bell peppers and onions. Return the pan to the oven and bake for 20 minutes.

Step 5

Warm the tortillas in the microwave for 30 seconds. Add the cauliflower mixture and top with cilantro, avocado or fresh lime juice.

Completed sheet pan cauliflower fajitas

Can I Cook Momos in the Microwave?

0

Modern conveniences like the microwave make steaming momos a breeze. These traditional dumplings of Tibet and Nepal are stuffed with a mixture of vegetables or meat and wrapped in a tender flour-based dough. Make this sumptuous street food favorite at home in less time by finishing momos in the microwave with the help of a microwave steamer.

Momo Basics

Momos are traditional dumplings filled with a mixture of vegetables such as carrots, cabbage, mushrooms and onions, as well as other meats such as chicken, buffalo and goat. Completed by steaming or frying to set the handmade dough, momos are typically served with dipping sauces such as hot chili sauce, tomato chutney or other spicy, salty and sweet sauces that pair well with the mild flavors of the momos. Serve momos piping hot upon completion.

Video of the Day

Making Momos

Momos begin by mixing flour and water together until a stiff dough is formed. After a 15-minute rest, the dough is ready to be divided and filled. Create a filling mixture using your favorite vegetables cut into a small dice or julienne and seasoned with soy sauce, sesame oil and salt. If using a meat mixture, cook it first before filling the dumplings.

Filling the Dumplings

Divide the dough into small, equal portions that are a little smaller than a ping pong ball. Roll each piece into a thin round and fill with a spoonful of the prepared filling. For more uniform wrappers, roll the dough rounds individually and use a cup or biscuit cutter to cut the dough into exact circle shapes about 2 to 3 inches in diameter. Once filled, pull the sides of the momo together to meet in the center top of the dumping, a necessary step that gives momos their unique look. Pinch the edges together so that they are sealed and hold together.

Steaming Momos

Steam the momos in your microwave to finish them. While a typical microwave steamer will work, a microwave idli maker also doubles perfectly for steaming momos. Place the momos in a lightly oiled microwave steamer, allowing space between them to prevent touching and sticking. Fill the steamer with water as directed in your steamer's instructions and steam the momos for three minutes in your microwave. Take caution when removing the cover of the steamer, as the steam escaping can cause burns.

How to Frost Drinking Glasses

If you are hosting a cocktail party, it is a good idea to know a few basic bartending tricks. Many people enjoy drinking beer, or other cocktails, from a frosted mug or glass. Frosting a glass is a very simple procedure. Several different methods may be used to frost a glass or beer mug; experiment with the techniques and choose the one that works best for you.

Step 1

Rinse the glass with cold water and place it in a freezer for 30 minutes to an hour. Remove the glass after it has a coating of frost.

Video of the Day

Step 2

Insert the glass into a bucket of shaved ice. Allow the glass to sit in the ice for 15 minutes.

Step 3

Fill the glass with ice and water. Stir the ice for several minutes until the glass is frosted.

Step 4

Make a sugar-frosted glass. Prechill the glass by storing in a freezer; remove the glass after it is frosted. Moisten the rim with slice of lemon or lime, then dip it in powered sugar.

How to Make No-Churn Berry Ice Cream

0

If you think you need a bulky and expensive ice cream machine to make the rich and creamy dessert, think again! With a few simple ingredients and a mixer, you can have a batch of perfectly round scoops in no time. It all starts with an easy-to-make base that's doctored up with a trio of fruit purees — raspberry, blueberries and strawberries — resulting in a refreshing cold treat that's hard to resist. It's a summer kitchen short-cut with endless possibilities.

No-Churn Berry Ice Cream

Video of the Day

Things You\’ll Need

  • 4–5 medium to large strawberries, hulled and halved

  • 1/2 cup blueberries

  • 1/2 cup raspberries

  • 1 can (14 ounces) sweetened condensed milk

  • 2 teaspoons vanilla extract

  • 2 cups cold heavy cream

  • Wax paper

  • 3-quart baking dish

  • Small food processor or blender

  • Mixer

Step 1: Make the Fruit Purees

Puree each fruit, one type at a time, using a small food processor or blender.

Fruit Purees for No-Churn Berry Ice Cream

Transfer each puree to small bowls and set them aside while making the ice cream base.

Fruit Purees

Step 2: Make the Ice Cream Base

In a stand mixer fitted with a whisk attachment (or a hand-held mixer), whip the heavy cream until soft peaks form. While the cream is whipping, combine the vanilla and sweetened condensed milk in a large bowl. Once the cream is whipped, gently fold it into the vanilla and condensed milk until everything is combined.

No-Churn Ice Cream Base

Step 3: Add the Fruit Purees to the Ice Cream Base

Scoop half of the ice cream base into the baking dish and spread it into an even layer. Then, spoon approximately half of each fruit puree on top. Using a dinner knife, swirl the fruit purees into the ice cream.

Now, scoop the remaining ice cream on top and gently spread it out evenly over the first layer. Lastly, spoon in the remaining purees and gently swirl them with the dinner knife.

Berry swirled ice cream

Step 4: Freeze the Ice Cream

Top the ice cream with a sheet of wax paper to prevent water crystals from forming on top while it freezes. Cover the dish with plastic wrap or tin foil and place it in the freezer. Allow the ice cream to freeze for at least eight hours.

Wax paper on the ice cream for freezing

Step 5: Scoop and Serve

When ready to serve, remove the ice cream from the freezer. Let it stand at room temperature for a few minutes before serving.

Scoop of no-churn berry ice cream

4 Easy Ways to Make Canned Gravy Taste Better

0

Prepackaged gravy is known for having a canned, sometimes chalky aftertaste. More often than not, it's bland. However, sometimes we don't have the luxury of preparing everything from scratch for any number of reasons. Thankfully, there are several tricks you can use to make canned gravy taste much better!

You will note that most of the ingredients listed below do not include measurements. That's because this isn't technically a recipe, and all canned gravies will taste slightly different. View all of the ingredients as suggestions, and try adding some or all of them to taste. *Remember one of the most important rules in cooking: it's easier to add than to subtract! *

Video of the Day

How to Make Canned Gravy Taste Better | eHow

Things You\’ll Need

  • Prepackaged gravy, preferably low sodium

  • Extra virgin olive oil

  • Fresh mushrooms, sliced or quartered

  • Yellow onions, diced

  • Fresh garlic, minced

  • Dry white wine, brandy or cognac

  • Chicken or turkey stock, preferably homemade

Add Sautéed Mushrooms

Mushrooms are a quick and easy way to add savoriness and depth to gravy, instantly improving the flavor. Any mushroom variety will work. Button, baby bella, and shiitake mushrooms are are excellent options. To add mushrooms: Place a large nonstick skillet over medium heat, and add a splash of extra virgin olive oil (just enough to thinly coat the bottom of the pan). Add the mushrooms, and sauté until caramelized and reduced in size. Add to the gravy.

How to Make Canned Gravy Taste Better | eHow

Add Sautéed Aromatics

As with mushrooms, sautéed onions and garlic can dramatically improve the flavor of canned gravy. In addition to yellow onions, shallots are an excellent choice. Garlic has a more subtle effect than onions, but it is still a worthy addition. Cook aromatics using the same method described in Step 1. You can use the exact same pan if adding both mushrooms and onions.

How to Make Canned Gravy Taste Better | eHow

Add Alcohol

Adding a splash of white wine, brandy or cognac can definitely improve the flavor of canned gravy. If you're adding it directly from the bottle, start with 1 teaspoon and see how it tastes. For best results, I recommend using the alcohol to deglaze the hot mushroom and/or onion skillet instead of adding it directly to the gravy. This will give the liquid a chance to reduce down slightly, and it will also infuse with the caramelized brown bits that are stuck to the skillet. You can then scrape them up using a spatula and stir both the alcohol and brown bits into the gravy. If you're deglazing a hot skillet, you can try using a few tablespoons of alcohol. If it seems like too much liquid in relation to how much gravy you're working with, let it reduce in the skillet for several minutes.

How to Make Canned Gravy Taste Better | eHow

Add Stock

Adding chicken or turkey stock can improve the taste of canned gravy as well. It's best to use homemade stock if you're going to do this. While certain low sodium brands will improve the flavor of gravy, some commercial stocks have the same flavor issues as canned gravy. Therefore, you run the risk of compounding the problem if bad stock is used.

How to Make Canned Gravy Taste Better | eHow

Tip

When you do have time to make gravy from scratch, be sure to try our Ultimate Homemade Gravy Recipe!

How to Make Canned Gravy Taste Better | eHow

How to Remove Skin From Pears

0

Things You\’ll Need

  • Slotted spoon

  • Small paring knife

  • Vegetable peeler

... Removing the skin from pears is a relatively simple task.

The pear is a nutritious fruit that is low in sodium and contains potassium, vitamin C and dietary fiber. This crisp, granular fruit is used in different types of desserts and is simple to cook with. Most recipes call for peeling pears, which can be a difficult task since the pear has an odd shape and a thin, tight skin. You can quickly and easily remove the skin from the pear by choosing young pears and a simple method.

Video of the Day

Step 1

Wash and dry the pear.

Step 2

Bring a medium-sized pot of water to a rapid boil on the stove. Place the pear into the pot and blanch it for 30 to 45 seconds.

Step 3

Use a slotted spoon to remove the pear from the water. Place the pear on a clean surface and allow it to cool slightly.

Step 4

Hold the pear firmly with one hand. Use a small, sharp paring knife and cut a shallow slit in the top of the pear. Insert the tip of the knife underneath the slit, then peel off the skin in a spiral direction. Rotate the pear in your hand and peel all the way around the pear, from stem to base.

Step 5

Use a vegetable peeler if you are having a difficult time around the awkward shape. Place the peeler at the top of the pear, then apply firm pressure as you pull the peeler down along the side of the pear. Repeat this process around the entire pear.

Tip

Place peeled pears into a bowl of cool water with one tbsp. of lemon juice. This will keep them from turning brown before you use them.