Home Blog Page 52

Tuna Melt Stuffed Peppers Recipe

0

For a tasty twist on the classic tuna melt sandwich, try these stuffed peppers. The filling is made with canned tuna, veggies and Greek yogurt, which gives the mixture a creamy consistency. Next, the peppers are topped with cheese and chives, and then they are baked until melted and bubbly. Serve the bell peppers on their own or with a side of brown rice.

Tuna melt stuffed peppers

Video of the Day

Things You\’ll Need

  • 4 large bell peppers, any color

  • Olive oil

  • 1 teaspoon salt

  • 1/2 teaspoon ground black pepper

  • 1 cup Greek yogurt, mayonnaise or sour cream

  • 2 tablespoons Dijon mustard

  • 2 tablespoons lemon juice

  • 4 (5-ounce) cans of tuna, drained

  • 2 garlic cloves, minced

  • 1/2 small red onion, minced

  • 1 celery stalk, minced

  • 1/2 cup brown rice, cooked (optional)

  • 2 tablespoons fresh parsley, chopped

  • 1 cup cheddar cheese, shredded

  • 1 tablespoon chives, minced

Ingredients for tuna melt stuffed peppers

Tip

If you'd like to tone down the flavor of the onion and garlic, cook both ingredients first. Warm oil in a skillet over medium heat and then sauté the onion for 5 minutes or until tender. Add the minced garlic and cook for another 30 seconds.

Step 1

Preheat the oven to 375°F. Slice the bell peppers lengthwise from the stem to the bottom. Scoop out the seeds and white pith with a spoon.

Cut bell peppers in half

Step 2

Place the bell peppers in a large casserole dish. Drizzle oil on the peppers and then sprinkle them with salt and pepper to taste. Bake for 20 to 25 minutes or until the peppers are almost your desired consistency. (The longer you pre-bake the peppers, the softer they will be.)

Pre-bake bell peppers

Step 3

Meanwhile, in a small bowl, combine the Greek yogurt, mustard, lemon juice, salt and black pepper. Mix well and set aside.

Mix sauce ingredients

Step 4

Add the tuna to a large bowl. Break up large chunks into smaller, flaky pieces.

Break up large chunks of tuna

Step 5

Add the garlic, onion, celery, rice, parsley and yogurt mixture. Stir until the ingredients are combined.

Mix tuna and yogurt

Tip

For extra-cheesy tuna melt peppers, add 1 cup to the tuna mixture. You can also omit the brown rice if you prefer.

Step 6

Pack the tuna mixture into the bell pepper halves. Depending on the size of your peppers, you might have leftover tuna.

Scoop tuna into the bell peppers

Step 7

Top the peppers with shredded cheddar cheese.

Top the bell peppers with cheese

Step 8

Bake for 5 to 10 minutes or until the cheese is bubbly and the peppers are as soft as you'd like.

Bake until the cheese is bubbly

Top with chives and serve immediately.

Finished tuna melt stuffed peppers with chives

15 Seasonal Fruits & Veggies for the Perfect Fall Recipes

0

Cranberries on a mug on rustic wooden background 1 of 16

For the absolute best tasting dishes, buying seasonal produce is the way to go and that by no means needs to be an intimidating concept. Knowing which fruits and veggies are the most ripe and delicious at certain times of the year can and should be as exhilarating an experience as it is tasty. Soon this lifestyle will become second-nature with help from our go-to list of 15 fruits and vegetables you should shop for this fall season, along with the perfect mouth-watering recipes that will help you enjoy every second of it.

Image Credit: Alena Haurylik/500Px Plus/GettyImages Baked apple pie formed into delicious blooming flower shapes 2 of 16

Apples

The smell of warm baked apple with cinnamon signals the stirrings of fall in the sweetest way possible. Try baking these soft, chewy, spiced apple oatmeal cookies with a warm brown butter glaze (included in recipe), or our even simpler homemade apple butter. Combined with a fresh-baked morning biscuit at the first cool breeze of autumn, you'll be hooked. Best of all, you could take the stress out of baking apple pie by turning them into mini rosebuds with our easy recipe.

Image Credit: Charity Curley Mathews, founder of Foodlets.com Pumpkin pie 3 of 16

Pumpkins

Sure, we've all had pumpkin pie, but have you tried a grain-free, sugar-free, low-carb, version that you could easily bake yourself, using natural sweetener and almond meal? We're talking the same rich and creamy pumpkin filling in a crumbly crust with only about 4.75 grams of net carbs per serving. Yup. Or, you could elevate pumpkin to a whole new level with our pumpkin crisp recipe. And for those who claim to not like pumpkin, hit 'em with our silky homemade pumpkin cheesecake.

Image Credit: Maya Marin Cropped Hands Of Person Holding Pomegranates 4 of 16

Pomegranates

You might be thinking to yourself, fruits can thrive in the fall? No way! Oh, yes. Pomegranate season will typically go from October all the way to February and the best, most ripe ones are deep-colored with a bright red to reddish-brown outer rind. Store those delicious, tangy fruits in the refrigerator unopened for up to four weeks, and then easily transform everyday recipes into these pomegranate-infused specials that will soon become your new fall favorites.

Image Credit: Mohd Hafiez Mohd Razali / EyeEm/EyeEm/GettyImages Homemade sweet potato fries and bowl of tomato basil dip 5 of 16

Sweet Potatoes

Sweet potatoes have come a long way since their strictly holiday candied yam past, becoming a healthy staple that almost everyone loves. But that doesn't mean we still don't love a baked sweet potato casserole moment absolutely smothered in soft, fluffy marshmallows. Our recipe also features pecans and fresh orange zest. Or there's our delicious, creamy sweet potato soup recipe that's loaded with vitamin-packed sweet potatoes, plus directions for a curried apple version, too. Ever wonder how to get your sweet potato fries crispy, and not soggy? Boom.

Image Credit: Westend61/Westend61/GettyImages High Angle View Of Butternut Squash In Tray 6 of 16

Squash

Whether you love delicata, acorn, kabocha, butternut, or spaghetti squash, fall and winter are the absolute perfect times to enjoy this hearty vegetable. And the good news is, once you learn how to roast one type, you've roasted them all, as instructions for baking squash are the same across the board. Even better news: you can easily incorporate any type into all kinds of dishes, from soup to cinnamon rolls. Here are 10 ways to eat squash.

Image Credit: Gregory Aleshire / EyeEm/EyeEm/GettyImages Baked cranberry meatballs 7 of 16

Cranberries

Baked. Cranberry. Meatballs. You read that right! These meatballs are moist, flavorful, and covered in a delectable cranberry-based barbecue sauce. Make ahead of time and stick them with toothpicks as a savory-meets-sweet fall party appetizer. Our healthy cranberry orange relish recipe includes pecans and is a wonderful side dish that freezes well, making an excellent condiment to serve alongside your favorite protein all through the winter. And, of course, we have an amazing cranberry sauce recipe for the holidays.

Image Credit: Ashley Manila Pears in basket on table 8 of 16

Pears

The process of making homemade spiced pear cider is just like apple cider. You can even substitute crisp apples or apple juice for some of the pears in this recipe for a deeper, more complex taste while maintaining the delicate pear flavor. Enjoy your fresh hot cider on cool fall evenings. We also include how to ferment this fresh-squeezed beverage for 2 to 10 weeks to create "hard" cider. If you've still got pears left over, preserve or freeze the fruit to retain its color, flavor and texture, and it'll last for up to 12 months in your home freezer or pantry, creating sweet treats throughout the year.

Image Credit: Roberts Resnais/500Px Plus/GettyImages Brussel Sprouts 9 of 16

Brussels Sprouts

Brussels sprouts have been given a bad reputation because when overcooked, they can develop a strong sulfur-like odor and taste. But if you roast them properly, the outer layers become caramelized and crunchy and the inside layers are tender and meaty, easily becoming a fall dinnertime favorite. Here's how to prepare them simply with olive oil, salt and pepper, plus a bit of sliced fresh garlic for added savoriness, if you like.

Image Credit: Michael Nalley/DigitalVision/GettyImages Two turnip quarters 10 of 16

Turnips

Turnips are a delicious cold weather root vegetable and an excellent source of vitamin C. Its green leaves are rich in calcium, vitamin A, vitamin K and folate. On their own, turnips have a slightly peppery flavor and, when cooked, develop a sweetness. They are super versatile and can be eaten pretty much any which way: raw, baked, boiled, stewed, scalloped, roasted, sautéed and steamed. Many prefer to eat them steamed with butter or other fresh condiments to retain the maximum amount of enzymes, nutrients and turnip-y taste. Steaming is among the fastest, healthiest ways to cook turnip and these hardy and versatile root vegetables have so much more to offer with the right spices.

Image Credit: Foodcollection/Foodcollection/GettyImages roasted beetroot halves 11 of 16

Beets

Roasted beets, or beetroot, are incredibly healthy, mildly sweet, and add a beautiful color and texture to just about any autumn meal. You can add them to salads, pickle them, or serve as a side dish on their own simply tossed with olive oil, vinegar or citrus juice, fresh herbs such as basil or mint, and don't forget the crumbled goat or feta cheese. Is anyone else getting hungry? Here's how to roast beets perfectly every time.

Image Credit: Gusto Images/The Image Bank/GettyImages Apple red cabbage in a pot 12 of 16

Cabbage

Apparently, there's actually a weight-loss plan that suggests eating red cabbage soup for seven days straight to detoxify the body (along with other fruits and veggies). Our healthy red cabbage soup recipe is packed with nutrients, rich in flavor and has a nice smooth texture. Whatever you do, be sure to serve your red cabbage soup while it's hot and garnish with thinly sliced apples, shredded carrots or cheddar cheese to add additional texture.

Image Credit: Wischnewski, Jan/Foodcollection/GettyImages Grated swede 13 of 16

Rutabagas

The rutabaga, also called a swede or neep, is a root vegetable closely related to turnips, and like the turnip, thrives in cooler months. Rutabagas are high in vitamin C, vitamin A, fiber and potassium. You may consume them raw, or prepare the produce by using a variety of cooking methods such as baking, steaming, boiling and braising. However you choose to prepare fresh rutabagas, make sure you store them properly soon after you purchase or harvest to prolong their shelf life and nutrient content.

Image Credit: ABERRATION FILMS LTD/SCIENCE PHOTO LIBRARY/Science Photo Library/GettyImages Close-Up Of Grapes In Wicker Basket On Table 14 of 16

Grapes

There is no sweeter way to celebrate the start of grape season than with some fresh, homemade jam. Perfectly ripe Concord grapes are naturally high in both pectin and sugar and late summer will yield the best fruits for jam. This means you don't need to add a single thing beside heat and time to develop a rich, spreadable consistency. Or, perhaps you're more of a fresh grape juice person. Well, we got you covered there, too, with our simple homemade grape juice recipe.

Image Credit: Krisztina Kovacs / EyeEm/EyeEm/GettyImages Slicing Chanterelle Mushrooms On Wooden Chopping Board 15 of 16

Mushrooms

Fall is the perfect time to add more meaty mushrooms of all varieties to your favorite savory dishes. Take our recipe that combines baby portobellos, smokey gruyere cheese and a simple stuffing technique to transform classic baked chicken into pure elegance in less than five steps. This dish is totally guest-worthy, yet easy enough for weeknight family dinners. And who doesn't love a stuffed mushroom? These artichoke dip stuffed delights are super easy to make and guaranteed to be a hit among party guests.

Image Credit: CasarsaGuru/E+/GettyImages Artichoke hearts in an Italian market 16 of 16

Artichokes

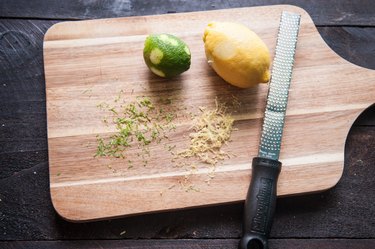
Artichokes are high in cynarin, which helps to lower cholesterol and is good for the liver and gallbladder. Steaming will actually help to retain the full nutrient content of the artichokes during cooking, making all that delicious melted butter and mayo for dipping even more appealing. This artichoke and lemon pesto is a breeze to make and includes ample amounts of lemon zest and fresh herbs to savor that last bit of summer we still have left (store your homemade pesto in a refrigerator for up to a week or freezer for up to six months). And for pure early fall decadence, this shortcut recipe makes the creamiest, dreamiest spinach and artichoke ravioli casserole in under an hour.

Image Credit: Gary Yeowell/Photodisc/GettyImages

Easy Hamentashen Recipe

0

Hamentashen are delicious filled cookies eaten for the Jewish holiday of Purim. They can be made with a variety of fillings, including fruit preserves and poppy seeds. Other popular options include Nutella, dates and prunes. These days, you can even find hamentashen with savory fillings, like goat cheese and herbs! Either way, you can be sure that your family and friends will enjoy these tasty triangle-shaped cookies.

Easy hamentashen recipe

Video of the Day

Things You\’ll Need

  • 2 cups all-purpose flour, plus more for dusting

  • 3/4 cup margarine or cubed unsalted butter, room temperature

  • 1/2 cup sugar

  • 1 teaspoon baking powder

  • 1/4 teaspoon salt

  • 2 teaspoons vanilla extract

  • 1 egg, room temperature

  • 1 1/2 cups filling of your choice

  • Water or orange juice, as needed

Tip

For this recipe, we used Nutella. But you can use any filling(s) you like or have on hand.

Ingredients for hamentashen recipe

Step 1

In a large bowl, combine the butter or margarine and sugar.

Combine butter and sugar

Beat with an electric hand mixer until fluffy and combined.

Beat butter and sugar

Step 2

Add the egg and vanilla extract. Beat to combine.

Add eggs and vanilla

Step 3

Add the flour, one third at a time, beating continously.

Slowly add flour

Step 4

Eventually, you'll need to combine the mixture by hand. Knead the dough until it is smooth and tacky, but not sticky. If it's too wet, add a sprinkle of flour. If it's too dry, slowly add water or orange juice, one tablespoon at a time.

Cover the dough and chill for 2 to 3 hours.

Chill the dough

Step 5

Preheat the oven to 350° Fahrenheit. Dust your work surface with flour. Roll the dough into a thin sheet, about 1/4-inch thick.

Roll the dough

Step 6

Use a mason jar lid to cut out circles. You can also use the rim of a glass or a 3-inch circle cookie cutter. Re-roll the scrap dough as needed.

Cut out circles

Step 7

Spoon 1 teaspoon of filling onto the center of each circle.

Add filling to center

Step 8

Fold one side of the circle toward the center.

Fold one side

Step 9

Fold the opposite side toward the center, creating a pointed end along the top.

Fold opposite side

Step 10

Fold up the bottom edge, tucking the bottom left under the first fold you made. This will make sure all three edges are tucked under a flap.

Pinch the edges to seal.

Fold bottom edge

Step 11

Transfer onto a greased baking sheet. Repeat with the remaining dough and filling.

Place on a greased baking sheet

Step 12

Bake for 12 to 15 minutes or until the edges are golden brown.

Bake until golden brown

Your homemade hamentashen cookies are ready to eat. Enjoy!

Easy hamentashen recipe

How to Make Block Ice for My Cooler

Things You\’ll Need

  • Freezer

  • Water

  • Plastic or metal pans

... Block ice will last longer than ice cubes in your cooler.

If you want to keep the items in your cooler colder for an extended period of time, fill the cooler with blocks of ice rather than ice cubes. An ice block will not melt as quickly as ice cubes because of its density. You can purchase block ice at businesses such as grocery or convenience stores or a fishing supply shop, but it is much more cost effective to make your own ice blocks at home.

Video of the Day

Step 1

Measure the approximate dimensions of the inside of your freezer with a measuring tape. The purpose of this step is to check how large of a pan of water will fit in your freezer. For example, you can fit a rectangular pan that is at least 17 inches long by 15 inches wide and 9 inches tall in a refrigerator/freezer 18 cubic feet in size. If you have a top loading, stand-alone freezer, this step is less relevant as you have significantly more room to make block ice.

Step 2

Check the dimensions of your cooler to be sure the ice block will fit.

Step 3

Purchase a metal or plastic pan sized to the appropriate dimensions if you do not already own that size of pan. You can use metal cake pans or — if your freezer and cooler are sufficiently large — plastic dishwashing pans.

Step 4

Clean the pan with soap and water before using it.

Step 5

Fill the pan with water so it is about 90 percent full and place it on a counter or table adjacent to the freezer. Water will expand when it freezes so you need to leave some room at the top of the pan.

Step 6

Place the pan in the freezer. Do this slowly in order to not spill any water. Make sure the pan is sitting on a flat surface.

Step 7

Wait at least 12 hours for the ice block to form. This time will vary depending on the model and temperature of your freezer and the size of ice block you are making.

Step 8

Take the pan out of the freezer when the water has completely turned to ice. There should be no movement of water in the pan.

Step 9

Slap the pan on the inside of your cooler to break the ice free from the pan. You may need to do this several times before the ice falls into the bottom of the cooler.

Tip

Although you can purchase block ice makers or ice molds at retail stores or on the Internet, this will increase your cost of making ice.

You can make multiple ice blocks at once by using slightly different sized pans and stacking them in the freezer. Place a piece of waxed paper in between each pan.

Seasonings for Broccoli

... Pairing different seasonings with broccoli creates a tasty and healthy dish.

You have probably heard that broccoli is great for you since you were a child, and it's true. In fact, broccoli has as much calcium gram for gram as milk does. It is a low calorie vegetable and is an excellent source of fiber, potassium and protein. The problem is, by itself broccoli does not have much flavor. If prepared properly, and seasoned correctly, broccoli can take on any flavor you want and is anything but bland.

Video of the Day

Lemon Pepper, Garlic Salt and Thyme

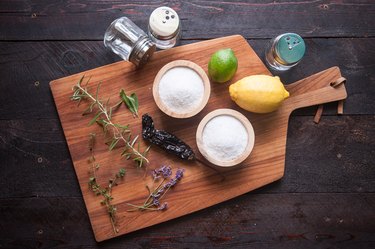
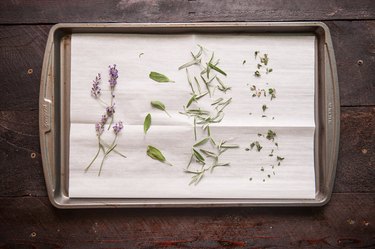
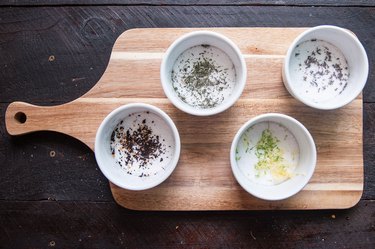
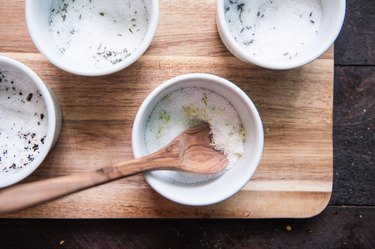
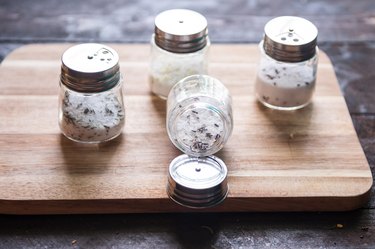
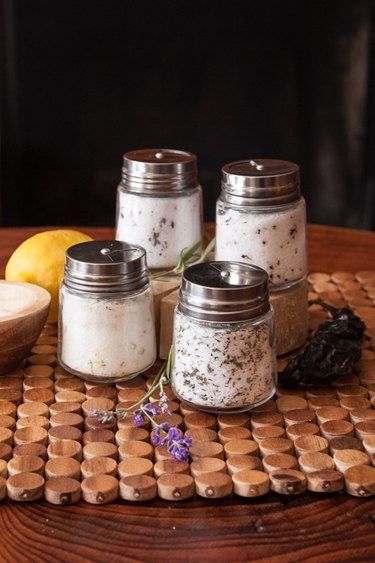
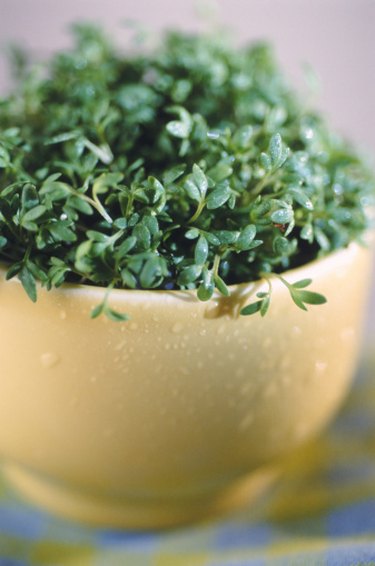
... Dried or fresh herbs can be used to dress up any broccoli dish.

The combination of lemon pepper seasoning, garlic and thyme is one way to spice up your broccoli and give it loads of flavor. Season the broccoli after it has been steamed or cooked, or cook the broccoli in a combination of spices. When cooking about 1.5 lbs. of broccoli, use about 1 tsp. of lemon pepper, 1/2 tsp. of garlic salt and 1/2 tsp. of thyme. Be careful not to add too much seasoning, as dried spices tend to have more flavor than fresh herbs. Melt in some butter to help coat the broccoli with all of the spices.

Marjoram, Basil, Onion Powder and Nutmeg

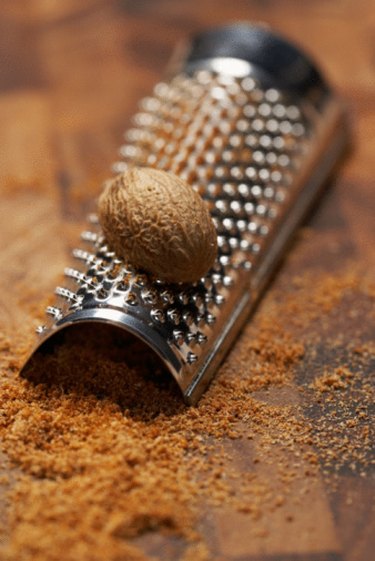
... Because nutmeg is a warm, aromatic spice, it is important to use it sparingly.

More adventurous cooks may want to incorporate several unique spices into their broccoli dishes. One way to add tons of flavor to broccoli is to cook it in a pot of chicken broth. Use bouillon, broth seasoning packets, store bought or homemade broth. For about 2 cups of broccoli, use about 1/2 tsp. of marjoram, 1/2 tsp. of basil, 1/4 tsp. of onion powder and just a pinch of nutmeg. After draining the broccoli, use butter and lemon juice for an extra pop of flavor.

Fresh Garlic, Red Pepper Flakes and Salt

... Many cooks use red pepper flakes to add a heat element to their dishes.

A more simple way to season broccoli is by cooking it in a pot of water with a clove of fresh minced garlic, 1/2 tsp. of salt and some olive oil. After cooking, you can sprinkle the broccoli with red pepper flakes to give it a little zip.

Cajun Spices and Garlic

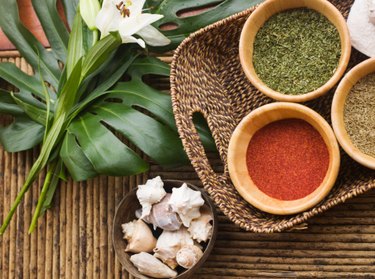
... Cajun seasoning is bold and spicy and combines numerous spices and herbs to develop the flavor.

An easy way to achieve spicy Cajun flair is by using minced garlic and a packet of pre-mixed Cajun or Creole spices. Cajun seasoning combines several spices such as salt, cayenne pepper, black pepper, garlic powder and chili powder. After cooking, mix the seasoning and broccoli together with a little bit of canola oil. For a full bunch of broccoli, 3/4 tsp. of the seasoning will be sufficient.

How to Make Flavored Salts

0

Making flavored salt couldn't be easier. Grab your favorite flavors, dry the spices, chop and combine them with salt, and voilà! You have your own signature flavor. This is also the simplest, quickest, least expensive homemade gift you can give that also feels very personal. Make your own signature salt by combining various flavorings, add some cute labels and you're all set.

How to Make Flavored Salts

Video of the Day

Tip

Use 1 teaspoon of flavoring for every 1/4 cup of salt. Add more to taste.

How to Make Flavored Salts

Things You\’ll Need

  • 2 cups coarse kosher salt

  • Fresh herbs such as rosemary, sage, and thyme

  • 4 springs fresh lavender

  • 1 lime

  • 1 lemon

  • 1 dried chili

  • Parchment paper

Step 1: Dry the Spices

Preheat the oven to 180 degrees Fahrenheit. Add the herbs and the lavender to a baking sheet covered with parchment paper. Allow to dry in the oven for 30 to 45 minutes or until very brittle.

How to Make Flavored Salts

Step 2: Chop the Herbs

Chop the lavender and the herbs. Keep the lavender separate from the herbs.

How to Make Flavored Salts

Tip

You can use pre-dried spices, but they won't be as flavorful. Dried herbs tend to lose their flavor over time and there is no way to know how long ago store-bought herbs were dried!

Step 3: Zest

Zest the citrus, about a teaspoon of zest for each fruit.

How to Make Flavored Salts

Step 4: Chop the Chili

Finley chop the dried chili.

How to Make Flavored Salts

Step 5: Combine

Set out four small bowls. Add 1/2 cup of salt to each bowl. Add 2 teaspoons of chopped chili to one, 2 teaspoons of herbs to the another, 2 teaspoons of zest to another, and 2 teaspoons of chopped lavender to the last. (Add more flavoring, if desired.)

How to Make Flavored Salts

Step 6: Mix

Mix well before adding to storage containers. For the citrus, make sure to press the zest into the salt to help release the oil. Air dry the zest in the salt before storing it by leaving it in an open container, stirring occasionally, until dried, about 3 days.

How to Make Flavored Salts

Step 7: Store

Add to storage containers, making sure spices are evenly distributed in the salt.

How to Make Flavored Salts How to Make Flavored Salts

The Advantages of Soft Drinks

Refreshing Ice Cold Soda Pop Soda with ice. Image Credit: bhofack2/iStock/Getty Images

Much ado is made about the disadvantages of soft drinks — namely, their high sugar content. However, soft drinks do carry certain advantages, from convenient energy boosts to, possibly, protection against disease.

Video of the Day

Bodily Benefits

If you need a quick pick-me-up, caffeinated soda makes a convenient option. Aside from providing an energy boost, caffeine may offer some health benefits. For example, a 2006 study published in the "Journal of Neurological Sciences" found that caffeine may protect against Parkinson's disease. According to Medical News Today, it could also protect against stroke and Type 2 diabetes.

Sweet Stuff

Soda is often derided for containing high fructose corn syrup, which has been linked to increased triglyceride levels and inflammation, according to Harvard Health Publications. Fortunately, many soft drinks makers are taking a healthier turn and using other types of sweeteners, such as stevia — which is natural and calorie-free — instead of high fructose corn syrup.

DIY Healthy Kimchi Recipe

0

If you've never tried kimchi, a classic Korean banchan, the description might not sound overly appealing. Assorted vegetables and other ingredients, salted and then (historically) buried underground and left to ferment. It's actually quite good by itself or as an accompaniment to other dishes. There are hundreds of kimchi varieties, and this is a basic version using two of the most common ingredients: napa cabbage and daikon radish. These days, there's no reason to bury kimchi. All you need is a glass jar with a lid. This version requires a 2-quart jar or two 1-quart jars. If you love kimchi and want to try preparing it at home, look no further than this tasty, simple recipe.

How to Make Your Own Kimchi | eHow

Things You\’ll Need

  • 2 pounds Napa cabbage, sliced

  • 1/2 cup kosher salt

  • 4 medium cloves garlic, minced

  • 1 to 4 tablespoons Gochugaru (Korean red pepper flakes)

  • 1 tablespoon fresh ginger

  • 2 tablespoons fish sauce

  • 1 1/2 teaspoons granulated sugar

  • 8 ounces daikon radish, peeled and sliced into 2-inch matchsticks

  • 4 scallions, sliced into 1-inch pieces

Step 1: Gather Your Ingredients

For the record, a few of these ingredients might be difficult to track down if you don't have an Asian (or slightly more upscale) market nearby. Napa cabbage and daikon radish are the traditional options. If you're unable to find them, I would suggest substituting any large green cabbage variety and omitting the daikon altogether. Daikon radishes have a subtle flavor compared to other more readily available radishes, which can have a more bitter taste. While delicious, they could alter the results. If you're unable to locate Gochugaru in stores, it can be purchased at many online retailers.

How to Make Your Own Kimchi | eHow

Step 2: Salt the Cabbage

Place the cabbage in a large bowl and top with the salt. Massage the salt into the cabbage for a few minutes.

How to Make Your Own Kimchi | eHow

Step 3: Add Water

Top with cold water until the cabbage is completely submerged. Cover with plastic film and let stand at room temperature for at least 3 hours, or up to 1 day. Drain and rinse the cabbage, then allow to dry.

How to Make Your Own Kimchi | eHow

Step 4: Prepare the Paste

In a small bowl, combine the garlic, Gochugaru, ginger, fish sauce, and sugar to form a paste. How much Gochugaru to add depends on your own personal preference for heat.

How to Make Your Own Kimchi | eHow

Step 5: Mix Kimchi Ingredients

In a large bowl, combine the cabbage, daikon radish, scallions, and paste until evenly mixed. This is best done with your hands, but wear kitchen gloves. It's a potent mix!

How to Make Your Own Kimchi | eHow

Step 6: Pack in a Sealable Jar

Pack the kimchi into one 2-quart or two 1-quart jars, pressing down tightly as you go. A brine will start rising up to the surface; this is a good thing. If there's no brine, wait several minutes before continuing. It will start to develop as the vegetables begin to release liquid. Leave 1 to 2 inches of space at the top of the jar.

How to Make Your Own Kimchi | eHow

Step 7: Store at Room Temperature for One Week

Close the lid and store at room temperature for one week. It's a good idea to place the jar on a place or in a bowl, because as the mixture ferments, liquid might seep out of the jar (depending on what type you're using). Once per day, push down on the kimchi to help the brine coat the vegetables evenly. After fermenting, transfer the jar to the refrigerator. The flavor will continue developing over time.

How to Make Your Own Kimchi | eHow

How to Make an Easy Dark Chocolate and Caramel Crepe Cake

0

Layers of a rich chocolate liqueur-infused dark ganache, salted caramel sauce and whipped cream make this dark chocolate and caramel crepe cake such a decadent but irresistible dessert! Though it looks complex and fancy, it's actually easy to make, too. Don't wait another minute to make it.

This Dark Chocolate and Caramel Crepe Cake is indulgent and delicious!

Video of the Day

Things You\’ll Need

  • 3 cups plain flour, sifted

  • 1/2 cup confectioners (icing) sugar, sifted

  • 1 teaspoon baking powder

  • 1 teaspoon sea salt

  • 4 cups milk

  • 3 large eggs

  • 1 teaspoon vanilla bean extract

  • 1/2 cup unsalted butter, melted, plus extra for brushing the pan

  • 17 fluid ounces / 500 milliliters + 4.2 ounces / 120 grams

    heavy cream

  • 1.7 fluid ounces / 50 milliliters chocolate liqueur (optional)

  • 17 ounces / 500 grams dark chocolate, finely chopped

  • 1 cup superfine (caster) sugar

  • 2.1 fluid ounces / 60 milliliters water

  • 3 tablespoons salted butter

  • 1 teaspoon sea salt

  • Almonds and whipped cream (optional for final decoration)

Step 1: Make the Dark Chocolate Ganache Filling

In a medium sized bowl, place the chopped dark chocolate. Set aside.

Chopped dark chocolate set aside in a bowl.

Step 2: Heat the Cream and Liqueur

Add the 17 fluid ounces / 500 milliliters of heavy cream and liqueur into a saucepan set over medium-high heat. Bring the mixture to a rolling boil, then remove and pour over the chocolate bowl.

Cream and liqueur set in a saucepan.

Step 3: Stir Until Smooth

Let the chocolate and cream stand for two minutes before gently whisking until smooth. Let the mixture cool to room temperature before chilling or freezing until it is thick and spreadable.

Smooth chocolate ganache.

Step 4: Make the Crepe Batter

In a large bowl, combine the flour, confectioners (icing) sugar, baking powder and sea salt.

Dry ingredients whisked together.

Add the milk, eggs and vanilla. Stir to combine until lump-free, then pour in the melted butter. Set aside to rest in the refrigerator for 30 minutes.

A smooth and lump free batter.

Step 5: Make the Crepes

Heat a large 9-inch / 18-centimeter non-stick pan over low heat and brush with butter.

Crepe pan with melted butter.

Spread 1/4 cup of the batter evenly into the pan. Cook until the edges are golden and are beginning to crisp, then flip and cook the other side, roughly two minutes on each. Transfer each crepe to a plate and set a piece of baking parchment or paper towel to separate each so that they do not stick together.

Frying the crepes.

Step 6: Make the Salted Caramel Sauce

Stir the superfine (caster) sugar with the water in a medium saucepan over medium heat until the sugar has dissolved. Bring to a boil and cook, swirling the pan gently until caramel in color, roughly five minutes. Add the butter, whisk to combine, then add in the 4.2 ounces / 120 grams heavy cream and sea salt. Whisk to combine, remove from the heat and set aside until cool.

Salted caramel sauce ready to be used.

Step 7: Stack and Assemble

Once the ganache and crepes are cool enough to assemble, set a single crepe on a stand or serving platter, then spread 2 tablespoons of ganache over its top, and then top with another crepe. Continue to layer until all the crepes have been used. Finish with a final layer of ganache, and then place in the refrigerator to chill until set.

Assembling the crepe cake. Finished crepe cake ready to be chilled.

Step 8: Add the Finishing Touches

Once the crepe cake has set, finish it by topping with whipped cream, extra dark chocolate ganache and salted caramel sauce. Sprinkle with almonds if desired.

A finished Dark Chocolate and Caramel Crepe Cake.

Step 9: Slice and Enjoy

Slice and enjoy your dark chocolate and caramel crepe cake! You can keep the cake chilled for up to three days in the refrigerator. Set out for 20 minutes before serving.

Slice and enjoy your Dark Chocolate and Caramel Crepe Cake. Slice and enjoy your Dark Chocolate and Caramel Crepe Cake.

Substitutes for Muffin Tins

... Muffins can be simple or complex, for breakfast or dessert.

Muffins are a quick and tasty treat that can be eaten any time of day. Making muffins is one of the least complicated baking procedures, but the standard muffin tin was once the only one way to bake muffins. Many inventions have been created to give you alternatives to using that old metal pan with six circle cutouts.

Video of the Day

Silicone Muffin Pans

A silicone muffin pan is similar to the muffin tin, but is made of flexible material that withstands heat, but bends and releases the muffins easily. Silicone is also non-stick so you do not need baking cups. These muffin pans come in regular muffin size, as well as mini muffin size. The size of the pan ranges from six cups to 12, or 24 for mini.

Free-standing Baking Cups

Free-standing baking cups allow you to make as many muffins as you want without needing a pan at all. These cups come in paper, foil or silicone and are simply placed on a baking sheet for support on the oven rack. The paper and foil cups are heavier than standard baking cups and do not fall to the side with the weight of the batter. Silicone cups are flexible and reusable. The silicone cups also come with ruffled edges, like standard baking cups. Using free-standing cups saves space and the clean up is much less.

Ramekins

Ramekins are traditionally used for individual dessert items, casseroles or quiches, but these small ceramic dishes can also be used for muffins, while giving them a more elegant look. Ramekins are generally sold in sets of four, but can be found individually or in larger sets at specialty or discount stores. Because ramekins are ceramic — though glass is available as well — cooking times or temperatures for the muffins may have to be altered.

Muffin Makers

Muffin makers have the look of a waffle maker, but are designed for regular and mini-sized cupcakes and muffins. Six to eight holders cook the muffins to perfection and without the need for liners. The surface is non-stick, so the clean up is fast and easy. Because of the covered and pressurized design, the muffin maker cooks the desserts much faster than an oven and with less work.