Home Blog Page 44

10 DIY Flower & Garden-Inspired Sweet Treats

0

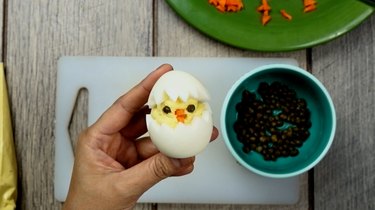
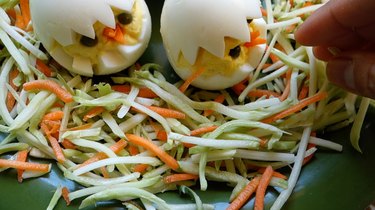
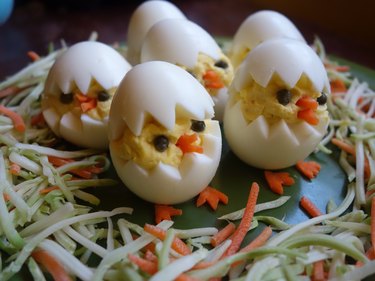
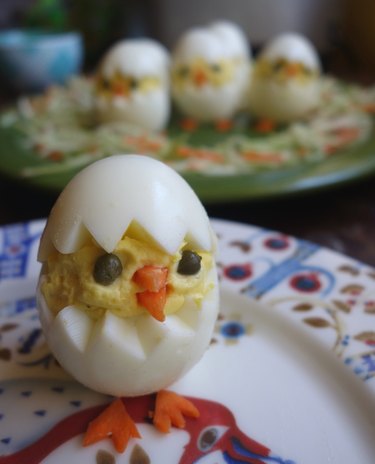
There's something life-affirming about gardens and gardening, and a bouquet of cut flowers can bring a sense of sunshine into even the gloomiest room. Colorful sweet treats are also a famously effective mood enhancer, so it makes sense that that bright, flower- or garden-themed arrangements of baked goods are extra cheerful. If you're celebrating a special occasion, these fun and whimsical treats are sure to please.

10 DIY Flower & Garden Inspired Sweet Treats

Video of the Day

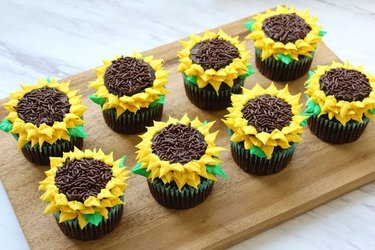
1. Sunflower Cupcakes

Very few blossoms look more cheerful than sunflowers, with their oversized heads of golden yellow and their dark centers. They're surprisingly easy to replicate as sunflower cupcakes, even if you aren't super-confident in your icing-piping skills. The seedy center couldn't be simpler. Melt some chocolate, spread it over some Oreo Thins, and then top them with chocolate sprinkles to represent the seed head. "Glue" these to the top of each cupcake with a dab of icing, and then use yellow and green decorator's icing for the petals and leaves.

Eight cupcakes, decorated to look like sunflowers, arranged on a wooden cutting board on a marble counter top.

2. Tootsie Roll Rose Bouquet

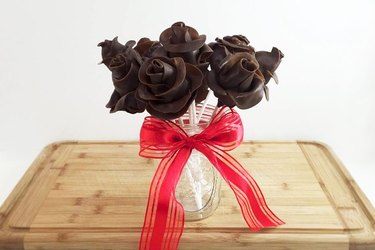
Roses are always a welcome token of your affection, and so is chocolate. So what could be better than a bouquet of chocolate roses? To make them you'll just need lollipop sticks, strawberries, melted chocolate and some Tootsie Rolls. Start by trimming the berries, mounting them on sticks, and dipping them in the chocolate. To make the petals, soften the Tootsie rolls for a few seconds in the microwave. Leave some whole, cut others in half, and some in thirds, then roll them into balls and flatten them with a rolling pin. Fold these flattened Tootsie Roll ovals around the strawberry centers to make petals, starting with the smallest and working up to the largest pieces.

A vase on a wooden cutting board, tied with a red ribbon, containing a bouquet of dark Tootsie Roll roses.

3. Bumble Bee and Flower Cupcakes

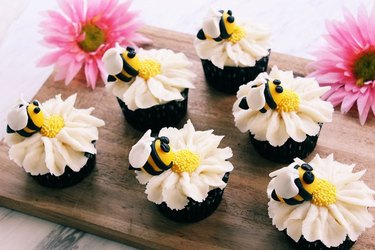
For a cheerfully summery treat that's equally delightful for adults or kids, try these bumblebee and flower cupcakes. Start with your favorite cupcake recipe, and trim their domes flat. Use white decorator's icing and a petal tip (shaped like a narrow teardrop) to pipe daisy-like petals in a ring around the top. For the pollen-filled center of the blossom, make small puddles with yellow candy melts and drop round yellow sprinkles on top. Transfer these to the center of the flowers with a knife tip, once they're cool, and finish the cupcakes with bees made of yellow and black fondant.

Cupcakes decorated with piped flowers and bumble bees, displayed on a cutting board with a pair of pink flower blossoms.

4. Blooming Flower Apple Pie

Traditional apple pies are the gold standard for home style comfort-food desserts, and for good reason. They're tasty, they go with almost any meal, and they're well within the home baker's skill set. One thing they ​aren't​, as a rule, is social media photo-worthy. That's why single-serving apple pies in rose shapes have been such a hit over the past few years. Most recipes require a fairly complex assembly process, but this simplified blooming flower apple pie recipe couldn't be easier.

Soft-focus image of "blooming flower" apple pies in a muffin pan, sitting on a wire cooling rack.

5. Starburst Rose Bouquet

Some people are fond of saying that life is better when you stop to smell the roses along your way. Sometimes it's also nice to ​eat​ the roses, which is why there are so many ways to make them from candy. Professional chocolatiers use fondant, gum paste or modeling chocolate to make flowers, but this Starburst rose bouquet in realistic pinks and reds requires only treat sticks, a microwave and Starburst candy. Just soften the candies in your microwave for a few seconds and press them flat to make petals, then bend 6 to 9 petals around the stick to make each beautiful rose.

A cluster of pink and red roses made from Starburst Candy, with soft-focus rose petals in the background.

6. Vegetable Garden Cupcakes

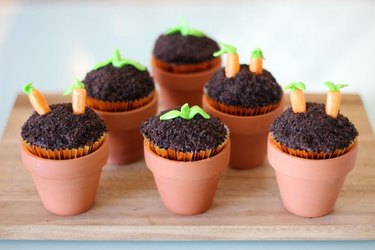
Part of what makes cupcakes so much fun is that they're just the right size to decorate in whimsical, colorful ways. For example, these vegetable garden cupcakes are the perfect way to celebrate the arrival of spring and gardening season. Start by dipping the tops of your freshly-iced cupcakes into pulverized whole Oreo cookies, which make a surprisingly realistic "soil." Then mold baby carrots from orange Starburst candies, and make carrot tops and sprouting seedlings from green Laffy Taffy. Insert these into the soil atop your cupcakes for a charmingly realistic garden treat.

A set of six cupcakes in small terra cotta pots, with tops decorated to resemble baby plants in soil.

7. Succulent Cupcakes

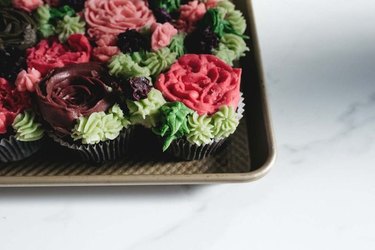
Gardeners love slow-growing, low-maintenance succulents for filling spaces between other landscaping features, or as a tightly clustered display in a single pot. With a batch of buttercream and a piping bag, you can turn a batch of your favorite cupcakes into an equally beautiful display of cupcake succulents. Pack the finished cupcakes closely into a rimmed baking sheet, to replicate the look of a small bed of succulents. Then pipe out your designs onto parchment using multiple greens for the succulents themselves, and vivid colors for the blossoms. Once the icing sets, transfer your designs to the tops of the cupcakes.

Cupcakes carefully piped with icing to resemble decorative clusters of small succulents and cacti.

8. Rose Cupcake Bouquet

If you really want to make a show-stopping presentation or centerpiece with cupcakes, try this impressive rose cupcake bouquet. The base is a large Styrofoam ball, wrapped in green tissue and set into a planter. Pin empty cupcake cups to the base using toothpicks, to plan the arrangement of your bouquet, then pipe the roses onto your cupcakes with pink or red icing. One at a time, replace those empty cupcake holders with your real cupcakes, and then finish by making tissue-paper greenery to fill the spaces in between.
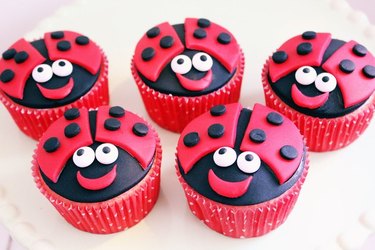
Rose cupcake bouquet against a pale pink background, with a scattering of rose petals underneath.

9. Ladybug Cupcakes

It's a funny thing, but even people who find bugs in general to be icky and repulsive seem to have a soft spot for ladybugs. There's just something irresistibly cheerful about their bright colors and gently rounded shape. As it happens, that shape and color are easy to replicate in these pretty and charming ladybug cupcakes. The design is made by simply rolling and cutting red and black fondant and transferring the shapes to your cupcakes, so you don't even need to have any piping skills to make these work.

Cupcakes decorated with cutouts of black and red fondant, to give them the appearance of cheerful ladybugs.

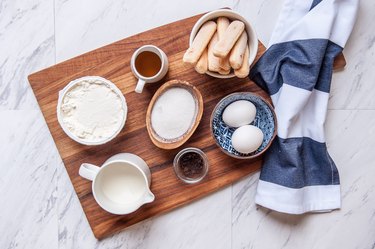
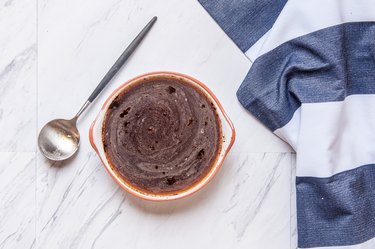
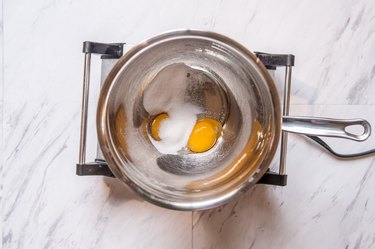
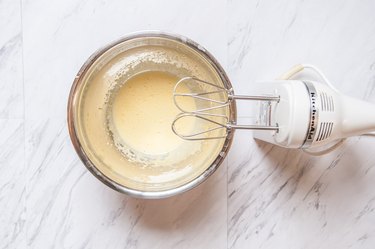
10. Sugar Cookie Flower Bouquet

When you have a special occasion to celebrate, a bouquet of flowers is never a bad idea. Cookies are always welcome, too. So why not a bouquet of cookies? It looks striking, and couldn't be easier. Start by mixing up a batch of sugar cookie dough, then use blossom-shaped cutters to cut them out. Insert wooden skewers for stems, while the cookies are still warm, then ice them in pretty whites and pinks once they're cool. Complete the resemblance to a bouquet by adding real or artificial greenery and blossoms, then wrap with a ribbon or florist's paper.

A male hand holding a bouquet of sugar cookies cut and iced to resemble flowers, wrapped in brown paper with stems of real plants to complete the bouquet.

Individual Tiramisu Recipe Tutorial

0

When it comes to the perfect dinner party dessert, there are two factors that make a recipe an outstanding choice: ability to make ahead of time, and wow factor. These individual Tiramisu pots not only have both of those in spades, they are also relatively easy to pull off, coming together in just about 30 minutes. It's the perfect way impress without the stress!

Individual Tiramisu Recipe Tutorial

Things You\’ll Need

  • 1 cup hot water

  • 1 tablespoon instant espresso powder

  • ¼ cup sugar, divided

  • ½ teaspoon salt

  • 2 tablespoons coffee liquor

  • 2 large egg yolks

  • 2 tablespoons brandy, cognac, or amaretto (optional)

  • 8 ounces mascarpone cheese

  • 1 cup heavy cream, chilled

  • 16 savoiardi (crisp Italian ladyfingers)

  • 2 tablespoons cocoa powder for garnish

Individual Tiramisu Recipe Tutorial

Step 1

Stir together the hot water, espresso powder, 2 tablespoons sugar, salt and coffee liquor until well combined. Set aside, allowing to cool to room temperature.

Individual Tiramisu Recipe Tutorial

Step 2

Add the egg yolks, brandy or amaretto (if using), and remaining 2 tablespoons sugar to a bowl over gently simmer water.

Individual Tiramisu Recipe Tutorial

Step 3

Beat with a hand mixer until light and tripled in size.

Individual Tiramisu Recipe Tutorial

Step 4

Beat in the mascarpone.

Individual Tiramisu Recipe Tutorial

Step 5

Beat the heavy cream until thickened and peaks form. Fold into the mascarpone mixture.

Individual Tiramisu Recipe Tutorial

Step 6

Dip the lady fingers into the coffee mixture, breaking in half if necessary to fit into your individual container. Add in an even layer in the bottom of the container.

Individual Tiramisu Recipe Tutorial

Step 7

Top with a layer of mascarpone custard. Repeat steps 6 and 7, layering soaked lady fingers and custard until the container is full.

Individual Tiramisu Recipe Tutorial

Step 8

Sprinkle with cocoa powder.

Individual Tiramisu Recipe Tutorial

Step 9

Cover and refrigerate for 3 hours and up to overnight.

Individual Tiramisu Recipe Tutorial Individual Tiramisu Recipe Tutorial

How to Recarbonate Flat Home Brew Beer

0

Things You\’ll Need

  • Package of brewer's yeast

  • brewing sugar

  • 5 gallon glass carboy

... Glass carboy with fermented beer and attached airlock.

Recarbonating flat home-brew beer can be done in two ways. The fastest, though less flavorful, technique is to charge a keg of flat home brew with carbon dioxide. A more effective, though time-consuming method, is to prepare a solution of brewer's sugar, water and yeast to create natural carbonation.

Video of the Day

Step 1

Attach a carbon dioxide cartridge designed for beer kegs to the valve on a keg of flat beer and release the charge into the keg, which should be shaken vigorously afterward to distribute the gas and allowed to set for at least an hour before retapping.

Step 2

Recarbonate flat bottled beer, such as home brew, by preparing a mix of sanitized water, one cup of brewer's sugar and a package of brewing yeast.

Step 3

Siphon or gently pour the flat beer into a clean, sterilized glass carboy (5 gallon tank).

Step 4

Add the solution of yeast, sugar and water to the flat beer and attach an airlock to the carboy to create a second fermentation, typically lasting seven to 10 days. Fermentation is complete when the airlock stops bubbling.

Step 5

Siphon the beer into a clean, restaurant-quality plastic bucket and place the bucket on a counter.

Step 6

Add one cup of brewer's sugar dissolved into one cup of clean water to the plastic bucket.

Step 7

Arrange glass bottles on the floor beneath the bucket and carefully siphon the fermented beer into each bottle.

Step 8

Cap the bottles and store in a cool, dark space for another seven to 10 days.

Tip

Pitching a solution of sugar and brewer's yeast into flat beer causes a secondary fermentation as the yeast feeds on the sugar for energy. The byproducts of this chemical reaction are alcohol and carbon dioxide, which recarbonates the beer.

Use sanitary equipment. Sanitize all containers with a solution of one cup household bleach to five parts water before adding any beer. Scrub thoroughly.

Warning

Failure to sanitize all equipment will impart off flavors to the beer. Introduction of bacteria into the beer via dirty equipment, while not dangerous to your health, can create high pressure in the bottle, resulting in beer that gushes out of the bottle when uncapped. In some cases, bottles can explode.

Creating a secondary fermentation in beer will increase the alcohol content by volume as a result of the additional yeast reacting with the sugar. The amount of alcohol concentration depends on a number of factors, including the quantity of sugar used to activate fermentation.

How to Make Vegan Fajitas

0

It goes without saying that Tex-Mex cuisine wouldn't be complete without fajitas. But when you live a vegan lifestyle or simply want to eat more veggies, this mouthwatering dish is literally off the table. After all, by definition, a fajita calls for grilled meat served on a tortilla. This doesn't mean you can't get in on the deliciousness, though! By cooking Portobello mushrooms in the right spices, you can enjoy a meaty texture with that classic fajita flavor. Add some cooked onions and bell peppers, and you've got yourself an easy vegan fajita recipe. Here's how to make it happen.

Vegan fajitas

Video of the Day

Things You\’ll Need

  • 2 Portobello mushrooms

  • 1 yellow or white onion

  • 3 bell peppers

  • 1 teaspoon liquid smoke

  • 1 tablespoon fajita seasoning

  • Oil for cooking

Ingredients for vegan fajitas

Tip

To make fajita seasoning from scratch, combine 1/8 cup chili powder, 1/2 tablespoon salt, 1 tablespoon cumin, 1 tablespoon paprika, 1 teaspoon onion powder, and 2 teaspoons garlic powder. For a spicy kick, add cayenne. Feel free to adjust the ingredients according to your taste buds.

Step 1

Slice the onions and peppers into long strips. Set aside.

Slice onions and bell peppers

Step 2

Remove the stems from the Portobello mushrooms. Slice into long strips.

Slice Portobello mushrooms

Step 3

In a large pan, warm the oil over medium heat. Sauté the onions until soft and slightly browned, about 10 minutes.

Cook onions

Step 4

In another pan, cook the sliced peppers until tender and brown, about 15 to 20 minutes. Set aside the cooked onions and peppers.

Cook bell peppers

Step 5

In a large bowl, toss the sliced Portobello mushrooms with fajita seasoning and liquid smoke.

Fajita seasoning and mushrooms

Step 6

Cook the mushrooms over medium heat until soft and brown, about 10 to 15 minutes.

Cook Portobello mushrooms

Step 7

To construct a fajita, add the cooked onions, peppers, and mushrooms to a soft tortilla shell. Top off with tasty ingredients like vegan sour cream, guacamole, salsa, or a splash of lime juice. Even better, why not add all of the above?

Vegan fajitas

Don't limit yourself to soft tortilla shells, though. Vegan fajita fillings taste just as delicious with pasta or rice. You can also toss them with greens and veggies for a fajita-inspired salad. Who wants seconds?

Vegan fajitas

How to Eat a Pepino Melon

0

South American fruit muricatum solanum or cucumber sweet or cucumber melon. Pepino dulce o pepino melon in clay bowl Once ripe, you can store a pepino in the refrigerator for three days. Image Credit: LarisaBlinova/iStock/GettyImages

Technically not a melon, the sweet, mild-flavored pepino is a member of the nightshade plant family, related to the tomato, potato and eggplant. In fact their Spanish name, pepino dulce, simply means "sweet cucumber." When ripe, pepinos are aromatic and have a delicate, lightly sweet flavor with notes of cucumber, honeydew melon and cantaloupe. A versatile fruit, pepinos may be eaten fresh or used in a range of dishes.

Video of the Day

Fresh and Ripe, Plain and Simple

Ripe pepino melons are typically yellow with purplish stripes or, in some varieties, freckles. Some types ripen to a deep, almost orange-yellow.

An aromatic fruit, fragrance is more an indication of ripeness than color. The scent should be light and sweet, not at all heavy or cloying, with hints of crisp cucumber and ripe melon.

The skin should be smooth, and when pressed gently the flesh should feel similar to a ripe, but not overripe, nectarine. Sweet, juicy pepinos are often pared, cut and served plain for dessert.

To prepare, wash a pepino well and cut it in half. Scoop out the seeds. Place the halves face down on a clean surface and cut each in half or into slices. Although edible, by the time pepinos are fully ripe, the peel is usually too tough to eat, so trim it away before serving.

Fresh In Salads and Salsas

Pepino fruit recipes draw on the melon's juiciness and its mild flavor, which highlights and complements other flavors without overwhelming them. Pepinos work well in a fruit salad, for instance, where the ascorbic acid in the pepino juice helps prevent the flesh of apples, bananas and similar fruits from discoloring after cutting. Pepinos are also used in traditional tossed salads, as one of many ingredients or just a few.

Try a fast, simple salad with a gourmet touch. Tear washed fresh spinach into salad bowls and top with diced pepino and crumbled feta cheese. Add a drizzle of olive oil, a squeeze of lime, a splash of balsamic vinegar, and a touch of fresh, coarse ground black pepper. If you're feeling really adventurous, add a couple of anchovies and a sprinkle of finely sliced green onion. When making fresh salsa, stir in some diced pepino for extra bulk and flavor.

In Savory Dishes

Many types of savory dishes use the clean, light sweetness of pepinos to highlight or serve as a counterbalance to warmer, spicier flavors. In Indian cuisine, pepinos may appear in curried lentil dishes, chutneys and spicy mixed pickles. Pepinos can show up in meat dishes to cool spices or meld flavors. They may be served along side of roasted meat in a sweet side dish or or a spicy relish. In Peru, pepinos may be grilled to serve with a spicy dish. Pepinos can also complement seafood, and can be used in a number of seafood sauces and marinades.

Like a Vegetable When Green

Pepinos can also be eaten well before they are ripe, when still green. The skin is thinner, more tender and the texture of the flesh is firmer, feeling more like a vegetable than a fruit. Without the sweetness that comes with ripening, the flavor is more like a cucumber when eaten raw. Try it diced finely in a salad or grated on a sandwich, pita or wrap. Green pepinos can be cooked and used like summer squash. Try green pepinos diced and added to soups and stews, sliced or diced and sauteed in olive oil, or steamed in its delicate green skin.

How to Dry Banana Peppers

0

Things You\’ll Need

  • Sharp knife

  • Dehydrator

... Banana peppers can be easily dried for later use.

Dehydration is a simple way to preserve fresh banana peppers. Once dried, the peppers can be stored in airtight containers on a pantry shelf and will be ready to use. Unlike many vegetables, you do not have to blanch peppers before drying them, which makes them less time-consuming to prepare.

Video of the Day

Step 1

Wash the banana peppers under cold, running water to remove any dirt and debris from the skin.

Step 2

Cut the stem off each pepper.

Step 3

Slice the peppers in half lengthwise and remove their seed core.

Step 4

Lay them in a single layer on a dehydrator tray. The peppers can touch one another, but don't lay them on top of each other.

Step 5

Place the rack in the dehydrator and close the lid. Turn on the machine.

Step 6

Dry them for eight to 12 hours or until the peppers are pliable when bent and are dry to the touch but not brittle.

Tip

Banana peppers can also be sliced into 1/4-inch rings and dried in the same manner, though be sure to remove the seed core from each. To rehydrate dried banana peppers, pour boiling water over them and allow them to soak for 30 minutes. If you use dried peppers in soups or stews, add them to the liquid at least 30 minutes before serving.

Easy to Make Fresh Homemade Whipped Cream

0

Once you know how to make fresh homemade whipped cream, you can add it to store-bought desserts and instantly give it a homemade feeling without having to do all of the hard work. Or use it to elevate made-from-scratch sweet treats such as mini blooming flower apple pies, bourbon-spiked hot chocolate or creamy pumpkin cheesecake.

Homemade whipped cream is easy and so much tastier than store-bought commercial brands. If you are like me, you will be eating it straight from the bowl, it's that good.

Video of the Day

How to Make Easy Homemade Whipped Cream How to Make Easy Homemade Whipped Cream

Things You\’ll Need

  • 2 cups heavy whipping cream

  • 1/4 cup powdered sugar

  • 1 teaspoon vanilla extract (optional)

How to Make Easy Homemade Whipped Cream

Step 1: Add Heavy Cream to a Chilled Metal Bowl

Place your metal mixing bowl in the fridge for about 15 minutes prior to wanting to make the whipped cream. Add the cream to the chilled bowl and mix with a whisk attachment until it has almost thickened to your desired consistency.

Step 2: Add in Powdered Sugar

A few minutes before the whipped cream is as thick as you want, add in the powdered sugar and continue mixing until well combined and the whipped cream forms a peak on the end of the whisk attachment.

Tip

If using an extract here, you would also add that in at this time with the powdered sugar.

How to Make Easy Homemade Whipped Cream

Step 3: Serve Immediately or Store in the Fridge

At this point, you can serve the whipped cream immediately or store in an airtight container in the refrigerator for up to a week.

How to Make Easy Homemade Whipped Cream

Next time that you want to wow your guests with a fantastic dessert, all you have to do it top a store-bought cake or pie with this easy homemade whipped cream. You can't get much easier or more delicious than that!

Easter Chicks Deviled Egg Recipe

0

Here's an Easter appetizer adorable enough to double as your table centerpiece. Turn everyday deviled eggs into almost-too-cute-to-eat hatchling Easter chicks! Follow the traditional classic deviled egg recipe included below, or use your family's favorite.

Deviled egg Easter chick on plate.

Things You\’ll Need

  • 6 hard-boiled eggs

  • 1/4 cup mayonnaise

  • 1 teaspoon white vinegar

  • 1 teaspoon yellow mustard

  • 1/8 teaspoon salt

  • Freshly ground black pepper to taste

  • A few carrot chips (for beaks and feet)

  • 12 capers for eyes

  • Piping bag or plastic food storage bag

  • Tweezers (optional)

Step 1: Remove Yolks

Cutting zig zag pattern in egg white to remove yolks for deviled egg Easter chicks

For each egg, cut through the egg white all the way around the center in a zig-zag pattern to simulate a "cracked open" appearance.

Removing yolks for deviled egg Easter chicks.

Gently separate the egg white halves into "bottoms" and "caps" and remove the yolks into a mixing bowl. Put the egg white bottoms and caps into the fridge while you make the deviled egg filling.

Step 2: Make Deviled Egg Filling

Making yolk filling for deviled egg Easter chicks.

Mash the yolks with a fork, then add mayonnaise, vinegar, mustard, salt, and pepper. Whip with the fork until the filling is well-combined and smooth.

Mixing ingredients for deviled egg Easter chicks.

Spoon the filling into a piping bag or plastic food storage bag (with one corner cut off). Put in fridge until ready to pipe.

Deviled egg filling in piping bag for deviled egg Easter chicks.

Step 3: Make Beaks and Feet

Now make the beaks and feet from your carrot chips. For the beaks, you'll need to cut 12 small wedges (one bottom and one top beak per chick). One carrot chip should yield 16 perfectly-sized wedges (though you'll only need 12).

Cutting beaks from carrot chips for deviled egg Easter chicks.

For the feet, cut a jagged edge into a carrot chip to form a starburst shape (see below).

Cutting feet from carrot chips for deviled egg Easter chicks.

Now, cut 12 wedges (two feet per chick) from the chip. One carrot chip should yield 8 feet.

Cutting feet from carrot chips for deviled egg Easter chicks.

Step 4: Assemble Chicks

Now here's the fun part — making your chicks! Take a bottom half of one of the egg whites and pipe filling inside. Then pipe a smaller mound on top to create the chick's "head." Place an egg white cap on top of the head.

Assembling deviled egg Easter chicks.

Using your fingers or tweezers, insert two capers (or two small pieces of chopped olive) into the head for eyes.

Assembling deviled egg Easter chicks.

Insert two carrot wedges between the eyes to form a beak.

Assembling deviled egg Easter chicks.

Super cute, eh? And so easy! Repeat for all eggs.

Assembling deviled egg Easter chicks.

Step 5: Arrange on Serving Dish

This is when you'll add the feet. Get creative with this step! I simply made a "nest"out of broccoli and carrot slaw, but you can also use a bed of shredded lettuce, fresh herb sprigs, or even set these cute little guys inside an egg carton. As you arrange each egg, add the feet.

Arranging broccoli carrot slaw into a "nest" for deviled egg Easter chicks. Deviled egg Easter chicks on plate.

Happy Easter — and happy eating!

Deviled egg Easter chicks on plate. Deviled egg Easter chicks on plate.

How to Eat Fresh Figs

0

While dried figs are more commonly featured in recipes, fresh figs are an absolute treat. Do not pass them up when you spot these beautiful gems in the produce aisle! They can be enjoyed on their own (try scattering them around a cheese platter), but they also pair beautifully with a wide variety of sweet and savory dishes. From homemade compotes to savory small plates, here are some wonderful ways to eat fresh figs.

How to Eat Fresh Figs | eHow

Video of the Day

Tip

Fresh figs are extremely perishable. It's best to use them within 1 to 2 days of purchase. Look for figs that are slightly soft but not mushy, and that have no visible signs of bruising. Store in the refrigerator and then wash and pat dry before using.

Figs with Mascarpone and Honey

Figs with mascarpone and honey are an easy, delicious dessert that can be prepared in no time. Slice the figs in half lengthwise and top with a small dollop of mascarpone cheese. Drizzle with honey and serve. This light dessert is an especially nice option after a heavier meal.

How to Eat Fresh Figs | eHow

Prosciutto-Wrapped Figs

If you're having guests over, prosciutto-wrapped figs are an amazing party appetizer. Simply slice the figs in half (remove the stem), wrap with good quality prosciutto, and secure with a toothpick. This would also work with bacon.

How to Eat Fresh Figs | eHow

Crostini with Goat Cheese and Sliced Figs

Another incredibly simple party appetizer is crostini with goat cheese and sliced figs. Three ingredients, minimal prep work involved, and delicious results. Preheat an oven to 350 degrees Fahrenheit, slice a baguette thinly on the bias and toast for 5 to 7 minutes, then allow to cool. Spread a generous layer of goat cheese onto each slice, and top with the figs. You could optionally drizzle a bit of balsamic reduction on top for added decadence.

How to Eat Fresh Figs | eHow How to Eat Fresh Figs | eHow

Other Ideas to Try

  • Try adding sliced figs to salads
  • Make a homemade fig jam
  • Add fresh figs to homemade scones, muffins or savory bread recipes
  • Build a beautiful fruit, cheese and cured meats platter that highlights fresh figs

How to Eat Fresh Figs | eHow

More Recipes That Use Fresh Figs

  • Fig Jam
  • Fig Preserves
  • Fig Wine

How to Make Red Wine Sangria

0

Warm nights just beg for batch cocktails, and the mother of all batch cocktails is the classic red wine sangria. With three kinds of booze, fresh fruit, and some bubbles for good measure, this pitcher is sure to be a crowd pleaser. Enjoy this classic recipe, or if you want, make it your own by adding favorite combinations of fresh fruit, flavored sparkling water, and replace the brandy with rum or bourbon.

How to Make Red Wine Sangria

Video of the Day

Tip

The most important step in making sangria is letting it rest overnight! Don't skip this step or your sangria will taste bland, unbalanced, and a tad bitter.

Things You\’ll Need

  • 1 apple

  • 1 orange

  • ½ cup blackberries

  • 2 tablespoons white sugar

  • 1 bottle (750mL) red wine

  • ½ cup brandy

  • ¼ cup orange liquor (such as Cointreau orTriple Sec)

  • 2 cups sparkling water, sparkling lemonade, or tonic

How to Make Red Wine Sangria

Tip

Any red wine you enjoy will do! No need to use an expensive bottle, most people favor well-priced Spanish table wines.

Step 1: Slice the Fruit

Slice the apple and orange, and add to a large pitcher along with the blackberries.

How to Make Red Wine Sangria

Step 2: Add the Alcohol and Sugar

Add the sugar, brandy, orange liquor, and wine to the pitcher. Stir to insure it's well combined.

How to Make Red Wine Sangria

Tip

Not a fan of the traditional brandy? Try a white rum instead.

Step 3: Let it Rest

This is the most important step. Cover the sangria and allow it to chill in the refrigerator for 24 to 48 hours. The fructose from the fruit will sweetened the wine and the flavors will marry and round out. Drink it now and it will taste flat and unbalanced.

How to Make Red Wine Sangria

Step 4: Add Sparkling Water

Add the sparkling water, sparkling lemonade, or tonic to the sangria. For a sweeter sangria, use tonic water; for a sweet and slightly citrus-y sangria use sparkling lemonade; for a less sweet sangria use sparkling water.

How to Make Red Wine Sangria

Tip

Ice is optional! Some people like to use it to keep the drink cold, others think it just waters it down. For a chilled sangria, without the watered down effects of ice, use frozen berries to keep that cocktail cold!

How to Make Red Wine Sangria