Countertop microwaves have been a part of everyday life for Americans since their introduction to the market in the 1970s. According to Statista, during 2019, 13.5 million units were sold in the U.S. It's almost impossible to imagine a modern kitchen without a place for a convenient and versatile microwave.
Video of the Day
Whether due to age, function or style, there comes a time for every household when you need to purchase a new unit. But what should you look out for when buying a microwave in 2022?
What To Consider When Purchasing a Microwave
Size: You should be interested in two measurements when selecting a microwave. The first is the actual dimensions of the product on the counter. Then, the other measurement is the cooking space, which is important if you plan to warm up large amounts of food. This interior measurement is listed as cubic feet.
Wattage: When paging through the local appliance store's catalog, you'll notice they list watts. Most modern microwaves have between 600 and 1200 watts. In short, the more watts you have, the more power you can tap into, which allows for faster cooking times.
Turntable: Although you might assume that all microwaves come with a turntable, some older units actually move from side to side. It's best to avoid these as you will be required to remove the food from the microwave and rotate it yourself.
Smart Sensors: Modern microwaves now come with smart sensors, which will automatically adjust time and power levels depending on the temperature of your food. This will take any guesswork out of cooking in your microwave and serve you a perfect meal every time.
Presets: The number of presets and their assigned functions vary between microwave models. Some units won't include any, while others might tout six or more. Always verify how many presets there are and what they do. Some functions, such as popping popcorn, can be a real life-changer!
Now that we've covered the basics let's look at the top-rated microwaves in 2022.
The Best Overall Microwave
Toshiba Black Stainless Steel Microwave Oven
$129.99 at Amazon
Offering all the best modern features you could desire, the Toshiba EM131A5C-BS packs in a lot. It can be integrated with Amazon Alexa, allows for hands-free cooking with voice activation and comes with its own app.
While there aren't many preset options on the unit itself, the app has 23 preset menu settings. And because it provides 1100 watts of power, it can easily handle any cooking load with ease. Other useful features include humidity sensors, which adjust cooking to the optimum level, and sound off, allowing midnight meals to be warmed up in silence—something unique to this microwave's price point.
The total interior space is 1.2 cubic feet (you can also upgrade to 1.3 cubic feet), and its dimensions are 20.5 inches long, 17.1 inches wide and 12.8 inches high.

The Best Budget-Friendly Microwave
Amazon Basics Microwave
$74.99 at Amazon
Powered by 700 watts, this Amazon Basics Microwave won't beat out any high-end appliances. Also, with 0.7 cubic feet of cooking space, it's a small and compact microwave. But where this microwave makes up for its shortfalls is with its voice control capabilities and ability to sync with Amazon Alexa.
By tapping the "Ask Alexa" button, you can tell the microwave precisely what needs to be done, from rewarming a cup of tea to popping a bag of popcorn (you can even place an order for a brand new box). An Echo device is required to use the voice control features, but it can still function as a regular microwave if you don't currently own one. The microwave packs in all the basics like ten power levels, a kitchen timer, a child lock, and most importantly, a turntable.
With its dimensions being 17.3 inches long, 10.1 inches wide and 14.1 inches high, it's also not going to take up a lot of counter space. We'd recommend it for a dorm room or studio apartment. While it may lack some expensive finishes and on-device features, this microwave is a bargain not to be missed.
The Best Large-Capacity Microwave
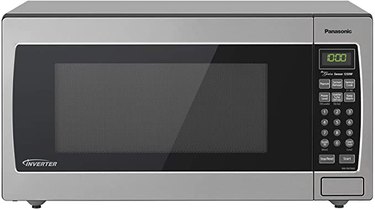
Panasonic NN-SN75LB Microwave Oven
$149.91 – $229.95 at Amazon
With 1250 watts of power and 1.6 cubic feet of space inside, this Panasonic model is perfect for large families. Its Cyclonic Inverter is guaranteed to deliver evenly-cooked meals every time. It comes with presets for popcorn, coffee, milk, sensor cook (detects how much cooking time is required), frozen foods, turbo defrost, and has a power level adjustment that goes up to 11. It also features a safety lock for children and a silent mode.
The exterior measurements for the Panasonic are 19.4 inches long, 11.9 inches wide and 21.9 inches high. It comes in three finishes (silver, black or white), which are all priced differently.
The Best Small-Capacity Microwave
Magic Chef Countertop Microwave
$84.98 at The Home Depot
The Magic Chef is the ideal countertop microwave for those not interested in complicated digital integrations and/or general technophobes. When using this appliance, there's no confusion with ten power levels, six presets, plus weight-defrost and time-defrost functions on the control panel. And it's compact to boot!
The Magic Chef Countertop Microwave boasts 1.1 cubic feet of internal space and 1,000 watts of power. The exterior measures 9.1 inches long, 15.7 inches wide and 20 inches high. Overall, it's a good quality product for a very reasonable price.

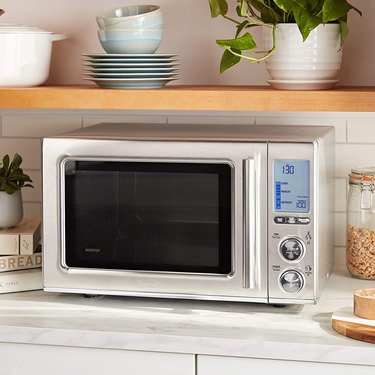
The Best Design-Forward Microwave
Breville BMO850BSS the Smooth Wave
$338.99 at Amazon
With a stainless steel design, sleek button arrangement and large screen, this is machine is a sight to see in any kitchen. It's powered by Sensor iQ technology, helping to take the guesswork out of cooking by adjusting power automatically to reheat and cook your dishes at the right temperature, ensuring a delicious meal every time. It offers a soft-close door and quieter operation than most microwaves on the market.
This microwave has 15 in-built smart presets—Smart Cook, Smart Reheat and Smart Defrost. The lower temperature setting allows for foods to be heated evenly without drying out the meal. The defrost setting takes care of being in a time crunch, providing an easy defrost of any meal in no time. Boasting 1250 watts of power and 1.2 cubic feet of interior space, it's also well sized. And its dimensions are 20.4 inches long, 17.5 inches wide and 12.4 inches high.
The Best High-Tech Microwave
Whirlpool Smart Over-the-Range Microwave
$584.00 – $699.00 at Lowe's
If you're all about having the most advanced technology in your home, this Whirlpool model is for you. It has smart features that connect to your WiFi and can be controlled via a mobile app. The app allows you to monitor cooking times, remotely turn it on and off and more. It can also operate via voice command using Google Assistant or an Amazon Alexa device.
This smart microwave features a barcode scanner for frozen foods, which automatically informs it about how to cook the meal. It also has a non-stick interior covered in CleanRelease, helping to prevent spills from sticking to the surfaces. And finally, you get an AccuPop cycle that will prevent popcorn from burning.
The exterior dimensions are 17.2 inches long, 29.9 inches wide and 16 inches high, so it's certainly not small. The double-layered interior boasts a whopping 1.9 cubic feet of cooking space and it has 1,550 watts of power. It's available in four finishes that vary in price.

")
 Set the flat side of the cheese on your cutting surface to help steady it.
  A great snack for kids to bring to school or parties.
  To transport, use a deviled egg carrier or on a tray with rolled up paper towels in between rows of eggs.
  Cut only the very top, but enough so you can place it back on top when finished.
  Dry off the empty orange peel before drawing on it.
 2 of 10
  3 of 10
  4 of 10
  5 of 10
  6 of 10
  7 of 10
  8 of 10
  9 of 10
  10 of 10
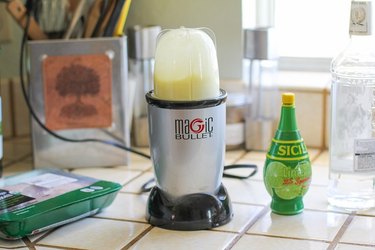 Prepare a marinade
  Marinate the chicken overnight
 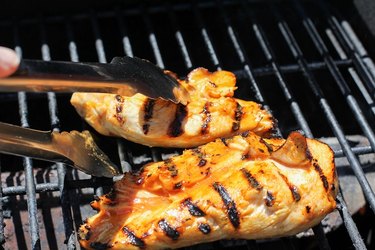 Grill the chicken
  Cook for
 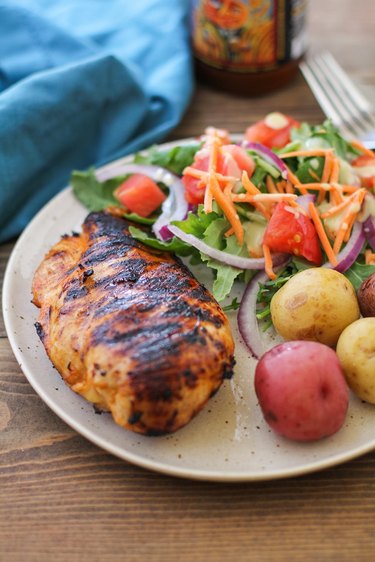 Serve with a side salad and boiled potatoes
 2 of 12
  3 of 12
  4 of 12
  5 of 12
  6 of 12
  7 of 12
  8 of 12
  9 of 12
  10 of 12
  11 of 12
  12 of 12