Home Blog Page 39

6 Foods You Didn\’t Know You Could Freeze

0

Stop letting good food go bad! Get storage savvy and check out this list of foods that you may not know you could freeze for later use. Just remember to freeze items right away in order to maintain maximum freshness, and mark each bag/container with the contents and freeze date.

Foods that freeze well: citrus slices, whipped cream, whole sandwiches

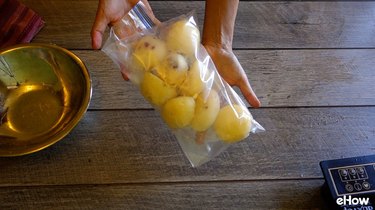
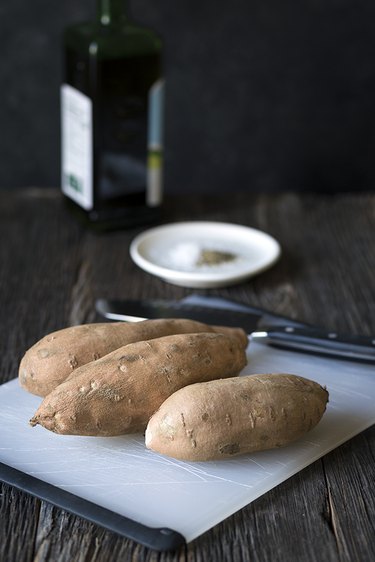
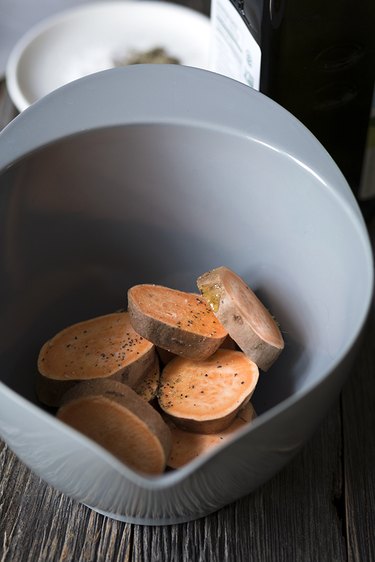
Partially-Cooked Potatoes

Freeze Up to 1 Year

Preparing raw potatoes for freezing.

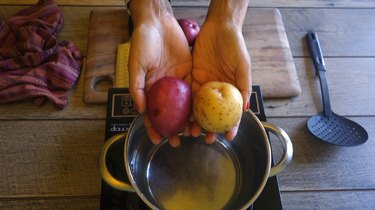
You probably know that cooked potatoes freeze well, but what if you want to store potatoes longterm and still have your choice of cooking options? Blanch before you freeze! This allows potatoes to remain in a mostly uncooked state until you're ready to boil, roast, fry, or whatever you'd like to do with them later.

Tip

Less starchy (i.e. waxy) potatoes such as Red Bliss and New Potatoes are preferred for this method over starchy potatoes like Russet and Idaho. For more information on freezing uncooked potatoes, visit this article.

Blanching potatoes before freezing.

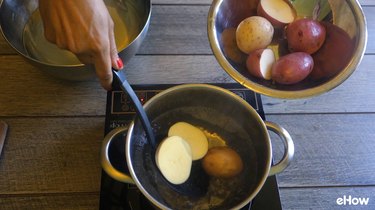
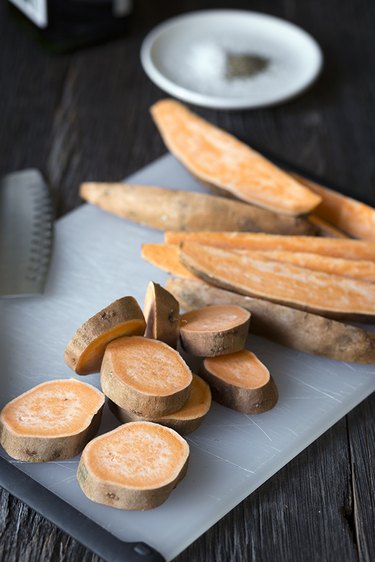
First, make sure they are uniform in size (small potatoes can be left whole). Then blanch by dropping into boiling water for 4 to 7 minutes depending on the size of the potatoes or potato pieces, then transfer right away to ice water to stop the cooking process.

Blanching potatoes for freezing.

Let them cool completely, peel, place in a freezer bag and freeze up to one year. No need to thaw them out before cooking.

Freezing par-cooked potatoes in a freezer bag.

Tip

Blanching is standard for freezing uncooked vegetables in general, as this allows them to retain both their color and nutrient content while frozen.
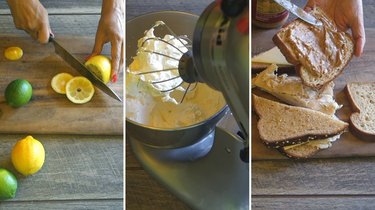
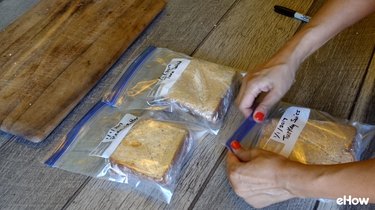
(Some) Sandwiches

Freeze Between 1 – 3 Months

Whole sandwiches that freeze well.

Some types of sandwiches (with low-moisture fillings) can be assembled in advance, frozen, and then thawed out in the fridge the day before eating them. Really handy for preparing lunches for weeks (even months!) ahead of time.

Fillings that freeze well:

  • Deli meats
  • Hard cheeses
  • Tuna salad
  • Chicken salad
  • Nut butters (minus the jam/jelly)

Avoid freezing:

  • Egg salad, as hard-boiled egg whites become rubbery
  • Moisture-rich sandwich fillers like tomatoes, lettuce, pickles, and sprouts which will make the bread soggy and/or get wilted. Add these in after thawing.
  • Condiments
  • Jellies or jams

Wrap whole sandwiches as airtight as possible (without smushing it!) with plastic cling wrap.

Wrapping sandwiches for freezing.

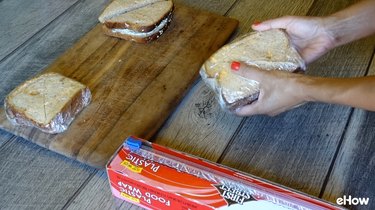
Then place inside freezer bags. The day before you'd like to eat your sandwich, place it into the refrigerator and allow to thaw overnight.
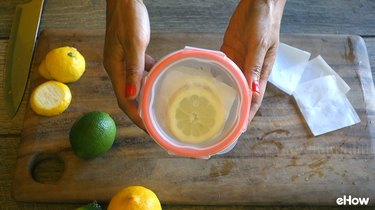
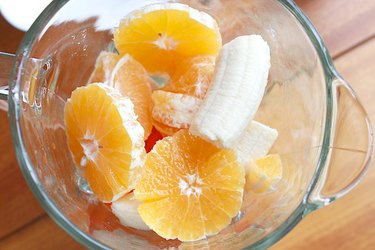
Bagging sandwiches for freezing.

Fresh Citrus Slices

Freeze Up to 6 Months

Preparing citrus slices for freezing.

If you've got a citrus tree, you probably end up with an overabundance of fruit. Instead of spending loads of time juicing them, slice them up to use for drinks and garnishes later.

Preparing citrus slices for freezing.

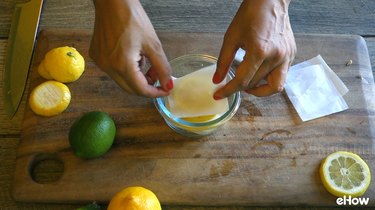
Simply place slices in between pieces of freezer/wax/parchment paper (so they're easy to separate), stack in a freezer-safe container and use as needed. You can add frozen citrus slices directly into drinks, a drink pitcher, or punch bowl. To use as a garnish, place in the refrigerator to thaw for a couple hours or at room temperature for about 30 minutes before using.

Preparing citrus slices for freezing.

Hard Cheeses

Freeze Up To 6 Months

Smoked gouda and cheddar cheese to be frozen.

Hard cheeses such as gouda, cheddar, and Swiss stand up well to freezing. Soft cheeses may be frozen as well for shorter periods of time (a couple weeks to a month), but there may be a significant change in texture.

Preparing cheese for freezing.

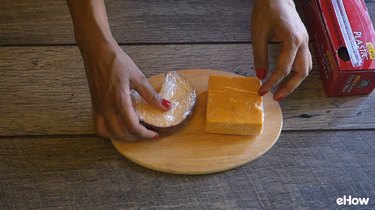
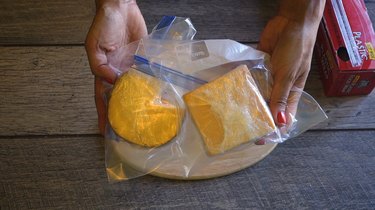
Wrap well in plastic wrap, place in freezer bags and freeze for up to six months. Allow to thaw completely in refrigerator around 24 hours before eating.
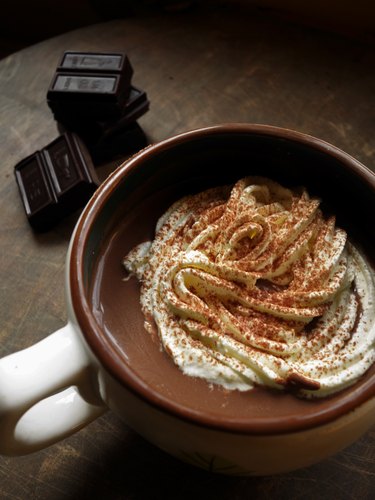
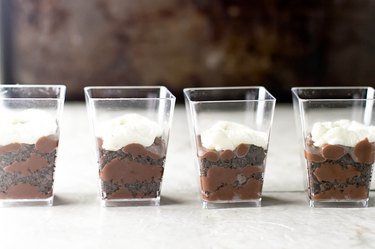
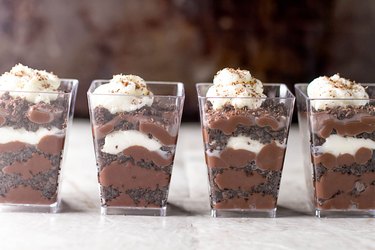
Preparing cheese for freezing.

Whipped Cream

Freeze Up to 2 months

Whipped cream in standing blender.

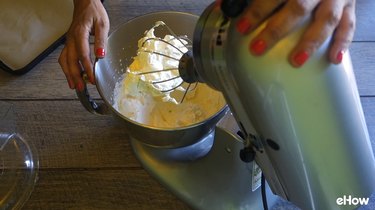
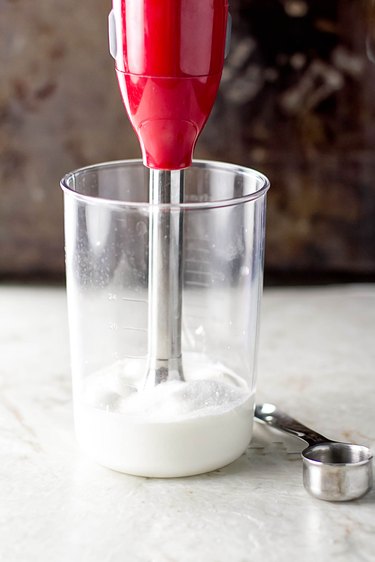
It can be difficult to judge how much whipping cream you need for topping desserts and other applications, especially when it's in a liquid state. No need to worry about waste, though, because you can easily freeze any extra whipped cream for later use.

Preparing whipped cream for freezing.

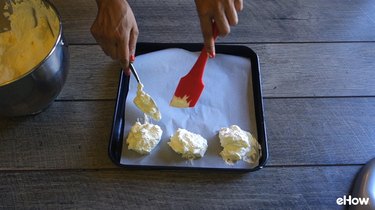
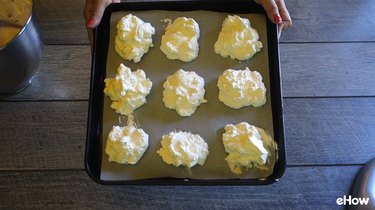
Place individual dollops of whipped cream on a freezer/wax/parchment-lined baking sheet or roasting pan. Place entire sheet in the freezer just long enough for the dollops to harden (for easy handling).

Preparing whipped cream for freezing.

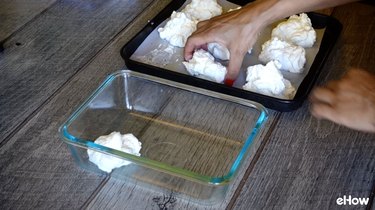
Finally, transfer the frozen dollops into a freezer bag or freezer-safe container.

Preparing whipped cream for freezing.

If using to top a dessert, you can place frozen dollops directly on top of the dessert and let sit at room temperature for about 20 minutes, or in the refrigerator for a couple of hours. You can also place frozen dollops directly on top of hot cocoa, if you don't mind it cooling down your drink a bit. If you'd rather keep your cocoa piping hot, let the whipped cream thaw in the fridge for a couple hours, or around 20 minutes at room temperature before using.
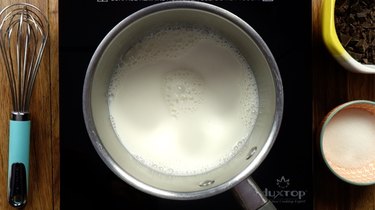
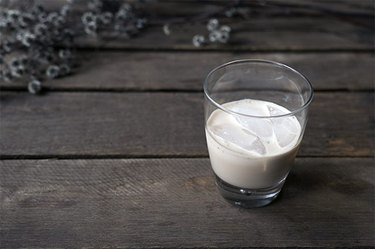
Milk

Freeze Up to 3 Months

It's surprising how many people let milk go to waste when it can easily be frozen and stored. The preferred method is in mason jars for their freezer-safe and preservation qualities and because they have a freeze line on them which makes it easy to know how much space to leave within the container to allow for expansion of the frozen liquid.

Filling mason jar with milk for freezing.

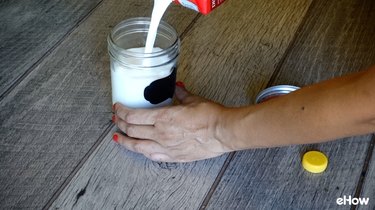
Fill a mason jar to the freeze line or if using another freezer-safe container, fill up to 3/4 full. Let defrost 24 hours in the refrigerator before using.
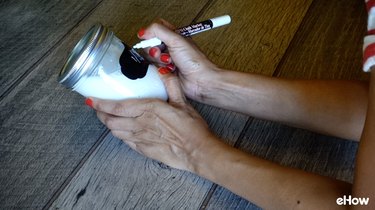
Dating mason jar full of milk for freezing.

Tip

As with all frozen food items, don't forget to mark the freeze date on the container.

How to Make Mini Chocolate Pudding Parfaits

0

A dinner party without dessert is like a musical without a third act: if there isn't a sweet little number to wrap up the show, it all feels incomplete. But I get it. The challenge of entertaining makes a store-bought dessert all the more tempting, but with a little planning, you can surprise your guests with a decadent last bite without much hassle at all. Make these mini chocolate pudding parfaits in advance and pull them out of the refrigerator when dinner is through. It's a win-win when everyone gets their own chocolate treat and you get to be where you belong — enjoying the party.

Chocolate Pudding Parfaits

Video of the Day

Things You\’ll Need

  • 2/3 cup plus 1 tablespoon granulated sugar

  • 1/4 cup cornstarch

  • 1/2 cup unsweetened baking cocoa

  • 1/4 teaspoon salt

  • 2 1/2 cups 2 percent milk

  • 3 egg yolks

  • 2 tablespoons unsalted butter, cubed

  • 4 tablespoons melted unsalted butter

  • 6 to 7 (approximately 6 ounces) chocolate graham crackers

  • 1 cup heavy cream

  • 1/2 ounce bittersweet chocolate, finely grated

  • 3 large resealable freezer bags

  • 6 (5 ounce) parfait glasses

Step 1: Make the Chocolate Pudding

In a large sauce pan, whisk the sugar, cornstarch, cocoa powder and salt until they are well combined. While continuously whisking, slowly add the milk to the dry ingredients and break up any lumps that form. Add the egg yolks and continue whisking until the mixture is smooth.

Turn the heat to "medium" and cook the pudding until it starts to thicken and the bubbles have to fight their way to the surface. Then, turn the heat off and strain the pudding through a fine mesh sieve and into a large bowl. Add the two tablespoons of cubed butter and stir until it's melted into the pudding. Finally, place a piece of plastic wrap directly on the surface of the pudding to prevent a skin from forming, and place the bowl in the refrigerator.

Make the chocolate pudding

Step 2: Prepare the Chocolate Crumbs

Place the chocolate graham crackers in a large resealable bag. Using a meat mallet or rolling pin, pound the graham crackers to break them up into very small pieces. Transfer the crumbs into a small bowl and combine them with four tablespoons of melted butter.

Chocolate crumbs

Step 3: Make the Whipped Cream

In a tall, narrow container, whip the heavy cream using an immersion blender. Once soft peaks form, add a tablespoon of sugar and continue whipping until the cream has doubled in size. Transfer the whipped cream into a resealable bag, and cut a small hole in one of the bottom corners. This will make it easy to pipe the whipped cream into the parfaits.

Whipping the cream

Step 4: Assemble the Parfaits

Transfer the pudding from the bowl into a resealable bag. Clip one of the bottom corners of the bag and pipe a few tablespoons of the pudding into the bottom of each parfait glass. Follow with a tablespoon of the buttery chocolate crumbs. Repeat these steps once more before adding a layer of whipped cream.

First few layers of the chocolate pudding parfaits

Now, continue layering the ingredients into the glasses. Pipe about a tablespoon of the whipped cream into each parfait glass, followed by another layer of pudding and another layer of crumbs. Once you get to the tops of the glasses, finish with dollops of whipped cream and grated chocolate on top.

Step 5: Chill and Serve

Chill the parfaits for at least two hours before serving, or up to a day in advance. When it's time for dessert, pass some spoons around and enjoy!

Chocolate Pudding Parfaits

How to Make Three Fruit Salsas for Your Summer Grilling

0

With all the sweet, juicy fruits available in the summer, it almost seems like there's not enough days in the season to eat them all! Sure, you can snack on an avocado or throw some blueberries back between meals, but there's no reason you shouldn't be using them on your dinner plates in a savory fashion, too. These three fruit salsas are perfect for pretty much anything that comes off your grill: they're simple, flavorful and give you yet another excuse to eat all the fruit you can during these warm weather months. Just combine the individual ingredients in a bowl, and get to grubbing!

Three fruit salsas for your summer grilling

Video of the Day

Step 1: Strawberry Avocado Salsa

This sweet and creamy salsa goes really well with chicken. A simple teriyaki or balsamic glaze on the meat would be a great pairing with the strawberries and avocado.

Things You\’ll Need

  • 3/4 cup diced strawberries

  • 1/2 large avocado, diced

  • 1/3 cup diced red onion

  • 2 tablespoons chopped cilantro

  • 1 tablespoon honey

  • 1 tablespoon red wine vinegar

  • Salt and pepper, to taste

Strawberry avocado salsa ingredients Strawberry avocado salsa

Step 2: Mango Tomatillo Salsa

There's just something about mango and fish that works really well together. Try this mango tomatillo salsa with a meaty fish that will hold up well on the grill, like salmon.

Things You\’ll Need

  • 1 ripe mango, chopped

  • 1/2 cup thinly sliced red cabbage

  • 2 tomatillos, chopped

  • 1/4 teaspoon red pepper flakes

  • 1 tablespoon chopped basil

  • Salt, to taste

Mango Tomatillo Salsa ingredients Mango tomatillo salsa

Step 3: Blueberry Lime Jalapeño Salsa

The heat and heartiness of the jalapeño and corn in this blueberry lime salsa would go really well with a steak. You could even grill the corn first before cutting off the kernels to bring a smoky char to the salsa as well!

Things You\’ll Need

  • 1/2 pint blueberries

  • Sweet corn kernels, cut from 1/2 an ear of corn

  • 1 jalapeño, thinly sliced

  • Zest of 1/2 lime

  • Juice of 1/2 lime

  • Salt and pepper, to taste

blueberry lime jalapeno salsa ingredients Blueberry lime jalapeno salsa

Smoothie Recipe for Clear Skin

... A fresh smoothie every morning can help your skin heal from breakouts, and stay youthful and glowing. Image Credit: Lilly Wallace

A nutrition-dense diet abundant in fresh, organic, antioxidant-rich vegetables and fruits does more than make you feel good — it helps you look good too with healthy, glowing skin. The following smoothie recipe includes five taste-pleasing ingredients that provide plenty of skin-healing vitamins, antioxidants and other essential nutrients.

Video of the Day

Equipment and Ingredients

... If you prefer a less sweet taste, swap a grapefruit for the orange. Image Credit: Lilly Wallace

This recipe makes about 30 ounces or two smoothie servings. To experience maximum benefits, it should be consumed immediately, so half the recipe sufficient for one person.

  • Blender
  • Knife
  • Glasses
  • 3 large carrots
  • 1 large cucumber
  • 2 oranges
  • Half a banana
  • Half a can of coconut juice/water (about 5 ounces)
  • A pinch of cinnamon (optional)

Benefits

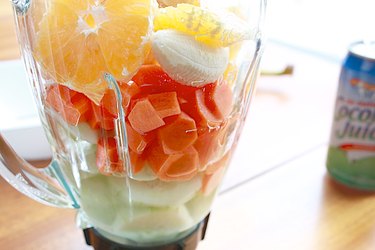
... You can also swap celery for the cucumber in this smoothie. Image Credit: Lilly Wallace

Cucumber is very hydrating due to the high water content (up to 95%), and has antioxidant and anti-inflammatory benefits.

Carrots provide high amounts of vitamins and phytonutrients, such as lutein and lycopene. Studies have shown that lycopene and β-Carotene (a Vitamin A derivate, abundant in carrots) increase the body's defenses against UV damage, therefore protecting the skin against sunburn.

Banana tastes great in a smoothie, but it also contains vitamins and flavonoids, which have antioxidant effects.

Coconut water is a great source of vitamins B and C, which are a powerful antioxidants and promote repairing of the skin. The tropical water also provides cytokinin, a class of phytohormones that have showed significant anti-aging properties.

Oranges add vitamin C. Vitamin C deficiency has been associated with impaired collagen synthesis, and therefore loss of skin elasticity and the formation of wrinkles.

Instructions

... For a sweeter taste, add a teaspoon of raw honey to the mix. Image Credit: Lilly Wallace

Wash the fruits and vegetables and peel the carrots, oranges and bananas. Cut them into small chunks and combine them in your blender with the coconut water and cinnamon, if desired. Process the smoothie until it reaches your desired consistency, and serve it immediately.

Don\’t Forget to Chew!

You may be tempted to simply drink your smoothie. However, you should chew it as if you were eating it, or at least swish it around your mouth to let it mix with your saliva before you swallow. Chewing releases an enzyme called ptyalin (a form of amylase) that helps digest carbohydrates and proteins.

How to Grill Sweet Potatoes

0

Sweet potato fries are a healthy alternative to regular French fries, which makes them a perfect option for serving next to grilled classics such as hamburgers and hot dogs (and even veggie burgers, for those who avoid meat). They're easy to prepare, and the grill adds a nice char and smokiness that you don't get with other cooking methods.

How to Grill Sweet Potatoes | eHow

Video of the Day

Things You\’ll Need

  • Sweet potatoes, preferably medium-sized (one per person)

  • Oil for grilling (olive oil is a good option)

  • Kosher salt and ground black pepper

  • Chef's knife

  • Cutting board

  • Heat-resistant tongs

  • Optional for serving: homemade aioli

Step 1: Gather Your Ingredients and Tools

Preheat a gas grill on high heat for 10 to 15 minutes.

Any type of sweet potato will work, but if you're planning on cutting them into a wedge shape (described in step 2), it's best to use medium-sized sweet potatoes that aren't too abnormally shaped. A typical serving size to keep in mind while gathering ingredients is one medium-sized sweet potato per person.

How to Grill Sweet Potatoes | eHow

Step 2: Cut the Sweet Potatoes Into Rounds or Wedges

Sweet potatoes do not need to be peeled for grilling, though they should be rinsed and patted dry first. There are two options for cutting: rounds or wedges. It's a personal preference. Keep in mind that the thicker the cut, the longer it will take for the sweet potatoes to cook through.

How to Grill Sweet Potatoes | eHow

Step 3: Coat With Oil, Salt and Pepper

Regardless of which cut you choose, you will want to liberally coat the sweet potatoes with oil to keep them from sticking to the grates.

How to Grill Sweet Potatoes | eHow

Step 4: Grill and Serve

Grill the sweet potatoes, using heat-resistant tongs to turn them over halfway through the cooking process. Depending on the thickness of cut, this can take anywhere from 4 to 6 minutes per side. It's best to test one for doneness before removing the rest.

How to Grill Sweet Potatoes | eHow

Grilled sweet potatoes are wonderful on their own, but they also pair wonderfully with homemade aioli!

How to Grill Sweet Potatoes | eHow

Kick-Ass Cocktail Recipes You Should Know

0

No suspenders or hipster handlebar mustache needed. Show bartenders who's boss by having some kick-ass cocktail recipes in your repertoire. Your home bar cart is begging for these babies. And, as they say, it's 5 o'clock somewhere. So let's get mixing.

Cocktail recipes

The Perfect Margarita

Just a few simple ingredients make this cocktail a classic. Get the recipe.

Homemade margarita

White Wine Spritzer

Is there anything more refreshing? We think not. Get the recipe.

White wine spritzer recipe

Old-Fashioned

It may be called an Old-Fashioned, but there's nothing fuddy-duddy about this drink. Get the recipe.

Old-Fashioned

Gin & Tonic

Choose the highest quality ingredients. And don't forget the lime. Never forget the lime. Get the recipe.

Gin & Tonic

Gimlet

Get ready for guests to shout,"Gimme that gimlet!" Seriously. Get ready. But first, get the recipe.

How to Make Caipirinha

Brazil's national cocktail is brilliant. Or should I say it's "brazilliant?" Get the recipe.

Caipirinha

Pomegranate Gin and Tonic

The citrus and fruit juice add just the right amount of sweetness. Get the recipe.

Pomegranate gin and tonic

Tom Collins

This too-tall Tom can do no wrong. Get the recipe.

Tom Collins

Martini

James Bond is no dummy. He knows what's up. Get the recipe.

Martini

Cucumber-Mint Grapefruit Margarita

Careful! The tequila is slyly hiding in this invigorating drink. Get the recipe.

Cucumber-Mint Grapefruit Margarita

Homemade Irish Cream Liqueur

Use this Irish cream to give your coffee a kick in the winter or when making a mudslide in the warmer months. Get the recipe.

Homemade Irish Cream Liqueur

Mint Julep

You don't need to wait for the Kentucky Derby to break out this recipe. Grab your muddler and make it now. Get the recipe.

Mint Julep Drink

Cocktails with Ginger Beer

#$@&%*! these are good! Get the recipes.

Cocktails with Ginger Beer

Homemade Orange Liqueur Recipe

This recipe can be used as a starting point that leads to a world of possibilities. Get the recipe.

Orange Liqueur Recipe

Sidecar Cocktail

Use that aforementioned homemade orange liqueur in this subtly sour and sweet sipper. Get the recipe.

Sidecar cocktail

Moscow Mule

The cute copper mugs seal the deal with this drink. Get the recipe.

Moscow Mule Drink

Mojito

You may not normally drink rum, but this cocktail will make you change your mind. Get the recipe.

Mojito cocktail

You Might Also Like…

How to (Quickly) Chill a Cocktail Glass

Three methods for getting a perfectly chilled cocktail glass… even when you need one at the last minute! (Because presentation is just as important as the drink, right?)

How to chill a cocktail glass

European-Style Sipping Chocolate Recipe (For Serious Cacao Lovers Only!)

0

Before going down this chocolatey road, be advised that this recipe is not for your run-of-the-mill hot cocoa. This European-style drinking chocolate (or "sipping chocolate") and is for serious cacao lovers only. I mean, it's for those who like their chocolate dark (at least 70% cacao) and who can happily inhale an entire bar in one sitting. Do I still have your attention? Perfect. Firstly, I'm not sure whether to categorize this as a food or a beverage, as it's so thick you may even choose to spoon it up rather than sip it. Also, I should mention that it differs from the traditional European recipe in that it isn't thickened by cornstarch (too carby!), but by adding half & half to the milk and evaporating off some of the liquid. The result is an intense, rich, and seriously decadent chocolate sipping experience. Oh, and did I mention that it's low-carb and low-sugar? Guilt-free decadence!

Sugar-free, low-carb European-style drinking chocolate.

Tip

Not a low carber? Simply use regular sugar instead of sweetener. Or you can use bittersweet chocolate bars and add additional sugar (if needed) to taste.

Things You\’ll Need

  • 1 ½ cups whole milk

  • ½ cup half & half

  • ¼ cup sweetener (I used Lakanto Classic)

  • 3 ½ ounces unsweetened chocolate, chopped

  • ¼ teaspoon chili powder (optional)

  • ¼ teaspoon ground cinnamon (optional)

  • ½ teaspoon vanilla extract

  • 2 to 3 pinches of sea salt

Step 1

In a heavy-bottomed saucepan, combine milk and half & half. Place over medium-low heat and stir.

Heating milk and half & half in saucepan for low-carb, drinking chocolate.

Step 2

Add sweetener and stir to dissolve.

Adding sweetener to milk and half & half in saucepan for low-carb, drinking chocolate.

Step 3

Once the sweetener is dissolved, add the chopped chocolate and stir it in.

Adding chocolate to milk and half & half in saucepan for low-carb, drinking chocolate.

Step 4

If using chili powder and cinnamon, add them in immediately after stirring in the chocolate, then continue simmering until the chocolate has completely melted and the mixture is thickened and smooth.

Adding optional chili powder and cinnamon to low-carb, drinking chocolate.

You'll know it's done once it coats the back of a spoon.

Thickened low-carb drinking chocolate coating the back of a spoon.

Step 5

Remove from heat, then add vanilla extract and 2 to 3 pinches of sea salt. Stir to incorporate.

Adding vanilla to low-carb, drinking chocolate. Adding pinches of sea salt to low-carb, drinking chocolate.

Step 6

Your chocolate is nearly ready to sip (or spoon!). To serve, strain in equal portions into small mugs.

Straining low-carb, drinking chocolate into a mug to serve.

This recipe makes 4 to 5 servings — depending on how much you can drink in one sitting!

Sugar-free, low-carb European-style drinking chocolate.

You can sip/spoon it up as is, top with whipped cream and cocoa powder, or even use it as a dipping sauce.

Sugar-free, low-carb European-style drinking chocolate.

However you take it, it's best enjoyed savored slowly on a cold and wintry morning (or eve!) while reminiscing about life's happiest moments.

Sugar-free, low-carb European-style drinking chocolate.

Easy to Make Shakshuka Recipe

0

Shakshuka is a recipe that you need to add to your breakfast arsenal. It's full of flavor, easy to share, and perfect for a lazy Sunday morning. It's also a great meal for any time of the day, often eaten in North Africa as dinner or lunch. Just serve it with crusty bread and beer and it's the perfect way to end a long day.

Easy to Make Shakshuka Recipe

Video of the Day

Things You\’ll Need

  • 2 tablespoons olive oil

  • 1 yellow or white onion, chopped

  • 1 red bell pepper, chopped

  • 1 large red jalapeño, chopped and seeded

  • 1 (28 ounce) can whole peeled tomatoes

  • ¼ cup

    tomato paste

  • 1 teaspoon salt

  • 1 teaspoon garlic powder

  • ½

    teaspoon smoked paprika

  • 1 teaspoon pepper

  • ½ teaspoon ground cumin

  • 1 teaspoon chili powder

  • 2 cups chopped red chard

  • 6 whole eggs

Easy to Make Shakshuka Recipe

Step 1

Heat the olive oil in a large cast iron skillet over medium heat. Add the onions, bell pepper and jalapeño, cooking until softened and starting to caramelize, about 15 minutes.

Easy to Make Shakshuka Recipe

Step 2

Add the tomatoes (along with the liquid from the can), the tomato paste, and all the spices. Simmer until the tomatoes have broken down slightly, about 10 minutes.

Tip

Make it your own! Add harissa, or you favorite hot sauce, maybe some sausage, or top it with feta cheese. It's an easy dish to customize to your taste buds!

Step 3

Stir in the chard, cooking until it has wilted

Easy to Make Shakshuka Recipe

Step 4

Crack eggs over the sauce so the eggs are evenly distributed across the surface. Cover, cooking until the whites are just set, about 5 minutes.

Easy to Make Shakshuka Recipe Easy to Make Shakshuka Recipe

Step 5

Spoon each egg into a bowl along with some of the tomato sauce.

Easy to Make Shakshuka Recipe

How to Use the Ikea French Press

Things You\’ll Need

  • French press

  • Whole coffee beans

  • Coffee bean grinder

  • Tea kettle

  • Wooden chop sticks/spoon

... Add some French press coffee to your morning routine.

Most people get their morning coffee from a drip coffee maker. It's an easy and reliable source of caffeine, with predictable flavors, tastes and textures. But when it comes time to treat yourself, there's no better way to do so with coffee than by using an Ikea French press coffee maker. In less time than it takes to make a full pot of drip coffee, you can have smooth, rich coffee, with bolder flavors and stronger taste. It's like having a barista in your own kitchen.

Video of the Day

Step 1

Fill your tea kettle with water and set it on the stove to boil. Always do this before beginning the French press process, as the water you use in the press cannot be boiling hot and needs to cool down slightly before use.

Step 2

Fill the Ikea French press with hot tap water to warm up the glass carafe while the water boils on the stove top. When the water on the stove is heated, pour the tap water from the carafe and let the boiling water settle.

Step 3

Grind your whole coffee beans to a medium or coarse grind, but no finer. Try using 1 tbsp. of ground coffee to 5 ounces of water, then adjust your portions accordingly.

Step 4

Add your ground coffee to the French press, which should be empty of warm tap water at this point. When finished, slowly pour the desired amount of nearly boiling water into the carafe, making sure you leave enough room for the plunger.

Step 5

Stir coffee grounds and water with wooden chop sticks or a wooden spoon. Avoid using anything metal, as that could crack your carafe.

Step 6

Place the top of your French press into place, and depress the plunger roughly 2 inches into the coffee, but not completely down to the bottom. Allow your coffee to steep for four or five minutes, but more or less time depending on the strength of the coffee you want – the longer it steeps, the stronger it is.

Step 7

Slowly depress the plunger all the way to the bottom using no more pressure than simply resting your hand on the handle of the plunger. Avoid pressing down in one fell swoop, as that could let grounds escape beyond the filter or let water seep too high and spill out above the mesh filter.

Step 8

Turn the pour spout toward the spout on the carafe and pour a glass of fresh French press in a coffee cup. From here, you can determine if your ratio of grounds to water was correct.

Step 9

Rinse out the glass carafe and mesh filter and hand dry it. Do this after every use to remove oils and sediment so you can have a clean, fresh cup of coffee every time.

How to Make Peanut Butter-Banana Smoothies

0

Fresh made Banana smoothie on wooden background Garnish your smoothie with slices of fresh banana. Image Credit: Lecic/iStock/Getty Images

Start to Finish: 5 minutes Servings: 4 Level: Beginner

Video of the Day

When a busy morning calls for a quick yet filling meal, a peanut butter-banana smoothie can be the perfect solution. Creamy banana blended with protein-rich peanut butter and tangy Greek yogurt can provide a delicious and nutritious start to your day.

Ingredients

  • 1 cup Greek yogurt
  • ½ cup low-fat milk
  • ¼ cup cold water
  • 2 bananas, sliced
  • 1 ½ tablespoons wheat germ
  • 1 tablespoon honey (or more to taste)
  • ¼ teaspoon vanilla extract
  • ¼ teaspoon ground nutmeg
  • 2 ice cubes
  • 2 tablespoons creamy natural peanut butter

Directions

Place all of the ingredients except the peanut butter into a blender in the order that they are listed.

Blend the ingredients on medium-high speed for 15 seconds. Remove the cover and scrape down the sides of the blender. Blend the ingredients for an additional 15 seconds.

Add the peanut butter and blend the mixture on medium speed for 30 seconds until all of the ingredients are incorporated and the drink is silky smooth.

Smoothie with a Twist

To create a chocolate, banana and peanut butter smoothie, inspired by Betty Crocker,replace the liquid in the recipe with ¾ cup of light chocolate flavored soy milk.

  • **Coconut water** can be substituted for plain water in smoothies and will provide added potassium.

  • **Flaxseeds** — also known as linseeds — are high in fiber and contain healthy omega 3 fatty acid. Add a teaspoon of ground flaxseeds to your smoothie to provide added nutrients.

  • For a variation on this smoothie, **try using other nut butters** such as almond or cashew. These butters pair well with the flavor of banana and will still provide healthy fats and protein.

Tips and Tricks

In an article on smoothies for "Yoga Journal," Pat Crocker, author of The Smoothies Bible suggests that to keep ingredients like nut butters from sticking to the sides of the container, add them after you blend the other ingredients.

Save time in preparing your smoothie by having sliced, frozen bananas for your smoothie on hand. Peel and slice fresh bananas. Place the pieces into a zippered freezer-safe bag in a single layer and put the bag into the freezer, lying flat. The banana slices will freeze and be ready to use when you need them. Using frozen fruit creates a frosty shake without the need to add ice.