Many common baking ingredients pose a challenge for those with dietary restrictions for medical reasons or lifestyle choices. But even if you yourself don't have any forbidden foods, you may find yourself in the position of baking for someone else who does. We've got your back! Check out our list of some of the most easy-to-find alternative ingredients for common ingredients used in baked goodies.
Tip
This tip is IMPORTANT, so pay attention! Before swapping out any of your recipe ingredients for the substitutions listed below, know that baking is a science. As such, this article is meant to provide information about a few of the many substitution possibilities available that will work well for many, but not all, needs. Please do additional homework on the specific item you’re baking and whether your chosen substitute might be a good fit. However, the absolute best way to find out what works is via your own personal experimentation.
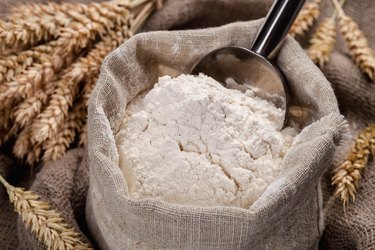
Wheat Flour Substitutes
These are some of the most common substitutes for those intolerant to wheat flour, probably because they're easy to find in most supermarkets and work very well in many quick bread, cookie, and cake recipes.
Tip
When trying out wheat flour substitutes for the first time, find recipes that require no more than 2 cups of flour.
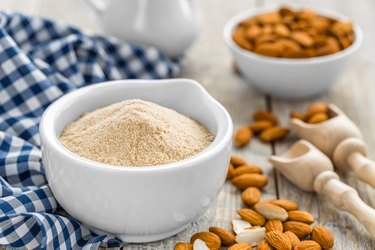
Blanched Almond Flour
Not to be confused with coarser almond meal (ground, unblanched almonds with skins left on), finely ground almond flour is a common substitute for all-purpose flour in cakes, muffins, quick breads, cookies, and press-in pie crusts. It's not suitable for making yeast-risen bread, unless you're using a mix of almond and a gluten-containing flour. For rising power, you also might want to add ½ teaspoon baking powder or egg. You'll also need to lower the temperature and/or shorten the baking time, as almond flour browns and burns quicker than wheat flour.
If you don't want to give up wheat flour entirely, you can also just substitute ¼ of the wheat flour with almond flour with no other changes to the recipe needed.
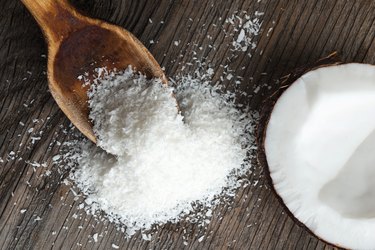
Coconut Flour
People with nut allergies use coconut flour as their wheat flour replacement instead of the more-common almond flour, but you won't be able to substitute it purely on its own without adding/altering other ingredients –typically more eggs and liquid. It's very absorbent, so unless you're making a bread that's meant to be on the dense and dry side (like scones, perhaps), you shouldn't opt for coconut flour. If you would like to use only coconut flour, a common conversion ratio is ¼ cup coconut flour for 1 cup all-purpose flour, plus the addition of about 2 eggs per ¼ cup coconut flour used (for binding and rising) and ¼ cup of additional liquid (water, your favorite type of milk, fruit juice, etc.) to prevent excessive dryness. Like almond flour, it's best used for cakes, muffins, quick breads, cookies, and roll-out pastry crusts.
Almond & Coconut Flour Blend
Using a combination of almond and coconut flour is a terrific substitution for all purpose flour for quick breads, cakes, and cookies, and typically does better than using just almond or coconut flour alone. Use a ratio of 3 parts almond flour to 1 part coconut flour and use this blend in place of wheat flour 1:1. However, because coconut flour is drying, you'll need to add an additional ¼ cup of liquid per 1 cup of almond and coconut flour blend. As with almond flour, if you need extra rising power in your recipe, add an additional 1 teaspoon baking powder to the recipe or an egg (if eggs are tolerated).

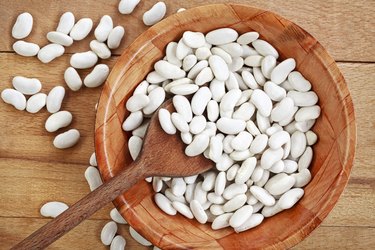
Bean Puree
Pureed beans in place of flour? Yes! Black bean puree in particular is popular for making brownies and chocolate cookies/cake. Great northern, cannellini, and chickpea purees are also frequently used as flour alternatives. Many sources call for substituting pureed beans for flour 1:1, but you're probably better off searching for baking recipes that are specifically made for beans. For example, try our terrific Black Bean Fudge Brownies recipe.
Refined Sugar Substitutes

Maple Syrup or Honey
Here's a simple formula for replacing sugar with these natural liquid sweeteners (with more nutritive value): Use ¾ cup honey or maple syrup for 1 cup sugar and reduce ½ cup of the liquid.

Stevia extracted (refined and concentrated) is just one of many low calorie sweeteners you can use in place of sugar in baked goods, but it's a bit trickier to substitute as it's much sweeter than sugar — 200 to 300 times sweeter. (Pure stevia extract is not to be confused with ground stevia leaves which is 10 to 15 times sweeter than sugar, but has a licorice-like aftertaste that is unpalatable for many.)

If using powdered stevia extract, you'll typically use just ½ – 1 tsp stevia powder to one cup sugar. If using liquid extract, use about 1 tsp of liquid stevia extract per one cup of sugar. Amounts vary from product to product, so read the labels carefully.
Also, since you're taking away some of the density that sugar lends to baked goods, you should add ⅓ cup of unsweetened applesauce, plain yogurt, or egg whites — whichever is best tolerated or would work better for your recipe — to replace the bulk that sugar adds.
Sugar Alcohols
Sugar Alcohols (which occur naturally) don't dramatically affect blood sugar levels like regular sugar, making them a popular choice for many bakers. The two most commonly-used sugar alcohols for home baking (as opposed to commercial baking) are xylitol and erythritol. They can typically be substituted for sugar 1:1, although erythritol is slightly less sweet than sugar. Xylitol is a very close match to sugar in sweetness and taste, but the downside is that it can have a laxative effect if too much is ingested, and is very dangerous (possibly lethal) to pets, so it must be kept away from them at all times. Erythritol, however, is safe for animals and causes less gastrointestinal issues (for more people) than xylitol.
Egg Substitutes
In baked goods, eggs typically play two roles: 1) binding agent 2) rising agent. Because of that, you'll have to figure out whether your recipe includes eggs for binding, rising or both and use substitutes accordingly.

For Binding
You can use one half of a mashed banana in place of one egg. You can also combine 1 tablespoon chia (ground or whole) or ground flax seeds with 3 tablespoons of water for each egg.

For Rising
One egg equals 1½ tablespoons apple cider vinegar (or other acid such as citric acid or lemon juice), I½ tablespoon oil t and 1 teaspoon baking powder.
Dairy Substitutes

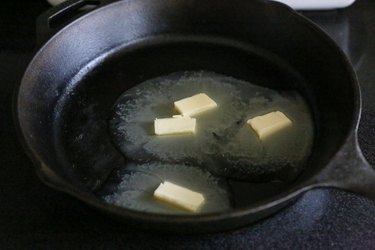
Butter
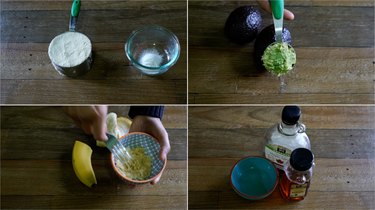
You can use the following at 1:1 ratio: unsweetened applesauce, mashed avocado for cookies, cakes and quick breads.

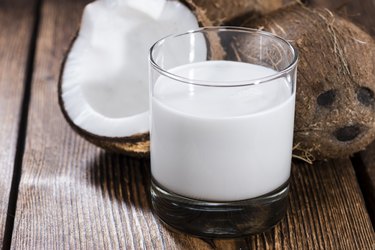
Cream
Light cream can be replaced 1:1 with full fat coconut milk or silken tofu that has been blended until smooth.
Heavy cream can be replaced 1:1 with coconut cream or with a non-dairy milk and oil blend using the following formula: 1 cup of soy or rice milk plus 1 tablespoon of avocado or extra light olive oil.
Buttermilk
Combine l tbs apple cider vinegar with 1 cup non-dairy milk of your choice such as almond, coconut, soy, flax, or hemp.
Oil Substitutes
Replace 50% – 100% of the oil in a recipe with unsweetened applesauce, mashed banana, or white bean puree.
Note that many more substitutes are out there for these and other baking ingredients — we've just provided few of the most commonly used and easy-to-find replacements. We hope that we were able to provide some useful tips and ideas to help kick off your own personal adventures in healthful baking!


 String cayenne peppers on needle and thread for drying.
  Cayenne peppers drying.
  Protect yourself from coming in contact with hot cayenne pepper oils.
  Canning jars help preserve cayenne peppers.