Home Blog Page 36

How to Cut Fruits for a Fondue Fountain

Things You\’ll Need

  • Cutting board

  • Chef's knife

  • 1/2 cup lemon juice

  • Small bowl

  • Strawberries

  • Blueberries

  • Raspberries

  • Blackberries

  • Toothpicks

  • Short skewers

  • Cherries

  • Oranges

  • Bananas

  • Tray or container, with cover

  • Pastry brush

  • Apples

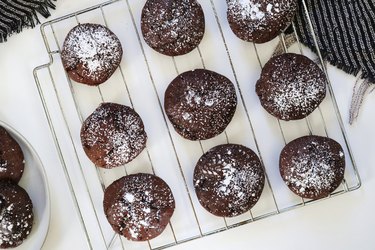
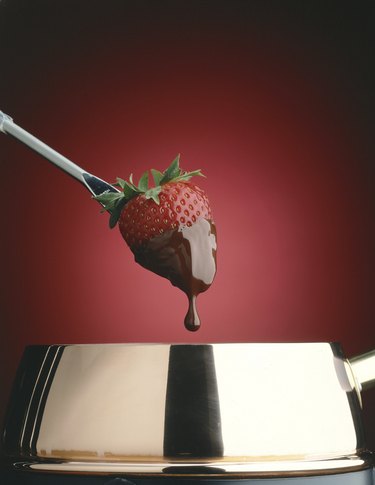
... Prepare strawberries to dip in the chocolate for a delectable combination.

Guests thrill to see rippling pools of chocolate fondue spilling over the tiered edges of a fondue fountain. Featuring this display at your event brings to life a delicious childhood fantasy many adults continue to cherish. Fruit is the most-common accompaniment for chocolate fountains because the acidity offsets the richness of the chocolate. Since fruits vary in size, shape and moisture content, you should cut each fruit into an attractive portion that guests can consume in no more than two bites.

Video of the Day

Step 1

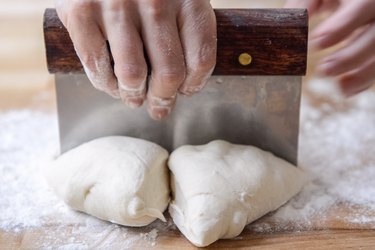
Lay a clean cutting board and chef's knife on your work surface. Pour 1/2-cup of lemon juice into a small bowl. Set the juice aside. The flesh on the inside of bananas and apples turns brown when you expose it to oxygen, causing it to look old or spoiled. However, the acid in lemon juice impedes discoloring temporarily. Brushing the bananas and apples with lemon juice, after you cut them, should preserve their appearance throughout the event. Place fruit on your cutting board to trim it for the presentation.

Step 2

Slice horizontally through the top of a strawberry to remove the leafy tops and a sliver of berry. Cut large strawberries in half vertically. Leave the green tops on the berries, if desired.

Step 3

Discard damaged blueberries, raspberries or blackberries instead of trimming them, since they are delicate and lose juice quickly. Run a toothpick or short skewer through the top of a berry, out through the bottom. Place two or three berries on each pick or skewer. This minimizes juice loss and makes it easy for guests to dip more than one berry at a time.

Step 4

Remove the stem from a cherry. Slice around the cherry in a vertical ring, down to the pit. Separate the halves gently with your fingers. Remove the pit with your finger or the tip of the knife. Slide two or three cherry halves onto a toothpick or short skewer.

Step 5

Peel an orange with your fingers. Remove as much of the bitter, white material from the flesh as you can. Pull the orange apart to separate each segment. Cut each segment in half horizontally.

Step 6

Peel a banana by hand. Lay the banana on the cutting board. Slice the fruit horizontally into 1/2- to 3/4-inch-thick slices. Place the banana slices on a tray or in a broad container. Dip a pastry brush in the bowl of lemon juice. Brush lemon juice onto each banana slice to prevent browning. Cover the tray or container immediately.

Step 7

Stand an apple right side up on the cutting board. Slice it in half vertically two times, in an X-pattern, to quarter the apple. Slice each cored segment horizontally into three, equal chunks. Slice 1/4 inch off of the narrow end of the chunk to remove remaining sections of core. Place the apple chunks, skin-side down, on a tray or in a broad container. Dip a pastry brush in the bowl of lemon juice. Brush each apple piece with the juice to prevent browning. Cover the tray or container immediately.

Tip

Prepare fruit as close to the service time as possible to reduce the likelihood of pieces browning or becoming dry. Cover cut fruit immediately in an airtight container or by covering a fruit tray with plastic wrap. Brushing fruit with lemon juice does alter the flavor slightly. However, chocolate covers the minimal taste of lemon, making it unnoticeable when guests eat lemon-treated fruit.

Chocolate Whoopie Pies with Red Wine Buttercream Recipe

0

This Valentine's Day, ditch the boxed chocolates and treat your loved ones to chocolate whoopie pies with red wine buttercream. The recipe combines the best ingredients of the holiday; chocolate, wine and lots of love. Plus, since they're easy to make and share, you can gift them to all of the special people in your life. Just don't forget to treat yourself, too!

Chocolate whoopie pies with red wine buttercream

Video of the Day

Chocolate Whoopie Pies

Things You\’ll Need

  • 2 cups all-purpose flour

  • 1 cup granulated sugar

  • 3/4 cup unsweetened cocoa powder

  • 1 teaspoon baking soda

  • 1/2 teaspoon fine salt

  • 10 tablespoons (1 1/4 sticks) unsalted butter, room temperature

  • 1 cup buttermilk

  • 1 large egg

  • 1 teaspoon pure vanilla extract

Ingredients for chocolate whoopie pies

Step 1

Pre-heat the oven to 375° Fahrenheit. Line a metal baking sheet with parchment paper and set aside.

In a large bowl, combine the flour, cocoa powder, baking soda and salt. Mix well.

Combine dry ingredients

Step 2

In a separate bowl, combine the butter and sugar. Beat on medium-high until light and fluffy.

Beat butter and sugar

Step 3

Add the egg and vanilla. Beat until combined.

Add egg and vanilla

Step 4

Adjust the beater to low speed. Slowly add half the flour mixture, then half the buttermilk. Repeat with remaining flour and buttermilk.

Beat on medium until the ingredients are fully combined. The batter will be sticky and thick.

Beat batter on low speed

Step 5

Scoop the batter onto the sheet, 1 heaping tablespoon at a time. Place them about 2 inches apart.

Moisten your fingers with water and smooth out each scoop of batter, if necessary.

Scoop batter onto baking sheet

Step 6

Bake for 10 to 12 minutes or until the pies spring back to the touch. Let cool for 5 minutes.

Transfer to a baking rack to finish cooling. Dust with confectioner's sugar, if you'd like.

Chocolate whoopie pies

Red Wine Buttercream

Things You\’ll Need

  • 3 cups confectioner's sugar

  • 1 cup red wine

  • 1/3 cup granulated sugar

  • 1/2 cup (1 stick) unsalted butter, softened

  • 1 teaspoon pure vanilla extract

  • 2 to 3 tablespoons milk of choice or wine (if necessary)

Ingredients for red wine buttercream

Step 1

In a pan over low-medium heat, combine the red wine and white sugar. Mix until dissolved.

Bring to a boil, then reduce to a simmer. Continue cooking until the wine is reduced to about 1/3 cup, about 15 to 20 minutes. It should be thick and syrupy.

Let cool.

Reduce red wine

Step 2

In a large bowl, beat the butter on low speed. Slowly add the confectioner's sugar until combined.

Beat butter and confectioner\'s sugar

Step 3

Add the reduced wine and vanilla extract. Mix well with a spatula or spoon.

If you'd like, add 2 to 3 tablespoons of milk to thin out the buttercream. You can also sweeten things up with sprinkles or mini chocolate chips.

Red wine buttercream

Beyond Valentine's Day, these adorable whoopie pies are perfect for other festivities. Make them for Easter, birthdays or just because!

Chocolate whoopie pies with red wine buttercream

How to Make a Cauliflower Pizza Crust

0

Gluten-free cauliflower crust pizza with caramelized onions, figs, ricotta, and basil. Make your pizza crust gluten-free with a cauliflower crust. Image Credit: Julia Mueller

Cauliflower crust is a gluten-free alternative to regular pizza crust. Made with a whole head of cauliflower, eggs and cheese, the crust is healthy and completely delicious. While making cauliflower crust necessitates some planning, it requires no more preparation time or effort than regular pizza dough. Toppings such as caramelized onions, fresh figs, ricotta cheese and fresh basil make for a light, yet satisfying meal.

Video of the Day

Things You\’ll Need

  • 1 large head cauliflower, chopped into florets

  • 2 eggs, lightly beaten

  • 1 cup Parmesan cheese

  • 2 teaspoons Herbs de Provence or Italian seasoning

  • 1/4 teaspoon sea salt

  • 1 large yellow onion, caramelized

  • 4 large fresh figs, cut into 1/4-inch slices

  • 1/3 cup ricotta cheese

  • 1/3 cup fresh basil, chopped

Heat the oven to 375 F. Line a large baking sheet with parchment paper, and plug in your food processor.

Step 1: Prepare Cauliflower

Wash the head of cauliflower, and remove the green stems. Chop the head into florets.

Chopped cauliflower. 
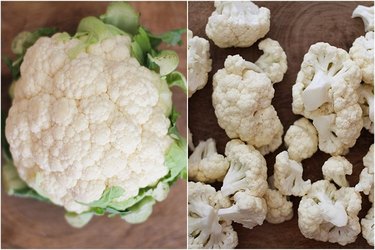
Wash and chop the cauliflower. Image Credit: Julia Mueller

Add the chopped cauliflower to a food processor. Pulse until small "rice" grains form. Depending on the size of your food processor, you may need to do this in batches.

Finely chopped cauliflower in a food processor. 
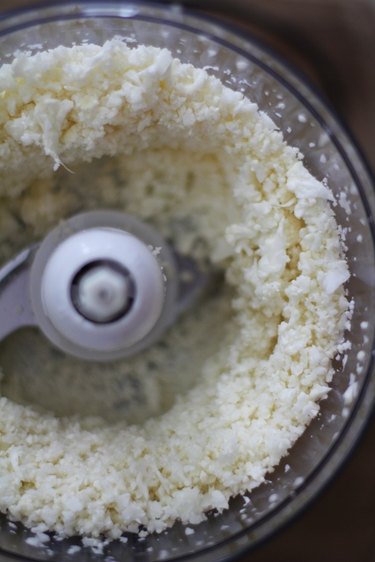
Process cauliflower into crumbs. Image Credit: Julia Mueller

Step 2: Bake the Cauliflower

Spread the cauliflower over the parchment-lined baking sheet, and bake for 15 minutes in the preheated oven. Remove and let cool.

Cauliflower on a baking sheet. Bake the cauliflower Image Credit: Julia Mueller

Step 3: Remove Water

Fold a large piece of cheesecloth once or twice, and place it over a large bowl. Once the cauliflower is cool enough to handle, place it in the center of the cheesecloth and wrap it into a ball. Squeeze out as much of the water as possible. This will take several minutes. Repeat for all of the cauliflower.

Cheesecloth filled with cauliflower and liquid dripping into a bowl. 
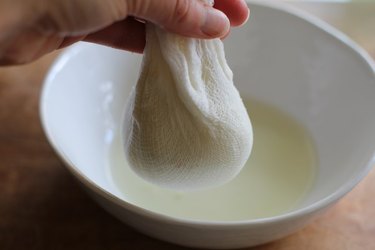
Squeeze out all of the water in the cauliflower. Image Credit: Julia Mueller

Step 4: Combine Crust Ingredients

Place the drained cauliflower into a mixing bowl along with the other crust ingredients. Stir the ingredients together until a thick, sticky mixture forms.

Bowl with cauliflower crust mixture. 
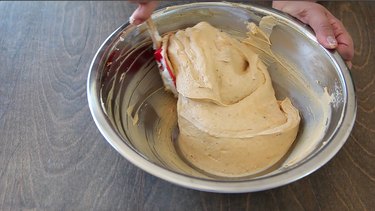
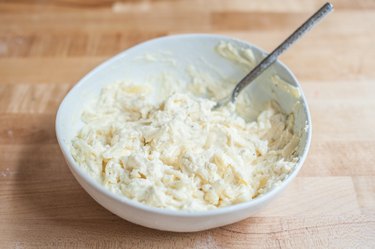
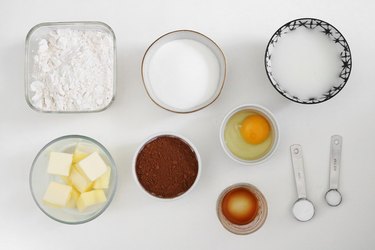
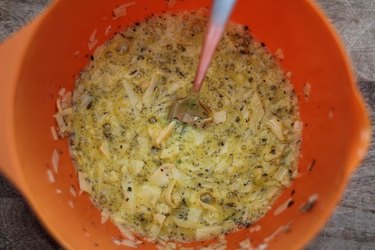
Thoroughly combine crust ingredients. Image Credit: Julia Mueller

Step 5: Transfer to a Baking Sheet

Increase the oven heat to 450 F.

Line a small baking sheet (or 8-inch pizza sheet) with parchment paper. Pour the crust mixture onto the prepared baking sheet.

Fork spreading cauliflower mixture onto baking sheet. 
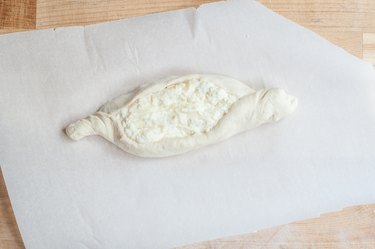
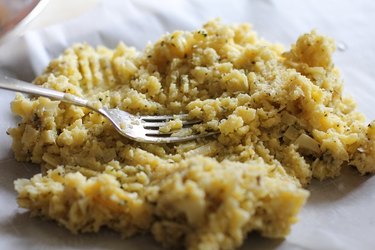
Transfer crust to prepared baking sheet. Image Credit: Julia Mueller

Spread the crust mixture over the baking sheet, using a fork or your hands to make the desired shape. Bake for 15 to 20 minutes in the 450-degree oven.

Raw cauliflower pizza crust on baking sheet. 
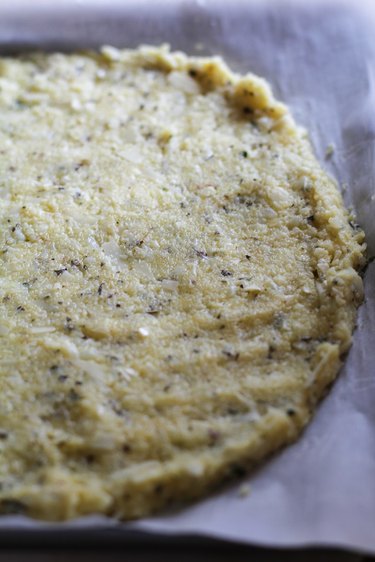
Form a smooth, even crust. Image Credit: Julia Mueller

Step 6: Build and Bake the Pizza

Once the crust is golden brown around the edges and feels firm, remove the baking sheet from the oven and allow the crust to cool slightly before adding toppings.

Baked cauliflower crust. 
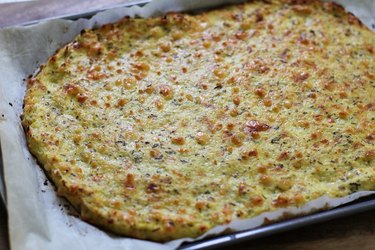
Cool the crust slightly before adding toppings. Image Credit: Julia Mueller

Evenly distribute the caramelized onion, ricotta cheese and sliced figs over the crust. Bake the pizza (still at 450 degrees) for 8 to 15 minutes or until the cheese has melted and the toppings reach desired crispness. Remove the pizza from the oven, and allow it to cool 5 to 10 minutes. Sprinkle the finished pizza with sea salt and fresh basil, and transfer it to a cutting board to cut into slices for serving.

Finished pizza. 
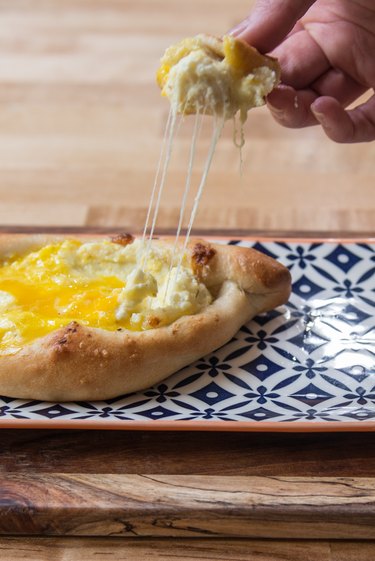
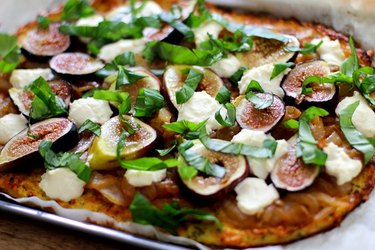
Bake your pizza with toppings until the cheese melts. Image Credit: Julia Mueller

Tip

Cheese options: Use mozzarella cheese or cheddar cheese instead of Parmesan, although the water content in these cheeses is higher, so the crust will turn out more moist than crispy. In place of ricotta cheese, try goat cheese.

Add tang by serving the pizza with a balsamic reduction.

You also can enjoy your favorite homemade or store-bought tomato or pesto sauce with this crust.

Cauliflower crust pizza with toppings, cut for serving. 
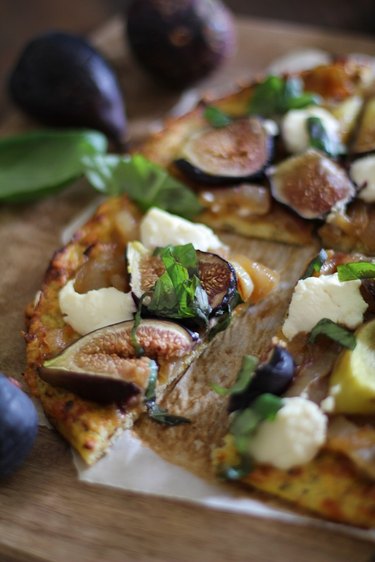
Experiment with tasty toppings for your pizza. Image Credit: Julia Mueller

Does Rain Affect Baking Cakes?

0

Mother and daughter (6-8) baking in kitchen, smiling Cakes require a few small adjustments if you\’re baking on a rainy day. Image Credit: Rayes/Photodisc/Getty Images

Baking cakes and other treats can be more complicated than it looks, because of the sheer number of factors that contribute to success. Your ingredients have to be fresh and properly measured, you have to handle them correctly and even outside factors such as the weather conditions can have an effect. Knowing how to adapt to these variables is one trait that distinguishes a skilled baker from a novice.

Video of the Day

Rainy Day Cakes

There isn't always a direct correlation between the weather outdoors and the success of your baking, but when it occurs it can be maddening. Your cake will rise vigorously in the oven, but will suddenly collapse either late in the baking time or shortly after you've taken it from the oven to cool. You'll be left with a cake that's perfectly baked around the edges, but fallen and dense in the middle. Some bakers try to compensate by ensuring that their ingredients are perfectly dry. Unfortunately that effort is wasted, because the problem is not caused by the rain's moisture but by the weather system itself.

Air Pressure and Baking

Most bakers are aware that cakes and baked goods behave differently when you bake at higher altitudes. That's partially because the air at high elevations is dry, but mostly because the air pressure is lower. The thin air offers less resistance to the cake's expansion as it bakes and, as a result, cakes tend to over-rise and then fall. At lower altitudes, the arrival of rainy weather is usually the result of a low-pressure zone. That means the barometric pressure in your area plunges sharply, creating a temporary effect similar to the effect of high altitude.

Adapting Your Ingredients

If you live at or near sea level it might seem strange to use high-altitude baking strategies, but it's the most effective way to counter variations in your cake baking caused by low-pressure storm systems. The simplest adjustment is to reduce the amount of leavening in your recipe. Try scaling back your baking soda by 1/4 teaspoon, or baking powder by a half-teaspoon. You can also strengthen the cake batter by adding two or three tablespoons of flour, or half a beaten egg white, to the mixture. The added protein helps the batter trap the gas from the leavening, rather than letting it escape, leaving behind a deflated cake.

Adapting Your Technique

Aside from tweaking the ingredients in your batter, you can adjust your cake-mixing technique. If you're making a sponge cake or angel food cake that relies on beaten-in air, beat the egg whites a bit less. This reduces the cake's rise, and limits the likelihood of it collapsing afterward. If you're making a cake that creams the fat and sugar, cut the creaming time by 1/2 to 1/3. That also reduces the amount of air in your batter, and limits the rise. Finally, try increasing your baking temperature by 10 to 15 degrees Fahrenheit. That will help the batter set firmly before the gases can escape, and keep it from collapsing.

How to Cook Drumsticks on the Grill

0

For tender, juicy chicken cooked on the grill, choose bone-in, skin-on drumsticks, thighs, or breasts rather than boneless skinless chicken. Drumsticks are perfect for serving at any gathering, large or small, because they make for easy cooking and easy eating. All you need is a store-bought or homemade marinade, dry rub, or barbecue sauce and you're slated for a delicious meal of fall-off-the-bone succulent chicken.

Grilled chicken on a plate

Video of the Day

Things You\’ll Need

  • 2 to 3 pounds bone-in chicken drumsticks

  • 1 cup (8 ounces) marinade, such as barbecue sauce (see tip below)

Tip

Rather than marinating the chicken, you can sprinkle the chicken with salt, pepper, and any dry rub or spice blend of your preference. Consider using onion powder, garlic powder, chili powder, ground cumin, curry powder, Cajun seasoning, Jamaican Jerk seasoning, Garam Masala, and/or dried herbs such as oregano, basil, and rosemary.

Step 1: Marinate the Chicken

Add the chicken and simmer sauce to a large plastic bag. Seal the bag and maneuver the chicken so that everything is well-coated. Refrigerate for at least 15 minutes, up to 12 hours. If you'd like to use a dry rub, sprinkle the chicken with the rub 15 minutes prior to grilling. Allow chicken to come to room temperature prior to grilling in order to ensure the meat cooks evenly.

Chicken and marinade in a bag

Step 2: Preheat the Grill

Preheat the grill to medium-high heat (about 450 degrees F). If using a gas grill, turn the knob to 450 or the medium-high setting. If using a charcoal grill, heat coals until they turn white and have embers. Spread the coals over the bottom of the grill.

Step 3: Grill the Chicken

Place marinated chicken onto the hot grill and discard the marinade. To avoid flare ups, place chicken pieces between the burners as opposed to directly over the flame.

Chicken drumsticks on a grill

Cover the grill and cook for 2 to 3 minutes, until dark grill marks appear. Flip and cook on the other side for 2 to 3 minutes. Continue flipping and cooking until the internal temperature of the chicken reaches 165 degrees F. If certain drumsticks are cooking faster than others, move them to the side or the back of the grill so that they continue cooking slowly over indirect heat.

Drumsticks with grill marks on a grill

To test the temperature, insert a meat thermometer into the thickest part of the meat, avoiding the bone. Wait until the needle stops moving (if digital, wait until the numbers stop changing) to get an accurate read.

Step 4: Let Chicken Rest

Allow chicken to rest 10 minutes before serving.

grilled chicken on a plate

Tip

To reduce the grill time, you can par boil the chicken. To do so, heat a large pot of water (or broth with spices) to boiling. Reduce the heat and carefully add the chicken. Simmer until chicken skin turns white and internal temperature reaches 150 to 160 degrees F. Transfer the chicken to a plate and spread barbecue sauce or marinade over each piece. Cook 2 to 3 minutes per side on the grill, or until internal temperature reaches 165 to 170 degrees F.

Types of Carbonated Drinks

Carbonated drinks are light, sweet water-based drinks that have carbon dioxide added to make them bubbly or fizzy. Milk can actually be carbonated too, but nobody would buy it.

Soda

Many people begin to drink carbonated beverages in childhood with a first sip of Coke, Sprite or Dr Pepper at a birthday party.

Video of the Day

Coffee

Although the ventures didn't succeed, Starbucks tried to introduce a carbonated coffee beverage called Mazagran and Coke attempted the same thing with Kona.

Water

Carbonated water (also known as sparkling water, fizzy water and seltzer) is popular among weight-conscious or other people who want to avoid sugar sodas. It is available plain and in a variety of light flavors, like lemon, raspberry and vanilla.

Sparkling Wine

Sparkling wine—or champagne, depending on where the beverage was produced—is the drink of choice for celebrations and also pairs well with light dishes like fish or chicken.

Energy Drinks

Enviga, Red Bull, Jolt and Monster are carbonated drinks that have stimulants that help energize.

Juice

You can buy juice that has carbonation but check their nutrition labels to see how healthy they are. One example is the Nantucket Nectars line of lightly carbonated juices called Nectar Fizz.

Turn Pie Crust Into Cookies & Serve With Pumpkin Butter Dip

0

If you need a simple party snack that looks like you went to a lot of trouble, this could be it. The recipe combines all the elements of pumpkin pie in an easy-to-make, easy-to-serve snack.

pumpkin dip and pie crust cookies

Things You\’ll Need

  • Flour

  • Parchment paper

  • Refrigerated pie crust

  • Decorative pie crust cutters

  • Cinnamon sugar

  • Cream cheese, 12 ounces

  • Powdered sugar, 1 cup

  • Pumpkin butter, 1 1/2 cups

  • Whipped cream or whipped topping, 2 cups

Pie Crust Cookies

Set out refrigerated pie crust and allow to come to room temperature. Preheat oven to 400 degrees Fahrenheit.

Roll out a large piece of parchment paper, and then dust it with flour. Dip each decorative pie crust cutter into flour.

Preparing surface

Gently unroll the pie crust, then use the pie crust cutters to cut out individual pieces.

Cutting pie crust leaves

Lay the cut-out shapes on a wire cooling rack. Set the rack over the parchment paper, then generously sprinkle the cut-out shapes with cinnamon sugar. Place on a cookie sheet and bake at 400 degrees for 15 to 18 minutes or until golden brown.

Sprinkling cinnamon sugar on pie crust leaves

Pumpkin Butter Dip

Set 12 ounces of cream cheese out to soften slightly. Place the softened cream cheese and 1 cup of powdered sugar in a bowl, and beat until light and fluffy.

Beating cream cheese and powered sugar

Add 1 1/2 cups of pumpkin butter and beat until thoroughly combined.

Adding pumpkin butter

Gently fold in 2 cups of whipped cream or whipped topping.

Folding in whipped cream

Chill thoroughly before serving.

Serving pumpkin spice dip and pie crust cookies

3 Refreshing La Croix Cocktails Perfect for Sunny Days

0

These three colorful concoctions are ridiculously refreshing and simply ideal for enjoying a day in the sun. They each only take a couple minutes to make and call for fresh, vibrant fruits. Whether you make just one for yourself or for a group of friends, these drinks are sure to please!

3 Refreshing La Croix Cocktails Perfect for Sunny Days

Watch the video

1. Blackberry & Vanilla Bean Gin Spritzer

Play up the berry flavor of Berry La Croix with muddled blackberries, gin and vanilla bean simple syrup.

Blackberry & Vanilla Bean Gin Spritzer

Blackberry and vanilla bean gin spritzer

Things You\’ll Need

  • 5-6 blackberries

  • 1/2 oz vanilla bean simple syrup, or more to taste

  • 2 oz gin

  • 4 oz Berry La Croix

  • shaker

  • muddler

  • ice

  • 1 glass (12 oz)

Vanilla bean simple syrup

Things You\’ll Need

  • 1/2 cup water

  • 1/2 cup granulated sugar

  • 1/2 vanilla bean

  • Small saucepan

Step 1: Make vanilla bean simple syrup

Add the water and the sugar to a saucepan and set over medium-hight heat. Remove the seeds from the vanilla bean and add them to the saucepan along with the pod. Stir the mixture occasionally and remove from heat once the mixture comes to a gentle boil and the sugar has dissolved. Allow the syrup to cool completely before transferring, along with the vanilla bean, to a clean, sealable container.

Step 2: Shake up the ingredients

Place the blackberries into the shaker and muddle. Add the vanilla bean simply syrup, gin, and a handful of ice. Seal the shaker and shake vigorously for 20 seconds.

Step 3: Strain and serve

Strain the contents into a glass filled with ice, and top off with 4 oz of the Berry La Croix. Garnish drink with some fresh blackberries and enjoy!

2. Lemon and Rosemary Gin Spritzer

Shake up a citrusy lemon cocktail with a savory herb twist.

Lemon and Rosemary Gin Spritzer

Lemon and rosemary gin spritzer

Things You\’ll Need

  • 1/2 oz rosemary simple syrup

  • 1 lemon wedge

  • 2 oz gin

  • 2 oz Lemon La Croix

  • Sprig of rosemary, for garnish

  • Mixing glass

  • 1 cocktail glass (5 oz)

Rosemary simple syrup

Things You\’ll Need

  • 1/2 cup water

  • 1/2 cup granulated sugar

  • 3 sprigs of rosemary

Step 1: Make rosemary simple syrup

Remove the leaves from the rosemary and roughly chop. Place the water, sugar, and rosemary into a saucepan and set over medium-high heat. Stirring occasionally, remove saucepan from heat once the mixture comes to a gentle boil and the sugar has dissolved. Remove from heat and let rosemary steep until room temperature. Allow the syrup to cool completely before straining through a fine mesh sieve and into a sealable container.

Step 2: Mix and enjoy

Fill a large container with ice and add 1/2 oz of simply syrup, gin, and a squeeze a lemon. Stir for a few seconds and strain into a glass. Garnish with a sprig of fresh rosemary, and enjoy!

3. Mango Coconut Cooler

Mix up a tropical cocktail that tastes so good you'll think you're on vacation.

Mango Coconut Cooler

Things You\’ll Need

  • 1 1/2 oz mango puree

  • 1/2 oz fresh orange or Mandarin juice

  • 1 lime wedge

  • 5 oz Coconut La Croix

  • Ice

  • 1 glass (12 oz)

Step 1

Fill a glass with ice and add the mango puree, orange juice, and a squeeze of lime.

Step 2

Add the Coconut La Croix and stir with a spoon until combined. If a sweeter drink is desired, simply mix in 1/2 oz of sweetener of choice (simple syrup, agave, etc.).

Easy Homemade Khachapuri Recipe

0

If you haven't made this delightful appetizer, it's about time you start. Khachapuri, (pronounced kaw-cha-pour-EE) is filled with cheese, butter and a glorious egg yolk — making it just about as delicious as possible. To eat it, you just grab a bit of the dough and dip into the molten cheese. There is no way not to love it!

Easy Homemade Khachapuri Recipe

Things You\’ll Need

  • 1 (1 lb) ball of pizza dough

  • 1 (15 oz) container of ricotta cheese

  • 3 cups shredded mozzarella or feta cheese (or a combo of the two)

  • 1 large egg

  • 1 teaspoon salt

  • 1 teaspoon pepper

  • 2 tablespoons melted butter

  • 4 large egg yolks

  • 4 pats of butter (about 1/2 a tablespoon each)

Easy Homemade Khachapuri Recipe

Step 1: Cut the Dough

Add pizza stone or large baking sheet to the oven. Preheat to 450°F.

On a lightly floured surface, cut the dough into 4 equal sized pieces (alternately, you can make two larger portions of cheese bread rather than 4 smaller portions). One at a time, roll the dough balls into long, thin ovals.

Easy Homemade Khachapuri Recipe

Step 2: Make the Filling

Stir together the ricotta, mozzarella (or feta), whole egg, salt and pepper.

Easy Homemade Khachapuri Recipe

Step 3: Fill

Add the dough ovals to a sheet of parchment paper, then add the filling to the center of each dough oval. Form into boats around the filling, twisting and pinching the edges.

Easy Homemade Khachapuri Recipe

Step 4: Bake

Transfer the boats (along with the parchment paper) to a preheated pizza stone or baking sheet. Bake at 450°F for ten minutes or until the dough just starts to brown.

Easy Homemade Khachapuri Recipe

Step 5: Butter + Yolk

Brush the edges with melted butter. Add a yolk and a pat of butter to the center of each boat.

Easy Homemade Khachapuri Recipe

Step 6: Bake

Bake again for two minutes.

Easy Homemade Khachapuri Recipe

Step 7: Serve

Use the crust to dip into the cheese and eat. Enjoy!

Easy Homemade Khachapuri Recipe

Easy Homemade Sun Tea Recipe

Sun brewed tea has been a longtime summer tradition — the process involves steeping tea in a hot, sunny spot over an extended period of time rather than utilizing boiling water. Letting the sun do the work for you, the tea can be made in large or small batches and requires minimal ingredients, using your favorite tea blend as a base. Take it up a notch by adding more flavors, for example, sugar, fresh herbs and slices of lemon.

Sun brewed tea in a glass and mason jar

Video of the Day

Black and green tea blends are known for their compatibility during summer months, as they retain a smooth flavor when chilled over ice. Our favorite summer tea, and the version we're sharing in this recipe, combines a peach tea blend with fresh peppermint sprigs snipped straight from our container garden.

Things You\’ll Need

  • Half gallon clear glass mason jar (See tip below)

  • 6 tea packs, black blend or your personal favorite

  • Filtered or distilled water

  • ¼ cup sugar (optional)

  • Fresh peppermint sprigs (optional)

  • 1 lemon, sliced (optional)

Tip

A clear glass vessel is key in brewing the perfect sun tea — it allows the sun’s rays to fully penetrate the tea and keeps the brew from leaching any chemicals in the way a plastic container might. We’re partial to the mason jar for the ease it provides with holding tea bags suspended in place at the top of the container. If a mason jar isn’t a regular staple in your kitchen artillery, any sealable clear glass container will substitute.

A spread of ingredients for sun brewed tea: tea bags, lemon, sugar and peppermint

Tip

This recipe can be easily adjusted depending on the amount of tea needed or size jar you may have on hand by modifying the number of tea packets accordingly to the tea strength of your liking. For example, 3 packets for a quart jar, or 1 to 2 for a single serve, 16 ounce jar.

Step 1: Prepare Your Ingredients

Clean the mason jar with warm soapy water, rinse and dry. If including ingredients in addition to tea, for example fresh herbs, lemon slices or sugar, incorporate them at this stage prior to filling the jar with water. Fill the jar with cold water just beneath the fill line. Gathering the tea packets by their tabs, give the strings a gentle twist to form a neat bundle before resting over the mouth of the jar. Tea packets should be fully immersed in the water.

Tea bags suspended in a jar for making sun brewed tea

Step 2: Seal the Container

Secure the jar's lid over the mouth of the jar, tightening to hold the tea bags suspended and in place for steeping.

Step 3: Sit & Steep

Find a bright and sunny spot, like a window ledge, patio table or wide deck railing to place the jar, allowing it to steep and soak in the final ingredient (those sunny rays of light). We decided to let ours steep out on our back balcony among the host of container garden vegetables we've been cultivating this summer — it's one the best spots for direct sunlight in our quaint city backyard.

Sun tea warming up in direct sunlight

Tip

Steep time simply depends on your desired tea strength. Allow at least 1 hour for the flavors to combine and up to 3 hours for added complexity. If you're able, checking the tea every 30 minutes should give you a good gauge on the strength — the darker the coloring of the liquid, the stronger the brew.

Sun tea, fully brewed in direct sunlight

Step 4: Prepare the Tea

Once steeped, open the jar lid to remove the tea bags and strain the liquid. Keep the tea refrigerated prior to serving.

Sun tea, strained and ready to serve

Step 5: Serve & Sip

Serve in glasses over ice, garnishing with an additional lemon slice, peppermint sprig and/or spoonful of sugar. Relax and enjoy sipping on the seasonal taste of summer — we promise you'll be able to taste the rays of sun that brewed this seasonal refreshment to perfection.

Sun tea garnished with peppermint and lemon in a tall glass

Looking for more creative project ideas with a natural twist? Learn how to make fragrant mulling spice packs at home, and try a touch of edible landscaping with pumpkin season this year.