Home Blog Page 34

Homemade Tanghulu (Chinese Candied Fruits) Recipe

0

Tanghulu is a traditional snack in China. It's made of fresh fruit covered in a sugary shell and is served on bamboo skewers. You don't need to book a trip to China to enjoy this tasty treat. With just a few simple ingredients, you can make tanghulu at home. Here's how to DIY this colorful and delicious snack.

Complete tanghulu

Video of the Day

Things You\’ll Need

  • 4 to 6 cups fruit (strawberries, mandarin oranges, grapes or berries)

  • 2 cups granulated sugar

  • 1 cup water

  • Bamboo skewers

  • Candy thermometer

Ingredients for tanghulu

Tip

Wash the fruits and pat them dry. The sugar mixture will not stick if the fruits are wet. Also, if you are using strawberries, remove the stems. You can halve or double this recipe.

Step 1

Insert each skewer into a few pieces of fruit. The skewers will be easier to dip if you only add one to three pieces of fruit depending on their size.

Insert skewer into pieces of fruit

Tip

If you are using small fruits, like blueberries, you can add more pieces per skewer.

Step 2

In a pot over medium-high heat, combine the sugar and water. Bring to a boil and then reduce to a simmer until it reaches 300 to 315°F on a candy thermometer. This can take 15 to 20 minutes. Do not stir the mixture.

Line a large baking sheet with parchment paper or a silicone baking mat.

Combine sugar and water

Step 3

Remove from the heat. Dip each skewer into the syrup, rotating it to make sure the fruits are completely coated. Work quickly. Depending on the size of your pot, you may need to tilt it to let the syrup pool on one side.

Dip fruits into sugar syrup

Tip

Be careful when handling the hot syrup. Use extra caution if you're making this treat with kids.

Step 4

Place the fruits on the baking sheet until they are cool and hardened.

Let cool

Enjoy!

Complete tanghulu

How to Eat Queen Palm Dates

0

If you live in or have visited a tropical region of the world, there's a good chance that you've seen a queen palm tree. While these trees are a native of Brazil, their low height and beautiful appearance has made them a common decorative tree in places such as Florida and California. But a queen palm is not just eye candy, for these trees also offer a delicious fruit that is completely edible.

Step 1

Locate queen palm dates on your queen palm tree. They grow in bunches and have a similar shape to grapes. They are initially green, but turn orange as they ripen. Fill up your bowl with orange queen palm dates (see Reference 2).

Video of the Day

Step 2

Rinse the queen palm dates under water for 10 seconds.

Step 3

Sit at a table with your bowl of queen palm dates, three or four napkins, and an empty bowl.

Step 4

Eat each date slowly. Do not eat the nuts inside of the fruit. Spit these into your empty bowl. The texture of each date is quite fibrous, so expect to chew each date longer than you would chew most fruits (see Reference 2).

Step 5

Clean your hands on a napkin as you eat the dates. They are very sticky, especially if they are very ripe, and can create a mess if not eaten over a table with napkins.

Step 6

Wash your hands when you are finished.

Tip

You can store green, unripe queen palm dates in your refrigerator until they ripen and turn orange.

Warning

Do not pick fruit from a tree that is not on your property without permission from the landowner.

10 Hacks to Make Boxed Brownie Mix Taste Even Better

0

Brownies are kind of like the pizza of desserts. Even when they're just okay, they're still pretty great. Brownies made from a boxed mix are a reliable crowdpleaser, but in terms of taste, they tend to score no higher than a nine on a 10-point scale. Get that perfect 10 by doctoring your boxed mix with tasty extras.

A bowl of chocolate brownie ingredients being stirred by a spatula.

Video of the Day

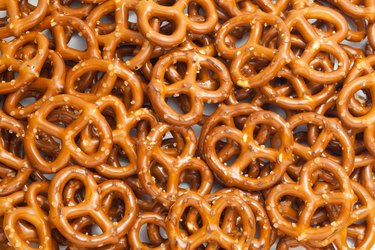
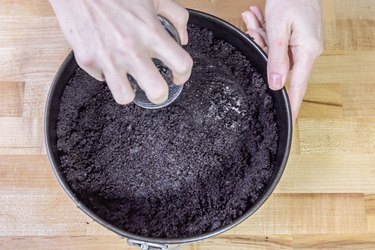
1. Add a Pretzel Crust

If you can't get enough of chocolate-covered pretzels, this easy brownie upgrade will be your new favorite dessert. Making a pretzel crust is as easy as mixing crushed pretzels with a little sugar and melted butter. Bake the crust for about 10 minutes, then pour prepared brownie mix on top and bake until set. The salty-sweet crunch is a perfect balance for gooey brownies.

Crunchy snack pretzel background

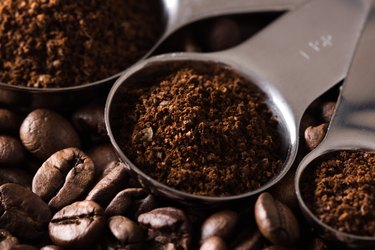
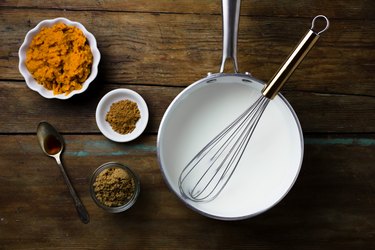
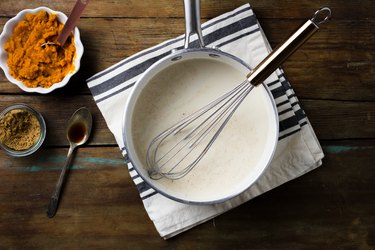
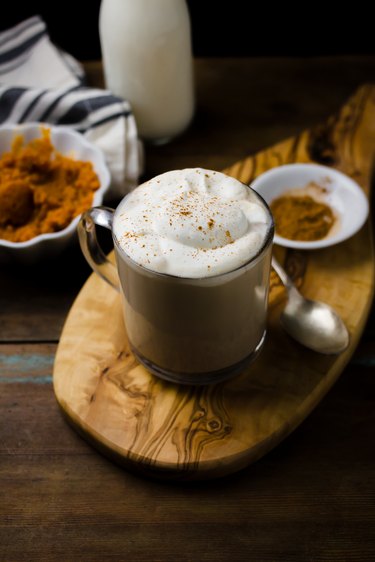
2. Stir in Espresso Powder

For people who love coffee, there's never a bad time for a dose of joe. Adding espresso powder to your brownie mix infuses dessert with delicious mocha flavor. Stir in a few teaspoons, or more to intensify the coffee essence. Even if you don't love espresso flavor, you may want to experiment with adding a little bit to your mix; it will intensify the chocolate flavor.
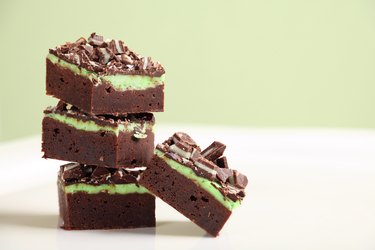
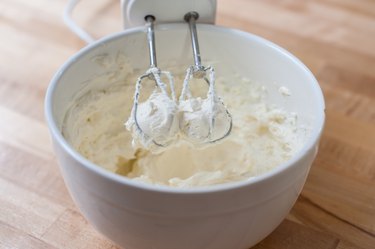
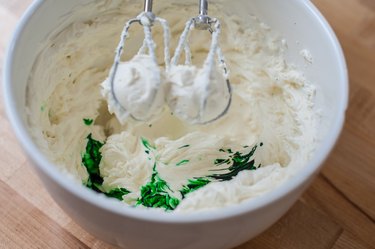
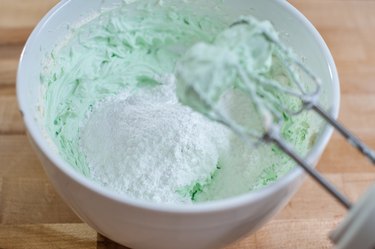
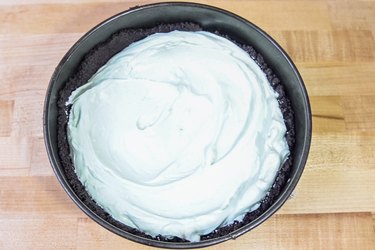
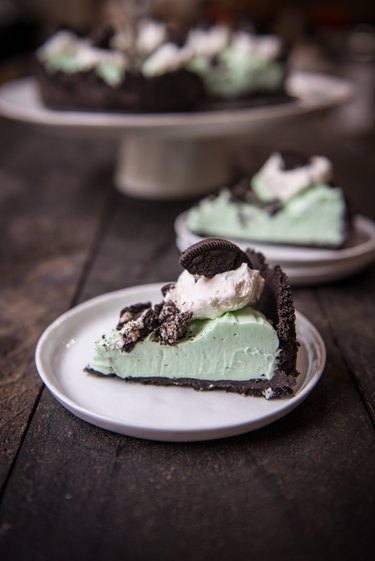
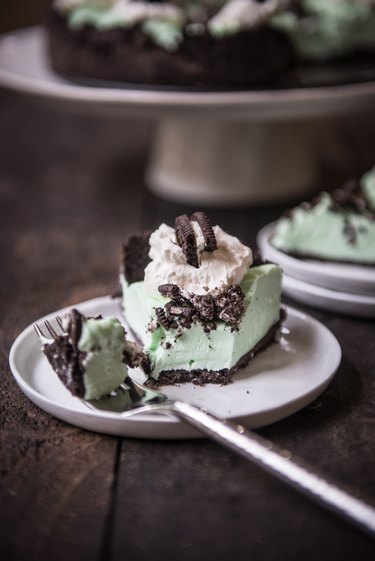
Coffee

3. Make Them Minty

Mint and chocolate are a classic combination. There are a few ways to infuse boxed-mix brownies with mint flavor. For one, you could add mint extract to the batter. Alternately, top finished brownies with mint frosting and an optional layer of chocolate ganache. The longer the brownies sit with the frosting, the moister and mintier they'll get.
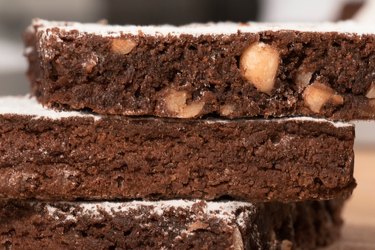
Stack Of Mint Chocolate Fudge Brownies

4. Stir in Crunch

When it comes to crunchy add-ins for your boxed-mix brownies, your imagination is the only limit. Stir in any kind of nuts, crushed pretzels, crushed cookies or coated candies. Crispy rice cereal or toffee chunks will also add texture. If you love spice, stir in cinnamon candies; they'll melt somewhat in the oven but should still retain some crunch.

Close-Up Of Chocolate Brownie With Sugar Icing

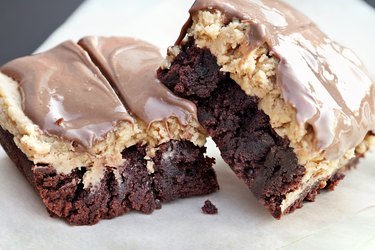
5. Add Some Peanut Butter

One guaranteed way to improve brownies made from a box mix? Cover them with peanut butter and more chocolate. Using a mix takes half the work out of making "buckeye brownies." Top a batch of baked brownies with peanut butter filling and chocolate glaze or frosting.

Buckeye Brownies

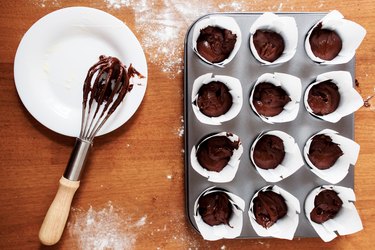
6. Turn Them Into Cupcakes

Anyone who has strong opinions about how their sandwiches are cut knows that sometimes, changing the shape of your food really seems to change how it tastes. Put that into practice by baking your prepared brownie mix in a cupcake pan. Baking them as cupcakes gives every brownie the crispy texture of edge pieces. Top the finished brownies with frosting.

The whisk for mixing and preparing chocolate cupcake and muffins

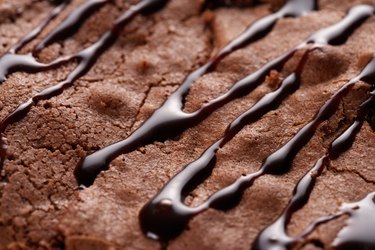
7. Drizzle With Sweet or Salty

Let's be honest. Drizzling brownies with something rich and delicious makes you feel like you're a pro pastry chef… and sometimes you might even pretend to talk to the audience on your imaginary cooking show while you do it. Obviously, a drizzle of chocolate sauce is a perfect topper for any batch of brownies. Salted caramel or a fresh berry sauce is equally impressive.

Chocolate sauce drizzled on brownie

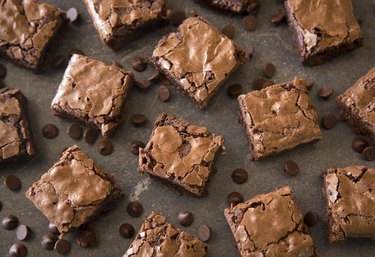
8. Triple the Chocolate

If chocolate is good, doesn't it stand to reason that triple the chocolate is three times the good? Okay, the math doesn't matter — the bottom line is that boosting the chocolate content of your brownies boosts their flavor, too. Try stirring in a little cocoa powder, mixing in chocolate chips and topping the finished brownies with chocolate frosting or ganache.

Homemade Gooey Double Chocolate Brownies

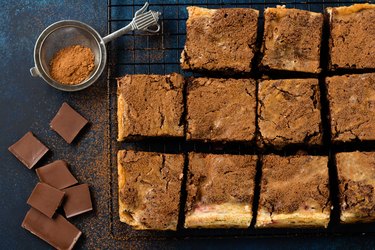
9. Swirl in Cheesecake Filling

Cheesecake brownies are just the thing for anyone who loves brownies but doesn't love intense chocolate flavor. Cutting the sugary brownie mix with rich, tart cheesecake filling makes them even more luscious. Plus, these treats look impressive but are super simple to make. Pour brownie batter into a prepared pan, and pour in a simple cheesecake batter of cream cheese, sugar and egg. Use a knife to swirl the mixtures together before baking.

Brownie cheesecake cake with cherry and chocolate on dark background. Top view.

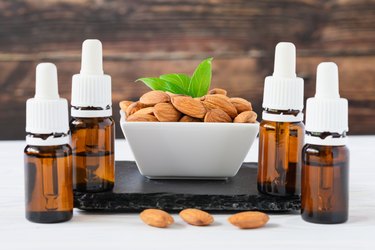
10. Experiment With Extracts

Extracts are the most effective way to alter the basic flavor of boxed brownies. These concentrated liquids will infuse every bite. Adding a splash of vanilla or almond extract will subtly enhance the flavor of your brownies. If you have any lemon or coconut flavorings on hand, you might experiment with them, too.

almonds in a white plate and glass bottles with oil on a black tray on a wooden table

Typical Italian Drinks

... Italian coffee drinks can range from bitter to sweet.

Italian cuisine is more than just good food; it also features many delicious drinks that can complement any meal. Many of these drinks are often served before or after a meal or at a particular time of the day, such as only in the morning hours, and have become a traditional part of Italian culture.

Video of the Day

Coffee Drinks

Many Italians drink espresso, a bitter, strong brew of coffee. Due to the strong flavor of the coffee, it is served in small portions. A cup of espresso is only about 3 oz. Milk and sugar are sometimes mixed into the espresso or it can be drunk black. Another common type of Italian coffee is cappuccino. Cappuccino is an espresso made with steamed and foamed milk. The milk gives the coffee a sweet and creamy flavor and the drink is sometimes topped with cacao powder. In Italy, cappuccino is typically served with breakfast and coffee in general is only consumed with or after a meal, according to the Life In Italy website.

Wine

Prosecco is a sparkling wine made in the Veneto region of Italy. This wine is a bubbly, delicate white wine made from the Prosecco grape. Prosecco is similar to French champagne yet is less expensive because the wine is not aged as long as champagne so it costs less to make. Another typical Italian wine is a dessert wine known as Passito. Passito wine is a red or white sweet wine often served after dinner. This type of wine is made from grapes that are picked late in the harvest season and then allowed to dry in the sun so the juice sweetens as the grapes dehydrate.

Nonalcoholic Drinks

Typical nonalcoholic drinks in Italy are Italian sodas made from fruit juice and carbonated mineral water such as Chinotto, Limonata and Arinchatta. Chinotto is a bittersweet soda made from herbal extracts and juice from the Chinotto fruit that grows on trees in Southern Italy. Limonatta is a lemon-flavored soda made from mineral water and lemon juice. Arinchatta is a soda made from mineral water and orange juice and can be flavored to taste bitter or non-bitter. Tap water is not commonly consumed in Italy. Most Italians drink mineral water because it is considered healthier and tastier than most tap water, according to the Discover Italian Food website.

Mixed Drinks and Liqueurs

Typical Italian mixed drinks include aperol spritz and Campari spritz. These drinks are usually served before dinner. An Aperol spritz is made from an orange-flavored liqueur called Aperol that is mixed with white wine, often Prosecco, tonic water and garnished with an orange slice. A Campari spritz is similar to an Aperol spritz except it is made from Campari liqueur which is a much more bitter orange-flavored liqueur and it is also mixed with white wine and tonic water. Limoncello is a typical Italian liqueur usually consumed after a meal. Limoncello is a liqueur made from lemon zest, alcohol, water and sugar and is usually served straight in small chilled glasses.

What to Do With Overripe Corn

0

... Corn is rich with vitamins B and C.

Corn, a grain rich with nutrients such as vitamins B and C, is typically grown in the warm seasons of spring and summer until it's harvested in the fall. But corn left on the stalk too long can become overripe, leading to coarse kernels. If you have a few stalks of overripe corn, don't be too quick to throw them away — there are several things you can make.

Video of the Day

Corn Meal

Turn your overripe corn into corn meal, which is simply ground corn kernels. All you need is a corn grinder that can be purchased from a hardware or farm-supply store. Add corn kernels to the grinder and grind them into meal. Corn meal can be used to make cornbread, tortillas and Indian pudding. Finely ground corn meal can be used to make hominy grits, a Southern dish usually served for breakfast.

Cream-style Corn

Overripe corn can be used to make cream-style corn. Unlike whole-kernel corn, cream-style is served with a sweet, buttery cream that helps flavor overripe corn. Remove the kernels from the cob and, depending on the recipe, combine them with melted butter, water, sugar, cream, cornstarch and seasoning. Serve cream-style corn with white rice or garlic mashed potatoes.

Corn Whiskey

Provided you have a liquor license, you can distill corn whiskey from overripe corn. Remove the kernels from the cob and mash them into mush. Heat the mush in a large pot overnight, add yeast and allow it to ferment for two weeks. After fermentation, pour the mush into a still and allow it to distill at least twice. Pour the resulting whiskey into an oak barrel and age it as long as you like.

Corn Relish

Several dishes and appetizers can be made from overripe corn, such as corn relish — which is simple to make if you have the necessary ingredients. Remove kernels from the cob and boil them for 30 minutes, along with seasoning and diced vegetables such as cucumbers, tomatoes, onions, green peppers and red peppers. After 30 minutes, add flour to thicken the relish. Serve with tortilla chips.

No-Bake Grasshopper Cheesecake Recipe

0

Grasshopper pie is a classic! Swap the classic Crème de menthe for the easier to source peppermint extract and food coloring, mix up a quick and easy no-bake cheesecake filling, and you have yourself a new twist on an old classic. Perfect for a weeknight treat, or even a dessert for guests.

No-Bake Grasshopper Cheesecake Recipe

Things You\’ll Need

  • 25 chocolate sandwich cookies (plus additional for garnish)

  • 6 tablespoons melted butter

  • 16 oz full fat cream cheese

  • 8 oz sour cream

  • 1 cup powdered sugar

  • 1 teaspoon peppermint extract

  • 3-5 drops green food coloring

  • Whipped cream for garnish

No-Bake Grasshopper Cheesecake Recipe

Step 1: Crush the Cookies

Add 25 cookies to a food processor (no need to remove the filling), and process until just crumbs.

No-Bake Grasshopper Cheesecake Recipe

Step 2: Add the Butter

Add the melted butter, and processed until combined.

No-Bake Grasshopper Cheesecake Recipe

Step 3: Press Into a Pan

Press the crust into a 9-inch spring form pan using a heavy flat bottom glass or measuring cup to press well. Freeze for 30 minutes.

No-Bake Grasshopper Cheesecake Recipe

Step 4: Beat the Cream Cheese

Add the cream cheese and sour cream to a mixing bowl, then beat until well combined.

No-Bake Grasshopper Cheesecake Recipe

Step 5: Add the Mint and Coloring

Add the peppermint extract and green food coloring, and beat until well combined.

No-Bake Grasshopper Cheesecake Recipe

Step 6: Add the sugar

Add the powdered sugar, beating until well combined.

No-Bake Grasshopper Cheesecake Recipe

Step 7: Add Filling to the Crust

Spread the filling into the crust in an even layer. Chill for at least 3 hours and up to a few days.

No-Bake Grasshopper Cheesecake Recipe

Step 8: Decorate & Enjoy

Decorate with desired amount of whipped cream and crushed cookies. Chill until ready to serve.

No-Bake Grasshopper Cheesecake Recipe No-Bake Grasshopper Cheesecake Recipe

How to Make a Pumpkin Spice Latte Better Than a Barista

0

It's officially that time of the year again. People are trading in their iced coffees for something a little warmer, like the always sought-after pumpkin spice latte. This drink seems to be gaining in popularity every year, meaning one can cost upwards of $6.00! But, why spend that much money when you can easily make this drink from the comfort of your home for a fraction of the price? Since this recipe uses real pumpkin, it'll likely taste better than what you would get at most coffee shops, too.

How to Make a Pumpkin Spice Latte Better Than a Barista

Video of the Day

Things You\’ll Need

  • 8 oz whole milk

  • 2 1/2 tablespoons pumpkin puree

  • 1 tablespoon brown sugar, more to taste

  • 1/4 teaspoon pumpkin pie spice

  • 1/4 teaspoon vanilla extract

  • 1 shot of espresso

  • Whipped cream, optional garnish

  • Cinnamon, optional garnish

  • Cinnamon stick, optional garnish

  • Saucepan

  • Whisk

  • 1 large coffee cup

Tip

If you don't have an espresso machine at home, try using instant espresso instead.

Step 1

Add the milk to a saucepan, and set over medium-low heat.

How to Make a Pumpkin Spice Latte Better Than a Barista

Step 2

As the milk is warming up, whisk in the brown sugar, pumpkin puree, and pumpkin spice until incorporated. Vigorously whisk the milk until slightly frothy. Remove the saucepan from heat once the milk is hot, but not boiling. Whisk in the vanilla extract.

How to Make a Pumpkin Spice Latte Better Than a Barista

Step 3

Add an espresso shot to a large coffee cup, followed by the hot pumpkin-milk mixture. Taste and add additional sugar, if needed. Garnish the latte with a dollop of whipped cream, a light dusting of cinnamon, and a cinnamon stick.

How to Make a Pumpkin Spice Latte Better Than a Barista

5 Easy Chicken Marinade Recipes You Can Freeze

0

Ask anyone who maintains a healthy lifestyle what their secret is, and I bet most will agree that meal planning is everything. Taking an hour to plan and prep sets you up for those busy days when you need dinner on the table quickly. Here are five healthy chicken marinades that are freezer-friendly and will keep those pizza-dialing fingers in check.

Five plated chicken entrees

Each marinade recipe below is for two boneless, skinless chicken breasts, but feel free to double or triple the recipes. For each recipe, mix all the ingredients together with the chicken in a freezer bag. When stored in a sealed freezer bag, each marinade can be frozen for up to three months.

Lime Cilantro

Lime cilantro chicken plated with black beans and rice

In a bowl, whisk together: 2 tablespoons olive oil, the juice and zest of 1 lime, 1/2 cup chopped cilantro, 1 minced garlic clove, and 1 tablespoon of chili powder. Season to taste with salt and pepper.

Side Dish Suggestions: black beans and lime-cilantro rice. Garnish with lime wedges and a sprig of cilantro.

Lemon Herb

Lemon herb chicken plated with mashed potatoes and spinach

In a bowl, whisk together: 2 tablespoons olive oil, the juice and zest of 1 lemon, 1 teaspoon chopped parsley, 1 teaspoon chopped sage, 1 teaspoon chopped rosemary, 1 teaspoon chopped thyme, and 1 minced garlic clove. Season with salt and pepper.

Side Dish Suggestions: mashed potatoes and steamed spinach. Garnish with lemon wheels and chopped parsley.

Teriyaki

Teriyaki chicken plated with brown rice and steamed broccoli

In a bowl, whisk together: 2 tablespoons olive oil, 2 tablespoons soy sauce, 1 tablespoon honey, 1/4 cup brown sugar, 1 minced garlic clove, and 1/2 teaspoon minced ginger. Season to taste with black pepper.

Side Dish Suggestions: brown rice and steamed broccoli. Garnish with chopped scallions.

Coconut Curry

Coconut curry chicken plated with jasmine rice and bell peppers

In a bowl, whisk together: 1/2 cup coconut milk, 1 tablespoon curry powder, 1 minced garlic clove, 1/2 teaspoon minced ginger, and 1/2 teaspoon red pepper flakes. Season to taste with salt.

Side Dish Suggestions: jasmine rice and red bell pepper. Garnish with red pepper flakes, cilantro and lime wedges.

Honey Balsamic

Honey balsamic chicken plated with carrots and green beans

In a bowl, whisk together: 2 tablespoons olive oil, 2 tablespoons balsamic vinegar, 1 tablespoon honey, 1 minced garlic clove, 1/4 cup brown sugar, and 1/2 teaspoon red pepper flakes. Season to taste with salt.

Side Dish Suggestions: roasted carrots and green beans. Garnish with chopped parsley.

How Long Does a CO2 Cartridge Last for Serving a Keg?

... How Long Does a CO2 Cartridge Last for Serving a Keg?

Carbon dioxide is integral for those people home brewing with a keg. Home brew kegs (also called "cornelius kegs") are smaller than most commercial kegs, so the carbon dioxide in most CO2 tanks last longer than it would for larger quarter-barrel to full-barrel kegs. CO2 cartridges, however, are a good alternative to tanks, as they take up less room and do not need the more elaborate tube set up required for tanks.

Video of the Day

CO2 Cartridges

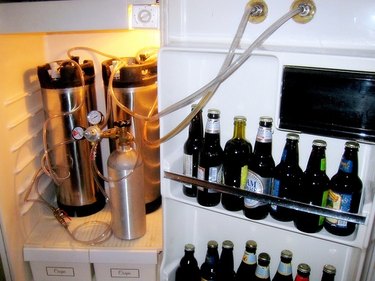
... Two cornelius kegs in a kegerator set up with 5 lb tank and tubes

CO2 cartridges stand in the place of a CO2 tank (or cylinder), which adds carbonation to a beer keg. Most home brewers use 5-gallon kegs, attached to which are anywhere from 3.5 to 20 lb CO2 tanks. CO2 cartridges hook into a portable CO2 charger, which is less cumbersome to use when dispensing beer from a keg outside of the house, and thus is often used for serving at picnics, parties or anywhere the keg must be carried.

Sizes of CO2 Cartridges

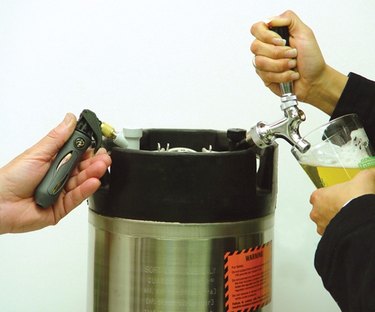
... Cornelius keg set up with CO2 charger

CO2 cartridges range in size from 12g to 68g, and the length of their life depends both on how much they hold and how much carbon dioxide needs to be pumped into the beer. In general, old versions of CO2 chargers take 12g cartridges, while newer chargers handle 16g cartridges. Be sure that you buy the correct size for your charger.

Temperature and CO2

... CO2 charger

The other important factor in the life of your cartridge is temperature. Particularly when using a portable cartridge, temperature is something that will affect the pressure of the CO2 cartridge and tank. The pressure increases when exposed to heat, and decreases when cool. At an average of 72 degrees F, the pressure should read 750 PSIG.

Rules of Thumb for CO2

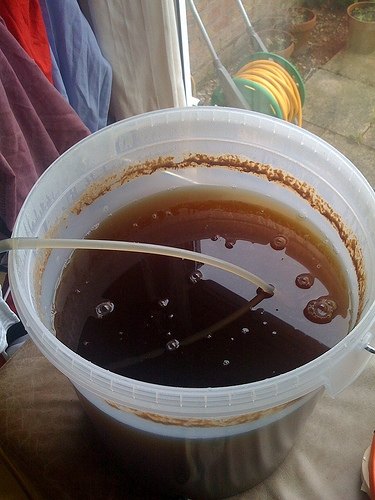
... Brewing beer into keg

In general, it takes about ½ lb of CO2 to dispense a quarter barrel of draft beer. Since most home brewers use 5-gallon kegs, however, these numbers are somewhat meaningless. For an average 5 lb CO2 tank and a 5-gallon keg, that means the tank will pump 31 to 44 kegs of beer. On a smaller scale, for portable cartridges, one 16g cartridge will empty about a third of a cornelius keg. A larger 68g cartridge will push through anywhere between one to four kegs.

CO2 Cartridge Warnings

Beware when attaching the charger to the keg. Always attach the ball and pin lock valve first to the keg, then to the charger. If you attach the ball and pin lock valve to the charger first, it will fail by becoming over-pressurized.

How to Convert Baume to Brix

... Degrees Baume and degrees Brix describe the sugar content in wine grapes.

Degrees Baume and degrees Brix both indicate the sugar content of a substance. Producers of wine, beer, juice, maple syrup, corn syrup and honey use these measurements, according to David Ball in the "Journal of Chemical Education." Measurements in degrees Baume use a scale of specific gravity — the density of a substance in relation to the density of water — and are used when there is a known relationship between the sugar concentration and the specific gravity of the substance. Measurements in degrees Brix indicate the number of grams of sucrose per 100 grams of the substance; 10 degrees Brix means 10 grams of sugar per 100 grams.

Video of the Day

Step 1

Check to ensure that the specific gravity of the substance characterized using degrees Baume is greater than that of water. The Baume scale uses a different scale for substances with a specific gravity less than that of water, but for grapes and syrups the density should be greater.

Step 2

Multiply the degrees Baume by 1.905.

Step 3

Subtract 1.6 from this number to obtain degrees Brix.

Tip

Approximate the percentage of alcohol in wine or beer by multiplying 0.55 by the degrees Brix of the original mixture.