Home Blog Page 28

Easy Eggplant Parmesan Recipe

0

Looking for an easy weeknight meal? You can't go wrong with this eggplant Parmesan recipe. It's one of those deliciously simple recipes that will satisfy even the pickiest of eaters. Enjoy it with pasta, bread or on its own.

Easy eggplant Parmesan recipe

Video of the Day

Things You\’ll Need

  • 2 medium eggplants, sliced 1/2-inch thick

  • 2 eggs

  • 2 cups Italian breadcrumbs

  • 4 cups marinara sauce

  • 8 ounces mozzarella, cubed, sliced or shredded

  • 3/4 cup Parmesan cheese

  • 1 small bunch basil, roughly chopped

  • Olive oil

Tip

For an extra saucy dish, add another 1/2 to 1 cup sauce.

Step 1

Preheat the oven to 350°F. Whisk the eggs in a shallow bowl.

Whisk eggs

Step 2

Using tongs, dip each slice of eggplant into the eggs. Coat both sides.

Dip eggplant slices in eggs

Step 3

Coat both sides with breadcrumbs.

Coat with breadcrumbs

Step 4

Grease a large metal baking sheet (or line it with a silicone baking mat). Depending on the size of your baking sheets, you might need to use more than one.

Place the coated eggplant slices on the sheet and drizzle with oil. Bake 20 minutes, flipping once halfway. The eggplant should be soft and almost fully cooked.

Bread and bake eggplant

Step 5

Increase the oven temperature to 450°F.

Grease a large 3-quart casserole dish. Spread 1/2 of the sauce along the bottom. Add eggplant slices in an even, single layer. Top with 1/2 of the mozzarella and Parmesan cheese.

Layer eggplant with sauce and cheese

Step 6

Add the remaining eggplant. Top with the remaining sauce, mozzarella and Parmesan. Garnish with chopped basil.

Top with remaining sauce and cheese

Step 7

Bake for 15 minutes or until the cheese is melted and bubbly.

Bake easy eggplant Parmesan recipe

How to Make Homemade Beer Goggles

Things You\’ll Need

  • Paper towel tube

  • scissors

  • tape

  • plastic wrap

  • petroleum jelly

Person holding scissors

For years, beer goggles have been blamed for bad judgment, rude behavior, and injuries from poorly executed motorcycle stunts. Now you can have the loss of balance and spatial coordination without the intoxication by creating homemade beer goggles. All you need is a paper towel tube, scissors, petroleum jelly, plastic wrap and tape.

Video of the Day

Step 1

Create the frame. Take the scissors and cut out two 2-inch wide rings from the paper towel tube.

Step 2

Create the lenses. Take the plastic wrap and cut out two circular pieces that will fit over the paper towel tube rings. Tape the plastic wrap to the paper towel tube rings.

Step 3

Smear the petroleum jelly over the plastic wrap lenses. When you wear the beer goggles, the petroleum will cause your vision to be even more distorted.

Step 4

Tape the beer goggles to your face. Place the paper towel tube rings over your eyes with the plastic wrap facing outward and tape the sides of the paper towel tube rings to your face.

Warning

Do not drive or operate heavy machinery with beer goggles.

Does Fruit Hold Alcohol When Added Into a Drink?

... Watermelon\’s hard outer rind will keep in the alcohol you pour inside.

For most people, fruits provide a refreshing, sweet and healthy snack. Most fruits contain a lot of water, so if some of the water can be pulled out of the fruit, the fruit can absorb any type of alcohol that it is dipped into. By infusing various types of fruit with alcohol, you can serve a unique treat at your next party.

Video of the Day

Watermelons

Watermelon is one of the best fruits to use if you want to make your fruit alcoholic. Get a watermelon and prop it up in a large bowl — the bowl helps reduce mess. Cut a hole in the top of the watermelon and dig out some of the fruit so that the neck of your bottle of alcohol will fit inside. Flip the watermelon upside-down and let the extra juices drain out for a few hours. You can hurry the process along by pressing against the sides with a wooden spoon. When drained, flip the watermelon back over, open your alcohol and set it upside-down into the watermelon. The watermelon will absorb the liquid that is being poured in after a few hours. Use watermelon-flavored rum or vodka to further mask the flavor.

Wine-Soaked Fruits

Wine is another beverage that can be absorbed into fruit. A fruity red wine will pair well with whatever fruit you decide to infuse it into. For example, peel a peach and cut it up into wedges. Place two to four wedges into a wine glass and fill the rest of the glass up with a red wine that you enjoy. Allow 10 to 15 minutes for the wine to soak in before you eat any of the peaches. Fruit in wine is a great idea for a dinner party or semi-formal lunch.

Jungle Juice

Jungle Juice is a strong alcoholic beverage that is typically made for parties. Fruit gets added to jungle juice to make it more sweet as well as mask the alcohol. In a large bowl, combine any alcohol that you enjoy: vodka, rum, gin, triple sec or schnapps. To this mixture add a citrus soda, fruit punch and juice concentrate. Select the fruit that you want to add to the mixture. Watermelon is the best at absorbing liquid, but other fruits like grapes and berries will make your Jungle Juice look more festive. Cut your fruit up so that it is in bite-sized pieces and press a paper towel against it to soak up extra moisture. Add the fruit to your drink at least an hour before you intend to serve it.

Champagne Punch

Champagne punch is a drink that contains alcoholic fruit but is also light and refreshing. In a pitcher, combine pineapple chunks, a bottle of white wine, a bottle of Champagne, lemon juice and sugar as needed. The result of this mixture is alcoholic fruit and a bubbly, refreshing punch.

Vegetarian Sweet Potato Black Bean Enchilada Recipe

0

Plate of vegetarian enchiladas with beans and rice. 
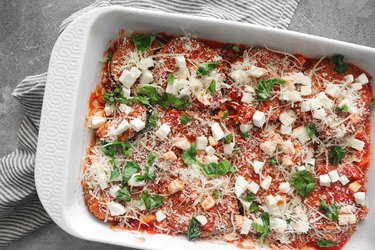
Vegetarian enchiladas make a healthy and satisfying meal. Image Credit: Julia Mueller

Looking for a fresh Mexican-inspired dish that's simple to prepare and fun to share with friends or family? Look no further! Authentic Mexican enchiladas typically use corn tortillas and are filled with meat or cheese. This nontraditional vegetarian approach to enchiladas is a lighter alternative that is both healthy and filling. Use your favorite vegetables for this simple and satisfying dish.

Video of the Day

Things You\’ll Need

  • 3 tablespoons olive oil

  • 1 large sweet potato, peeled and chopped into 1/2-inch pieces

  • 1 medium yellow onion, finely chopped

  • 1 large bell pepper, cored and chopped

  • 1 teaspoon ground cumin

  • 1 teaspoon chili powder

  • 1 /2 teaspoon sea salt

  • 5 ounces baby spinach

  • 1 cup canned black beans, drained and rinsed

  • 6 to 8 medium-sized flour tortillas

  • 2 (10-ounce) cans red enchilada sauce

  • 1 1/2 cups pepper jack cheese, grated

Step 1: Saute the Vegetables

Add the olive oil, chopped sweet potato and onion to a large skillet, and heat over medium-high. Saute, stirring occasionally, for 8 minutes.

Chopped onion and sweet potato in a skillet. 
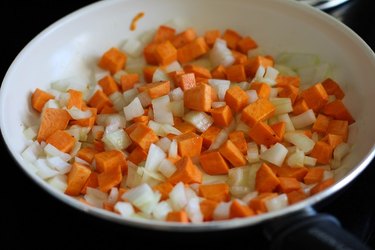
Saute over medium-high heat. Image Credit: Julia Mueller

Add the bell pepper, ground cumin, chili powder and salt. Saute, stirring occasionally until vegetables have softened, about 10 to 12 minutes. When the vegetables begin drying out or sticking to the skillet, reduce the heat to medium and add a few tablespoons of water to help steam and cook the vegetables.

Sauteed onion, sweet potato and bell pepper in a skillet. 
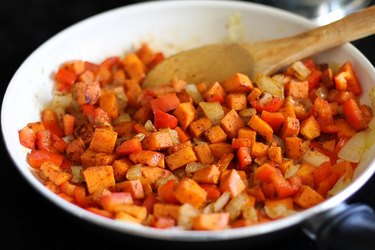
Add a little water to the vegetables if they begin to stick. Image Credit: Julia Mueller

Add the spinach and black beans to the skillet. Cover and cook 2 to 3 minutes, until spinach is wilted.

Vegetable-filled skillet covered with a glass lid. 
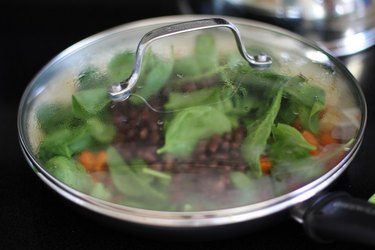
Cover the skillet to wilt the spinach. Image Credit: Julia Mueller

Remove from heat, and set aside until ready to use.

Vegetarian enchilada filling in a skillet 
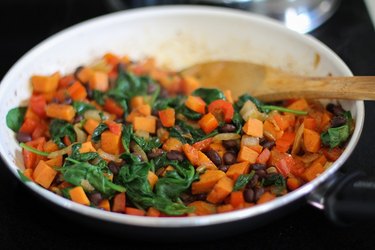
Set vegetables aside Image Credit: Julia Mueller

Step 2: Prepare the Baking Dish

Heat the oven to 350 degrees F.

Pour about 1/4 to 1/3 cup of the enchilada sauce in the bottom of a 9-by-13-inch casserole dish, and spread evenly to coat the bottom.

Enchilada sauce in the bottom of a casserole dish. 
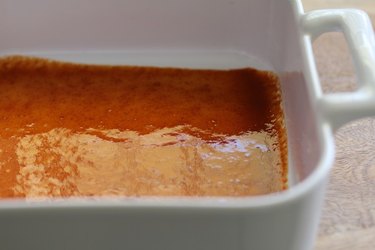
Coat casserole dish with enchilada sauce. Image Credit: Julia Mueller

Step 3: Dip the Tortillas

Pour 1 cup of the enchilada sauce in a large-mouth bowl or deep plate. Dip both sides of a tortilla in the sauce, ensuring the whole tortilla is coated.

Bowl of enchilada sauce next to a stack of flour tortillas. 
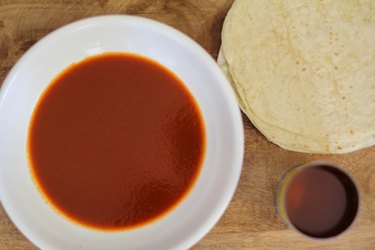
Coat both sides of a tortilla in enchilada sauce before filling. Image Credit: Julia Mueller

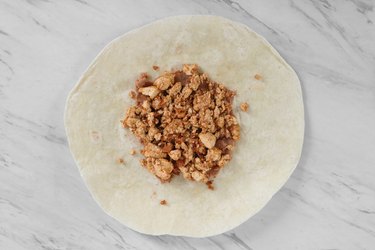
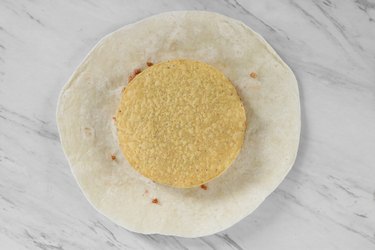
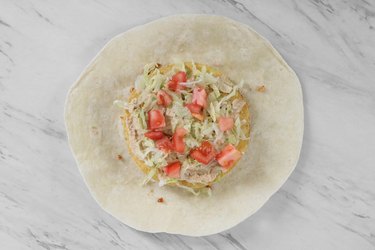
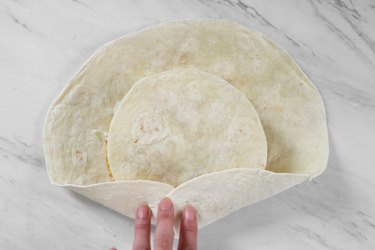
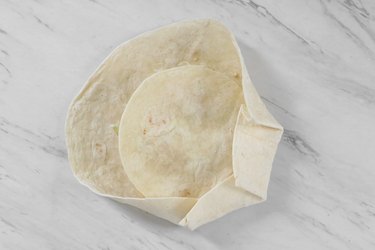
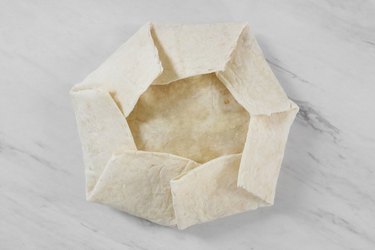
Step 4: Stuff the Tortillas

Add filling to the center of the sauce-coated tortilla, and then wrap the filling in the tortilla by rolling it up. Repeat the dipping and filling process with all of the tortillas.

Tortilla with vegetable filling on top next to the skillet of sauteed vegetables. 
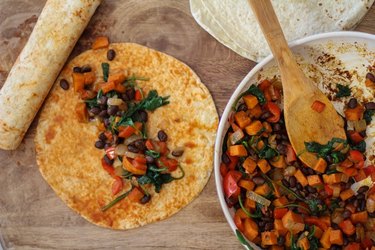
Fill the tortillas with sauteed vegetables. Image Credit: Julia Mueller

Step 5: Transfer to the Casserole Dish

Place the stuffed tortillas in the prepared casserole dish. Make sure the tortillas are situated close together. Pour enchilada sauce over the stuffed tortillas, reserving a small amount of sauce for serving.

Casserole dish with stuffed tortillas and sauce. 
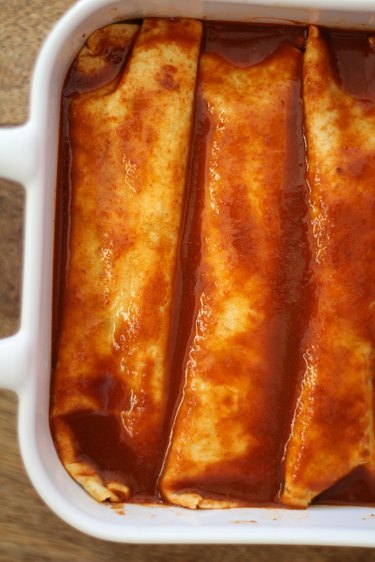
Fill the casserole dish with enchiladas. Image Credit: Julia Mueller

Sprinkle with cheese, and place on the center rack of the preheated oven.

Casserole dish of uncooked enchiladas with grated cheese. 
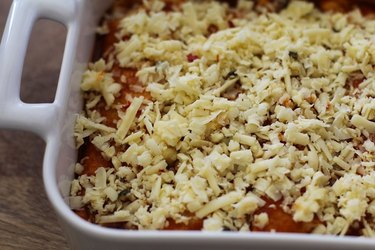
Sprinkle enchiladas with grated cheese. Image Credit: Julia Mueller

Step 6: Bake

Bake Enchiladas for 20 to 30 minutes, until the cheese has melted and begins turning golden-brown.

Casserole dish with baked enchiladas. 
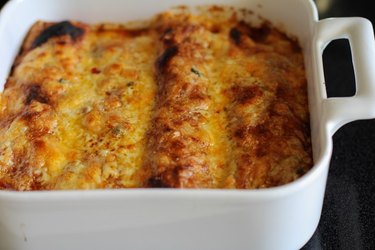
the Bake enchiladas until they turn golden-brown. Image Credit: Julia Mueller

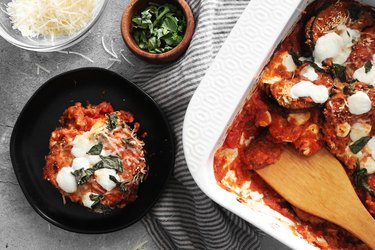
Allow the enchiladas to cool slightly before serving with beans and rice.

Plate with two vegetarian enchiladas, black beans and rice. 
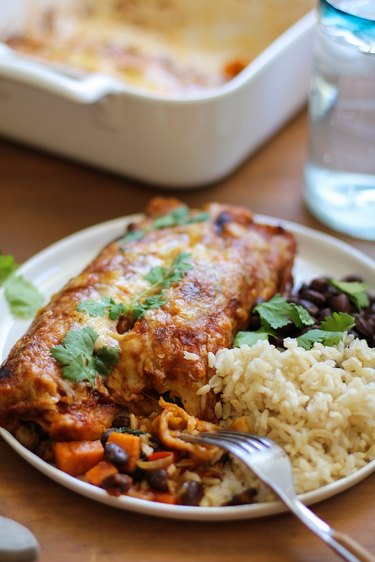
Serve enchiladas with your favorite side dish. Image Credit: Julia Mueller

Tip

Make this dish gluten-free by using corn tortillas instead of flour tortillas.

Substitute pepper jack cheese for cheddar, or experiment with other cheeses of choice.

You can replace the sweet potato with 2 large red potatoes if you prefer.

Can You Freeze Snickerdoodles?

23602218 Snickerdoodle dough responds well to freezing. Image Credit: Hemera Technologies/PhotoObjects.net/Getty Images

Snickerdoodles aren't the fanciest-looking cookies you can make, but what they lack in appearance is made up for in flavor. These cinnamon-sugar-flavored cookies, while delicious straight from the oven with a glass of milk, keep well up to two weeks in an airtight container. Make enough snickerdoodle dough at one time to bake a batch and freeze the extra to enjoy at a later time.

Video of the Day

What Is a Snickerdoodle?

Snickerdoodles have been around since the late 1800s. Also referred to as "snipdoodles," the cookies were likely first baked in New England and are Dutch or German in origin. While they have an unusual name, their taste is quite familiar. The inside of the cookie is similar to a sugar cookie, while the outside is rolled in cinnamon and sugar before baking. When baked correctly, they have a soft, chewy inside and crisp edges.

Freezing Snickerdoodle Dough

If you want freshly baked cookies all year long, you can prepare the snickerdoodle dough and freeze it in one of two ways, in logs or preportioned. To freeze in a log, prepare the cookie dough according to your recipe; shape the prepared dough into one or more logs. Wrap the logs in a layer of wax or parchment paper, tucking in the ends to keep the log fully covered. Put the logs in a freezer bag and remove as much air as possible before sealing it; place it in the back of your freezer. To use the dough, thaw the log in the refrigerator overnight, slice your cookies to size and then roll them in the cinnamon-sugar mixture before baking. To freeze in preportioned cookies, prepare your dough, then portion the cookies onto a cookie sheet. Place in the freezer just until solid, which could take up to six hours. Then transfer the cookies to an airtight freezer bag for longer storage. To bake the cookies, first thaw them in the refrigerator overnight, roll into the cinnamon-sugar mixture and bake according to your recipe. With either method, use the dough within three months of freezing.

Freezing Baked Snickerdoodles

You can bake your snickerdoodles to freeze and use later, which is especially helpful if you're starting your holiday baking early. Bake the cookies according to your recipe and cool them completely on a wire cooling rack. Place them in a single layer inside a freezer bag or airtight container. Put a piece of wax or parchment paper in between each layer of cookies, ending with plastic wrap or parchment on top. Place the container in the freezer for up to two months.

Some Considerations

Cookies and unbaked cookie dough can absorb odors in your freezer, which you can avoid by properly wrapping and sealing your snickerdoodles before freezing. Write the type of dough and date before freezing your dough or pre-baked snickerdoodles. Defrosting unbaked cooking dough can take a few hours, while baked snickerdoodles can defrost in as little as an hour on the counter. If they are stored properly, your snickerdoodles will taste as if they were made and baked fresh that day.

Vegan Copycat Crunchwrap Supreme Recipe

0

If you follow a vegan diet, you probably know all about the vegan hacks at Taco Bell. They offer an awesome variety of vegan-friendly options. This includes the Crunchwrap Supreme, a fan favorite that's been around for more than decade. However, with vegan staples like cashew cheeze and tofu, you can make an even better version at home. Read on to learn how to make your newest favorite dish.

Vegan copycat Crunchwrap with salsa and cilantro

Video of the Day

Cashew Cheeze

Things You\’ll Need

  • 1 cup chopped cashews

  • 1/2 cup non-dairy milk

  • 4 tablespoons nutritional yeast

  • 1 tablespoon taco seasoning (optional)

  • Water

Ingredients for cashew cheeze

Step 1

Soak the cashews in water for at least 4 hours. Make sure everything is completely submerged in water.

For best results, soak the cashews for 6 to 8 hours or overnight. The longer you soak them, the better.

Soak cashews overnight

Step 2

In a food processor, combine the soaked cashews, nutritional yeast and taco seasoning, if using. As the ingredients blend together, slowly add the non-dairy milk.

Nacho cheeze ingredients

Step 3

Process the ingredients until it reaches your desired consistency. If necessary, add more non-dairy milk, 1 tablespoon at a time. This will help thin out the cheeze.

Give it a taste. If needed, add more nutritional yeast or taco seasoning.

Nacho cheeze

Tip

For a tangy flavor, add a splash of lemon juice or a dash of garlic powder.

Tofu Taco Meat

Things You\’ll Need

  • 14 ounces extra-firm tofu, drained and pressed

  • 4 tablespoons olive oil

  • 1 packet taco seasoning

Tofu taco meat ingredients

Tip

Tofu retains a lot of moisture, so it's a good idea to press it before cooking. To do so, lay the tofu between two sheets of paper towels. Place a cutting board on top. Next, weight it down with a heavy pan or cans. Wait for at least 30 minutes.

Step 1

Break apart the tofu.

Chopped tofu

Step 2

In a pan over low-medium heat, warm the olive oil. Cook the chopped tofu for 10 minutes. Use a spatula to break it up into smaller crumbles.

After 10 minutes, add the taco seasoning. Toss until all of the tofu is coated. Cook for another 10 to 12 minutes, mixing occasionally.

Cooked tofu taco meat

Vegan Copycat Crunchwrap Supreme

Things You\’ll Need

  • Large soft tortillas

  • Small soft tortillas

  • Tostada shells

  • Tofu taco meat

  • Refried beans

  • Shredded lettuce

  • Chopped tomatoes

  • Nacho cheeze

Vegan Crunchwrap ingredients

Step 1

Place a large soft tortilla on a flat surface. Spread 1 tablespoon of refried beans on to the center. Add 1 tablespoon of tofu taco meat on top.

Add taco tofu meat

Step 2

Place a tostada shell on top of the tofu.

Add the tostada shell

Step 3

Add a layer of nacho cheeze and about 1/4 cup of lettuce and chopped tomato.

Add nacho cheeze and vegetables

Step 4

Finally, add a small soft tortilla shell. This will keep the ingredients in place.

To construct the Crunchwrap, hold the edge of the large tortilla. Bring it toward the center to create a fold.

Fold the tortilla shell

Step 5

Continue folding in the edge. Fold as tight as possible.

Fold the Crunchwrap

Step 6

Work your way around the Crunchwrap until it is completely sealed.

Folded Crunchwrap

Step 7

With the seam side facing down, place the Crunchwrap in a lightly greased pan. Cook over low heat for 2 to 3 minutes or until golden brown. For a crispier tortilla, cook for another minute or so.

Flip over the Crunchwrap and cook for 2 to 3 minutes.

Vegan copycat Crunchwrap recipe

Tip

This homemade Crunchwrap can also be toasted on a panini press.

Your vegan Crunchwrap is ready to eat. Enjoy it with a side of salsa, guacamole or vegan sour cream. You can also add cilantro or hot sauce.

Don't be afraid to experiment with this recipe. For example, you can use whole black beans or kidney beans in place of refried beans. Instead of tofu, you can use vegan meat crumbles. A vegetarian taco meat recipe made of cauliflower, mushrooms, and quinoa also works well. The possibilities are endless!

Chicken Enchilada Soup Recipe

0

A family meal does not get easier or more crowd-pleasing than this. It's simple to throw together, it cooks on its own and you can garnish to your heart's content. Don't be surprised if this cozy meal makes it into your regular rotation!

Chicken enchilada soup

Video of the Day

Things You\’ll Need

  • 1 1/2 pounds chicken breasts, boneless and skinless

  • 3 cups chicken broth

  • 1 (10-ounce) jar red enchilada sauce

  • 1 (14.5-ounce) can fire-roasted tomatoes

  • 1 (15-ounce) can black beans, drained and rinsed

  • 2 cups corn kernels (frozen or fresh)

  • 1 (3.5-ounce) can chopped green chilies

  • 1 cup chopped white onions

  • 1 teaspoon garlic powder

  • 2 teaspoons chili powder

  • 2 teaspoons cumin

  • 1 teaspoon smoked paprika

  • 1 teaspoon salt (plus additional to taste)

  • Garnishes: tortilla strips, cheddar cheese, sour cream, etc.

Tip

If you can buy some of the ingredients in jars rather than cans, do it. You will avoid the metallic taste that can sometimes go along with the cans.

Ingredients for chicken enchilada soup

Step 1

Add everything (other than the garnishes) to a slow cooker, including the whole chicken breasts.

Add ingredients to the slow cooker

Step 2

Cook the ingredients on high for 4 hours or low for 8 hours.

Cook soup in slow cooker

Step 3

Remove the chicken. Shred the chicken using two forks and return it to the slow cooker.

Shred the chicken

Step 4

Ladle the soup into bowls and garnish as desired.

Garnish with toppings Completed chicken enchilada soup

How to Cure Walnuts

Things You\’ll Need

  • Old newspaper

  • Thick gloves

  • Protective glasses or goggles

  • Walnuts

  • Hammer

  • Garden hose or bucket

  • Nutcracker

  • Vice

  • Sealable plastic bag or airtight container

... Walnuts come in different varieties and are highly versatile.

Walnuts come in different varieties; there is the black or American walnut, and the Carpathian, Persian or English walnut. The black walnut has a much tougher husk than the Carpathian walnut, so much so that people have been known to drive their cars over them just to break them open. The black walnut also has a much stronger flavor, but both varieties of walnut can be used in baking, on salads and in desserts. The walnut is a versatile ingredient to add to your kitchen cupboards, and cured walnuts have the additional benefit of being long lasting.

Video of the Day

Prepare

Step 1

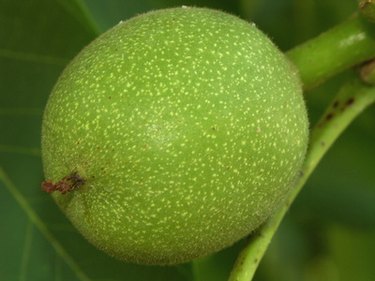
... Walnut husks need to be removed before curing.

Cover your work surface with old newspaper and put on gloves and protective glasses. Walnut husks contain a brown dye that stains, so protect your surfaces and your hands.

Step 2

Take off the husks of the walnut by rubbing with your hands or using the side of a hammer. Black walnuts are much tougher, and you may need to use some force to remove the husks.

Step 3

Rinse the nuts either outside using a garden hose or in an old bucket; dye will still be on the nuts so this will get rid of it. Let the nuts dry.

Cure

Step 1

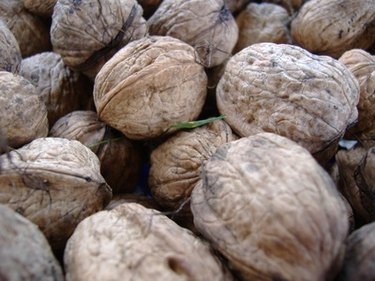
... Cure walnuts before shelling.

Place the nuts in a cool, dry place to dry out. Stack them only two or three layers deep so that there is plenty of air circulating for them to dry well.

Step 2

Leave the nuts to cure for four weeks. Do not allow any direct sunlight into your curing space.

Step 3

Take out a sample nut and test. If the shell breaks easily and makes a sharp cracking sound the nuts are ready. If not leave for another week and sample again.

Shell and Store

Step 1

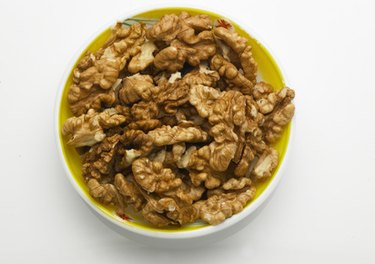
... Once cured and shelled, walnuts can last up to nine months in the fridge.

Moisten your walnuts before you shell them; this stops them from shattering and you are more likely to end up with whole nuts. Soak them in hot water for 24 hours, drain them and soak them again for two hours.

Step 2

Use a nutcracker to remove the shells, if the shell does not yield use a vice to take off the shell. If you do use a vice, do this slowly and gently so as not to shatter the nutmeat.

Step 3

Place all your shelled walnuts in a sealed plastic bag or airtight container. The nuts can be stored in the refrigerator for up to nine months and frozen for up to two years.

Tip

Airtight storage jars can be bought from home and garden stores. Use the attic, cellar (if it's not damp) or airing cupboard to cure your nuts.

Warning

Do not use sharp knives or other sharp objects to remove husks or shells from nuts; this is a dangerous practice and you could be injured. Do not put walnut husks to compost as they contain chemicals harmful to other plant life.

How to Make a Bloody Mary Bar

... Bloody Mary Bar Image Credit: Elizabeth Biscevic

Want to throw the perfect brunch party? Surprise your guests with a DIY Bloody Mary Bar! With some good vodka or gin, the right fixings, and some pretty colors you can create a Bloody Mary bar worthy of any over-priced brunch spot.

Video of the Day

When designing the bar, think of the Bloody Mary as five separate parts: the base, the rim, the veggies, the protein, and the spice/flavor. Here's some inspiration to get started.

THE BASE

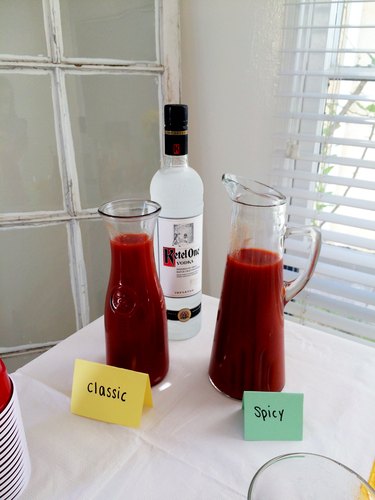
... Include a spicy and classic variation. Image Credit: Elizabeth Biscevic

There are lots of different recipes claiming to be the best Bloody Mary mix around, but the options are really endless. For this bar, I used the recipe below for the classic mix and then divided it into two. I left one as is for guests who don't like spice, and then added extra Tabasco, Sriracha, and jalapeño juice to the other for a spicier option.

Mix up the following ingredients and pour over ice:

  • 3 cups V8 Juice
  • 1 tsp horseradish
  • 3 tbsp lemon juice
  • 3 tbsp lime juice
  • 1 tbsp Tabasco
  • 1 tbsp Worcestershire sauce
  • 1 tsp celery salt
  • 1 tsp garlic
  • 1 tsp minced garlic
  • ¾ tsp salt
  • ½ tsp black pepperand most importantly…
  • VODKA

THE RIM

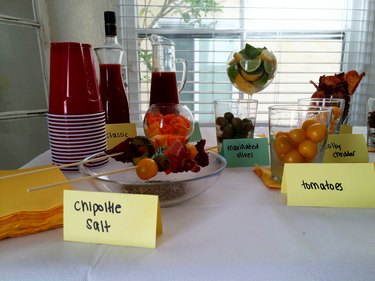
... A little salt makes the flavors really pop! Image Credit: Elizabeth Biscevic

Choose a couple flavored salts to rim your glass. I make my own by combining kosher salt with different flavors, like garlic and chipotle. Put the salt in small dishes that will fit the rim of the cup. Keep lemons or limes close by so guests can wet the rim before dipping their glasses in the salt.

Here are a few salt ideas:

  • Celery Salt: 1 tablespoon celery salt + 1 tablespoon kosher salt
  • Chipotle Salt: 1 tablespoon chipotle powder + 1 tablespoon kosher salt
  • Spicy Garlic Salt: ½ tablespoon garlic powder + ½ tablespoon paprika + 1 tablespoon kosher salt
  • Lemon Pepper: 2 tablespoons lemon pepper

THE GREENERY

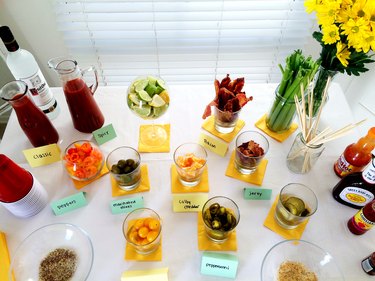
... Celery sticks are an iconic Bloody Mary garnish – perfect for added flair and to stir flavors together. Image Credit: Elizabeth Biscevic

Garnishes are one of the best parts of the Bloody Mary. Pickled veggies, lemons, celery sticks, and jalapeños are classic, but you can include anything you like.

Make sure to include skewers on your spread so guests can load up on all the yummy greens!

Here are a few ideas for your bar. Bonus points for using the pickling them beforehand:

  • Artichoke hearts
  • Asparagus
  • Basil
  • Celery
  • Cherry tomatoes
  • Cucumber
  • Green olives
  • Jalapeños
  • Lemons
  • Limes
  • Pearl onions
  • Pepperoncini
  • Pickles
  • Pickled asparagus
  • Picked carrots
  • Pickled cauliflower

PROTEINS

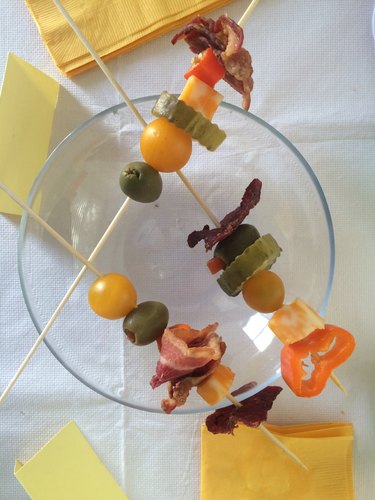
... Make skewers of your favorite fixings for guests to select and enjoy. Image Credit: Elizabeth Biscevic

Whether you're drinking for a hangover or just enjoying a Bloody Mary before a day of partying, you don't want to miss out on the protein. Anything, and I mean anything, goes here, but a few of my favorites include:

  • Bacon
  • Beef jerky
  • Cheddar squares
  • Hard boiled egg
  • Mozzarella balls
  • Shrimp
  • Mini sliders
  • Tofu

SHAKES & FLAVOR

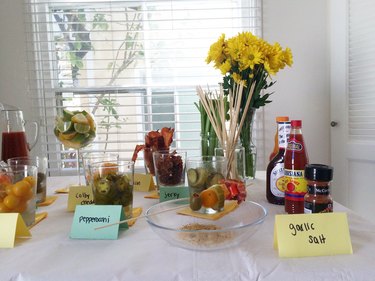
... Ever joked about wanting to drink BBQ sauce? Now you can. Image Credit: Elizabeth Biscevic

The perfect Bloody Mary almost requires tasting as you go, which makes a bar spread perfect for all guests. Pull out all pantry for this one, and allow guests to add and stir in whatever their hearts desire!

Here are a few ideas to get you started:

  • Celery salt
  • Cholula
  • Barbecue Sauce
  • Black pepper
  • Frank's Red Hot
  • Garlic powder
  • Garlic salt
  • Lemon pepper
  • Louisiana Hot Sauce
  • Pickle juice
  • Seasoned salts
  • Smoked Paprika
  • Sriracha
  • Worcestershire sauce

What Vegetables to Serve at a Luau?

... Hula dancing is a typical activity at a Hawaiian luau.

A luau is a traditional Hawaiian feast featuring food, dancing and celebrations. The word luau comes from the taro plant which is used often in Hawaiian food and culture. Luaus are held for birthdays, graduations, weddings and other special occasions. The main feature of a luau is usually one or more pigs slowly roasted in the ground, as well as a variety of seafood, fruit and vegetables. Hula dancing is sometimes included for entertainment at the event.

Video of the Day

Poi

Poi is a purple-gray paste made from pounded taro root and water mixed together to form a paste. Taro is a nutritional plant that has many uses in Hawaiian cooking and culture, so it makes sense that this dish is ubiquitous with luau feasts. Poi can be purchased at many international stores in the U.S. in powdered form; it just needs to be mixed with water until it reaches the desired consistency.

Sweet Potatoes

Sweet potatoes grow throughout Hawaii, so they are often included on luau menus. Hawaiian sweet potatoes often have purple centers instead of the usual orange, which gives them visual appeal on a luau buffet. The recipe for Hawaiian sweet potatoes is simple; they are just washed and baked before being brushed with butter and served. Sweet potatoes need to cook for approximately 30 to 40 minutes in a 350-degree Fahrenheit oven.

Pickled Onions

At ancient Hawaiian luaus many years ago, barrels of pickled onions were often served to guests. This tradition continues in the culture today. The onions are sliced and placed into a glass jar with a seeded, green bell pepper, salt, water, vinegar and red pepper flakes. When covered and refrigerated overnight, the onions develop a slightly salty, spicy and pickled flavor that accents rich, fatty meats, such as pork and flank steak.

Other Options

Other vegetable items that are prominent at luaus include potato salad, spinach salad and green salad. Greens are tossed with cherry tomatoes and carrots. Potato salad is sometimes made out of baked, sweet potatoes that have had time to cool down. A carrot and cucumber salad is made out of julienned vegetables mixed with dressing. Salads are often dressed with ranch, thousand island or papaya salad dressing.