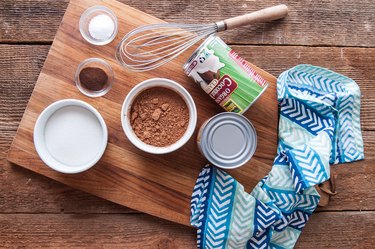
Home Blog Page 27

How to Brew Beer with Amaranth

Things You\’ll Need

  • 2 buckets

  • 2 large cookie sheets

  • 2 dish towels

  • Tap water

  • Amaranth seeds

... Amaranth beer is a rarity.

Beer brewed with Amaranth is safe for those with celiac disease, is gluten-free and is a rarely used ingredient in American beers. Amaranth, an ancient grain used by the Aztecs and enjoyed in Central and South America, is relatively easy to obtain.

Video of the Day

Sprouting Amaranth Seeds

Step 1

Purchase 10 to 20 pounds of Amaranth seeds.

Step 2

Split your seeds in half between the two buckets.

Step 3

Cover the seeds with cool tap water up to one-half inch above the seeds.

Step 4

Cover each bucket with a damp towel.

Step 5

Change the water every eight hours or the sprouts can die or go moldy.

Step 6

Store in the coolest and darkest place in your house for 24 hours.

Step 7

Spread the wet seeds on cookie sheets, and cover with towels to keep moist.

Step 8

Allow the seeds grow to 1/4 inch in length, six to 48 hours.

Step 9

Adjust the oven to the lowest setting and remove towels.

Step 10

Place the cookie sheets in the oven.

Step 11

Allow the sprouts dry out slowly; checking every 30 minutes. The point is to dry them, not cook them.

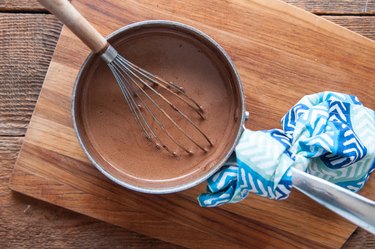
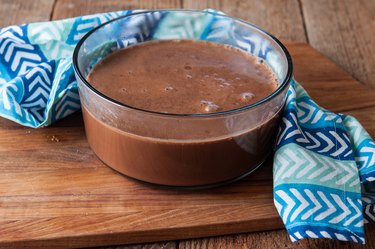
Toasting Amaranth and Brewing

Step 1

Cook dried and sprouted seeds on cookie sheets for 10 minutes at 150 degrees Fahrenheit for a Pilsner malt, 250 degrees for an amber malt, 325 degrees for a dark malt, and 400 degrees or higher for a chocolate malt. This cooking requires experimentation, observation and patience. Please try small batches until you master your oven temperature.

Step 2

Select your favorite beer recipe. Kolsh, Cream Ale, Honey Brown or any other light ales or lagers are appropriate choices for this ingredient.

Step 3

Convert a standard barley or wheat beer recipe by multiplying the barley or wheat grains by 2.0 to 2.5, as it will take more Amaranth to make the brew than it would wheat or barley.

Tip

Find Amaranth seeds online, at farmer's markets or at feed stores.

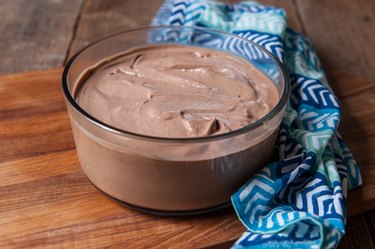
Add agave nectar or honey to boost flavor and alcohol.

Add Amaranth to standard barley-based beer for a light-tasting additive.

Warning

Select your brewing adjuncts carefully when brewing for people with celiac disease. Many ingredients, including certain brewer’s yeasts, contain wheat/barley products and even trace amounts can be harmful.

Purchase only feed grain and never seed grain; seed grain may contain pesticides and insecticides.

How Many Beers in a Mini Keg?

... How Many Beers in a Mini Keg?

A draft beer is one of the joys of a hot summer day–it's much better to many people than a can or bottle. However, it is just not practical to keep a keg of beer on hand in your house. The mini keg is a much smaller version of the traditional keg, but with all of the same qualities. There are 14 12-ounce cups, 10.6 16-ounce cups and 8.5 20-ounce cups in a mini keg.

Video of the Day

Definition

A mini keg is generally considered to be a miniature keg for containing beer that holds 5 liters or 1.32 gallons of beer. The mini keg is usually disposable and is made of aluminum with either a pressurized tap or a pour spout. The mini keg is about 1/10 the size of a full sized keg.

Types

Other terms for smaller kegs are pony kegs, beer balls or party balls. These types of kegs all hold 5 gallons or 18.9 liters of beer. A mini keg is much smaller than these types.

Beer Size

A typical can of beer holds 12 ounces, but most cups for parties will hold either 16 or 20 ounces of beer. When figuring out how many beers are in a mini keg, you must know how much your cups will hold.

Conversion

One liter is equal to 0.26 gallons or 33.8 ounces. A five liter mini keg is equal to 1.32 gallons or 169 ounces. Therefore, there are 14 cups of 12 ounces, 10.6 cups of 16 ounces and 8.5 cups of 20 ounces in a mini keg.

Fun Fact

The mini keg was called a "Bubba" in Canada by Molson. You can ask at a store for a "Bubba" and they will know you mean a mini keg. However, in America, there is a company called "Bubba Kegs" so the term can be confusing to American consumers.

How to Know if a Cantaloupe Is Bad

... A ripe cantaloupe is a healthy snack.

The American cantaloupe is actually not a true cantaloupe. True cantaloupes are native to Italy and are only grown in Europe. The American cantaloupe is a close relative, however, and it is an extremely healthy fruit. Cantaloupe is a low-calorie food and a good source of vitamins A and C. Like all fruits, cantaloupes can become contaminated with dangerous pathogens, so selecting a ripe, undamaged cantaloupe is important.

Video of the Day

Step 1

Check the outside of the melon for bruises, soft spots, or tears. Bruises and soft spots indicate a melon that is overripe and may have gone bad. A cantaloupe with a damaged outer rind will spoil quickly.

Step 2

Smell the end of the cantaloupe where the stem was attached. A good cantaloupe should have a fresh, sweet aroma.

Step 3

Make sure the cantaloupe is not shriveled, leaking juice, or damaged where the stem was attached. Pathogens that cause foodborne illnesses may enter through a damaged stem area.

Step 4

Inspect the area where the cantaloupe is being stored. Cantaloupes are extremely vulnerable to the absorption of aromas and liquids. Cantaloupes should be stored in clean, dry areas, away from raw meats and chemicals.

Step 5

Tap the cantaloupe with the palm of your hand. A ripe cantaloupe should make a hollow sound.

Tip

Store a firm cantaloupe at room temperature for several days for softer and juicer flesh.

Warning

When in doubt, throw it out. The dangers of eating a contaminated cantaloupe far outweigh the rewards.

This Seasonal Gingerbread Creamer Makes Coffee Taste Like Christmas

0

Drinking flavored coffee drinks is one of the easiest ways to get into the holiday spirit — and you don't have buy from the local coffee shop every time you want to drink it! This gingerbread creamer will spread loads of cheer, and it's free of the additives that typical flavored coffee creamers include. The ingredients are simple and the spices — ginger, cinnamon, nutmeg and clove — pair perfectly with a hot cup of coffee!

This Seasonal Gingerbread Creamer Makes Coffee Taste Like Christmas

Video of the Day

Things You\’ll Need

  • 1/2 cup half-and-half

  • 1/2 cup whipping cream

  • 1/4 cup sweetened condensed milk

  • 1/4 cup grade A maple syrup

  • 1 teaspoon cinnamon

  • 1/4 teaspoon ginger

  • 1/4 teaspoon clove

  • 1/4 teaspoon nutmeg

  • 1/4 teaspoon pure vanilla extract

  • Large mason jar or bowl

This Seasonal Gingerbread Creamer Makes Coffee Taste Like Christmas

Step 1

Pour whipping cream and half-and-half into a jar and stir to combine.

This Seasonal Gingerbread Creamer Makes Coffee Taste Like Christmas

Step 2

Add condensed milk, and stir to combine.

This Seasonal Gingerbread Creamer Makes Coffee Taste Like Christmas

Step 3

Add maple syrup. Stir.

This Seasonal Gingerbread Creamer Makes Coffee Taste Like Christmas

Step 4

Add all the spices to the mixture.

This Seasonal Gingerbread Creamer Makes Coffee Taste Like Christmas

Step 5

Add vanilla extract.

This Seasonal Gingerbread Creamer Makes Coffee Taste Like Christmas

Step 6

Stir creamer mixture thoroughly or twist on the lid and shake.

This Seasonal Gingerbread Creamer Makes Coffee Taste Like Christmas

Step 7

Stir creamer before serving. Pour into hot coffee according to taste. Keep refrigerated for up to two weeks and enjoy!

This Seasonal Gingerbread Creamer Makes Coffee Taste Like Christmas

This homemade gingerbread creamer is sure to impress guests this holiday season, or keep it for yourself to enjoy in the morning!

This Seasonal Gingerbread Creamer Makes Coffee Taste Like Christmas This Seasonal Gingerbread Creamer Makes Coffee Taste Like Christmas This Seasonal Gingerbread Creamer Makes Coffee Taste Like Christmas

How Long Does Wine Last After Opening?

0

Full You can still enjoy a half-finished bottle of wine — but don\’t wait too long. Image Credit: ktsimage/iStock/Getty Images

Whether you only felt like a single glass or the party wound down with a few half-empty bottles lying around, you don't need to pour out the rest of your wine. Stored properly, a half-full bottle of wine should still be good for a few days. The exact length of time varies depending on the wine, but you can do some things to extend it.

Video of the Day

Wine Life Expectancy

Exactly how long your wine will last depends on the wine itself. Most red and white wines will last for about two to three days after opening; after this point, they begin to sour and lose their flavor. Sparkling wines lose their carbonation almost immediately and should be enjoyed as soon as they are opened. By contrast, fortified wines such as port or sherry can last several weeks or more; the higher the alcohol content, the longer the life of the wine.

Wine lifespan varies depending on the acidity of the wine; a high-acidity wine such as a Riesling or Sauvignon Blanc will survive a little longer than a lower-acidity wine such as a Pinot Grigio.

How to Spot Bad Wine

As wine is exposed to air, it begins to undergo a chemical reaction called oxidation. Whites are more vulnerable to oxidation than reds, but both will oxidize rapidly if left exposed to oxygen. The color of the wine may change; if a Merlot takes on a brick-red hue or a Pinot Grigio begins to go brown, it's oxidized. Oxidized wines typically develop a dry, bitter flavor, although the exact result varies depending on the wine.

Prolonging Your Wine\’s Life

Once you've uncorked your bottle, the clock is ticking. However, you can do a few things to maximize the wine's lifespan. With proper care, you can make a bottle of wine last a week or even more. Cork the bottle tightly, using the original cork or a wine stopper. Refrigerate it, even if it's red; this will inhibit oxidation. You can also transfer the remaining contents into a smaller bottle to reduce the surface area exposed to oxygen. For the gadget lover, devices are available to remove air from the bottle or even replace the air it contains with an inert gas; these might be good strategies for an expensive bottle, but for ordinary table wine they're probably overkill.

What to Do With Spoiled Wine

Once wine has started to lose its character, you don't have to get rid of it right away. Wine that you wouldn't drink can still be useful in the kitchen. If you have a recipe that calls for wine, feel free to use older wine for it; the differences in flavor won't be noticeable in a dish with lots of other ingredients.

You can also put old wine to other uses; some believe that a small amount of wine added to your bath helps to soften the skin. You can also use red wine as a fabric dye.

Ways to Carry Bottles of Beer

... Beer is a great beverage for social events.

Beer is a popular alcoholic beverage around the world. Beer is popular for many reasons, including its refreshing taste and its easy transportability. Unlike mixed drinks, beer doesn't require a lot of preparation except perhaps to be kept cold until you're ready to enjoy it. There are a variety of ways to keep your beer cold until you reach your destination.

Video of the Day

Coolers

Coolers are perhaps the most popular and obvious way to carry bottles of beer from place to place. Coolers come in many sizes; make sure you aren't using one that is going to be too heavy to carry when filled with ice and beer bottles. Smaller coolers work great and are very portable, but they are often designed to hold cans. You may have to get creative with your beer placement to fit as many bottles in the cooler as possible. This will be more difficult with long-neck bottles. Short-necked bottles will pose less of a problem.

Plastic Bags

In a pinch, you can use plastic bags to carry bottles of beer. Use an ordinary bag such as you might get with your purchase at a grocery or department store. If the bag feels flimsy, you can double bag and put another bag inside it. Lay your beer flat in the bag and cover it with ice. Check the bag frequently and dump out any water that forms as the ice melts.

Cooler Boxes

The cooler box is an innovative invention by the brewing industry, specifically Coors Brewing, that makes taking bottles of beer with you simple and easy. Coors Light cooler boxes are specifically designed to handle ice without getting the box wet and warping it, causing it to break apart and crumble. All you have to do is open the box and add enough ice to fill the open spaces in the box and you're ready to go with your bottled beer.

Backpacks

You can carry bottles of beer in a backpack. Take a backpack you don't value too highly. It may get a little bit wet in the process. Put an old towel down and line the backpack with it. Place the bottles of beer in the backpack. Place them on their sides and line the bottles up facing each other so you can get more bottles in the bag. To keep the bottles cold, use reusable ice packs and place them in the bag directly next to the bottles. If you don't have reusable ice packs available, you can fill up a locking, sealed plastic bag with cubes of ice; just make sure the bag is sealed.

Peanut Butter Chocolate Chip Gooey Bars Recipe

0

Dessert bars are perfect party food, and gooey bars are no exception! These peanut butter chocolate chip gooey bars are oozing with sweetened condensed milk for a decadent dessert that will satisfy any sweet tooth! They come together in no time.

Peanut Butter Chocolate Chip Gooey Bars Recipe | eHow

Video of the Day

Things You\’ll Need

  • 7 1/2 ounces (1 1/2 cups) all-purpose flour

  • 1/2 teaspoon kosher salt

  • 1 teaspoon baking powder

  • 3/4 cup creamy peanut butter, divided

  • 1 (14-ounce) can sweetened condensed milk, divided

  • 4 ounces (8 tablespoons) unsalted butter, room temperature

  • 1/2 cup packed light brown sugar

  • 1/3 cup granulated sugar

  • 1 large egg

  • 1 tablespoon pure vanilla extract

  • 2 cups bittersweet chocolate chips, divided

  • 9×13 inch baking pan

  • Baking spray

  • Parchment paper

  • Plastic wrap

  • Stand mixer

  • Bowls, whisks, spatulas

Step 1: Combine Dry Ingredients

Preheat the oven to 350 degrees Fahrenheit and grease a 9×13 baking pan with baking spray or butter, making sure to grease the sides of the pan. Line the bottom with parchment paper.

In a medium bowl, whisk together the flour, salt and baking powder. Set aside.

Peanut Butter Chocolate Chip Gooey Bars Recipe | eHow

Step 2: Prepare Peanut Butter Drizzle

In a small bowl, stir together 2 tablespoons peanut butter, 1 tablespoon sweetened condensed milk, and 2 tablespoons warm water until smooth. It should have a sauce-like consistency. Stir in an additional 1 to 2 tablespoons of water if needed to bring the drizzle together.

Peanut Butter Chocolate Chip Gooey Bars Recipe | eHow

Step 3: Combine Peanut Butter, Butter, and Sugars

In a stand mixer fitted with the paddle attachment, mix the remaining peanut butter, unsalted butter, brown sugar, and granulated sugar on medium-high speed for several minutes until fluffy. Scrape down the sides several time during this process.

Peanut Butter Chocolate Chip Gooey Bars Recipe | eHow

Step 4: Add Egg, Flour and Dry Ingredients

With the mixer on medium-low speed, add the egg and vanilla extract, allowing to mix until fully combined. Scrape down the sides. Add the dry ingredients and mix until just combined.

Peanut Butter Chocolate Chip Gooey Bars Recipe | eHow

Step 5: Create Bottom Layer

Add half of the batter to the pan. Using a piece of plastic wrap, flatten the batter so that it fills the bottom of the pan into the corners. If necessary, add additional batter, but keep in mind that the layer can be thin.

Peanut Butter Chocolate Chip Gooey Bars Recipe | eHow

Step 6: Top with Chocolate Chips and Sweetened Condensed Milk

Top evenly with 1 ½ cups chocolate chips and the remaining sweetened condensed milk.

Peanut Butter Chocolate Chip Gooey Bars Recipe | eHow

Step 7: Add Remaining Batter

Add the remaining batter evenly over the top, and then use plastic wrap to gently even out and flatten. Note: there will still be visible chips and sweetened condensed milk. It will be gooey)

Peanut Butter Chocolate Chip Gooey Bars Recipe | eHow

Step 8: Add Peanut Butter Drizzle

Add the remaining chocolate chips followed by the peanut butter drizzle. (Use a spoon or spatula to drizzle it).

Peanut Butter Chocolate Chip Gooey Bars Recipe | eHow

Step 9: Bake

Bake for 30 to 33 minutes, until slightly golden on top and just bubbling on the sides.

Peanut Butter Chocolate Chip Gooey Bars Recipe | eHow

Step 10: Cool and Slice

Allow to cool for at least 15 minutes before slicing. It can be warm, but not straight out of the oven. Run a knife around the edge of the pan to dislodge any sweetened condensed milk that might have cooked onto the sides. Enjoy.

Peanut Butter Chocolate Chip Gooey Bars Recipe | eHow

How to Make a Heart-Shaped Cake

0

Love is in the air with this homemade conversation heart cake. And you don't even need a heart-shaped pan to make it. We've got a hack using pans you probably already have in your kitchen. They say the way to the heart is through food, and we guarantee your special someone will most definitely feel loved with this heart-felt confection of affection.

Conversation heart cake

Things You\’ll Need

  • 8-inch x 8-inch square cake pan

  • 8-inch round cake pan

  • Cake batter

  • Wire cooling rack

  • Buttercream frosting

  • Pink food coloring

  • Red gel icing

Tip

We used an 8" round pan and 8" x 8" square pan for this cake, but you could use a different size. The important part is that the diameter of the round pan is the same length/width of the square pan.

Slice of conversation heart cake

Step 1

Mix up your favorite cake batter and divide it evenly between the square and round cake pans. We used a box strawberry cake mix.

Pouring cake batter into two pans

Step 2

Bake the cakes per the recipe's instructions, and then allow them to cool completely on a wire rack.

Round and square cake on cooling rack

Step 3

Trim off the tops of both cakes so they're even.

Slicing off tops of cakes

Step 4

Cut the round cake in half.

Cutting round cake in half

Step 5

Rotate the square cake so it's in the shape of a diamond on your cake platter, and then place each half of the round cake above it to form a heart.

Round cake halves placed above square cake in heart shape

Step 6

Add several drops of pink food coloring to your favorite buttercream frosting and mix it together. If you want to be extra, we love this sparkling rosé buttercream frosting!

Mixing pink food coloring into frosting

Step 7

Frost the cakes together. We recommend frosting a light crumb coat first, letting that harden a bit, and then frosting a smoother coat on top.

Frosting heart cake with pink icing

Tip

If you dip your frosting knife in a mug of warm water every so often and wipe it off, the heat will create a very smooth texture on the frosting.

Step 8

Use red icing gel to write a sweet message on your cake. You could stick to classic conversation heart sayings like "Be Mine" and "XOXO," or mix it up with more modern phrases like "BAE" and "For Like Ever." Also, if you're unsure of your cake writing skills, you could always use candy letters or cut some out of fondant.

Writing "XOXO" on cake

Now all that's left to do is slice and share!

Conversation heart cake Conversation heart cake Conversation heart cake

Vegan Ice Cream Recipe

0

If you're a bettin' man (or woman), I've got a good one for you. Make a bet that you can make an ice cream so good, no one will be able to tell that it's vegan. Because the thing about this ice cream is that it's so creamy and full of flavor, it's hard to even understand how there isn't a trace of dairy in it. So, I guess that makes it a bit more healthy than the other types, but that isn't the point. It's incredibly easy, and incredibly delicious and it's just a bonus that it's also slightly on the healthy side. It's also a bonus that you just won your bet.

How to Make Amazing Vegan Ice Cream

Video of the Day

Tip

Ice cream is creamiest when it's able to get to a frozen state as quickly as possible. Making your ice cream base the night before you churn it helps to chill it thoroughly and give you the creamiest results!

Things You\’ll Need

  • 13.5 oz cans of full fat coconut milk, (2)

  • 1 1/4 cups granulated sugar

  • 1/2 cup unsweetened cocoa powder

  • 1 teaspoon espresso powder

  • 1/2 teaspoon salt

How to Make Amazing Vegan Ice Cream

Step 1: Gently Simmer

Add all ingredients to a pot over medium-high heat and bring to a low simmer, stirring frequently, until well combined and slightly thickened, about 8 minutes.

How to Make Amazing Vegan Ice Cream

Step 2: Chill

Add the ice cream base to a container and refrigerate until chilled, at least three hours and up to three days (overnight preferable).

How to Make Amazing Vegan Ice Cream

Step 3: Churn

Add the base to your ice cream maker and churn according to the manufacturer's specifications.

How to Make Amazing Vegan Ice Cream

Step 4: Freeze

Add to a freezer safe container, cover and freeze until hardened, at least 3 hours.

How to Make Amazing Vegan Ice Cream

Your vegan ice cream is now ready to be dished out and enjoyed!

How to Make Amazing Vegan Ice Cream

Tip

Not all sugar is vegan! Did you know that some sugar is processed using animal bones? Although the practice is becoming less common, it's still a concern for those looking to avoid animal products. A few vegan safe brands are: Whole Foods 365, Sugar In The Raw, C&H Organic Sugar, and Imperial Sugar. A quick web search will tell you if your favorite sugar is animal friendly.

How to Make Amazing Vegan Ice Cream

How to Substitute Fresh Tomatoes for Canned

0

Things You\’ll Need

  • Stockpot

  • Knife

  • Colander

  • Bowl

  • Ice

... Fresh tomatoes can be used in place of canned.

During most of the year, it is difficult to get fresh, in-season tomatoes. Therefore, most recipes call for canned tomatoes. When fresh tomatoes are available, however, you might prefer the taste. When you need to make a meal and all you have in the house are fresh tomatoes, it is possible to use them to substitute for canned tomatoes. However, using fresh tomatoes requires some preparation.

Video of the Day

Step 1

Buy or pick your tomatoes. You will need a lot of tomatoes. For example, one 28-oz. can of peeled whole tomatoes equals 10 to 12 tomatoes; a 14-oz. can equals five to six tomatoes. Rinse tomatoes in cold water to clean off any dirt or debris.

Step 2

Boil a very large pot of water. Add the tomatoes to the water. Boil the tomatoes for a maximum of one minute.

Step 3

Drain the tomatoes into a colander, then transfer them to a pot or bowl filled with ice water. This will allow the tomato peels to come off easily. This step is essential because leaving the skins on would make the tomatoes tough and chewy.

Step 4

Cut the tomatoes in half and remove the seeds and excess liquid. Rinse well. Squeeze the tomatoes to remove additional liquid. The volume of tomatoes you have now will be significantly less than when you began.

Step 5

Use tomatoes to make sauce or salsa, according to recipe or directions that called for canned tomatoes.