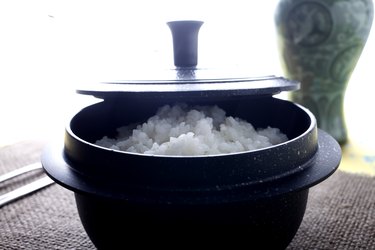
Rice is one of the world's greatest staple crops, and billions of people eat it (and rely on it) every day. Surprisingly, despite its great popularity, cooks who didn't grow up in rice-eating cultures often struggle to cook it well. Don't worry – you don't need to invest hundreds of dollars in a microprocessor-controlled rice cooker or reconcile yourself to heat-and-eat pouches in order to have good rice. This list of simple hacks and solid basic techniques will make you a rice-cooking master in no time.
Video of the Day
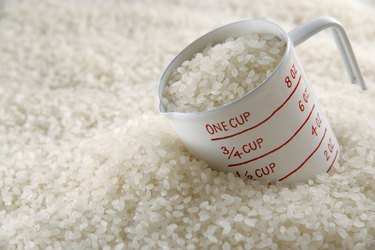
1. Don't Treat Them All the Same
Even a relatively small supermarket will carry a dozen or more kinds of rice, and there are hundreds available from specialty markets or online vendors. The first thing you need to know about cooking rice is that they all cook differently, so no one set of instructions covers them all. Whole-grain brown rice needs more time, plump Spanish bomba or Italian arborio absorb more liquid and "glutinous" rice is supposed to stick together, while delicate Indian basmati decidedly is not. Your best bet? Start with one or two kinds you've liked in restaurants, and once you've mastered those, you'll be ready to try new ones.
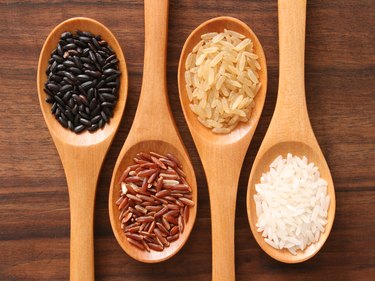 There are many kinds of rice, and they cook differently. Image Credit: FotografiaBasica/E+/GettyImages
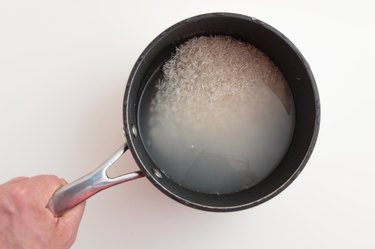
2. Rinse Your Rice
The instructions on the package might not say to rinse your rice before you cook it, but it's one of the single biggest things you can do to help it come out right. Those grains of rice spend a long time rubbing against each other as they're packaged and shipped around the world, and the resulting friction means they're coated with fine rice powder. If you just add water and cook it, that starchy powder basically turns to glue and sticks the rice together. Instead, rinse the rice in a bowl until the water runs clear or put it in a mesh strainer and rinse it well under cold running water. Your rice (and fellow diners) will thank you.
 That cloudy-looking water is filled with sticky starch. Image Credit: annick vanderschelden photography/Moment/GettyImages
3. Use the Right Amount of Water
The standard instructions in many cookbooks and on the back of some brands of rice is to use 2 cups of water for every cup of rice. That's not always (or even usually) correct. Whole-grain brown rice often needs a bit more, and long-grain white rice is firmer and fluffier with less (the USA Rice Federation has a good chart). Also, that ratio only applies when you're making 1 cup. For larger batches, you need less water per cup of rice. There's no right answer, as some people like their rice a little softer, and some like it more al dente, so use more or less to suit your taste. Oh, and if you rinse your rice, reduce the water by a couple of tablespoons to compensate.
 The usual ratio of 2 cups of water to 1 cup of rice isn\’t always correct. Image Credit: MIXA/MIXA/GettyImages
4. Use Something Other Than Water
Usually, rice is a supporting player in a dish – a "blank canvas" that takes a back seat to the other ingredients. That's fine, but it doesn't have to be that way. You can up the ante by replacing some or all of the cooking water with other liquids, from stock or broth to vegetable or fruit juices. Just remember that some add-ins, like coconut milk or dairy products, are prone to sticking and scorching. Use low heat and a heavy-bottomed pot with those. You can also add flavor by dropping spices into your pot and then picking them out before serving the rice.
 Plain water makes plain rice. To add flavor, use a flavored liquid instead. Image Credit: Saurav Pandey Photography/Moment/GettyImages
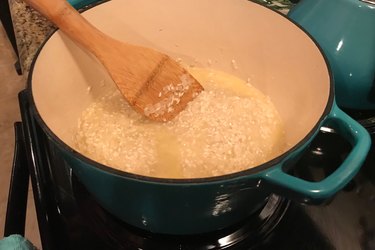
5. "Toast" the Rice in Oil
Before you add water (or another cooking liquid) to your rice, there's an optional step you can take to improve both the flavor and texture. Add a little bit of oil to the pot first and use it to "toast" the rice over moderate heat before you proceed. You don't want to brown the rice at all, just heat it until it starts to smell nutty and fragrant. Toasting rice this way is a traditional first step in making risotto, and it heightens the grain's flavor. The heat also helps your rice to hold its shape and texture better once it's cooked.
 Stirring the rice in hot oil at the beginning of its cooking time improves flavor and texture. Image Credit: Jeff R Clow/Moment/GettyImages
6. Don't Rush It
A common mistake with rice is to crank the heat so it comes to a boil more quickly. It's better to keep the temperature moderate while your pot comes to a boil. Your rice is less likely to clump and stick, and in turn, you're less likely to find a layer of scorched-on rice at the bottom once it's done. You might even lose enough moisture in the form of steam to leave your rice undercooked at the end. Instead, bring it slowly to a boil, cover it with a lid and then turn the heat to a very low simmer. Your rice will come out better, and you won't have to hover anxiously over the pot to keep it from boiling over.
 Too much heat can lead to bad (and burnt!) rice. Image Credit: Prassanee Insrichan / EyeEm/EyeEm/GettyImages
7. Use a Kitchen Towel. Really.
One of the reasons it's hard to get just the right amount of water to cook your rice is that some of it escapes in the form of steam. Exactly how much varies depending on your pot and lid, and with some lids, a lot of water will condense and drip back into your rice instead. You can use a kitchen towel to limit this and help keep your rice from getting mushy. Once the water sinks below the top of the rice, lift the lid, drape a kitchen towel over the pot and then replace the lid. Gather the ends of the towel with an elastic or a piece of twine (you don't want them to burn) and leave the towel in place until the rice is done. It will absorb the excess and keep it from dripping back down.
 An ordinary kitchen towel can surprisingly help improve your rice. Image Credit: Jennifer Causey/Moment/GettyImages
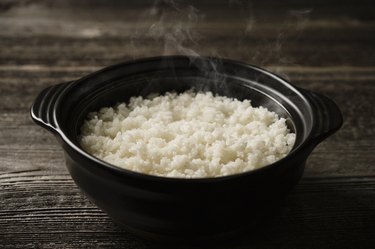
8. Let It Rest
One widespread (but misguided) instruction is to fluff rice with a fork once the rice has cooked. Don't do that – at least not when the rice is fresh-cooked. At that point, its starches are still very soft, and the rice won't hold its shape. Even if it is perfectly cooked, it will still mush a bit. Instead, leave it covered and let it rest for 10 to 15 minutes. The grains of rice will cool slightly and begin to firm, and it also provides time for moisture to migrate from the wetter rice at the bottom to the drier rice at the top. When you do lift the lid and apply the fork, your rice will fluff like it's supposed to.
 Let your rice rest for 10 to 15 minutes after cooking. Image Credit: RUNSTUDIO/Photodisc/GettyImages
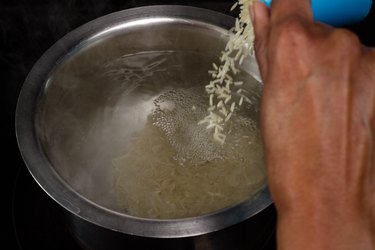
9. Keep It Simple With the "Pasta Method"
What if all the usual tips and tricks don't work for you? What if you don't have a pot with a lid that fits properly or a stove that will maintain a gentle simmer? If that's you, you might want to follow the "pasta method" instead. It's exactly what it sounds like: Instead of fiddling with ratios of water to rice and a gentle simmer, just fill a big pot with water, bring it to a boil and cook your rice as if it was macaroni. Taste it periodically until it's done the way you want, drain it thoroughly and let it stand for 10 to 15 minutes uncovered for the steam to evaporate. There's no fuss and no muss (though you'll lose a few vitamins along the way).
 Cooking rice like pasta is a simple, effective "cheat." Image Credit: Roberto Bombardieri©Photographer/Moment/GettyImages
10. Finesse It With the Persian Method
If you've mastered basic rice and you're looking to up your game to "best rice ever" levels, the Persian method combines a few of these hacks for a really superior outcome. Start by rinsing the rice (basmati is your best choice) and then letting it soak for a few hours in the cold water. Bring the water to a boil as you would for pasta, cook until the rice is al dente and then drain it. Melt a bit of butter in the bottom of the pan. Iranians love a crusty, golden layer of rice at the bottom of the pot, so they'll mix yogurt or egg yolks into part of the rice and press that into the butter (this part is optional). Now, mound the rice back into the pot in a heap, place a towel under the lid and cook at medium-low for another 10 minutes to finish steaming the rice. It will be great!
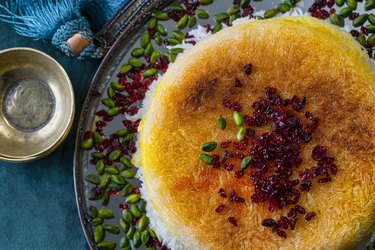 Iranian cuisine is loaded with sophisticated rice dishes and has a sophisticated cooking method to match. Image Credit: Martin Steinthaler/Moment/GettyImages


 The pot should easily hold 17 oz.
  Store-bought juice has too many chemicals.
 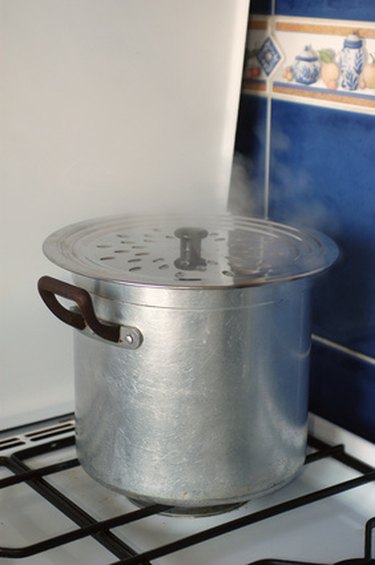 Too much heat will burn the juice.
 2 of 16
  3 of 16
  4 of 16
  5 of 16
  6 of 16
  7 of 16
  8 of 16
  9 of 16
  10 of 16
  11 of 16
  12 of 16
  13 of 16
  14 of 16
  15 of 16
  16 of 16


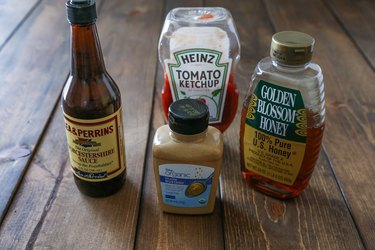 How to make meatloaf sauce with just 4 ingredients
 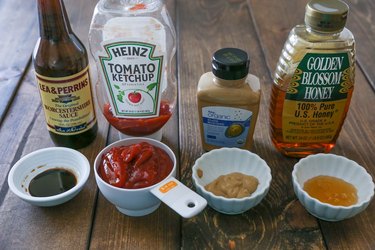 Measure your ingredients
 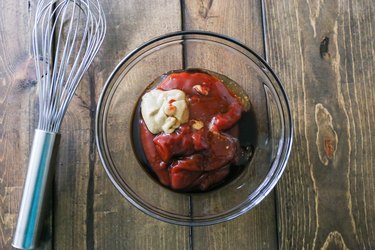 Add everything to a bowl
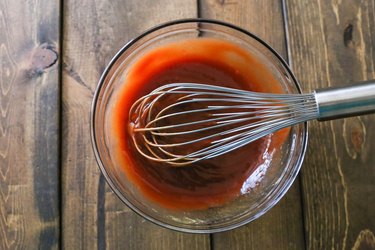
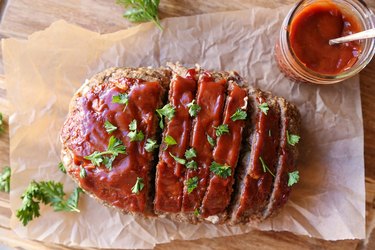 Put sauce to use!
 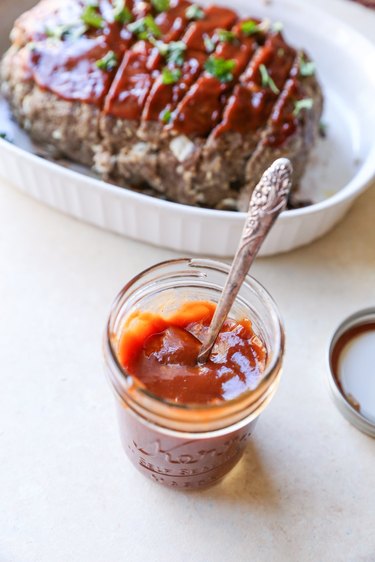 serve sauce on the side for added flavor