It doesn't take long to understand why the Instant Pot has become a kitchen staple. With a simple push of a button, the Instant Pot allows you to make everything from applesauce to potato salad. You can even use it to whip up spaghetti with the following dinner recipe. Just dump the ingredients in the pot and click a button. And while this particular dish may not be traditional or authentic, it's perfect for when you want a comforting meal in about 30 minutes. Read on to make this quick spaghetti in your Instant Pot.

Video of the Day
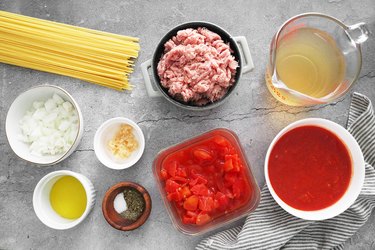
Things You\’ll Need
-
Instant Pot
-
8 ounces spaghetti noodles
-
2 tablespoons olive oil
-
1/2 cup onion, diced
-
2 teaspoons minced garlic
-
1 pound ground turkey or beef
-
1 teaspoon salt
-
2 teaspoons Italian seasoning
-
1/4 teaspoon ground black pepper
-
2 cups broth or water
-
24 ounces pasta sauce
-
14.5 ounces canned diced tomatoes
Tip
To make a vegetarian spaghetti, omit the ground turkey or beef.
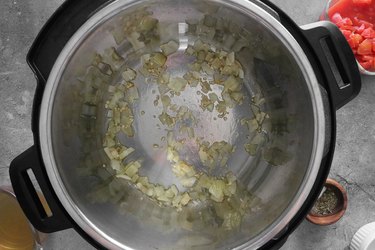
Step 1
To the Instant Pot, add the olive oil and onions. Set to "Sauté" and cook for 3 minutes or until fragrant. Add the minced garlic and cook for another 30 seconds.
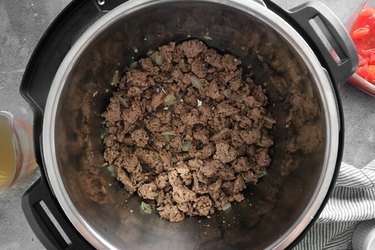
Step 2
Add the ground meat. Cook until brown and no longer pink, about 5 to 7 minutes. Use a wooden spatula to break up the meat as it cooks.
Once cooked, turn off the Instant Pot. Drain the grease, if desired.
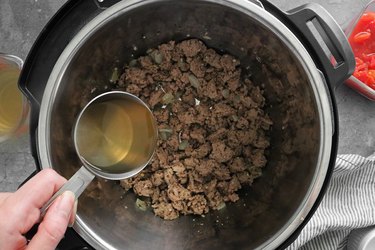
Step 3
Add 1/2 cup of broth or water. Scrape the bottom of the pan with a wooden spoon or spatula; this will help prevent the meat from burning and sticking to the pot.
Step 4
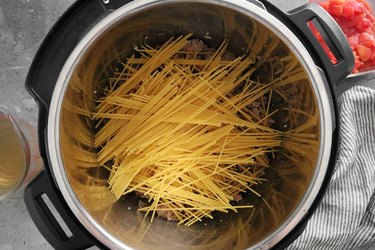
Break the spaghetti noodles in half. Place in the pot, layering the noodles in a criss cross formation. This will help minimize clumping.
Step 5
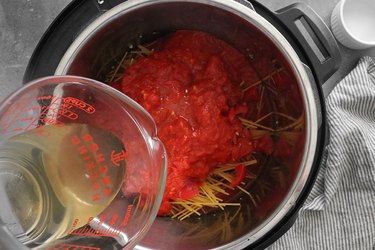
Add the rest of the broth or water, spaghetti sauce and canned tomatoes (with liquid). Pour these ingredients in the center of the pot. Again, this will minimize burning.
Press down the pasta until most, if not all, the noodles are submerged. Do not stir the spaghetti.
Tip
If you're using a store-bought sauce in a jar, add it to the pot first. Pour the remaining broth into the empty jar, gently shake to "rinse" it out then add to the Instant Pot. If you're using homemade sauce, you can skip this step.
Step 6
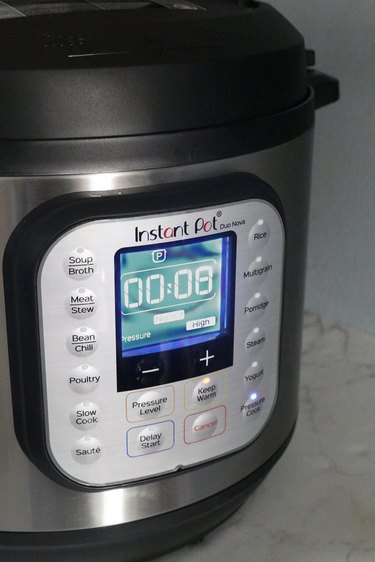
Close the lid and seal the valve. Set to "Pressure Cook" on HIGH for 8 minutes. The Instant Pot will take about 10 minutes to reach the right pressure, then it will begin the countdown.
Once the 8 minutes are done, the Instant Pot will beep. Use quick release to release the pressure. The Instant Pot will release a quick stream of pressure, so make sure your face or hands are not near the valve.
Step 7
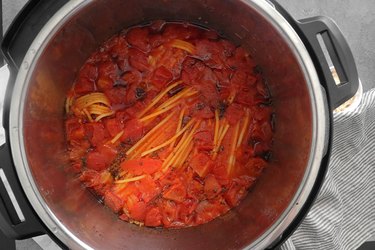
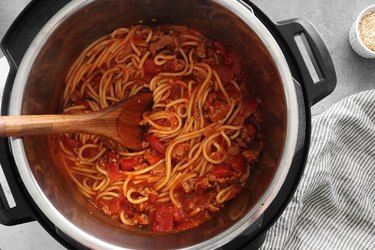
Once all the pressure is released, open the Instant Pot. The spaghetti will look very liquidy. This is normal!
Step 8
Turn off the Instant Pot. Stir the spaghetti and let sit for 10 minutes. As it cools, the sauce will thicken.
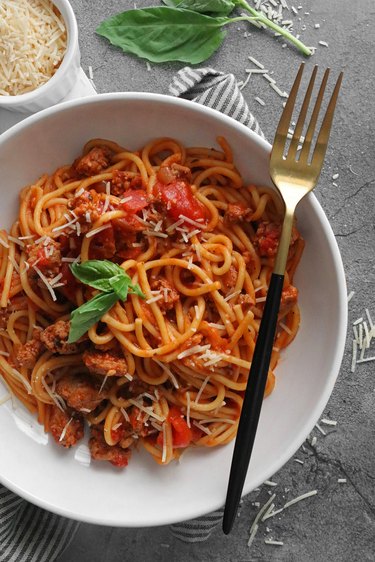
Your spaghetti is ready to enjoy. Serve it with Parmesan cheese, fresh basil and garlic bread.

 Gather your ingredients for the caprese salad
  Slice the tomatoes and mozzarella cheese
  Arrange tomatoes and cheese on a platter
  Drizzle the tomatoes and cheese with olive oil
  Sprinkle the tomatoes and mozzarella with salt, pepper, and fresh basil leaves.
  Classic Caprese Salad


 2 of 10
  3 of 10
  4 of 10
  5 of 10
  6 of 10
  7 of 10
  8 of 10
  9 of 10
  10 of 10


")