Home Blog Page 18

Brewing Temperatures of the Mr. Coffee

0

... Mr. Coffee is just one of the many brands of coffeemakers available for purchase.

Mr. Coffee is a supplier of coffeemakers. The company creates coffeemakers for homes, with the option of 4-, 5-, 8-, 10- and 12-cup brewers. It also offers single-serving brewers and 45-cup brewers. The website for the brand doesn't specify the temperature at which its machines brew coffee and there are many factors which go into brewing coffee which will affect the end result.

Video of the Day

Brewing Regulations

The standard brewing regulations of the Specialty Coffee Association of America (scaa.org) and the National Coffee Association (ncausa.org) require that coffeemakers brew coffee at a temperature between 197.6 degrees Fahrenheit and 204.8 degrees Fahrenheit. Most new coffeemakers will brew to these temperatures, but their performance wanes with extended and excessive use. Of the Mr. Coffee brand, the model JWX27, a 12-cup programmable coffeemaker, has routinely scored highest among tests done by coffee drinkers.

Too Hot

Some newer coffeemakers risk overperforming and brew coffee at a temperature higher than recommended. When this occurs, the coffee beans are over-extracted and the result is a brew that is bitter or burnt. Mr. Coffee doesn't make many high-performance coffeemakers, so they rarely brew coffee that becomes too hot too fast.

Too Cold

Just as with any other coffeemaker, as a Mr. Coffee coffeemaker is used repeatedly, the resulting brew will eventually be affected. Older machines may not brew the coffee as hot as they once did. When the water temperature is low, the coffee beans are under-extracted, giving it a weak taste and sour flavor.

Fixing Temperature

Mr. Coffee recommends that owners clean their coffee machines regularly to prevent them from brewing at a temperature that is too low. However, if the coffee is continually cold and the warming plate stays cool, it may be an indication that the coffee machine needs to be repaired or replaced.

Do You Really Know How to Cook Eggs? 8 Easy Recipes to Memorize

0

8 Easy Egg Recipes That Will Change Your Life 1 of 9

When it comes to the most important meal of the day, there's no doubt that eggs reign supreme. Whether you prefer perfectly scrambled, baked, soft-boiled, hard-boiled or extra cheesy, our team at eHow has you covered with easy egg recipes for any occasion, covering just about every style of preparation. Yup, your weekend brunch game is about to level up.

Image Credit: Jennifer Farley – SavorySimple.net Perfectly Cooked Scrambled Eggs Every Time 2 of 9

Make the Perfect Scrambled Eggs

The secret is low and slow. Patience is key, and if you take your time, you'll get perfect, custard-like scrambled eggs every single time.

Image Credit: Jennifer Farley – SavorySimple.net Easy to Make Cheesy Eggs Baked in a Muffin Tin 3 of 9

Bake Individual Frittatas in a Muffin Tin

If you're looking for a quick breakfast on the go or a healthy, protein-filled snack, look no further.

Image Credit: Jennifer Farley – SavorySimple.net Cook Hard-Boiled Eggs in a Muffin Pan 4 of 9

Use a Muffin Pan to Cook Hard-Boiled Eggs

You're just 30 minutes away from perfectly cooked hard-boiled eggs that practically peel themselves.

Image Credit: Ashley Manila Toad in a Hole 5 of 9

Cook Eggs in Toast (AKA: Toad in the Hole)

Breakfast in bed that looks like it took all morning, but really comes together in just a few minutes? Bingo.

Image Credit: Dave Johnson The Secret to Soft-Boiled Perfection 6 of 9

Soft-Boil Eggs to Perfection

Bust out your dainty spoon and prepare your toast points for this elegant delight.

Image Credit: Jennifer Farley – SavorySimple.net Avocado with Egg Baked into the Center 7 of 9

Bake Eggs in Avocados

If you're a fan of high protein, low carbohydrate breakfasts that are full of healthy fats and nutrients, this will be right up your alley.

Image Credit: Jennifer Farley – SavorySimple.net Broccoli Cheddar Frittata 8 of 9

Master the Art of the Frittata

The beauty of this savory Italian treat is that you can always experiment with your favorite meats, cheeses, and vegetables. It's your world, we're just living in it.

Image Credit: Ashley Manila Low-Carb Baked Eggs Packed with Flavor 9 of 9

Bake Eggs in Tomatoes

This delicious recipe makes for an easy and healthful low-carb breakfast. Win-Win.

Image Credit: Julia Mueller

What Is the Equivalent of Dry Yeast to Cake Yeast?

0

Rows of bread dough Commercial bakeries use fresh yeast, but dry is more convenient at home. Image Credit: Jupiterimages, Brand X Pictures/Stockbyte/Getty Images

Exploring vintage cookbooks can be great fun for cooks and bakers, though adapting to outdated techniques and now-rare ingredients can make it challenging. For example, many cookbooks dating from the first half of the 20th century call for yeast in cake form, which is now relatively rare and not stocked in all stores. Converting an old recipe to use dry yeast — or a modern recipe to use cake yeast, once you've found it — is relatively straightforward.

Video of the Day

A Quick Yeast History

Archaeologists have demonstrated that breads risen with wild yeasts were already well known in ancient Egypt and Mesopotamia, but it wasn't until the late 19th century that they were identified by French scientist Louis Pasteur. Pasteur's quest for pure, refined yeast was intended to revolutionize the wine industry — which it did — but brewers and bakers benefited as well. Within a few short years, manufacturers had begun producing purified fresh yeast in cake form for professional and home bakers. Compared to older techniques using starters or sourdough, fresh yeast produced a much faster and more reliable loaf of bread.

Fresh Versus Dry Yeast

Fresh yeast is the preferred version for the most serious bakers, because the yeast cells are live and fully active as soon as it's added to the dough. It begins rising the dough quickly, and it lasts longest in the kind of slow-rising doughs favored by artisanal bakers. Unfortunately, it's also highly perishable. In weeks or even days, it can die or become moldy and unusable. Active dry yeast addresses that problem by drying out the yeast cells, rendering them dormant and surrounding them with a protective shell of dried yeast cells. Dry yeast can last for months on the shelf, rather than days in the refrigerator, making it a more practical option for home bakers.

Doing the Math

Active dry yeast is sold in small envelopes weighing 7 grams, or 1/4 ounce, and measuring 2 1/4 teaspoons. That's enough yeast to leaven a batch of bread with 3 to 4 cups of flour. Fresh cake yeast is sold in two sizes, smaller blocks of 0.6 ounce or larger cakes of 2 ounces. One small block, or one-third of the larger block, is equivalent to an envelope of dry yeast and will raise the same amount of dough. If you're converting from a recipe that measures its ingredients in weights, you'll have to do the math. Multiply the weight of fresh yeast by 0.4 to arrive at the correct weight of dry yeast, or divide the amount of dry yeast by 0.4 to convert to fresh yeast.

A Few Other Details

Fresh yeast and dry yeast are both liveliest when they're warm, but they require slightly different temperatures. Recipes using dry yeast usually specify that your wet ingredients should be at a temperature of about 110 degrees Fahrenheit, nicely warm to the touch. Fresh yeast isn't surrounded by a shell of dead cells, so it favors liquids at about 90 to 95 F, just lukewarm to the touch. Both can be started in water if you wish, to ensure that they're alive and working, or can be added directly to the dry ingredients and then moistened when the liquids are added to the dough. It's largely a matter of personal preference, and finding what works for you.

You’ll Love These 10 Easy Recipes – Even If You Hate to Cook

0

Super easy recipes to make 1 of 11

We all know how hard it is to incorporate fresh eats into a packed schedule. Thankfully, there are easy recipes out there that will help cultivate your culinary repertoire without taking up too much of your time. From weeknight meals to seasonal festivities, these 10 recipes prove that you can learn how to make effortless dishes and drinks for every event on your calendar.

Image Credit: eHow Taco casserole. 2 of 11

A Kid-Friendly Weeknight Meal

Dinners on weeknights are tough to put together, and they're even harder to do when you have kids. Make this taco casserole for after soccer practice or art lessons. It tastes way better than most of your takeout options, and you'll have enough for everyone's lunches the next day.

Image Credit: Charity Curley Mathews Turkey burgers. 3 of 11

A Grownup Dinner Party

When you have friends over for a real dinner party, think about serving turkey burgers. Don't worry if you don't have a grill — you make these bad boys in the oven. Include some fries as a side to complete the meal, of course.

Image Credit: Leigh Ann Chatagnier Mozzarella-filled meatalls. 4 of 11

An Office Potluck

We've all been there: there's going to be a holiday party or a shower at the office, and you have no idea what to bring. From now on, you're good to go with mozzarella-filled meatballs. You can make the meatballs the night before, and keep them warm in a crockpot in the office kitchen. So, so easy.

Image Credit: Ashley Manila BBQ chicken. 5 of 11

A Blowout Block Bash

The next time your neighborhood gets together, try bringing two or three plates of barbecue chicken to the buffet table. If you're feeling adventurous, you can spend some weekend time experimenting with homemade barbecue sauce, too. Get some friends to make coleslaw or biscuits for the perfect complements, and it'll be one memorable block party.

Image Credit: Julia Mueller Slow cooker chicken rice soup. 6 of 11

A Sick Day at Home

Save this chicken rice soup to your recipe board on Pinterest for the next time you're feeling a cold coming on. This version uses a slow cooker, so you can spend all day recovering and not hunched over the stove. And when it's time to pour this steaming goodness into a bowl, the smell alone will make you feel better.

Image Credit: Julia Mueller Grilled cheese with apricot, bacon and brie. 7 of 11

A Lunch With Your Girls

On a Saturday morning, call up your friends to see if they're up for a homemade lunch. Mention that you're making grilled cheese with apricot, bacon and brie, they'll reply that they're on their way. Getting to spend time with your girls + a unconventional twist on a classic sandwich you love = perfect weekend.

Image Credit: Gina Matsoukas Hardboiled eggs. 8 of 11

A Healthy Mid-Day Snack

Skip the pantry the next time you get a craving for something sweet, and go straight for the fridge. This how-to on hardboiled eggs is so easy, you'll never reach for a snack pack ever again. Pair it with some crackers or a cheese stick. Egg-cellent.

Image Credit: Ashley Manila Beer bread. 9 of 11

A Sunday Brunch Treat

Having brunch at home will be better than going out when you start making beer bread. The thick and moist bread tastes great with butter and jam, and it makes for decadent French toast, too. Pro tip: Add in some extras like cooked bacon or chocolate chips when you've mastered the original recipe.

Image Credit: Jackie Dodd Cucumber, pineapple and mint popsicles. 10 of 11

A Bestie’s Summer Birthday Party

When you get the invite for your BFF's low-key celebration, tell her you'll take care of the dessert and that you're bringing fancy popsicles. This version has cucumber, pineapple and mint flavors, which is perfect for the summer. It'll be a huge hit: everyone will appreciate the alternative to cupcakes or ice cream, and how beautifully and simply easy they are.

Image Credit: Abbey Rodriguez Red wine sangria. 11 of 11

A Swanky Summer Soiree

Making most cocktails seems to require an extensive knowledge of bartending, which can be frustrating when all you want is a drink that tastes good for a midsummer night's party. Don't even worry about it — red wine sangria will do the trick. Don't forget to pick out your favorite red to really make it special for your guests. When you incorporate easy recipes like these into your everyday life, you'll master the kitchen and any occasion on the horizon.

Image Credit: Jackie Dodd

How to Steam Dried Beans

0

Things You\’ll Need

  • Measuring cup

  • Dried beans

  • Large bowl

  • Water

  • Pan lid or aluminum foil

  • Mesh strainer

  • Steamer

  • Kitchen timer

  • Wooden spoon

... Any variety of dried bean can be steamed before eating.

Keeping dried beans of any kind is one way to ensure you have a stock supply of food that doesn't take up much space and can be stored for years without being cooked. You have several options when you are ready to cook your beans–most of which involve boiling or heating the beans in water. However, you can also steam the dried beans to keep as many of the nutrients inside the bean as possible for a healthy meal.

Video of the Day

Step 1

Measure out the quantity of beans you need to cook and pour the beans into a large bowl. Add water in twice the amount of beans used. For example: one cup of beans needs two cups of water. Make sure the water fully covers the beans.

Step 2

Cover the bowl loosely with a pan lid or aluminum foil. Set the bowl of beans aside and allow them to soak and absorb the water for at least six hours. An overnight soak is even better.

Step 3

Pour your soaked beans into a mesh strainer held over a sink to drain any remaining water.

Step 4

Fill your steamer pot with as much water as needed for your type steamer and bring to a boil. Place the soaked beans into the steamer basket, set them over the boiling pot and cover.

Step 5

Steam the beans for three to four minutes or until tender–this will take 3 to 4 minutes. Take off the lid and stir the beans every minute to ensure they all cook evenly. Remove the steamer basket and pour the beans into your preferred serving bowl or container.

Tip

Add any seasonings you wish either before the beans are steamed or after they have finished steaming.

If soaking beans doesn’t fit with your day to day schedule, soak a large batch of beans over the weekend and freeze the soaked beans in freezer bags. When you’re ready to use, the beans simply pull out as much as you need and cook.

Cookie Dough Ice Pops Recipe

0

I love cookie dough, and I'll put it on just about anything — ice cream, donuts, cupcakes. That's why when the idea to make cookie dough ice pops came up, I had to do it. This recipe embodies the flavors of chocolate chip cookie dough while maintaining the texture of an ice pop. The alternating layers of vanilla, chocolate chips and dough worked perfectly!

Three chocolate chip ice pops with alternating layers on marble

Of course, I didn't actually use cookie dough. Instead I discovered that a little dark brown sugar mixed with vanilla and milk tastes strikingly similar to the real thing. The result: A refreshing, delicious and somewhat healthier way to get your cookie dough fix!

Melty group of many chocolate chip ice pops on marble

Watch the Video!

Vanilla Layer

Things You\’ll Need

  • 1 1/2 cups milk

  • 1 1/2 teaspoon vanilla

  • 1 1/2 tablespoon sugar

Things You\’ll Need

  • 1 cup milk

  • 1 teaspoon vanilla

  • 3 Tablespoons dark brown sugar

  • Mini chocolate chips

Close up of three chocolate chip ice pops

Step 1

In a small bowl combine vanilla layer ingredients.

Step 2

In another small bowl combine all the ingredients for the cookie dough layers except for the chocolate chips.

Step 3

Pour 1 tablespoon of vanilla mix into the bottom of each ice pop mold. Freeze for an hour until solid.

Step 4

Sprinkle chocolate chips on top of frozen vanilla layer, followed by 1 Tablespoon of cookie dough mix. Freeze for an hour until solid.

Step 5

Insert wood sticks. Repeat process alternating layers until ice pop molds are full. Serve and enjoy!

Chocolate chip ice pop on wood and marble

Tip

For easy ice pop removal, soak mold in hot water for 15-30 seconds.

How to Make Prune Juice More Palatable to Kids

0

Prune juice, like green veggies and an early bedtime, is healthy for your kids — but that doesn't mean they'll like it. This liquid is an acquired taste for some. It's packed with potassium, contains iron and helps to aid digestion, which is why many parents turn to prune juice to help mildly constipated kids.

Dilute It

Diluted prune juice is often recommended for constipated infants, but a child of any age may be more willing to sip this drink if the flavor isn't too strong. Try a half-and-half combination of water and prune juice.

Video of the Day

Join Juices

One easy way to "hide" prune juice from a picky kid is to mix it with other kinds of juice. Not only will the flavor of the mixer juice mask some of the flavor, but your child will get nutrients from the second juice as well. Use a half-and-half combination of prune juice and apple, orange, grape or cranberry juice. If your child balks at this drink, experiment with the amounts of each juice until you find a ratio that she's willing to drink.

Make this drink even more palatable by making it seem like a special occasion "party" drink. Stir together prune and other juices in a pitcher, add chopped fruit and refrigerate it overnight. Before serving, stir in some lemon-lime soda or sparkling water for fizz. Serve drinks with paper umbrellas and call it a kid-friendly sangria.

Blend It

Few kids can resist a frosty smoothie. Use prune juice with frozen blueberries or mixed berries; the dark color will mask the prune juice's telltale nearly black hue. A handful of berries, a banana, some ice and a cup of prune juice is all you need to make a smoothie that little ones will be happy to sample. Sneak in some leafy greens or yogurt to add even more nutrients and protein.

You may also try making a variation on Food & Wine's alcoholic prune shake. Combine prune juice, ice, maple syrup and vanilla frozen yogurt or vanilla ice cream in a blender.

Tip

Freeze prune juice in ice cube trays. Keep these cubes in the freezer to toss into smoothies and shakes whenever your child is backed up.

Sweeten It

Hide prune juice in desserts to curb complaints. Try making a prune cake with a gooey, buttery topping. With plenty of cinnamon and sugar, kids won't notice the strong prune flavor.

Juice isn't the only way to introduce prunes into your child's diet. Buy or make prune puree and stir it into softened ice cream or a bowl of applesauce. You can also substitute this puree for half the oil, butter or shortening in baked recipes.

Warning

If your child suffers from chronic constipation, prune juice alone won't help. Consult your pediatrician.

What Is the Difference Between Roti & Whole Wheat Flour Tortillas?

0

Tortillas cooking Cook several tortillas at once using a large skillet or griddle. Image Credit: Jupiterimages/Photos.com/Getty Images

While eaten as a component of cuisines a world apart, roti and whole wheat flour tortillas are nearly identical. These flat breads serve as both a utensil for grasping food and as a wrap for eating it, and are quick and simple to prepare. You can make your own roti or whole wheat tortillas in less than an hour, so you can enjoy them the best possible way — freshly made.

Video of the Day

The Heart of the Difference

What differentiates roti and whole wheat tortilla is that they each contain different fats to lend smoothness to the dough. Whole wheat tortillas use lard or shortening to create their silky and smooth texture, while the slightly rougher roti dough relies upon vegetable oil, canola oil — or no oil at all. In a pinch, and because of their close similarity, whole wheat tortillas or roti can be substituted for one another with little discernible difference.

Whole Wheat Tortillas

Served widely in Mexican cuisine, whole wheat tortillas range in size from 6 to 10 inches in diameter and are used to wrap both tacos and burritos. Make whole wheat tortillas with four simple ingredients — whole wheat flour, salt, vegetable shortening or lard and warm water. Combine the salt and whole wheat flour with the shortening or lard until it incorporated and slowly pour the water in, mixing as you go. Knead the dough for three to five minutes until it is smooth. Working quickly, divide the dough into balls the size of a golf ball and cover with a towel for 30 minutes to rest before rolling and cooking.

Making Roti

Roti is just one of several different types of flat bread used in Indian cuisine, but also one of the most simple. Make roti by combining whole wheat flour with salt in a bowl, drizzling the mixture with oil and adding in warm water while stirring the dough as you go. Once the dough holds together, knead it for two to three minutes until it becomes smooth and the same consistency as tortilla dough. Divide the dough and roll it into golf ball-sized portions. Let the dough rest for at least 15 minutes on the counter before rolling and cooking.

Roll and Cook Flat Breads

After the dough rests, the steps for creating roti and whole wheat tortillas are the same. On a lightly floured surface, roll out each dough ball until it forms a 6- to 7-inch circle. Turn the balls several times as you roll in order to achieve a well-rounded circle. Roll all of the dough out, separating each layer with wax paper or parchment paper to prevent sticking. Heat a cast iron or non-stick skillet over medium-high heat and place each tortilla or roti in it for 30 to 45 seconds on each side or until it gets spotty brown. Remove the flat bread from the pan and cover it in aluminum foil until serving time.

Cast Iron Skillet Recipe: Pumpkin Spice Chocolate Chip Cookie

0

This giant Pumpkin Spice Chocolate Chip Cookie is the perfect dessert. It's quick, easy to make and irresistibly delicious, especially when served with a generous scoop of vanilla or caramel ice cream. Its fragrant spices and rich pockets of melted chocolate chips make it perfect for fall. Make this today!

Pumpkin Spice Chocolate Chip Cookie is the most perfect cozy dessert for fall!

Video of the Day

Things You\’ll Need

  • 2 cups all-purpose flour

  • ½ tsp baking soda

  • 1 tsp ground cinnamon

  • 1/2 tsp ground ginger

  • 1/2 tsp ground nutmeg

  • 1/4 tsp ground allspice

  • 1/4 tsp ground cloves

  • 1/2 tsp kosher salt

  • 3/4 cup unsalted butter, cubed

  • 2/3 cup light brown sugar

  • 1/3 cup + 1 tablespoon granulated sugar

  • 1 large egg

  • 1 tablespoon vanilla extract

  • 1/2 cup + 1 tablespoon pumpkin pie filling or pumpkin puree

  • 1 1/4 cups dark chocolate chips

  • To serve: vanilla ice-cream, caramel ice-cream chocolate fudge sauce, caramel sauce, toffee bits, candied nuts, a pinch of flaked salt optional

Step 1: Preheat Oven

Preheat the oven to 350° Fahrenheit (180° Celsius). Lightly grease a large 8-inch (20-centimetre) non-stick skillet. Set aside.

Step 2: Combine Dry Ingredients

In a large mixing bowl, combine the flour, soda, cinnamon, ginger, nutmeg, allspice, cloves and salt.

Add all the dry ingredients into a large bowl.

Step 3: Mix Wet Ingredients

Place the butter into a medium sized saucepan, set over medium-low heat. Heat, stirring occasionally, until the butter is melted. Remove from the heat and pour the butter into a large mixing bowl. Add in the light brown sugar and granulated sugar and whisk until well combined.

Whisk together the melted butter and sugars.

Add in the egg and vanilla followed by the pumpkin pie filling or puree and whisk until smooth.

Add in the pumpkin pie filling or pumpkin puree.

Step 4: Make Dough

Incorporate half of the dry ingredients into the bowl and whisk until just combined. S__ome dry flour pockets should remain. Add in the remaining dry ingredients, again, whisking until just combined.

Whisk in the dry ingredients until just incorporated.

Fold in the dark chocolate chips until evenly incorporated.

Put the chocolate chips into the dough bowl.

Use a rubber spatula to evenly spread the dough into the prepared skillet.

Make sure to spread the dough all the way to the edges of the skillet.

Step 6: Bake

Bake for 25 to 30 minutes or until just firm around the edges and beginning to turn golden brown all-over.

Bake until risen, fragrant, and golden brown.

A skewer inserted into the middle should come out clean. Remove from the oven and set aside to cool until just warm or at room temperature.

Step 7: Serve

When you're ready to serve, use a sharp knife to slice the cookie into evenly sized triangles. Serve with a generous scoop of vanilla or caramel ice cream and your desired toppings.

Adorn the skillet cookie with your desired toppings and serve warm.

This Pumpkin Spice Chocolate Chip Cookie is best enjoyed warm on the day of making. It can be stored for up to 3 days in an airtight container at room temperature.

Healthy Eating: Baked Chips Recipe

0

Who can resist the temptation of crunchy, salty potato chips? The satisfying, addictive crunch makes for an enticing go-to snack between meals. While there are now plenty of healthier options for potato chips in grocery stores, making them at home is a great way of controlling what you're eating, and it is also a fun process. Any type of potato (or root vegetable) and high-temperature cooking oil can be used to adapt homemade baked potato chips to your taste or dietary needs. All you need to get started is a mandolin slicer and a couple large potatoes.

baked potato chips in a bucket 
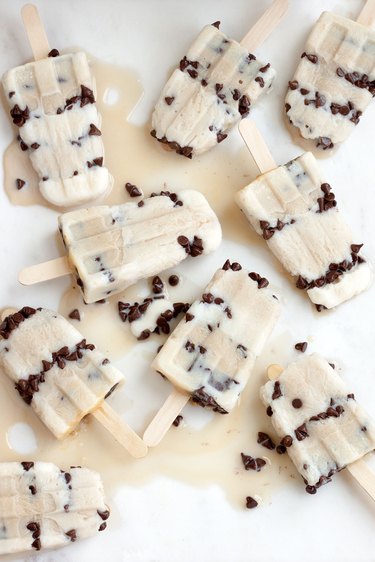
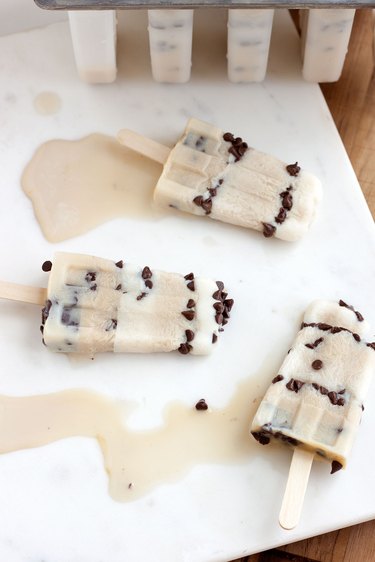
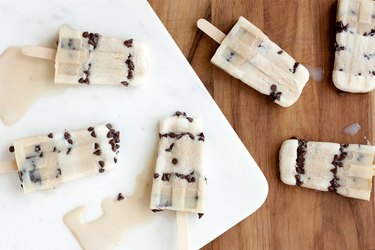
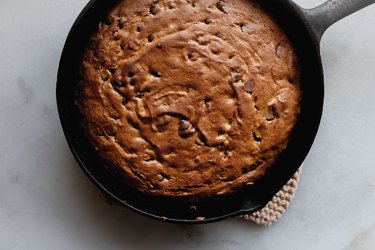
Finished chips Image Credit: Julia Mueller

Video of the Day

Things You\’ll Need

  • 2 large russet (or Yukon gold potatoes)

  • 2 tablespoons olive oil (or high-temperature cooking oil of choice)

  • Sea salt

  • Seasonings such as garlic powder and onion powder if desired

Tip

You can also use beets, rutabaga, turnip, carrots, sweet potato, etc. Just note: if you use anything other than russet or Yukon gold potato, the bake times will vary.

Replace the olive oil with canola, almond, grapeseed, algae or coconut oil.

Incorporate your favorite seasonings such as chili powder, garlic powder, lemon pepper, Cajun seasoning, and paprika.

Mandolin slicer and potatoes how to make homemade baked potato chips Image Credit: Julia Mueller

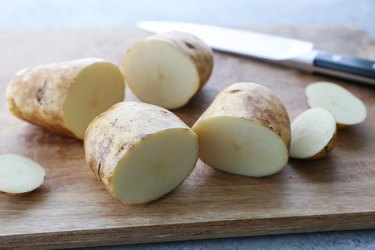
Step 1: Prepare the Potatoes

Before slicing the potatoes, you'll want to cut the potatoes into large chunks to make the slicing easier. Start by trimming the ends off of each potato.

two potatoes with ends cut off 
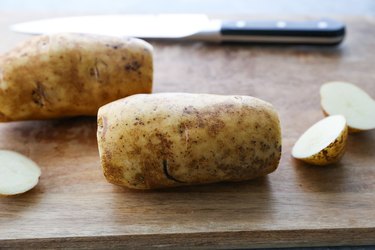
Cut off the potato ends Image Credit: Julia Mueller

Chop the potatoes in half. Be sure to cut the potatoes straight down so that the cut sides aren't angled.

Potatoes chopped in half Chop potatoes Image Credit: Julia Mueller

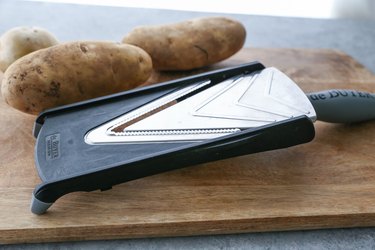
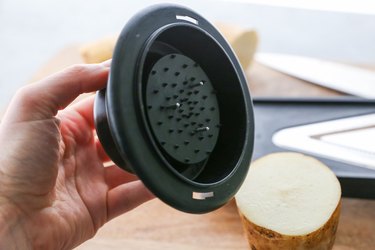
Step 2: Slice with Mandolin Slicer

Set up your mandolin slicer on a stable surface. Insert the protection guard into one of the chunks of potatoes. This will give you a good grip on the potato for slicing and will protect you from slipping and/or slicing yourself.

Protection guard of mandolin slicer Get ready to slice Image Credit: Julia Mueller

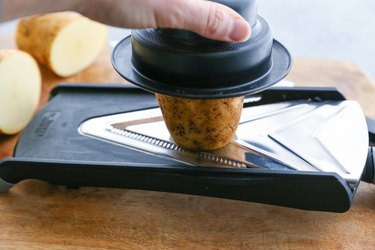
Make sure your slicer is set up to slice 1/8-inch slices. From the back of the slicer forward, firmly press the potato against the blade .

slicing a potato on a mandolin slicer slice potatoes Image Credit: Julia Mueller

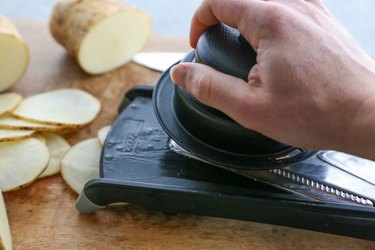
Get into a rhythm of slicing. Once you get the hang of it, the slicing goes really quickly!

Potato slices and mandolin slicer continue slicing Image Credit: Julia Mueller

Continue slicing your potatoes. Note that once you get down to the very ends of the potatoes, you'll be left with small chunks of potato – you can either continue slicing these chunks carefully with a knife, or you can use them for other cooking purposes.

Pile of potato slices 
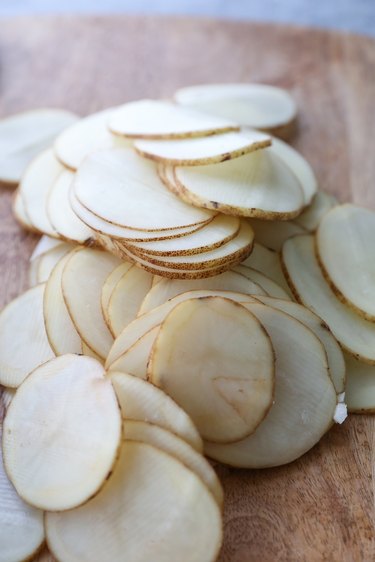
Slice all the potatoes! Image Credit: Julia Mueller

Step 3: Prepare to Bake

Preheat the oven to 400 degrees Fahrenheit, and lightly spray or oil two large baking sheets. Transfer the potato slices to a large mixing bowl, and drizzle with olive oil. (Note: you can use any type of cooking oil, such as almond, canola, algae or coconut.)

Olive oil being poured over potato slices 
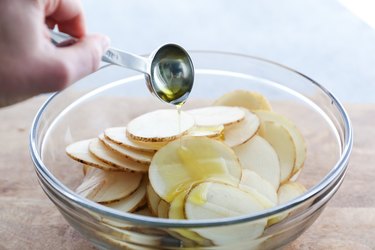
Drizzle with oil Image Credit: Julia Mueller

Use your hands to coat all of the potato slices in oil.

Coating potato slices in oil 
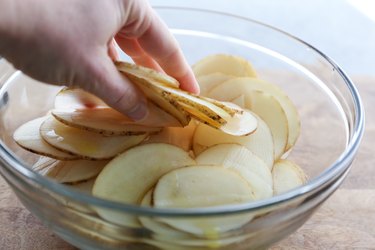
Be sure all slices are fully coated in oil Image Credit: Julia Mueller

Sprinkle with sea salt and carefully toss to ensure everything is salted. Here's where you can get creative with your seasonings and add garlic powder, onion powder, chili powder, lemon salt, paprika, cayenne, and so forth.

Sprinkling potato slices with sea salt 
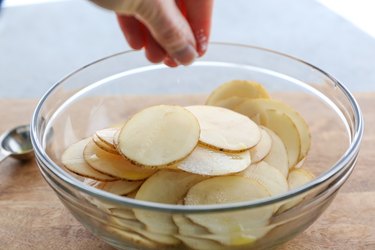
Sprinkle with salt Image Credit: Julia Mueller

Step 4: Bake the Chips

Arrange the potato slices in a single layer on the two prepared baking sheets. Give plenty of room between the potato slices so that they bake evenly.

Potato slices on a baking sheet 
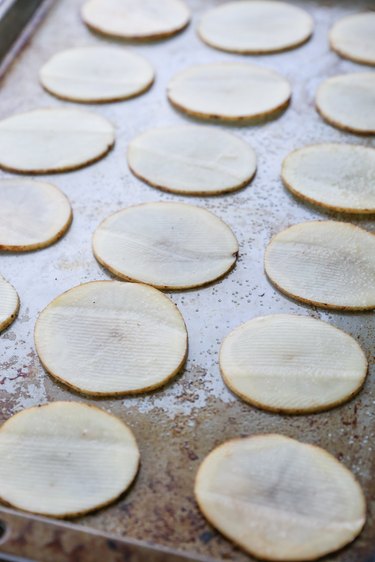
Transfer to a baking sheet Image Credit: Julia Mueller

Bake for 12 to 15 minutes, or until the chips turn golden brown.

Baked chips on a baking sheet 
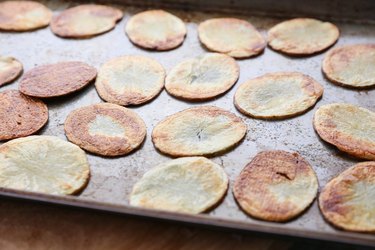
Bake 12 to 15 minutes Image Credit: Julia Mueller

Remove chips from the oven and immediately flip them with a spatula. This will ensure they don't stick to the baking sheet. Sprinkle with more sea salt and/or seasonings if desired.

Flipping the potato chips 
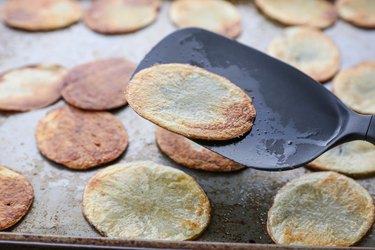
Flip the chips Image Credit: Julia Mueller
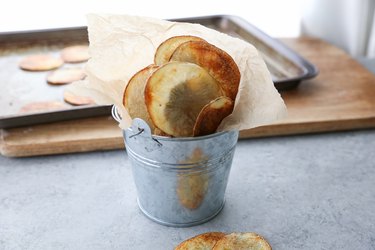
Step 5: Enjoy

Allow chips to cool 2 to 3 minutes before consuming. Chips are best fresh out of the oven. Leftovers can be stored in a zip lock bag for up to 3 days.

Baked potato chips in a small bucket 
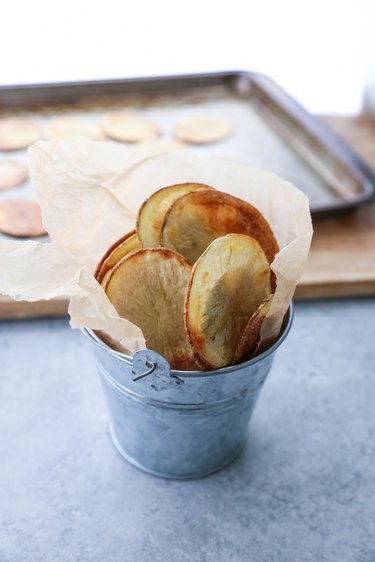
Baked potato chips recipe Image Credit: Julia Mueller