Pressure cookers are great for quickly preparing delicious meals without much fuss or cleanup. By building up pressure and trapping steam, they heat food faster than other cooking methods—shortening cook times—and they increase flavor development and promote nutrient retention.
Video of the Day
There are two main types of pressure cookers: stovetop and electric. Stovetop pressure cookers tend to build higher pressure and cook a little faster than their electric counterparts. These days, electric pressure cookers are often actually multi-cookers that have more features and that can pressure cook, slow cook, sauté and more; these are handy appliances for people with limited kitchen space who want one convenience item that does a lot.
And just in case you have visions of cooking vessels exploding under pressure, or a lid being propelled at high velocity across your kitchen, don't worry. Quality pressure cookers available today have safety features like an automatic safety release valve that prevent disasters and make these appliances perfectly suitable for beginners.
What to Consider When Purchasing a Pressure Cooker
Style: Do you want a stovetop pressure cooker or an electric one? Again, the stovetop style is a slightly more efficient cooking apparatus, but it's generally more limited than electric ones. Still, because it's used on the stove, it can double as a regular pot, it's also good for searing and it requires no plug. It's also usually cheaper than electric versions and easier to find in a wider range of sizes.
But the best electric pressure cookers today are easier to use and have timers and sensors that regulate pressure and cater better to the set-it-and-forget-it style of cooking. They also tend to cook more evenly at the bottom, reducing the risk of scorched food and tough cleanup. If you're going with an electric model, decide whether you want one that's only a pressure cooker, or if you prefer the more-common multi-cooker that does lots more than just pressure cooking.
Settings: This is mostly a consideration if you're going with an electric pressure cooker or multi-cooker. If you opt for a multi-cooker, consider which cooking methods it can handle and peruse the list of additional features. The more you get, the more you're likely to spend, so find the balance of versatility and affordability that appeals to you. Look for models with a lot of automation, yet allow you to manually adjust the cook time and pressure at the start of cooking and during the process. See if the user interface looks simple and intuitive, with clearly marked buttons and a large, informative display screen.
Capacity: Small pressure cookers usually run from 2 to 4 quarts, and they're adequate for people who only cook for one or two. Standard pressure cookers run from 5 to 8 quarts, with a 6-quart capacity being large enough for a family of four. They're also good for cooking in bulk for fewer people so you can prepare food for the week or stock your freezer. Large pressure cookers run up to around 14 quarts, and these make the most sense for people who cook for groups (or who like to really stock their freezer).
Price: You can get a small, basic stovetop pressure cooker for around $25, though $60 to $100 is where many stovetop models sell. Electric pressure cookers and multi-cookers generally retail between $80 and $160. Of course, there are high-end models of both types that reach into the several-hundred-dollar range. The size and capabilities affect the cost, obviously, but you certainly don't have to shell out for the most expensive pressure cooker you can find to get a high-quality, reliable appliance.
There are lots of stovetop and electric pressure cookers to choose from. These considerations should help you settle on one that's just right for your needs.

The Best Stovetop Pressure Cooker
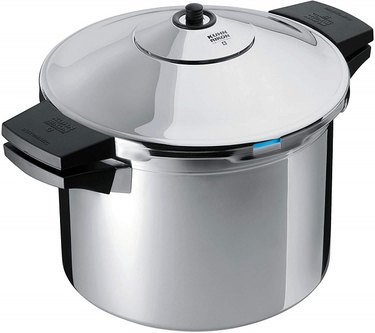
Kuhn Rikon Duromatic 6.3-Quart Pressure Cooker
$222.01 at Amazon
This one's admittedly an expensive pressure cooker, especially for the stovetop style. But it's a good investment in a piece of kitchen equipment that will serve you well for many, many years. This durable model delivers superior cooking results, it has great safety features (including an automatic pressure-release valve and a steam shield that reduces the risk of burns), it has a spring-loaded pressure gauge (rather than the less appealing, old-fashioned jiggler gauge), and it's also very elegant and attractive.
Cooking is especially efficient with this model, which maintains and distributes heat exceptionally well. The central valve for toggling between low pressure, high pressure and release and the accompanying indicator rod are a welcome, user-friendly improvement over the normal system of valves, switches or levers on most stovetop pressure cookers. The valves and rods are also easy to remove and clean, and the valve is made of metal so it will last. It's not recommended to put any component of this stainless steel appliance in the dishwasher, but it's easy to clean by hand.
At a Glance:
- Manufacturer: Kuhn Rikon
- Style: Stovetop pressure cooker
- Capacity: 6.3 quarts
- Size: 11.4" x 11.2" X 10.3"
- Material: Stainless steel
- Dishwasher-Safe: No
The Best Budget Stovetop Pressure Cooker
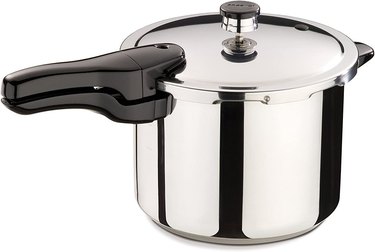
Presto 6-Quart Stainless Steel Pressure Cooker
$89.89 at Amazon
If the Kuhn Rikon is beyond the reach of your budget or your willingness to spend, this is a much more affordable, easy-to-recommend option with enough capacity for most people's needs. It's a simple kitchen tool with simple controls, and it gets the basics of pressure cooking done well. That is, it consistently and automatically maintains the proper pressure, distributes heat evenly, cooks efficiently and the lid stays secure. It's made from stainless steel, as opposed to aluminum like many of the other budget-friendly stovetop pressure cookers on the market. Along with greater durability, that makes it better suited to acidic foods.
One nice bonus with this model is the included rack that holds food off the bottom of the pot for increased control over cooking. There's a cover lock indicator that lets you know when the pressure is reduced enough to safely open the lid, and the helper handle facilitates easily moving the pressure cooker. Cleanup is a breeze too, as this pressure cooker is almost entirely dishwasher safe; just remove the overpressure plug and sealing ring first and hand-wash those.
At a Glance:
- Manufacturer: Presto
- Style: Stovetop pressure cooker
- Capacity: 6 quarts
- Size: 9.12" x 17.31" x 8.75"
- Material: Stainless steel
- Dishwasher-Safe: Yes
The Best Overall Electric Pressure Cooker
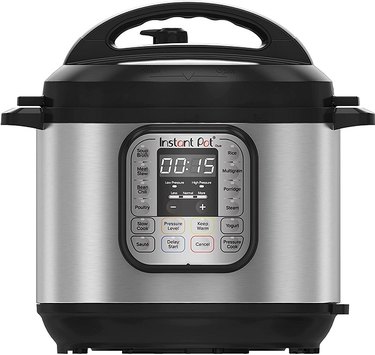
Instant Pot Duo 6-Quart 7-in-1 Electric Pressure Cooker
$89.00 at Amazon
Instant Pot is a well-known and beloved name in multi-cookers. This is one of its most popular models for pressure cooking and more, as it's an excellent value for all you get. Not only is this an amply sized electric countertop pressure cooker, it also slow cooks, browns and sautés, steams, cooks rice, makes yogurt and warms food (thus the "7-in-1").
There are plenty of thoughtful features. For example, there's an exceptionally user-friendly interface, a delayed start feature, long-lasting automatic and manual keep-warm features, the stainless steel insert has a triple-ply base for even heating, and the lid is removable for easy cleaning and can be conveniently stored vertically on either handle. As for making life easier when you're pressure cooking, you have precise temperature control and there are 13 pre-programmed settings for pressure cooking various foods—and this machine cooks them quickly.
It also comes with a steaming rack for steaming foods and elevating them off the bottom of the pot. Plus, get peace of mind knowing this appliance has more than 10 safety features. And that cleanup won't be a chore, as the inner pot, lid and accessories are all dishwasher safe.
At a Glance:
- Manufacturer: Instant Pot
- Style:
Electric countertopmulti-cooker
- Capacity: 6 quarts
- Size: 13.38" x 12.2" x 12.48"
- Material: Stainless steel
- Dishwasher-Safe Removable Pot: Yes
The Best Budget Electric Pressure Cooker
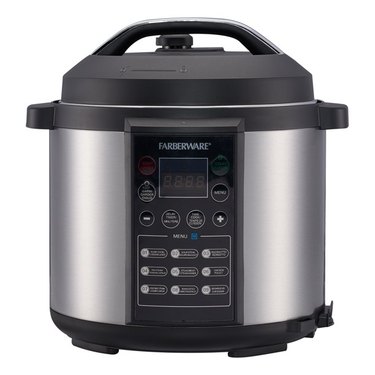
Farberware 6-Quart Programmable Digital Pressure Cooker
$49.88 at Walmart
If you're seeking a low-cost electric countertop pressure cooker and multi-cooker, Farberware makes this great option. You're not sacrificing size, functionality or reliability to save money with this one. The 6-quart capacity is adequate for family cooking, and multi-cook options beyond pressure cooking include slow cooking, rice cooking, browning and sautéing, steaming and more.
Nine pre-programmed settings for common cooking tasks like steaming fish or vegetables, making soups and stews, cooking rice or risotto, and others greatly simplify use and eliminate the guesswork. And this model's pressure cooking and other methods turn out consistently well-cooked, tasty finished products, including perfectly tender meat.
There's a safety release valve to maintain proper pressure, and the lid seals securely and won't open if there's too much pressure inside. The easy-grip handles facilitate portability, and the inner pot is dishwasher safe. Overall, for the price, this is a smart purchase.
At a Glance:
- Manufacturer: Farberware
- Style:
Electric countertopmulti-cooker
- Capacity: 6 quarts
- Size: 12.2" x 12" x 12.6"
- Material: Stainless steel
- Dishwasher-Safe Removable Pot: Yes
The Best Large-Capacity Pressure Cooker
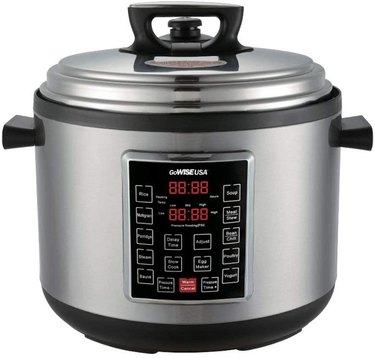
GoWISE USA 14-Quart 4th-Generation Electric Pressure Cooker
$129.95 at Amazon
For those who need a massive pressure cooker to quickly and easily prepare delicious food for a crowd or to load up their freezer with ready-made meals, this is a go-to choice. This multi-cooker is as big as electric pressure cookers get, but it offers plenty more than size. It has 12 convenient pre-programmed settings to automatically set the pressure, method and cook time for a range of commonly prepared foods with the touch of a button.
The delay timer is a nice feature and one that can often come in handy when you're busy and trying to put together a large meal. Also useful is the ability to adjust the pressure and cook time, as well as the automatic keep-warm feature. The LED display is informative on this model, and the user interface is intuitive. A steaming rack, steaming basket and a few other practical accessories are included, too. The ceramic-coated inner pot shouldn't go in the dishwasher, but it's generally easy to clean.
At a Glance:
- Manufacturer: GoWISE USA
- Style: Electric countertop multi-cooker
- Capacity: 14 quarts
- Size: 13" x 16" x 15"
- Material: Stainless steel exterior; ceramic-coated inner pot
- Dishwasher-Safe Removable Pot: No