Home Blog Page 123

Sheet Pan Chicken Sausage with Sweet Potatoes, Onions and Apples

0

There's nothing simpler for dinner than cutting up a few veggies with some sausage–and this flavor combination can't be beat. Roast everything together on a single sheet pan where the juices mix and mingle for the perfect blend of sweet and savory in every bite.
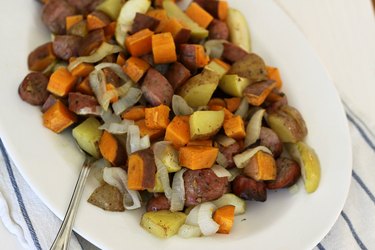
sheet pan apples sausage

Video of the Day

Things You\’ll Need

  • 2 sweet potatoes, cut into large dice

  • 1 to 2 golden potatoes cut into large dice

  • 1 pound pre-cooked sausages (we used chicken-apple here), cut into bite-sized pieces

  • 1 sweet onion, sliced

  • 1 1/2 teaspoons salt plus more for serving

  • 1/2 teaspoon pepper plus more for serving

  • 3 tablespoons olive oil

  • 2 Granny Smith apples, cut into wedges
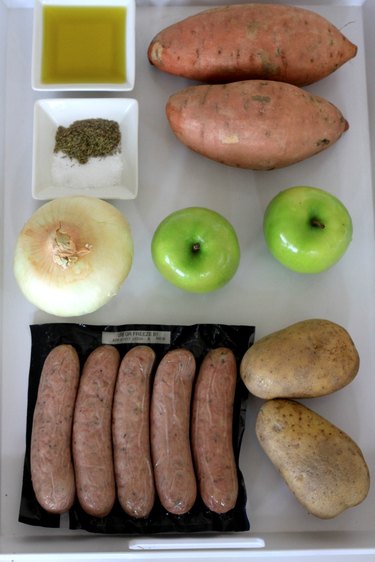
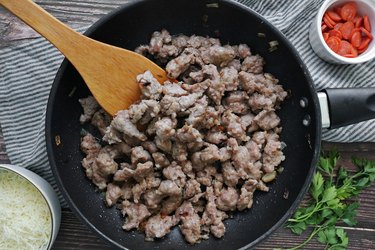
ingredients for sheet pan apple sausage

Step 1: Chop the Ingredients

Dice both potatoes and slice your onions, sausage and apples.

Tip

Use pre-cooked sausage, so there's no worry about food contamination on the cutting board.
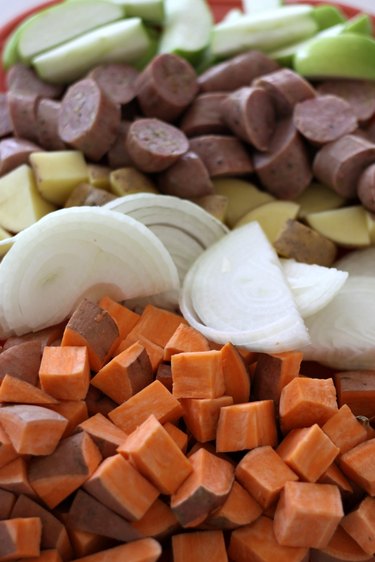
chopped ingreidnets

Step 2: Slather with Oil

Reserve the apples but make a mound on a baking sheet with the rest of your ingredients. Then drizzle the olive oil. Sprinkle your salt and pepper and use your hands to mix until every bite is coated.
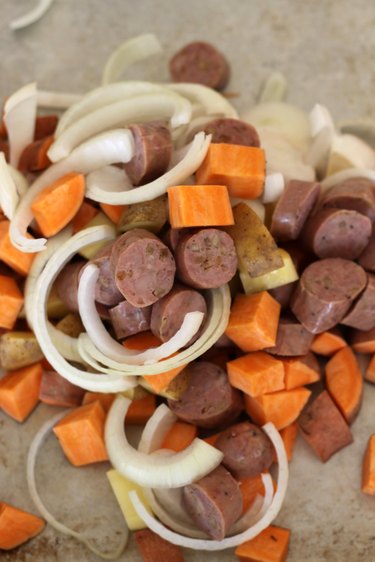
veggies on tray

Flatten out the ingredients, covering the entire space on your pan. Aim for a single layer but a little overlapping isn't a problem.
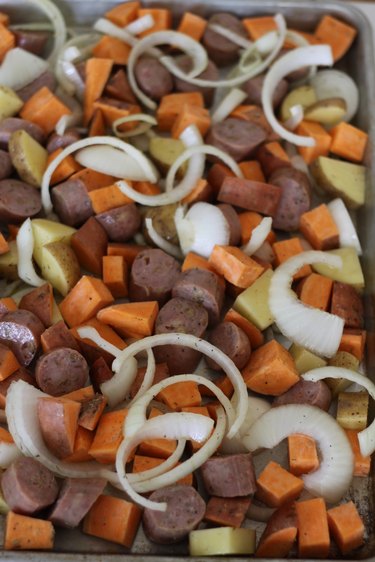
veggies smoothed on tray

Step 3: Roast at 400 degrees Fahrenheit

Cook for 15 minutes, then remove from the oven. Use a spatula to flip the ingredients and add the apples. Cook for another 20 minutes.

Tip

During the first 15 minutes while the tray is roasting, add a little olive oil to your apple wedges. This will help keep them moist in the oven.
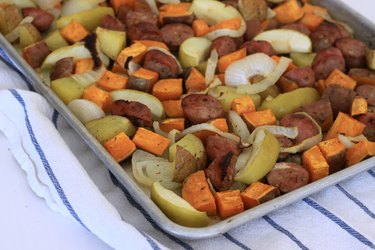
roasted sweet potatoes, sausage and apples

Serve immediately or cover with foil if you prefer to keep the sheet pan warm for later.

Tip

This dish is a great make-ahead option and travels well for potlucks.
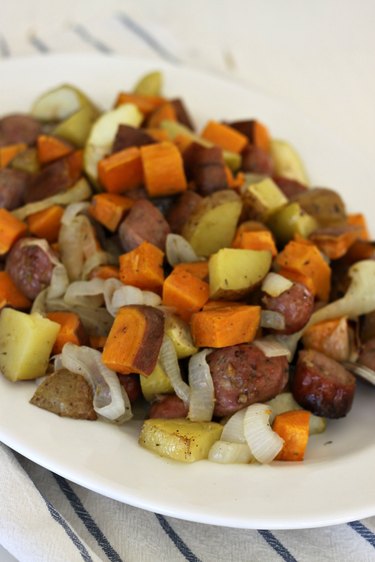
sheet pan apples and sausage

Strawberries & Cream Pie With Biscoff Crust Recipe

0

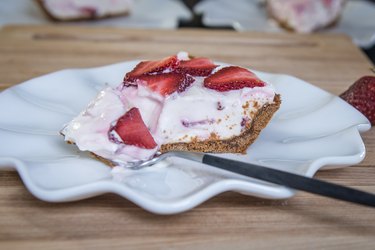
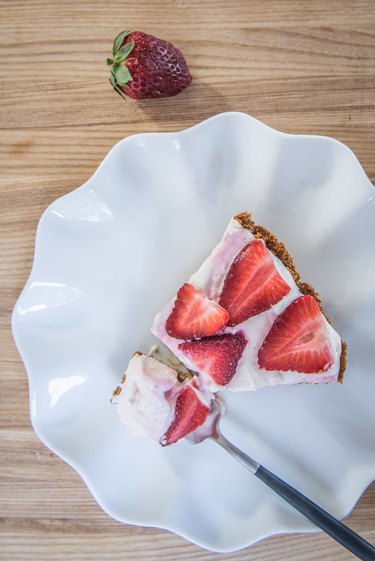
If you need an easy dessert that's also incredibly delicious and sure to make everyone happy, this is it. Strawberries and cream? Yes, please! And once you make this Biscoff crust, you'll never go back to graham cracker. It's the sort of pie that will be the first to disappear from the dessert table, no matter the occasion.

Strawberries & Cream Pie with Biscoff Crust Recipe

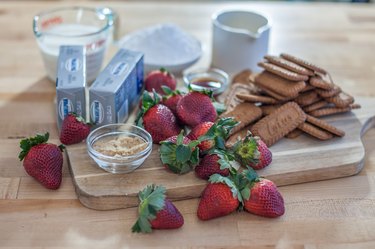
Things You\’ll Need

  • 1 (8 oz) package Biscoff cookies

  • 2 tablespoons brown sugar

  • 4 tablespoons melted butter

  • 2 packages (8 oz) of cream cheese, at room temperature

  • 1 cup powdered sugar

  • 1 teaspoon vanilla extract

  • 1 cup heavy cream

  • 1 lb sliced strawberries, divided

Strawberries & Cream Pie with Biscoff Crust Recipe

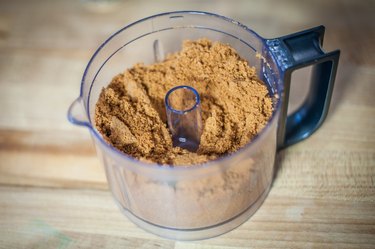
Step 1: Crumb the Biscoff

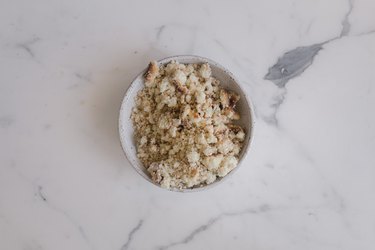
Add the cookies to a food processor and process until just crumbs remain.

Strawberries & Cream Pie with Biscoff Crust Recipe

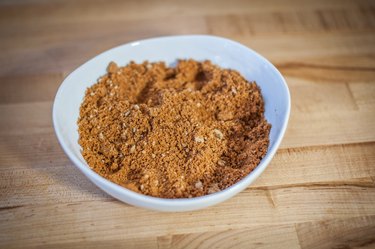
Step 2: Stir in Sugar and Butter

Add to a large bowl, stir in the brown sugar and then the melted butter until well combined (this can also be done in the food processor, if desired).

Strawberries & Cream Pie with Biscoff Crust Recipe

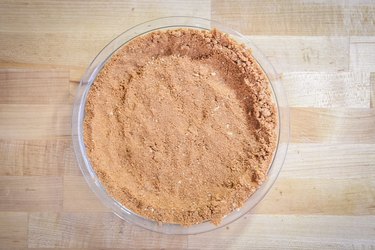
Step 3: Press Into a Pie Pan

Add to a pie pan, then press until well compacted in an even layer in a 9-inch pie pan. Bake at 350°F for 15 minutes, and allow to cool.

Strawberries & Cream Pie with Biscoff Crust Recipe

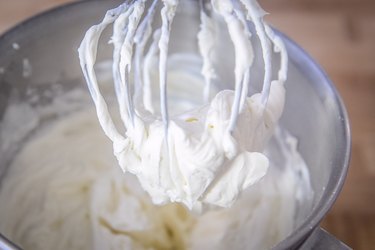
Step 4: Make the Cream

Beat the cream cheese until light and fluffy, then beat in the powdered sugar and vanilla. Next, beat in the heavy cream until well combined.

Strawberries & Cream Pie with Biscoff Crust Recipe

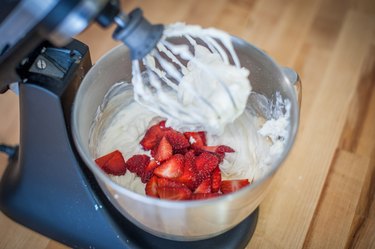
Step 5: Stir in the Strawberries

Stir in about half the sliced strawberries until just combined.

Strawberries & Cream Pie with Biscoff Crust Recipe

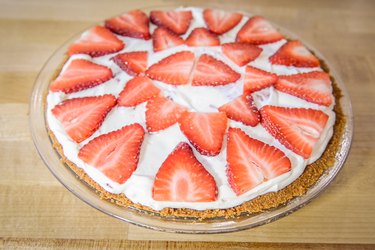
Step 6: Add to the Pie Crust

Add the filling to the crust in an even layer. Top with remaining berries. Chill for 2 hours and up to overnight.

Strawberries & Cream Pie with Biscoff Crust Recipe

Step 7: Chill and Serve

Chill for 2 hours and enjoy!

Strawberries & Cream Pie with Biscoff Crust Recipe

List of Deep Yellow Vegetables

0

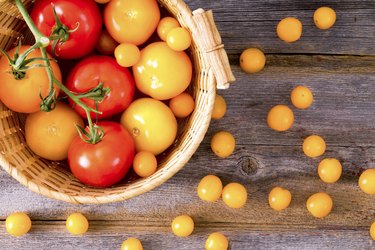
Fresh red and yellow tomatoes An overhead view of a basket of red and yellow tomatoes. Image Credit: ozgurcoskun/iStock/Getty Images

From yellow bell peppers to Yukon potatoes, yellow-hued vegetables are rich in carotenoids, the pigments that give them their vibrant color. These vegetables also contain many nutrients, and offer several health benefits, according to the Linus Pauling Institute. They offer much variety in the way of meal options, from serving as salad toppings to being baked into bread.

Video of the Day

Yellow Bell Peppers

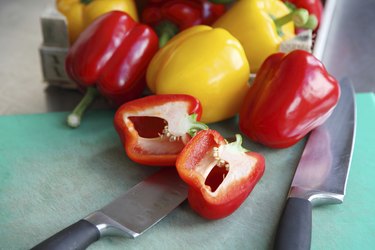
Selection of raw vegetables Red and yellow bell peppers on a cutting board with chopping knives. Image Credit: PGoodie76/iStock/Getty Images
Crisp and slightly sweet with a vibrant, rich hue, yellow bell peppers are high in Vitamin C, states Produce for Better Health Foundation. They should be firm and have tight skin when purchased; avoid buying them shriveled. Left raw, they can be sliced and eaten as a snack, or used to top a green salad. Try roasting them with potatoes, or including them in a salad of beans and tomatoes.

Sweet Corn

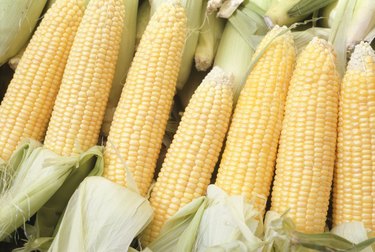
Corn cobs, (Close-up) Seven cobs of freshly peeled yellow sweet corn. Image Credit: Gary Faber/Photodisc/Getty Images
Corn is a starchy vegetable that is rich in Vitamin C, lutein and zeaxanthin, which promote eye health according to Eating Well. Choose corn with husks that aren't dry or pale, as farmer Kevin Smith tells Eating Well. Corn can be roasted or grilled on the cob, used raw or roasted in a salad with black beans and bell peppers, or even baked into a pudding.

Squash Varieties

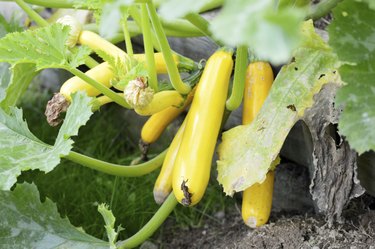
Yellow squash Yellow summer squash growing on the vine in the garden. Image Credit: lindmon/iStock/Getty Images
Squash is technically a fruit because it has seeds, but it is often thought of, and used, as a vegetable. Yellow summer squash is high in fiber and Vitamins A and C, according to Better Homes and Gardens. Versatile in cooking options, it can be boiled, steamed, baked, grilled, roasted or broiled. Try sauteing it with zucchini and using it to top rice, or baking it into bread or grilling it with other vegetables for a shish kabob. Butternut squash has a golden yellow hue, and has lots of fiber, potassium and Vitamin B6, making it beneficial for the heart and nervous system, according to Whole Living. It can be pureed for soup, or sliced and added to pasta. Another option is the fiber-rich acorn squash, per Men's Fitness; try slicing it in half and baking it for a simple side dish.

Golden Beets

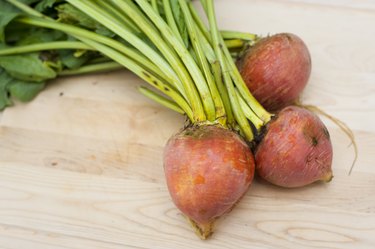
Farm-Fresh Golden Beets Three whole golden beets with tops on a cutting board. Image Credit: slearmonth2/iStock/Getty Images
Unlike other yellow vegetables, golden beets get their color from betalains, a type of pigmentation that also serve as antioxidants and may decrease inflammation, according to Whole Foods. Try slicing them very thinly and adding them to a green salad, per Martha Stewart, or roasting and pairing them with red beets.

Yellow Potatoes

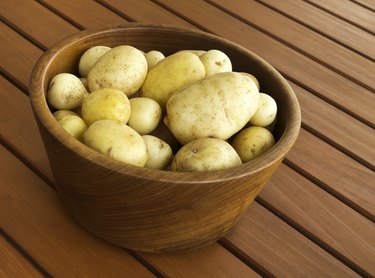
Potatoes in Wooden Bowl A wooden bowl of golden yukon potatoes on a patio deck. Image Credit: Stephen Kane/iStock/Getty Images

Ranging from pale yellow to golden brown, with golden yellow flesh, Yukon gold potatoes are waxy with low-to-medium starchiness. Avoid using them in potato salads, as they may fall apart; instead, try steaming or boiling them and sprinkling with your favorite seasoning.

Can I Still Drink Expired Red Wine?

0

top view of red wine in glasses arranged isolated on white Can I Still Drink Expired Red Wine? Image Credit: LightFieldStudios/iStock/GettyImages

Whether you're just beginning to enjoy wine or you are an avid collector, the question of whether or not it's alright to drink expired red wine is a common one. Varied life expectancies of red wine cause varietals to age differently, but the good news is that drinking red wine that has gone bad won't hurt you. The vintage will just not taste right if it has reached the end of its wine shelf life. A full understanding of red wine itself, and what to expect when opening a bottle, can help you decide if you should drink your bottle.

Video of the Day

Try Not to Panic

If your wine tasted off when you drank it, should you be on the lookout for drinking bad wine symptoms? Probably not. Expiration dates imply that after a certain point, a product has gone bad and will cause harm if ingested. Wine bottles do not display a sell-by date or an expiration date indicating an official end to a particular wine shelf life. That's because drinking expired wine doesn't actually harm you. If you taste a bottle of red that has gone bad, you know – immediately – that it's not the right bottle to serve. The taste, smell and appearance are off. So, although you can drink expired wine – you probably shouldn't.

Determine the Wine Shelf Life

Most of the time, you can tell by the wine's appearance that it has gone bad. A leaky cork means that the seal on the wine is not good. When a wine isn't sealed, oxygen has gotten into the bottle, aging and oxidizing the wine. Just as air exposure causes metal to rust, oxygen breaks down parts of the wine, creating a bad taste. Spoiled wine usually looks cloudy or foggy, and may be tinted a brownish-red color. If your red wine tastes either vinegary or moldy, it's gone bad. For this reason, the hunt for drinking bad wine symptoms will have more to do with the spoiled taste of the wine itself, rather than with any real health risks to you.

Learn Each Wine\’s Characteristics

Red wine includes the varietals merlot, cabernet sauvignon, claret and pinot noir. Although red wine varies from grape to grape, and region to region, each varietal carries similar characteristics. Red wines display flavors of red or black fruit such as raspberry, blackberry, cherry, blueberry, and stone fruit such as plums. It is drier than white wine, which tends to be sweeter. Cooler climate red wines have an elevated acidity: that tingly sensation at the front of your mouth that leaves your tongue feeling rough after drinking. Red wine commonly has more of a bite than white or blush wines, but only expired red wine will taste like a musty basement or a bottle of vinegar.

Forget the Misconceptions

Most wines aren't meant to be cellared, or stored, for many years at a time. The notes on the back of the bottle or on the winery's website will let you know the optimum storage time for your red wine. On average, red varietals store well for anywhere from two to five years. Premium wines are sometimes crafted to last longer, but most of the red wines available on the market are good right off the shelf. Some wineries prefer to leave their wines unfiltered. If you see small particles floating in your wine, or if the wine has a cloudy look, it may not actually be bad. The wine label will state if the wine is unfiltered so you know what to expect from the bottle.

DIY Champagne Glass Cake Pops

0

Champagne Glass Cake Pops are the sweetest treat for a celebration and serve as the most perfect mouthful to ring in the New Year! They are equally as delicious as they are pretty and are filled with plenty of champagne, rose and white chocolate. Learn how to make these perfect Champagne Glass Cake Pops for your next party below!

Champagne Glass Cake Pops are a fun and delicious addition to your next party!

Step 1: Make the Dough

Things You\’ll Need

  • 1 x large baked vanilla cake (about 2 cups of cake crumbs)

  • 4.4 ounces (125 grams) unsalted butter, at room temperature

  • 8.8 ounces (250 grams) powdered sugar

  • 1.4 ounces (40 millilters) champagne

  • 1 teaspoon rose water

  • 1.7 ounces (50 grams) shredded coconut

Use your fingers to crumble the vanilla cake into a large bowl. Set aside.

Crumble the cake.

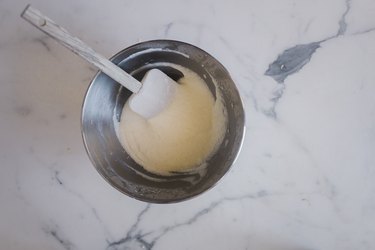
In a bowl of a stand mixer fitted with the beater attachment, or using handheld electric beaters, beat together the butter and sugar until light and fluffy for 4 minutes. Add in the champagne and rose water. Beat until the mixture is smooth for 3 more minutes.

Beat the mixture well to make a smooth frosting.

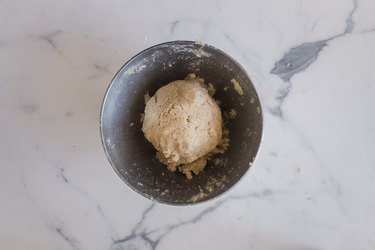
Add the frosting into the bowl with the crumbled cake. Use a wooden spoon to bring the mixture to form a rough dough. Then add in the shredded coconut and use your hands to bring the dough together into balls. Set aside in the refrigerator to chill while you proceed with the next steps.

Form a dough ball.

Step 2: Form the Champagne Glass Pops

Things You\’ll Need

  • 36 milk or white chocolate buttons

  • A wooden skewer

  • 36 cake pop sticks

Line a large baking tray with non-stick parchment paper.

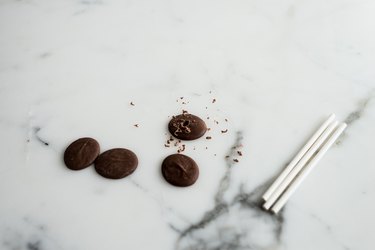
To form the champagne glass bases, gently use a wooden skewer to hollow out a small hole in the middle of the chocolate buttons to form a circle that is the same width as the cake pop sticks. Slide a chocolate button onto a cake pop stick then place on the baking tray. Repeat with the remaining chocolate buttons and cake pop sticks. Set the tray in the freezer until needed.

Hollow out the middle of the chocolate buttons so that the cake pop sticks can just fit through them.

Next, form the champagne glass cake balls. Using a small cookie dough scoop, or a teaspoon as a measure, scoop out portions of the cake dough. Roll each portion between your hands to make them into a smooth ball. Then use your fingers to pinch and shape the ball into a cylinder glass shape to resemble that of a champagne glass.

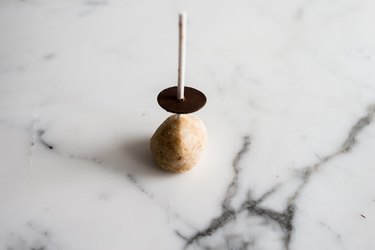
Remove the cake pop sticks from the freezer. Insert the cake pop sticks into the base of the glasses. Place the champagne glass cake pops facing downwards onto the baking tray. Freeze until firm for about 30 minutes.

Form the dough into something that resembles a champagne glass.

Step 3: Dip and Decorate

Things You\’ll Need

  • 14 ounces (400 grams) melted white chocolate

  • 1/8 cup of gold edible glitter

  • 1/8 cup of gold sprinkles

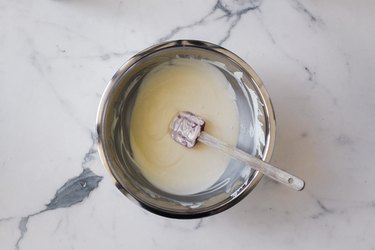
Place the melted white chocolate into a medium sized bowl. Divide the white chocolate into two separate bowls; one filled with 10 ounces (285 grams) and one filled with 4 ounces (115 grams). Set the bowls aside on the kitchen counter to cool for about 10 minutes, making sure to give each an occasional stir.

Let the chocolate cool at room temperature until slightly thickeend.

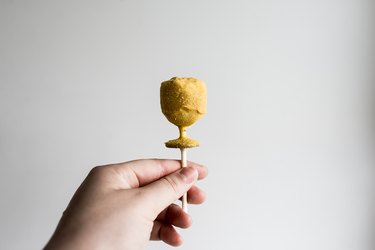
When you're ready to coat the cake pops, remove them from the freezer. Place the cake pop sticks into the base of the cake. Dip the cake pops into the bowl with the larger amount of white chocolate until completely coated. Carefully set them back on the baking tray, then cover the cake pops in gold edible glitter. Freeze until the white chocolate coating is firm for about 30 more minutes.

Cover the cake pops in edible glitter.

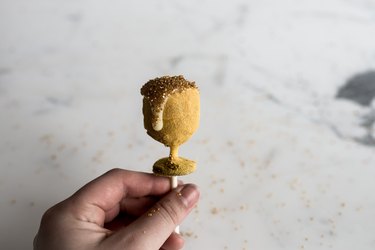
Remove the cake pops from the freezer. Use a spoon to drizzle the remaining smaller bowl of melted white chocolate over the top of the cake pops. Immediately decorate the white chocolate with sprinkles so that it resembles something similar to champagne bubbles. Place them back on the baking tray and freeze until firm for 15 more minutes.

Decorate with sprinkles.

Step 4: Serve!

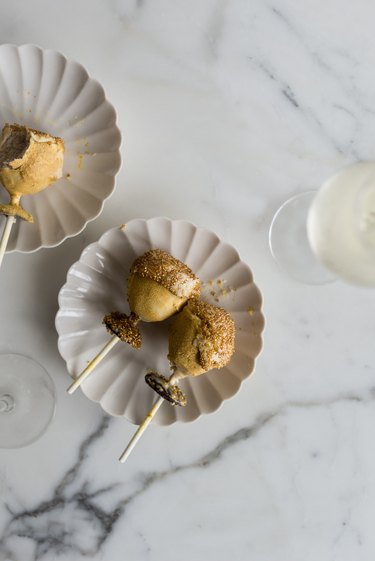
Serve and enjoy! Champagne Glass Cake Pops will keep in an airtight container stored in the refrigerator for up to 1 week.
Serve and enjoy these Champagne Glass Cake Pops alongside a glass of Champagne!

DIY Peeps Treat Ideas for Kids

0

Treat the little peeps in your life to some eye-catching Easter goodies made with marshmallow PEEPS. From tiny rabbits racing in cars to little chicks swimming and splashing, these sweet snacks are completely edible and totally adorable. They're also simple enough to make that the kids can hop into the kitchen and join in the fun. Make one or all, and your Easter table is sure to be full of charm and delight.
DIY peeps treat ideas for kids

Racing Rabbits

Peeps bunny race car dessert

Things You\’ll Need

  • Bunny PEEPS

  • Twinkies

  • White icing

  • Pretzels

  • Mini Oreos

Step 1

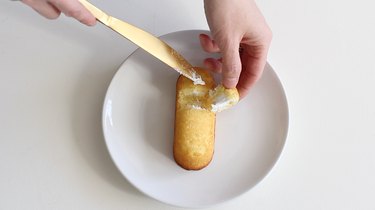
Cut a rectangle in the Twinkie that's the same size as the bunny PEEP. You want to cut about two thirds of the way through the Twinkie, but not all the way through.

Cutting rectangle out of Twinkie

Step 2

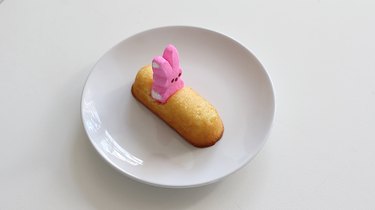
Pipe white icing inside the rectangle to act as "glue," and then place the bunny so that it's nestled securely inside.

Bunny Peep placed inside Twinkie

Step 3

Slide a pretzel in front of the bunny to act as the "steering wheel."

Pretzel steering wheel inserted in front of bunny

Step 4

Break apart two mini Oreos so that you have four "wheels" and use icing to attach them to the sides of the Twinkie.

Bunny race car Peeps kids treat

Swimming Chicks

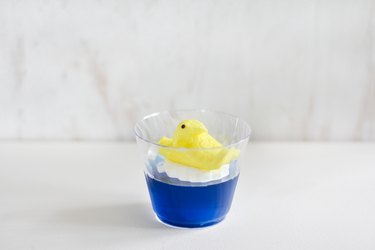
Peeps swimming chick in Jello dessert

Things You\’ll Need

  • Chick PEEPS

  • Blue Jell-O, 2 packets

  • Small clear cups or glasses

  • Whipped cream

Step 1

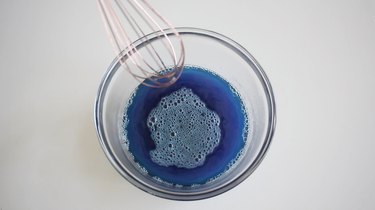
Add 2 packets of blue Jell-O to a bowl, and stir in 2 cups of boiling water until combined.

Whisking boiling water with blue Jello mix

Step 2

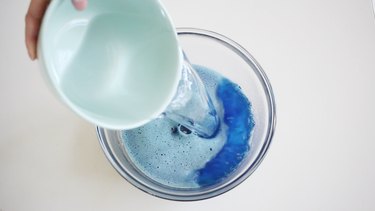
Add 2 cups of cold water to the Jell-O and stir until combined.

Pouring cold water into blue Jello mix

Step 3

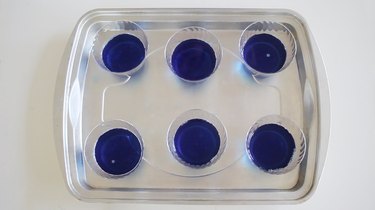
Pour the Jell-O into clear cups or glasses so that they're each about halfway full. Refrigerate for 4 hours until firm.

Blue jello in clear cups

Step 4

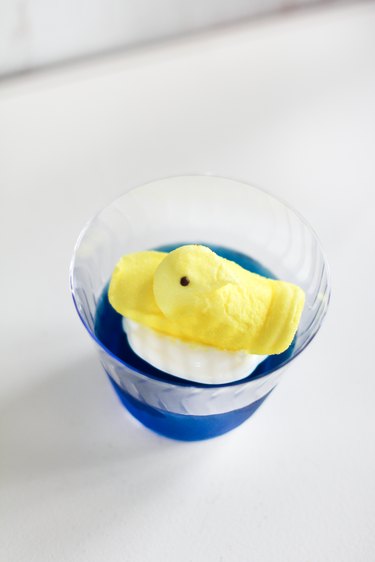
Top the Jell-O with whipped cream and place a chick PEEP on top.

Swimming chick Peeps kids treat

Skateboarding Bunnies

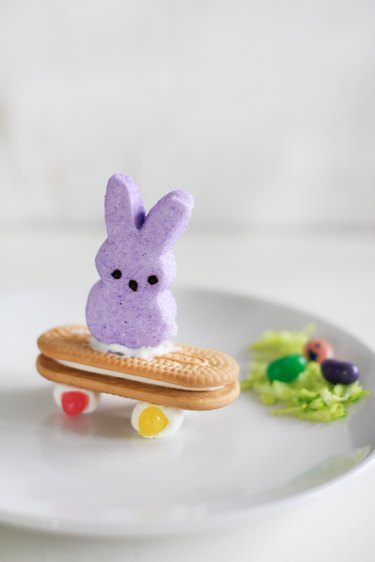
Peeps skateboarding bunny dessert

Things You\’ll Need

  • Bunny PEEPS

  • Mini jelly beans

  • Mini marshmallows

  • White icing

  • Vienna Fingers

Step 1

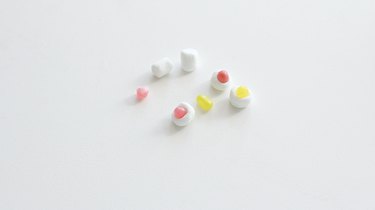
Slice mini jelly beans in half and stick them inside mini marshmallows to act as "hubcaps" for the wheels. I didn't find it necessary, but if needed, you can use white icing to get the jelly beans to stay put.

Jelly bean halves stuck inside mini marshmallows

Step 2

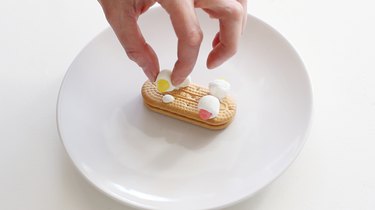
Use white icing to attach the four "wheels" to a Vienna Finger cookie, which will serve as the skateboard. Let the icing dry completely.

Attaching marshmallow wheels to cookie with icing

Step 3

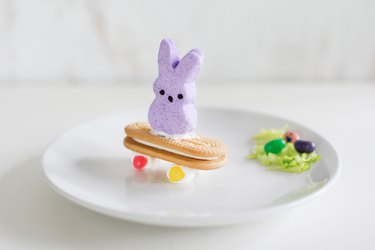
Flip the "skateboard" over and attach the bunny on top with white icing. Use a generous amount of icing in front and behind the bunny to ensure it doesn't topple over.

Peeps bunny skateboard kids treat

Bird Houses

Peeps bird house kids treat

Things You\’ll Need

  • Chick PEEPS

  • Graham crackers

  • White icing

  • Shredded coconut

  • Green food coloring

  • Mini jelly beans

Step 1

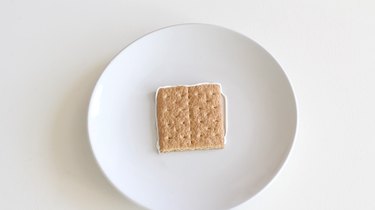
Break three graham crackers in half and place one of the halves on a plate. Pipe white icing around three sides of the cracker.

Icing piped around graham cracker

Step 2

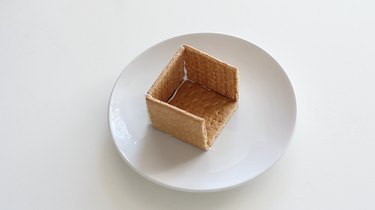
Attach three cracker halves to serve as the back and sides of the house, using icing to adhere them to the bottom cracker and to each other. Let the icing dry completely before attaching the roof, as it will be more stable and easy to assemble.

Building house from graham crackers

Step 3

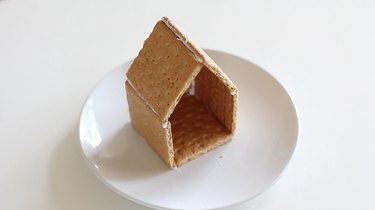
Pipe icing along the top of the house and attach two cracker halves to serve as the roof. Allow the icing to dry.

Graham cracker house assembled

Step 4

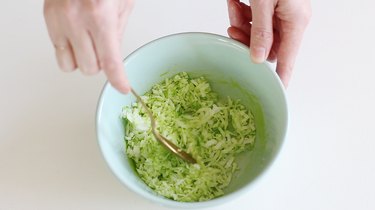
While the icing is drying, add 5 drops of green food coloring to 3/4 cup of shredded coconut and stir until the color is evenly distributed.

Green shredded coconut "grass"

Step 5

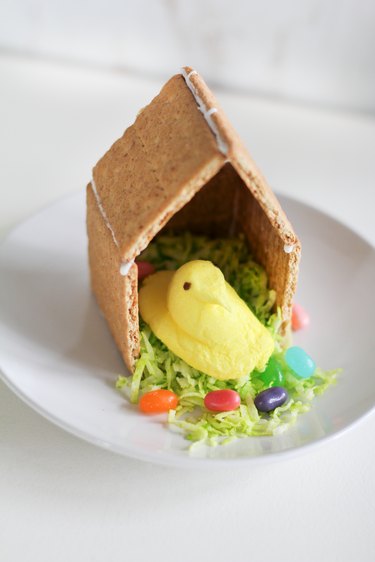
Spoon "grass" inside the birdhouse and place a chick PEEP inside. Garnish with jelly bean "eggs" laid on the grass.

Bird house made with graham crackers and PEEPS

Stuffed Pepperoni Pizza Peppers Recipe

0

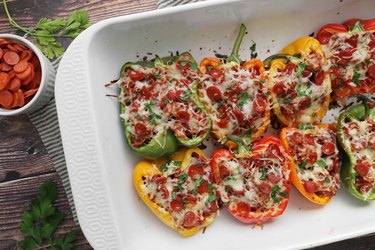
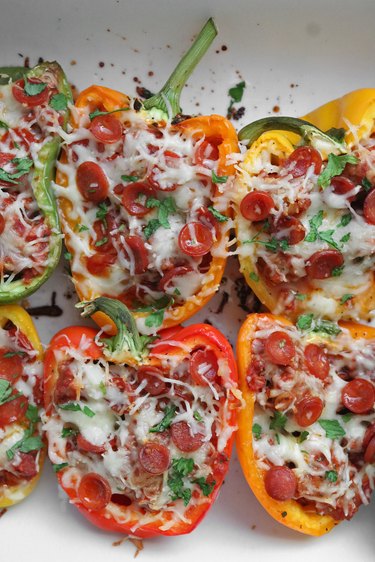
Pepperoni pizza may be tasty, but sometimes, you might want to ditch the crust. Not only can it be time-consuming to make, but it's also often full of refined carbs. Why not use bell peppers instead? By stuffing these vibrant veggies with pepperoni pizza ingredients, you can get the same classic flavor without the crust. These stuffed pepperoni pizza peppers are gluten-free, kid-friendly and easy to make.

Pepperoni pizza stuffed peppers

Video of the Day

Things You\’ll Need

  • 4 bell peppers

  • 1/3 cup yellow onion, diced

  • Olive oil

  • 1 pound sweet or hot Italian sausage (removed from casings)

  • 1/3 cup mini or regular pepperoni

  • 1 cup pizza or pasta sauce

  • 2 cups shredded mozzarella cheese

  • 1/2 tablespoon dried oregano

  • 1/2 tablespoon dried parsley

  • Salt and pepper

  • Fresh parsley (for topping)

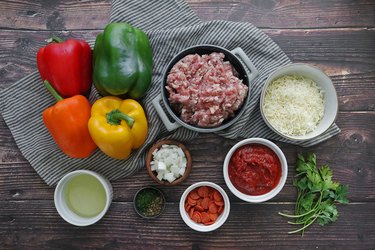
Ingredients for pepperoni pizza stuffed peppers

Tip

Taste your sauce first. If it doesn't have enough flavor, feel free to add more spices to the stuffing.

Step 1

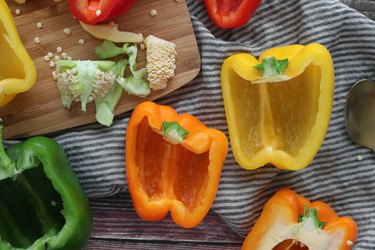
Pre-heat the oven to 375° Fahrenheit. Meanwhile, cut the peppers in half lengthwise and remove the seeds.

Cut bell peppers lengthwise

Step 2

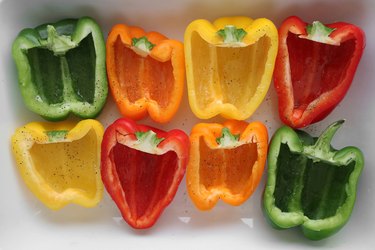
Transfer the cut bell peppers to a large baking dish. Drizzle with olive oil and season with salt and pepper. Set aside.

Drizzle bell peppers with olive oil

Tip

Pre-bake the bell peppers if you prefer a softer consistency. Simply bake them for 15 to 20 minutes before stuffing. Otherwise, you can skip pre-baking if you like a crispier texture.

Step 3

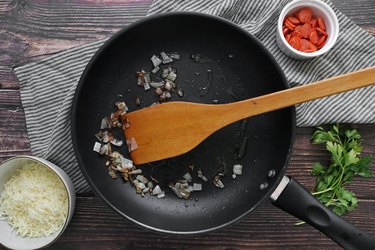
In a saucepan over medium-high heat, warm about 1 tablespoon of olive oil. Add the onion and cook until tender, about 5 to 7 minutes.

Cook chopped onion

Step 4

Add the Italian sausage and cook until brown, about 10 minutes. Use a spatula to break up the meat. Once cooked, drain the fat.

Cook Italian sausage

Step 5

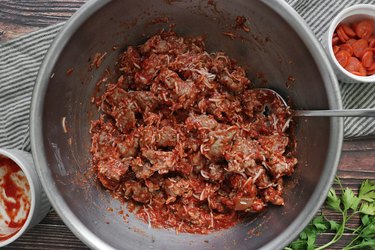
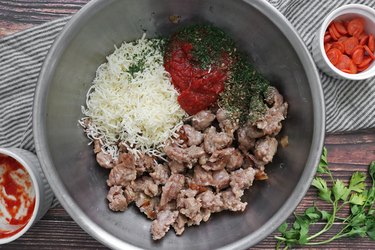
In a large bowl, combine the cooked sausage with pizza sauce and 1 cup of mozzarella cheese. Add the spices, salt and pepper, to taste.

Combine sausage, pizza sauce, cheese and spices

Step 6

Mix until the sausage is fully covered in pizza sauce.

Mix the stuffing ingredients

Step 7

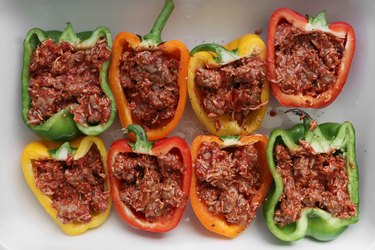
Fill each bell pepper with the sausage mixture.

Fill bell peppers with sausage

Step 8

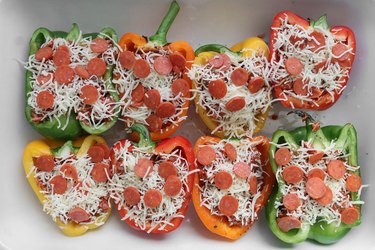
Top with the remaining cup of mozzarella cheese (or more, if you'd like). Add the pepperoni.

Add mozzarella cheese and pepperoni

Step 9

Bake for 25 minutes or until the cheese is bubbling and the peppers are slightly tender. Sprinkle with fresh parsley and bake for another 5 minutes. Serve and enjoy!

Pepperoni pizza stuffed bell peppers

How to Keep Apples Crunchy

0

Things You\’ll Need

  • Plastic bags

  • Food ties

  • Refrigerator crisper drawer

  • Cool water

  • Paper towel

... You can keep your apples crisp and crunchy.

Apples, like all other fruits and vegetables, tend to go mushy and spoil when not kept properly. An apple is sought after for its crisp, crunchy and either tangy, sweet, spicy or tart taste. When an apple loses its crisp bite, it is not as enjoyable. You can keep your apples crisp by following a few easy techniques so that when it is time to eat an apple, it will be crunchy and delicious.

Video of the Day

Step 1

Place the apples that you have in a plastic bag carefully so that you do not bruise them or give them soft spots by dropping them on top of each other too hard. Close the top of the plastic bag and twist a food tie around the bag so it stays closed.

Step 2

Place the bag of apples into the crisper drawer in your refrigerator. This will keep the apples crisp and crunchy for a longer period of time. If you do not have a crisper drawer in your refrigerator, you may store the apples in the coldest part of the fridge instead.

Step 3

Wash the apples under cold water before eating. Remove the stems by twisting and pulling them out. Dry the apples off with a paper towel. You can now enjoy a crisp and crunchy apple.

Tip

Storing your apples in the crisper drawer of your refrigerator or the coldest part of your refrigerator will keep the apples crisp and crunchy for up to six weeks.

Shrunken Head Apple Martini

0

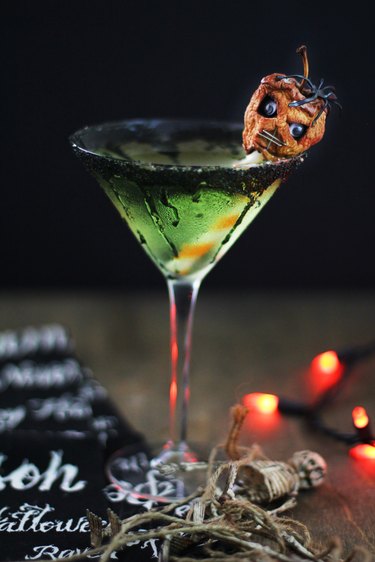
For a Halloween cocktail that is equal parts delicious and devilish, serve a caramel apple martini garnished with a tiny shrunken head carved from a mini apple. If you dare, rim the glass with black salt for a festive salted caramel version.

Learn how to make shrunken apple heads.

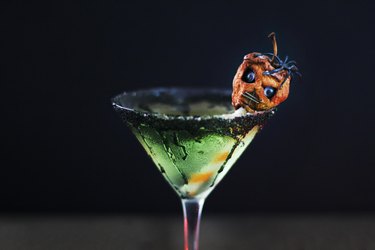
green caramel apple martini garnished with shrunken head

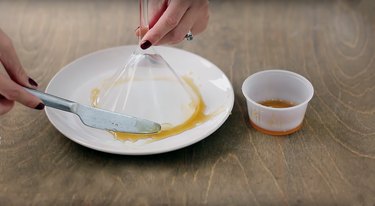
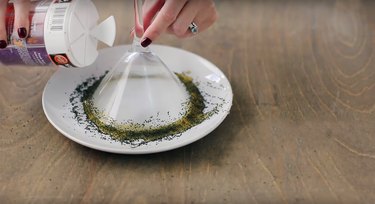
Coat the rim of a martini glass with caramel sauce and then dip in black sugar (or use black salt for a salted caramel version).

coating martini glass rim with caramel sauce coating martini glass rim with black sugar

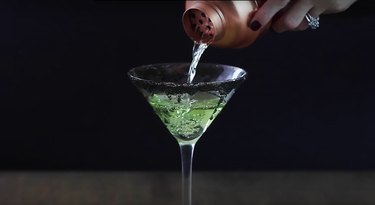
Mix 3 ounces of sour apple schnapps, 1 ounce of vodka and 1 ounce of butterscotch schnapps in a shaker with ice. Strain into the martini glass.

straining apple martini into martini glass

Skewer a mini shrunken head onto a straw and use as garnish.

green caramel apple martini garnished with shrunken head

Tip

Use staples to create a spooky mouth and a plastic spider for a haunting hairline!

green caramel apple martini garnished with shrunken head

How to Make Sherry Wine

Things You\’ll Need

  • 4 or 5 bushels Palomino, Pedro Ximenez or Moscatel grapes (to make about 10 gallons of must)

  • Brandy

  • Large pressing basin and stirring paddle

  • Stainless-steel fermentation vats

  • Wooden paddles and dippers

  • Oak barrels

  • Glass bottles and corks

  • pH meter

  • For home-brewed wine:

  • 1.3 gallons of white-grape concentrate and 5 gallons warm water

  • 10 pounds sugar

  • 5-gram package commercial flor yeast

  • Fermentation and aging vessels and bottling supplies

  • Optional ingredients for either process (amounts will vary with type of grapes and chemistry used):

  • Sodium or potassium metabisulfite crystals or tablets

  • Acid blend for wine (2-ounce package or more)

... Make Sherry Wine

Sherry is produced near the southern Spanish town of Jerez, founded nearly 3,000 years ago and named Sherish by the Moors. Cool winters, hot and dry summers, chalky soil and more than 300 days of sunshine per year produce the grapes that make sherry. Although you could make sherry in glass jugs using sugars and sulfites, true sherry-making is an art, producing a range of wines from the dry, clear Fino de Jerez to the amber-colored Amontillado and the sweet, thick, mahogany-hued Oloroso.

Video of the Day

Step 1

... Mosto de yema

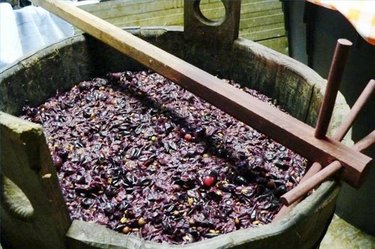
Use Palomino, Pedro Ximenez or Moscatel grapes, harvested just as they ripen. Press grapes (like Palomino) that will make dry or light sherry immediately but dry grapes that will make sweet or darker wine in the sun to allow the fructose to fully develop before pressing. Crush grapes to form a mash and drain the must, the clear to amber-colored liquid that contains the sugars and proteins from the underside of the skins. Traditionally, only the first pressing of grapes ("mosto de yema") is used to make sherry. Use subsequent pressings in sherry vinegars or cooking or table wines. Home winemakers produce must by adding sugar and yeast to grape juice.

Step 2

Put the must in a covered stainless-steel vat and allow the grapes to ferment for about two months. Test for alcohol content beginning at about 45 days until the batch reaches an alcohol content of 11 to 12.5 percent. Add premixed sherry flor yeast to jump-start fermentation and add sugar if fermentation begins to slow too early.

Step 3

"Fortify" the wine by adding brandy to "shock" it, stopping the fermentation process. Add enough alcohol to light, dry wines to raise the alcohol content to 15 percent and fortify darker, sweeter wines to 17 percent. Check the wine's pH with a pH meter; it should be between 3.0 and 3.5. Use winemaker's acid (a blend of citric, malic and tartaric acids) to adjust the pH. Add a quarter-teaspoon at a time, stir and then test before adding more.

Step 4

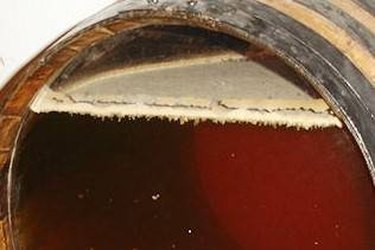
... Flor tops sherry in a transparent-ended bota.

Transfer light or dry wines to oak barrels (botas) for aging. Fill botas to within "two fists" of the top of the cask–about five-sixths of the way–before sealing. A layer of yeast ("flor") will grow on the surface, keeping the air away from the wine. The flor also imparts tastes and aromas that distinguish Fino and Manzanilla sherries. Age these sherries in this manner for two to three years. Wine can be allowed to continue to age in botas or separated from the flor and transferred to "solera" casks. Bottling the wine will not stop the aging process, but it will halt the development of taste and aroma created by the wood barrels. Home winemakers can achieve the flor stage by sealing jugs with stoppers lined with cotton-wool to allow just enough air in the bottle.

Step 5

... New wine moves downward as it ages in this solera cellar.

Age heavier sherries that cannot produce flor due to their higher alcohol content using a rotation called a "solera" system. A cask of aged sherry is half-emptied to make way for a new batch. As batches are made, halves of wine casks are moved along to the next barrel, making the last barrel a blend of the oldest wine in the cellar. Since sherry is often aged for decades, the sherry in the last cask may contain grapes from dozens of vintages. Home wine-making will require–and produce–smaller quantities, so solera processing will probably not be feasible.

Tip

Oak chips and powders are available to give homemade sherries a woody taste. Purchase all supplies and chemicals from wine-making suppliers and follow package instructions for quantities. The first fermentation period goes very fast but slows down as it reaches the finish. If grapes lack enough fructose to reach the required alcohol level, add sugar-water a few cups at a time to give the process a boost. Sherry is served in tall, tapered glasses called copitas. White-wine or champagne flutes are acceptable substitutes.