Home Blog Page 122

Thanksgiving Must: Turn Your Leftovers Into Enchiladas

0

Thanksgiving leftovers are arguably one of the best parts of the holiday, if not better than the actual meal itself. They signify at least a solid week of built-in eats, but let's be real, recreating the typical plate can get a little boring as the days go on. Don't let leftover apathy happen to you! Instead of zapping the same fixings in the microwave until they're all gone, repurpose your leftovers into mouthwatering enchiladas that will bring fresh flavors into the mix. This unexpected — and totally delicious — take on your feast's remainders is a whole new way to combine classics like turkey, potatoes and cranberry sauce with the likes of green onions, sour cream and cheese. Say hello to your new Black Friday tradition.

Thanksgiving leftover enchiladas

Video of the Day

Things You\’ll Need

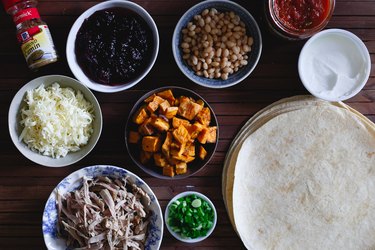
  • 1 1/2 cups leftover shredded turkey

  • 1/2 cup leftover cranberry sauce

  • 15-ounce can beans, drained and strained (black or white beans)

  • 1 cup leftover roasted sweet potatoes

  • 1/2 cup green onions, chopped

  • 1/2 cup salsa

  • 1/2 cup shredded cheese blend (Monterey jack, Colby, Cheddar)

  • 1/2 cup sour cream

  • 1 teaspoon cumin

  • Salt and pepper

  • 6 flour tortillas

Turn Thanksgiving leftovers into a delicious enchilada dinner

Step 1: Combine Ingredients

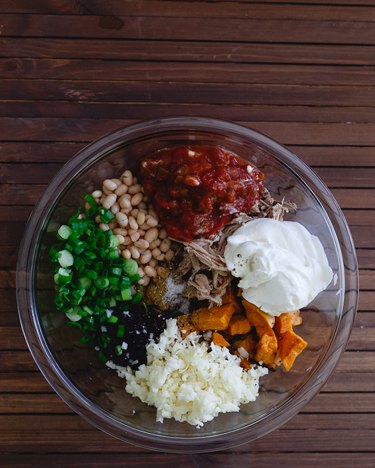
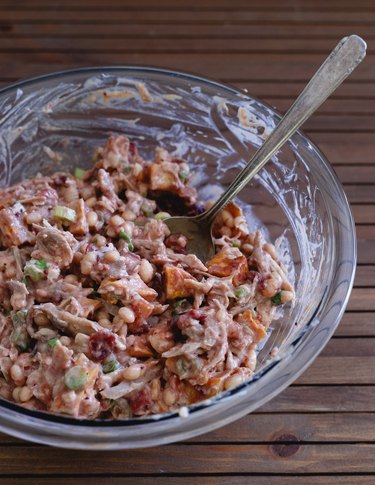
In a large bowl, combine all of the ingredients until they are mixed well.

Take your leftover turkey, sweet potatoes and cranberry sauce from Thanksgiving and make a festive enchilada dinner Leftover Thanksgiving ingredients turn into a fall inspired enchilada dinner

Step 2: Spoon Mixture Into Tortillas

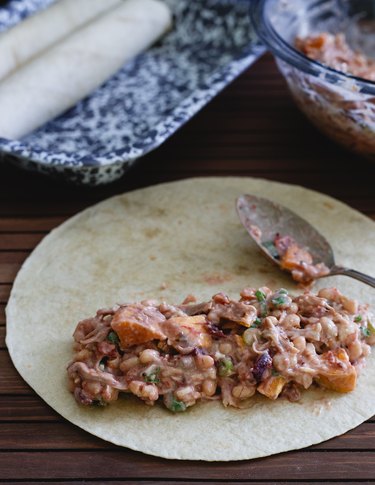
Scoop three tablespoons of the mixture into the tortillas. Wrap them, and then place the tortillas seam-side down in a baking sheet to avoid any leakage. The enchiladas should be closely grouped together in the baking sheet.

Enchiladas made with leftover Thanksgiving ingredients

Step 3: Make Enchilada Sauce

Mix together a 1/2 cup of leftover cranberry sauce, a 1/2 cup of sour cream and a 1/2 cup of salsa in another large bowl until they're well combined. Spoon the enchilada sauce all over the top of the tortillas. Cover the dish with aluminum foil and bake it at 350 degrees Fahrenheit for 35 minutes.

Cranberry salsa sour cream enchilada sauce tops these Thanksgiving leftover enchiladas

Step 4: Spread on More Cheese and Green Onions

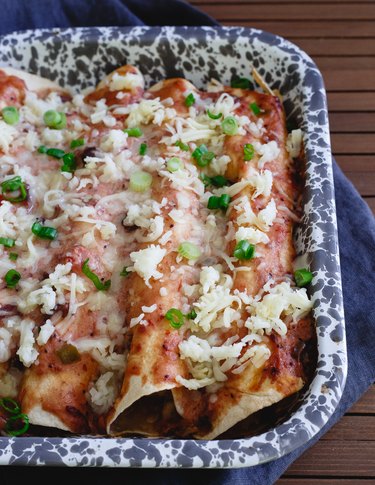
Remove the foil from the pan. Top the enchiladas with a 1/2 cup of more shredded cheese and a sprinkling of additional chopped green onion. Return the baking sheet to the oven, uncovered, for about 5 minutes or until the cheese is melted.

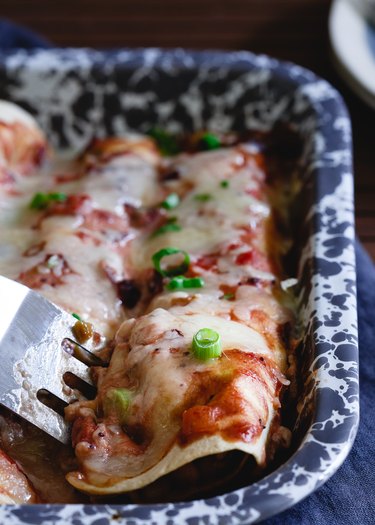
Use up the holiday leftovers in these Thanksgiving enchiladas

Step 5: Remove From the Oven and Serve

Once the cheese has melted, remove the baking sheet from the oven and serve your enchiladas with a dollop of sour cream and a scoop of salsa.

Enchiladas get a festive makeover using leftovers from Thanksgiving dinner

Bourbon Hot Chocolate Recipe

0

It's holiday season and there's a chill in the air… so you know what that means. It's time to break out your cozy socks and start making warm, seasonally inspired drinks. Hot apple cider and spiked eggnog are classics, but when temperatures cool down, there's nothing quite like good old fashioned hot chocolate. You know what makes hot chocolate even better? Booze. While it's obviously an optional ingredient, adding bourbon to hot chocolate truly takes it to the next level. Try this easy version for a cozy treat that will warm you up in no time.

Bourbon Hot Chocolate Recipe | eHow

Video of the Day

Things You\’ll Need

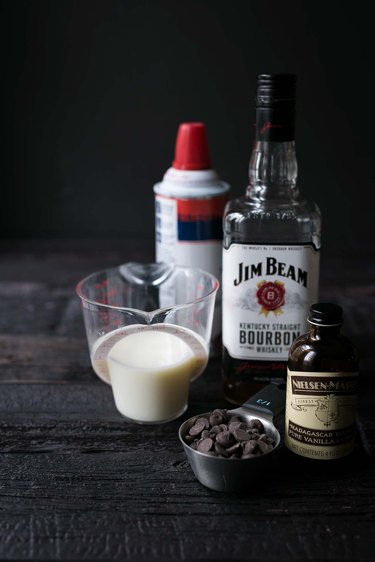
  • 1 cup whole milk (low-fat or nondairy may be substituted)

  • 2 ounces (1/3 cup) bittersweet or semisweet chocolate chips

  • 1/4 teaspoon pure vanilla extract

  • 1 to 2 tablespoons bourbon

  • Optional: whipped cream for serving

Step 1: Gather Your Ingredients

Any milk will technically work in this recipe. Keep in mind that the higher the fat content, the more decadent the results will be. If you're adding whipped cream, a lower fat milk might make the hot chocolate feel less heavy. If you're omitting whipped cream, definitely consider using whole milk. Treat yourself!

You can get creative and use something other than bourbon. Spiced rum and Grand Marnier would be good options. Since the hot chocolate is already sweet, a sweet liqueur such as Irish cream or Kahlua has the potential to be cloying. It can still work, but consider using unsweetened chocolate instead of sweetened, and then adding the liqueur for sugar content.

Bourbon Hot Chocolate Recipe | eHow

Step 2: Heat the Milk

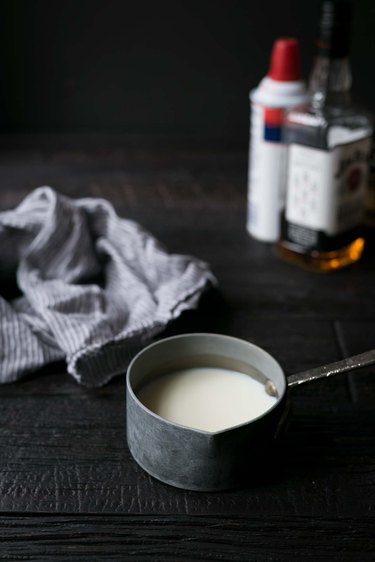
In a small saucepan, heat the milk over medium heat until it's steaming and barely starting to simmer.

Bourbon Hot Chocolate Recipe | eHow

Step 3: Place Chocolate Chips in a Bowl

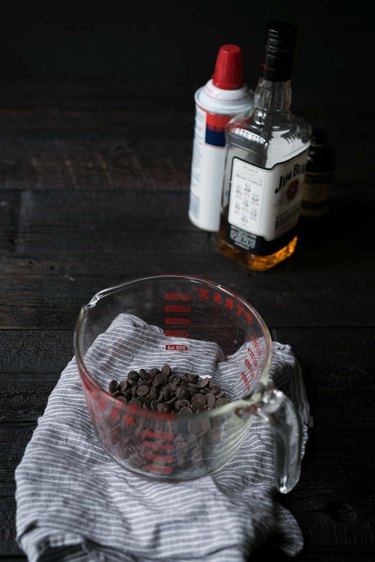
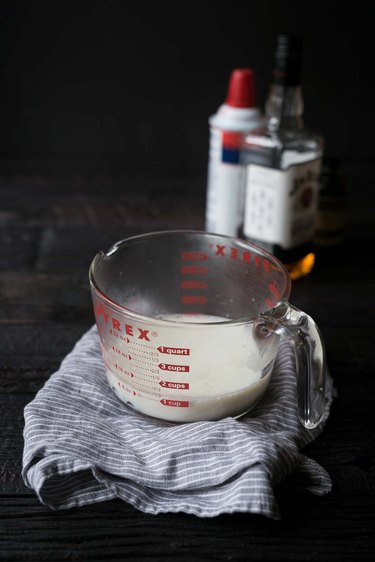
Place the chocolate chips in a liquid measuring cup or bowl, preferably one with a spout.

Bourbon Hot Chocolate Recipe | eHow

Step 4: Pour Hot Milk Over Chocolate

Pour the hot milk over the chocolate chips. Allow it to sit for about 30 seconds to melt the chocolate.

Bourbon Hot Chocolate Recipe | eHow

Step 5: Whisk, Then Add Remaining Ingredients

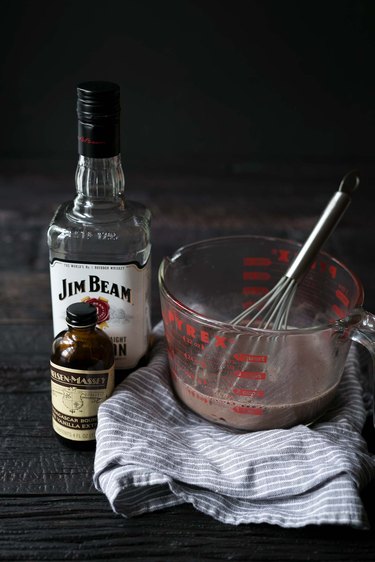
Whisk until the milk and chocolate have incorporated. Whisk in the bourbon and vanilla.

Bourbon Hot Chocolate Recipe | eHow

Step 6: Serve

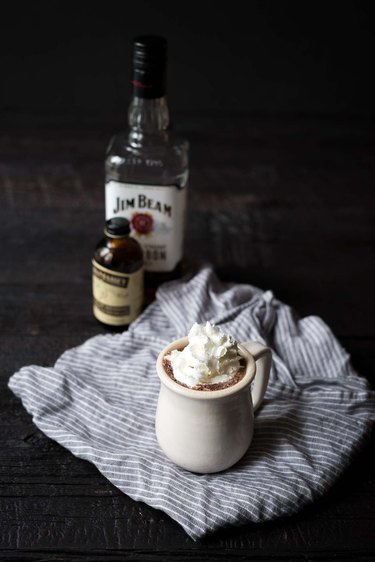
Pour into a mug. (Note: if there are any chocolate lumps, you can pour through a fine mesh strainer). Top with whipped cream, if using. Serve immediately.

Bourbon Hot Chocolate Recipe | eHow

How to Make Chaffles (Low-Carb Cheese & Egg Waffles)

0

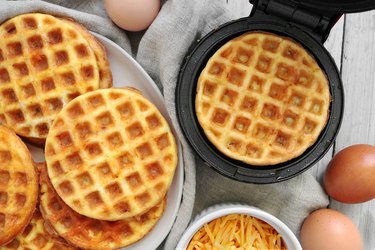
Making homemade waffles doesn't have to be complicated. Thanks to basic ingredients like shredded cheese, eggs and oil, you can make savory waffles in a pinch. The result is a batch of tasty cheese and egg waffles, cleverly known as "chaffles." Something tells us you'll love this unique dish, whether you're cutting back on refined carbs or simply ran out of waffle batter. Here's how to make it yourself.

Low-carb cheese and egg waffles

Video of the Day

Things You\’ll Need

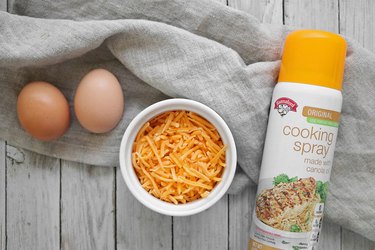
  • 2 eggs

  • 1 cup shredded cheese

  • Cooking oil spray

Ingredients for cheese and egg waffles

Tip

You'll need a mini waffle maker. Alternatively, you can use a waffle maker that makes multiple mini waffles. Avoid using a regular or Belgian waffle maker, as these machines are too thick for chaffles.

Step 1

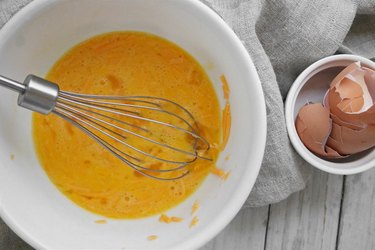
In a bowl, combine the eggs and cheese. Mix well.

Mix eggs and cheese

Step 2

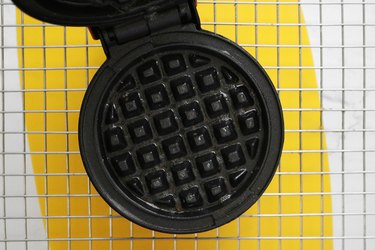
Spray the mini waffle maker with oil.

Spray with oil

Step 3

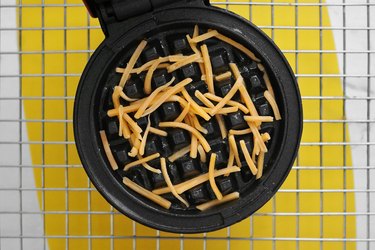
Sprinkle some cheese on the waffle maker and let it melt. This adds an extra layer of crispiness, but it's a completely optional step.

Add cheese to waffle maker

Step 4

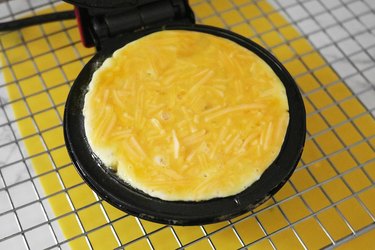
Once the cheese has melted, add just under 1/4 cup of the cheese-egg mixture. Avoid overfilling the waffle maker. In fact, it's best to _under_fill, as the egg will significantly puff up.

Add cheese-egg batter to waffle maker

Tip

When using just under 1/4 cup per waffle, you'll end up with a total of three waffles. This uses all of the batter. However, if you want slightly thicker waffles, you can use a bit more than 1/4 cup for each waffle. While this yields two thicker waffles, keep in mind that you'll have a few tablespoons of batter leftover.

Step 5

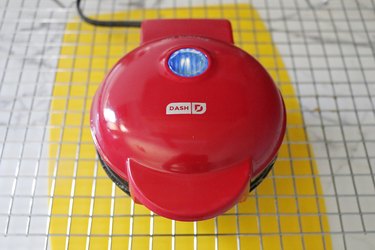
Close the waffle maker. Let cook for 7 minutes or until the steaming stops.

Cook the cheese and egg waffle

Step 6

Carefully open the waffle maker and remove the waffle with a silicone or non-metal spatula, as metal can scratch the waffle maker's surface. Repeat with the rest of the batter.

Cooked cheese and egg waffle

Let cool slightly before serving. Enjoy your cheese and egg waffles with your favorite toppings, like mashed avocado, ground black pepper and feta cheese.

Avocado toast chaffles

You can even make mini "pizzas" with mozzarella cheese, pepperoni and oregano.

Pizza chaffles

Some people use chaffles to make sandwiches. Simply layer your favorite fillings in between two chaffles and dig in! Others like to add dessert-inspired toppings such as berries, nuts, cinnamon or butter. Anything is possible with this unique cheese and egg waffle recipe.

Cheese and egg waffles

Orange Crush Cocktail Recipe

0

Congratulations! You've found your new favorite summer cocktail. It's so easy to throw together and dangerously delicious, so it will be your go-to cocktail all year long. Make it your own with flavored vodka, some frozen fruit or even a fun garnish. It's very agreeable and easy to tweak to your liking.

Orange crush cocktail recipe

Video of the Day

Things You\’ll Need

  • 2 ounces vodka

  • 2 ounces triple sec

  • 1/4 cup orange juice

  • Lemon-flavored sparkling water (to taste)

  • Crushed ice

Ingredients for orange crush cocktail

Step 1: Add Vodka

Add vodka to a shaker that is half filled with ice.

Add vodka

Step 2: Add Triple Sec

Add triple sec

Step 3: Add Orange Juice

Add orange juice

Step 4: Shake

Shake the cocktail until it is well chilled.

Shake the cocktail

Step 5: Strain

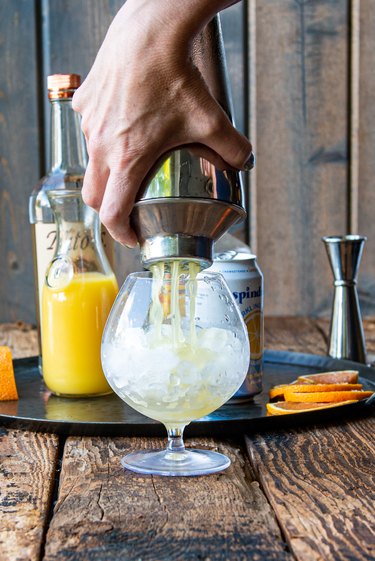
Strain the cocktail into a glass filled with crushed ice.

Strain the cocktail

Step 6: Add Sparkling Water

Add as much lemon-flavored sparkling water as you desire.

Add sparkling water

Step 7: Serve Immediately

Orange crush cocktail

Can Amaretto Replace Orgeat?

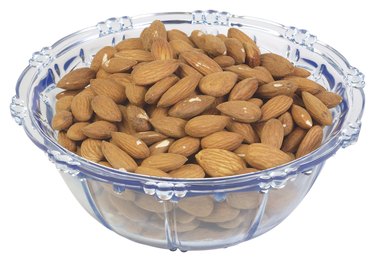
23603192 Both orgeat syrup and amaretto liqueur give drinks and dishes an almond taste without all the crunchiness. Image Credit: Hemera Technologies/PhotoObjects.net/Getty Images

The problem with some specialty cocktails is that they call for special ingredients, which means you have to make a special trip down to the liquor store or market. Orgeat, a nutty floral syrup, works as a sweetener in mixed drinks, primarily of the tropical variety. Substitute amaretto, an almond-flavored liqueur, for orgeat to maintain the same flavor profile while giving the drink a more potent punch.

Video of the Day

Oh, Orgeat

Orgeat, a non-alcoholic syrup, gives cocktails a sweet combination of almonds and floral-infused water. A mixture of almond extract, rose or orange flower water and sugar, orgeat is an important ingredient in the mai tai cocktail, a Polynesian-style rum-based cocktail, which was invented by Californian restaurant Trader Vic's. Orgeat works well in cocktails like the mai tai with sweet liquors like rum and blue Curacao because the syrup adds only a subtle sweetness without overpowering the other flavors.

Amaretto, I Dunno

Amaretto liqueur, a moderately potent, sweet and nutty liquor, mixes well with many other liquors and liqueurs in shots and cocktails. Often enjoyed chilled straight or on the rocks, this Italian alcoholic beverage gets its almond flavor from real almonds or apricot pits, depending on the brand and quality of the liqueur. Not only is the liqueur mixed in different shooters and cocktails, desserts like tiramisu also list it as an ingredient. Due to the high sugar content of the liqueur, the liqueur's texture is thick and slow-pouring.

Make the Switch

Amaretto can sub for orgeat syrup but with a few catches. First, amaretto liqueur costs more than the syrup. Second, amaretto liqueur actually has alcohol in it whereas orgeat does not. Finally, amaretto liqueur has none of the rose or orange flower floral notes. An easy way around these differences is to substitute orgeat with two-thirds amaretto liqueur and one-third flower water; this won't affect the potency of the drink too much because it's like adding a small floater or half-shot to the drink.

Make Your Own

If you have to have orgeat and cannot find it on the shelves anywhere, you can actually make your own with a few different recipes. The simplest recipe calls for only four ingredients: almond milk, almond extract, sugar and orange blossom or rose water. Another recipe calls for a mixture of already-made syrups — vanilla, cream and simple syrups — mixed with a few drops of bitter almond oil. One final recipe calls for a little elbow grease — crush sweet and bitter almonds with a mortar and pestle, then mix with water, sugar and orange flower water.

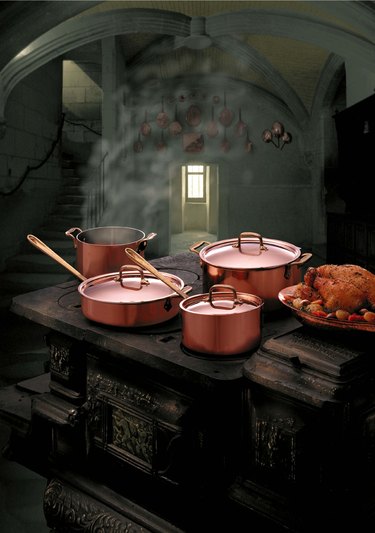
Can I Cook Tomato Sauce in Copper Pots?

0

Copper Pots in Kitchen Copper was one of the first metals used in making cookware. Image Credit: Jupiterimages/Stockbyte/Getty Images

Relied on for their beauty and durability, copper pots have the ability to conduct heat evenly, which makes them a smart choice. Acidic ingredients, such as tomato sauce and lemon juice, can react with the copper, even without heat, causing the metal to dissolve and discolor the food. To avoid the intestinal discomfort this causes, choose only copper pots that have been lined with another metal when cooking acidic foods like tomato sauce.

Video of the Day

Choosing the Perfect Pot

Most copper pots are lined with either tin or stainless steel. Both metals have their pros and cons. Tin is more economical and quickly conducts heat; its downside is that it wears down quicker than stainless steel — usually in about 15 years — exposing acidic foods, such as tomatoes, to the copper underneath. Some manufacturers of copper cookware re-line worn copper pots, while other companies offer innovative cookware made with a combination of copper and stainless steel because the steel matches copper's durability.

Understanding Copper Cookware

Your cookware might be made with copper even if you can't see its telltale coloring. Copper is often sandwiched between other metals and used as a core because of its ability to conduct heat. The other metal — usually stainless steel — provides a safe cooking interior, and also covers the outside of the pot, preventing it from tarnishing. Stainless steel doesn't wear down or melt under high heat like tin does, so you are assured of the pot's safety when cooking acidic ingredients such as tomatoes. High-end copper cookware designed for professional chefs is lined with silver for cooking temperature-sensitive desserts, such as Italian custards and pastries.

Uses for Unlined Copper Pots

Unlined copper pots are beautiful to look at and work perfectly for whipping up non-acidic confections such as cream and egg whites when making airy treats. These unlined bowls are prized by pastry chefs for their ability to keep cold ingredients cold; in candy making, unlined copper kettles are used for their superb temperature control and ability to conduct heat evenly. When polished, unlined copper cookware also makes for stunning decoration when hung on your kitchen wall.

Tarnished Pot Safety

Copper oxidizes over time, causing it to develop a greenish color known as patina. Although the discoloration may not look attractive, it will not affect your food. When cooking tomato sauce in a tarnished copper pot, look first at the condition of the lining inside the pot. This will tell you whether or not the pot is suitable for cooking acidic ingredients. Older pots lined with tin may not be safe for cooking tomato sauce.

10 Common Baking Mistakes and How to Avoid Them

0

The smell of something warm and fresh-baked is wonderfully alluring, which is why a lot of supermarkets put their in-store bakery near the entrance. Capturing that comforting aroma at home (not to mention eating the baked goods themselves) is one of the real pleasures of learning to bake. Unfortunately, the path to expertise in baking is not a smooth one, and it's littered with trial and error and a lot of common mistakes. Learning about those mistakes and how to avoid them can help you in your quest to be a better baker.

Homemade freshly baked oatmeal cookies in kid`s hands

Video of the Day

1. Trusting Your Oven's Thermostat

When you set your oven to 350 degrees Fahrenheit, do you know what temperature it actually reaches? In real-life testing, they can vary by as much as 50 degrees from the temperature you've set. That's important because even a relatively modest 10 to 15 degrees can change how your baked goods turn out. You can adjust your times and temperatures through trial and error, but it's much better to check the real temperature with an inexpensive oven thermometer. Once you know the setting you need to get a ​real​ 350 or 375 degrees, you can bake with confidence.

Closeup of modern oven with baking temperature The temperature you select isn\’t always the temperature you get. Image Credit: domin_domin/E+/GettyImages

2. Not Knowing the Hot Spots

Another important thing to know is that your oven doesn't heat evenly, which can cause cake or bread to bake inconsistently. It helps a lot to know where your oven's hot and cold spots are located. To find out, choose a baking sheet (or sheets) to cover most of your oven rack and fill them with either sliced white bread or a thin layer of breadcrumbs. Bake for a few minutes at 350 degrees Fahrenheit with the light on and watch where they brown and where they stay pale. That's a map to your oven's hot and cold spots. When you're baking something small, you can avoid the cold spots. Otherwise, your best bet is to rotate the pans midway through baking so each side gets equal exposure to the heat.
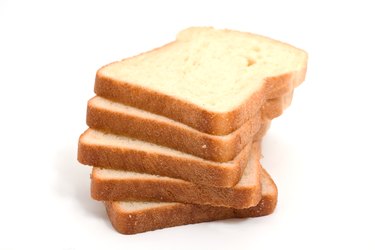
Stack of bread slices Fill your oven with sliced white bread to check for hot spots. Image Credit: Ursula Alter/Stockbyte/GettyImages

3. Peeking too Often

This is closely related to the other issues regarding the heat of your oven. You can monitor its real temperature with a thermometer (or even have it professionally calibrated) and know where the hot spots are and still have issues with time and temperature if you can't resist opening the oven for a peek.

Every time you open the oven door, you're dropping its working temperature by 25 to 50 degrees. You'll slow the baking, and since your oven has to work overtime to bring the heat back up – and most ovens rely on the bottom element for that – you run the risk of your baked goods being too light on the bottom and too dark on the top. Most ovens have a light and a window, so use them if so. If you don't, make a note of the recipe's baking time and start checking just a minute or two before it's supposed to be done.
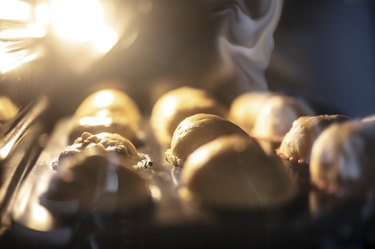
Muffins baking inside oven Peek through the window rather than opening your oven. Image Credit: mikroman6/Moment/GettyImages

4. Scooping Your Flour

A cup of milk or white sugar is always the same amount, but a cup of flour is not. Flour packs tightly when you scoop it, so depending on how heavy your hand is, that one level cup can vary by 20 percent or more. If your friend's cake is light and fluffy and yours from the same recipe is a brick, that's usually why. Instead of scooping flour from the bag or container, spoon it into your measuring cup and then swipe the top with a knife to level it. That's how recipe testers do it, and it gives a more consistent result. Better yet, do what the pros do: Buy a kitchen scale and use recipes that measure by weight rather than cups. A pound is always a pound.
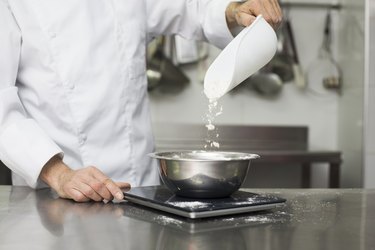
Chef measuring flour on scale For really consistent results, use a scale like the pros do. Image Credit: Cavan Images/Cavan/GettyImages

5. Overmixing Your Doughs and Batters

Do you find that your cakes and muffins are tough and leathery or that your biscuits and pie crusts could be used to shingle a roof? You're probably overmixing your doughs and batters. Many recipes say to stir or fold "until just combined" or "until just mixed," and this is why. The more you mix, the more chewy gluten develops in your dough. That's great for bread but not for delicate baked goods. Learn to mix gently and remember that you don't need to make every trace of dry flour disappear (it will bake out). If you ​really​ struggle with this, stack the deck in your favor and use lower-gluten cake or pastry flour. That helps.
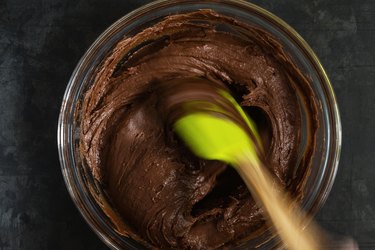
Mixing chocolate batter in bowl Overmixing produces tough, chewy baked goods. Image Credit: istetiana/Moment/GettyImages

6. Substituting Baking Soda and Powder

Sometimes, you won't have the leavening for which your recipe calls, and it's certainly possible to substitute. The only issue is that baking soda and baking powder aren't direct equivalents, so the substitution can mess up your baking. Baking soda needs acidity in the batter to make it react. If you replace it with baking powder, that acidity will give you pale baked goods that may taste oddly tangy. If you do the opposite, the baking soda won't give you enough rise and may leave a soapy, chemical taste behind. You can substitute successfully by adding or removing acidic ingredients (like buttermilk in place of regular milk) or just using a recipe that calls for the leavening you have.
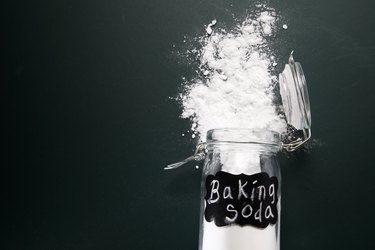
Baking soda spilled on table Baking soda doesn\’t work without an acidic ingredient in your batter. Image Credit: Eskay Lim / EyeEm/EyeEm/GettyImages

7. Messing Up the Egg Whites

A lot of recipes, like sponge cakes and meringues, call for beaten egg whites to give them a large part of their lightness and delicacy. Those recipes are often considered challenging by beginners because there are so many ways for the egg whites to lose their volume.

First, your bowl and utensils must be scrupulously clean, as any fat will prevent your whites from reaching their potential height. You'll also need to separate them carefully because even a smidge of yolk will do the same. Third, the whites should be room temperature to whip to their potential. Also, you need to stop when they form peaks because if you overwhip, they'll start to break down. Finally, you'll need to be gentle when folding your dry ingredients into the whites (or your whites into the wet ingredients). It just takes practice, and eggs are cheap, so practice a lot.
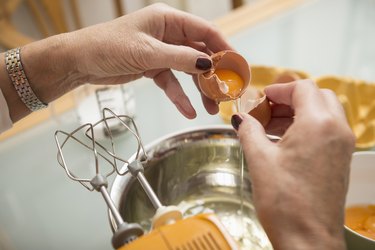
Woman dividing egg white and egg yolk Even a little bit of yolk can keep your egg whites from getting as fluffy as they should. Image Credit: Dreet Production/Alloy/GettyImages

8. Seizing Your Chocolate

Chocolate is one of the most wonderful and versatile baking ingredients, but it's also one of the most finicky. If one of your favorite recipes involves melting real chocolate, you may have seen it go from smooth and silky to grainy and solid in seconds. That's called ​seizing​, and it happens when water or other liquids get into your bowl. If you're melting over a double boiler, steam or condensation can do that, and so can a drop of water from your spoon, your whisk or your own freshly washed hand. In the microwave, it's usually because your bowl or measuring cup wasn't completely dry. Once the chocolate seizes, it usually can't be used in that recipe, but you can still dissolve it in water or milk to make really good hot chocolate.
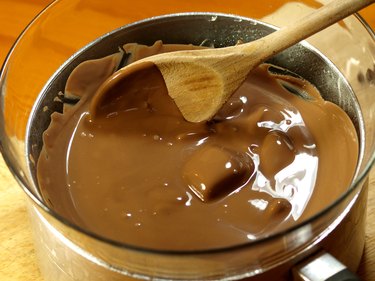
Melting chocolate Even a drop of water will take your chocolate from silky and luscious to solid and grainy. Image Credit: Nik Taylor/Moment/GettyImages

9. Substituting (or Reducing) the Sugar

If you love your baked goods but don't want to eat too much sugar, there's an obvious temptation to reduce the amount of it in your baked goods. You can indeed cut down the sugar in many recipes (cakes, cookies and the like) but only by 10 to 20 percent. Sugar actually plays a significant role in the chemistry of baked goods, and creaming fat and sugar together helps lighten and leaven your baked goods. Cut back too far – or substitute with low-calorie sweetener – and your baked goods will resemble bricks. Some low-calorie sweeteners are blended with sugar or calorie-free sugar alcohols and are intended (and labeled) as one-to-one substitutes for baking. Those will work, but the tiny pouches you empty into your coffee will not.
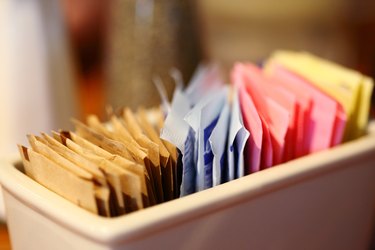
Sugar and sweetener packets in container Most sweeteners work in coffee but not in baked goods. Image Credit: Sharon Pruitt / EyeEm/EyeEm/GettyImages

10. Overbaking and Underbaking

Your cookies were hard as rocks, not soft and chewy. Your cake looked beautiful when you took it out but collapsed in the middle as it cooled. These are the results of overbaking and underbaking, and it's maddening to be ​thaaaat​ close and still have things go wrong. Many of the other tips given here – not peeking, knowing your oven's real temperature – will help a lot. Setting a timer will help as well so that simple distraction (stop scrolling!) doesn't lead you to overbaking.

Underbaking is harder to spot, especially since some cakes or muffins will pass the toothpick test but still not be quite ready. Tapping the center of the cake gently with a fingertip will sometimes tell you if it needs a few more minutes. Conversely, when it starts to draw away from the edges of the pan, it's probably ready. Experience matters, so learn from your mistakes (and write them down).

Overbaked Christmas cookies It doesn\’t take long for cookies to become overbaked. Image Credit: Jennifer A Smith/Moment/GettyImages

How to Make Beer Salt

Things You\’ll Need

  • Popcorn salt

  • Measuring cup

  • Packets of powdered lime

  • Resealable bag

  • Airtight plastic container

...

In the world of alcoholic drinks, many drinks have their own little rituals attached. When it comes to certain beers created south of the border, it's traditional to add a wedge of lime and some salt to the drink. While this may add to the flavor of the beer, it's far from convenient to track down fresh limes, sharp knives and a cutting board on a weekend night. You can buy beer salt with lime flavoring, but it's difficult to find in some parts of the country, and quite expensive for just salt and lime flavoring. Make your own container of beer salt to save money while improving the taste of your beer.
Video of the Day

Step 1

...

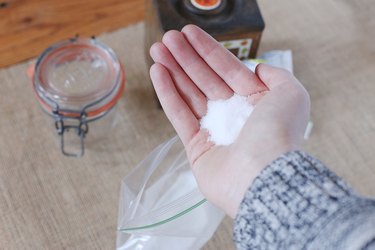
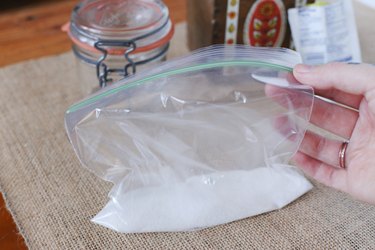
Measure a little less than a handful of popcorn salt, which is finely ground salt, into a resealable bag. Empty four packets of powdered lime into the bag.

Step 2

...

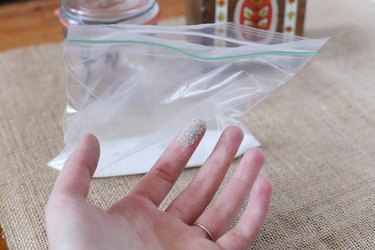
Close and shake the bag vigorously to mix together the salt and lime powder.

Step 3

...

Taste a bit of the lime salt to see if the flavor is to your liking. If you prefer a stronger citrus flavor, add more packets of powdered lime, one at a time, tasting between each addition until you get the flavor you like.

Step 4

...

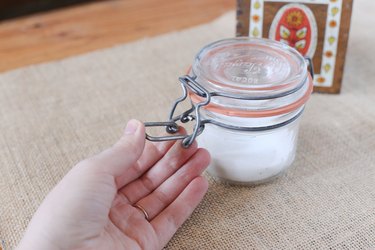
Pour the salt and powdered lime mixture into an airtight container. Add a pinch of the mixture to the neck of a beer bottle right after it's opened.

Tip

Keep the container tightly closed when you're not using the beer salt.

Experiment with a mixture of powdered lemon and lime for a slightly different flavor.

Use this salt as a rimming salt for margaritas, too.

Sheet Pan Dinner: Honey Mustard Chicken with Broccoli, Potatoes and Red Onions

0

Full of juicy chicken and wholesome roasted vegetables, all swimming in a sweet and tangy sauce, this sheet pan dinner is about to become a new family favorite. The prep comes together in minutes, with only one pan to clean in the end. Just chop, roast and enjoy!

honey mustard chicken with vegetables

Video of the Day

Things You\’ll Need

  • 2 pounds golden potatoes

  • 1 pound broccoli

  • 1 1/2 pounds boneless, skinless chicken thighs

  • 1 red onion

  • 1/4 cup olive oil

  • 1/3 cup honey

  • 1/3 cup Dijon mustard

  • 1 teaspoon salt

  • 1 teaspoon garlic powder

  • 1/2 teaspoon pepper

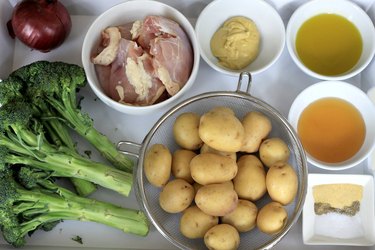
ingredients for honey mustard sheet pan chicken

Tip

Frozen broccoli can be a time saver. Just use a bag of frozen florets in place of fresh broccoli. No need to thaw, just put the frozen broccoli pieces right on the pan and let the oven do its work.

Step 1: Chop the Vegetables

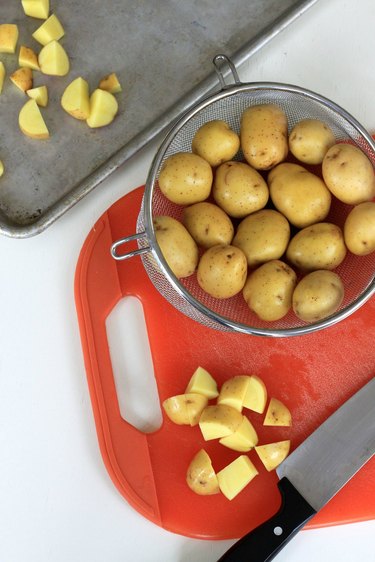
Chop the potatoes into 1-inch pieces. This is important because if they're too big, they won't be finished cooking with the rest of the dish.

Slice your broccoli into small florets and slice the onion into thin slivers.

chopping potatoes

Tip

Yellow or red potatoes work perfectly because you don't need to peel their tender skins.

Step 2: Place Vegetables on a Pan

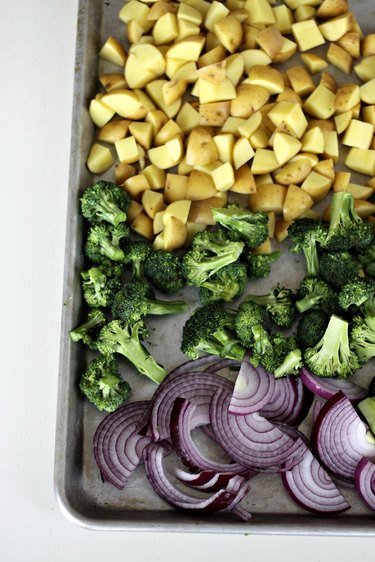
Arrange all of the vegetables on your sheet pan.

sliced vegetables

Step 3: Prepare the Honey Mustard Sauce

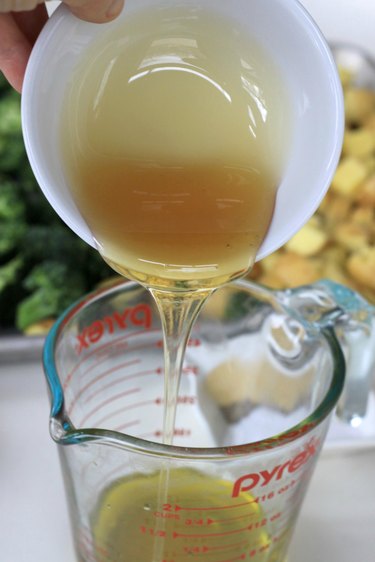
Combine the olive oil, honey, mustard and spices into a bowl, stirring until incorporated.

honey into bowl

Step 4: Add Chicken

Place the chicken thighs on the pan with your vegetables and pour honey mustard sauce over everything. Use your hands to coat each piece before spreading into an even layer.

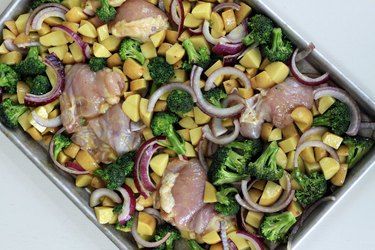
raw chicken and veggies

Step 5: Roast

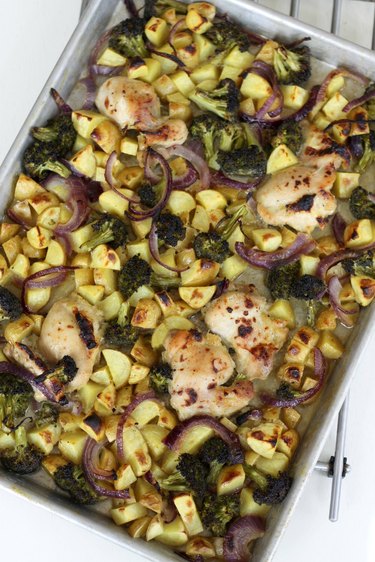
Put the whole pan in the oven for 30 minutes at 400 degrees Fahrenheit. When it's done, you have the option to add extra caramelization. Just move the pan under the broiler and turn it on high for 2 to 3 minutes. Serve immediately, being sure to scoop up the extra sauce, ladling it on to every portion.

honey mustard chicken sheet pan

How to Use a Microwave Coffee Brewer

0

Things You\’ll Need

  • Water

  • Coffee grounds

Coffee is a crucial part of many people's daily routine. There are many ways to make a quick cup of coffee, such as instant coffee or a single brewing countertop machine. A newer way to brew a fast cup of coffee is with a microwave coffee brewer. The ability to brew coffee in a microwave allows people to brew their own coffee virtually anywhere there's a microwave, such as work, waiting in the hospital or at home.

Step 1

Unscrew the two parts of the body of the microwave coffee brewer. Fill the bottom portion with cool water to the fill line. Use filtered water for best tasting results.

Video of the Day

Step 2

Grind your own coffee for the best tasting results. Grind the beans on a coarse setting–the setting used for a drip coffee maker. Place two scoops (2 tbsp.) of your ground coffee in the bottom portion of the coffee maker with the water.

Step 3

Screw the top back on and place the coffee maker in the microwave. Cook on high for two minutes and then check the progress. Every microwave is different, so your microwave may need more or less time. The coffee is done when it has filled the top portion of the coffee maker.

Step 4

Pour the brewed coffee into serving cups and clean the coffee maker. Unscrew the unit, top from bottom. Dump the used coffee grounds in the trash and rinse the maker with soap and water. Allow to air dry until the next use.