Home Blog Page 121

How to Make Dalgona Whipped Coffee

0

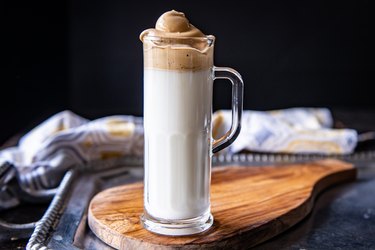
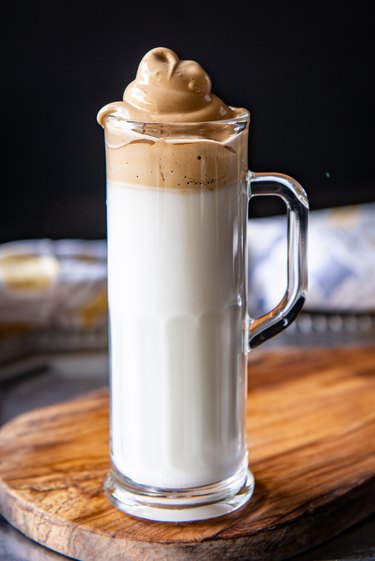
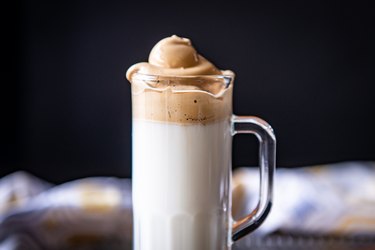
If you haven't tried to whip coffee, now is the perfect time to do so! It's incredibly simple, and takes just a few minutes to enjoy this gorgeous, frothy, whipped coffee as your afternoon pick-me-up! It's easy to tailor to your needs — any milk works, and you can adjust the amount of sugar to your own taste.

How to Make Dalgona Coffee

Video of the Day

Things You\’ll Need

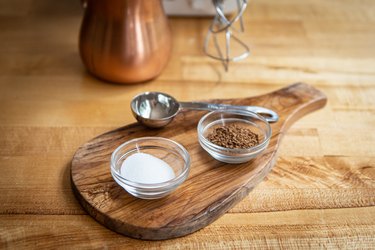
  • 1 tablespoon instant coffee

  • 1 tablespoon sugar

  • 1 tablespoon boiling water

  • milk of any kind

How to Make Dalgona Coffee

Step 1

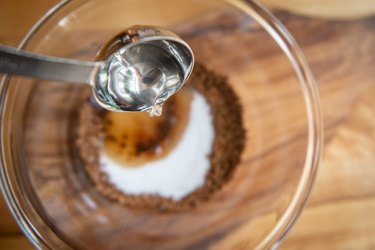
Add the instant coffee, sugar, and hot water to a small bowl and combine.

How to Make Dalgona Coffee

Step 2

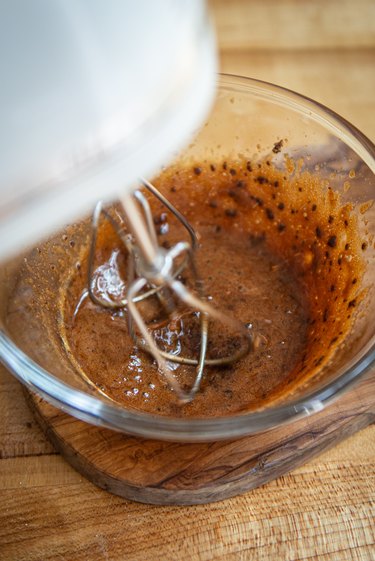
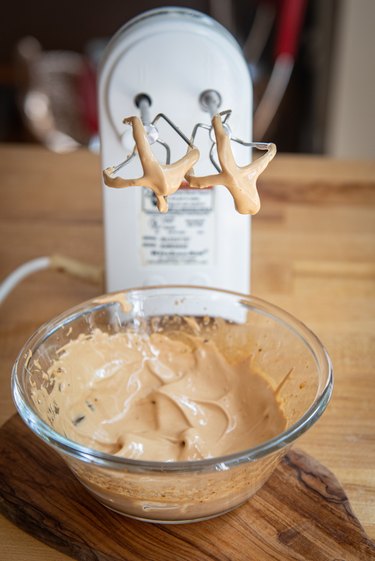
Whip with a hand mixer on high speed. It may take several minutes, but continue to whip until the mixture is light brown and soft peaks form. It's impossible to over-mix so if you think it's not done, just keep going!

How to Make Dalgona Coffee How to Make Dalgona Coffee

Step 3

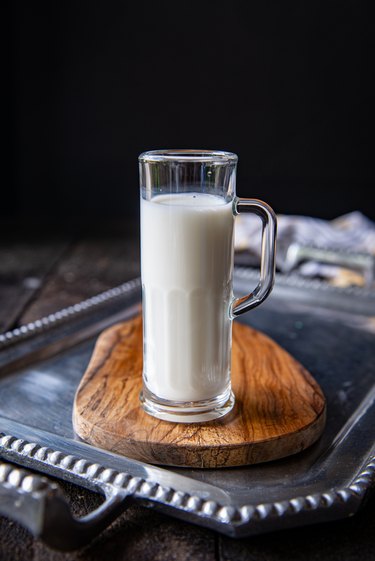
Pour the milk into a serving glass. Any milk, cold or hot, will work.

How to Make Dalgona Coffee

Step 4

Top with whipped coffee and serve immediately. Enjoy!

How to Make Dalgona Coffee How to Make Dalgona Coffee How to Make Dalgona Coffee

How to Bake Acorn Squash

0

Roasted acorn squash is a comforting yet healthy dish that can be prepared during the fall and winter months. Rather than loading up carbs found in bread or pasta, you can enjoy hearty winter squash as a low-carb, vitamin-packed nutritious option. Plus, you can roast the seeds just like pumpkin seeds for a healthful snack. Roasting acorn squash is easy and there are plenty of ways you can serve it to keep the flavors fun and interesting. Stay tuned at the end of the article for serving suggestions.
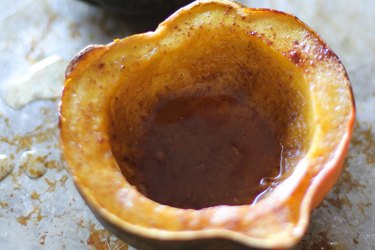
Acorn squash with honey in the center How to bake acorn squash Image Credit: Julia Mueller

Video of the Day
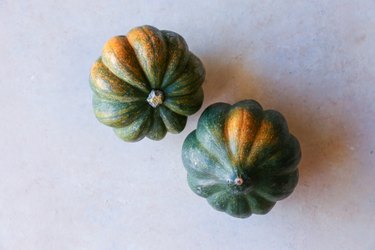
two acorn squash acorn squash Image Credit: Julia Mueller

Things You\’ll Need

  • 1 acorn squash

  • 2 tablespoons olive oil

  • Sea salt

  • Seasoning such as ground cinnamon, cumin, or chili powder

  • Pure maple syrup, honey, or brown sugar for serving

Step 1: Trim the Acorn Squash

Preheat the oven to 375 degrees Fahrenheit. Place acorn squash on a sturdy surface and turn it sideways. Use a sharp knife to cut the tip off.
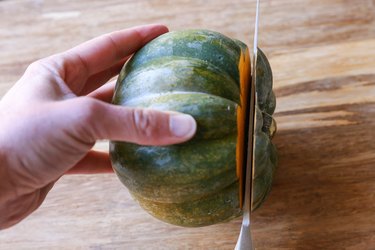
Removing the top of an acorn squash with a knife Cut off the tip Image Credit: Julia Mueller

Similarly, cut off the bottom of the acorn squash, then stand it upright.
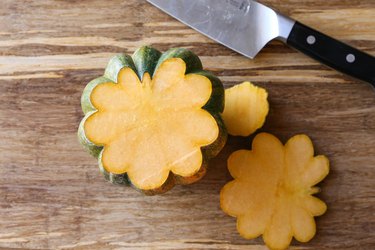
Acorn squash on a cutting board without tip or tail Remove the tail of the acorn squash Image Credit: Julia Mueller

Step 2: Cut Acorn Squash in Half

Cut the acorn squash in half vertically, using gravity as your friend to help cut through the tough flesh.
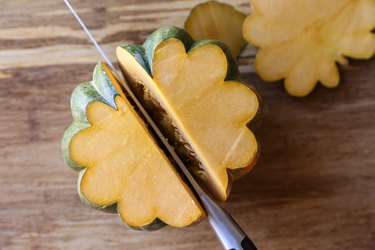
Acorn squash being cut in half Cut squash in half Image Credit: Julia Mueller

Once open, you'll notice the squash has a webbing of seeds, just like a pumpkin!
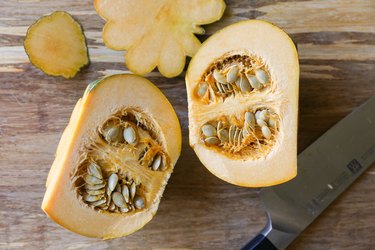
two halves of acorn squash Check out the seeds! Image Credit: Julia Mueller

Step 3: Scoop Out the Innards

Using a sturdy metal spoon, scrap the innards and seeds out of each half of the squash. You can save the seeds and roast them later.
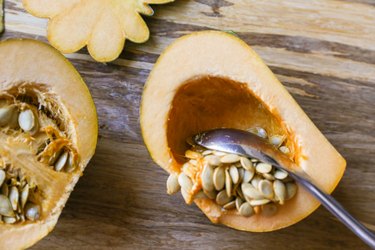
Seeds being scooped out of acorn squash Scoop out the seeds Image Credit: Julia Mueller

Tip

To roast the seeds, remove the webbing around the seeds by washing them well, then pat them dry. Coat the seeds in olive oil, sprinkle with salt, cinnamon, chili powder, or seasoning of choice, and roast at 275 degrees Fahrenheit for 15 minutes.

Step 4: Coat Flesh with Olive Oil

Drizzle olive oil into the bowl of each acorn squash half (about 1 tablespoon per half).
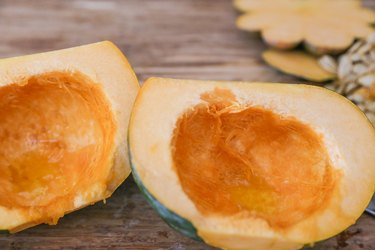
acorn squash with olive oil inside Drizzle with olive oil Image Credit: Julia Mueller

Use your hands to coat the full surface of the flesh with oil.
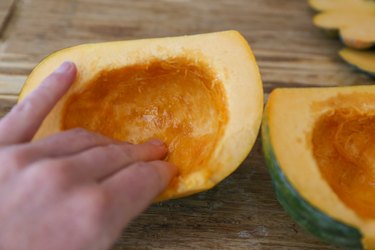
olive oil being rubbed into acorn squash Rub olive oil over all the flesh Image Credit: Julia Mueller

Step 5: Season the Acorn Squash

Sprinkle sea salt, pepper, and choice of seasonings over the flesh of each half. You can use ground cinnamon, nutmeg, cardamom, ground cumin, chili powder, all season spice, and so forth.
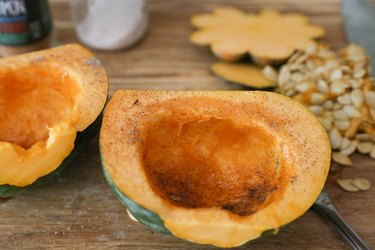
Acorn squash sprinkled with cinnamon and cardamom Season with salt and cinnamon Image Credit: Julia Mueller

Step 6: Bake the Squash

Place each half of acorn squash cut-side down on a baking sheet. Bake for 30 to 40 minutes, or until the acorn squash is tender when poked with a fork, and has reached desired done-ness.
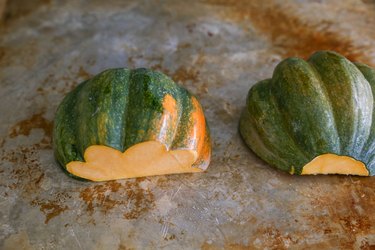
acorn squash face-down on a baking sheet Roast face-down Image Credit: Julia Mueller

Step 7: Serve!

Remove squash from the oven and carefully turn it right-side up. If necessary, use a spatula to get between the squash and the baking sheet. It's ready to go!
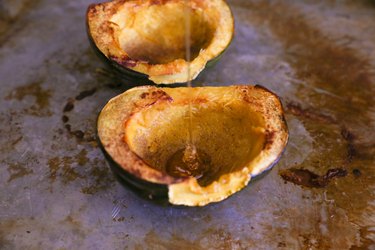
acorn squash with honey drizzled inside Drizzle with honey Image Credit: Julia Mueller

Tip

Want it to taste sweet? Add butter, honey, brown sugar, or pure maple syrup to the acorn squash bowls if desired. Serve piping hot fresh out of the oven with a sprinkle of salt and/or ground cinnamon.
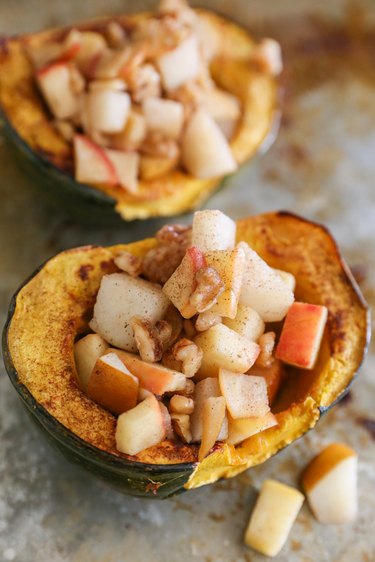
acorn squash stuffed with apples, pears, and walnuts acorn squash stuffed with apples, pears, and walnuts Image Credit: Julia Mueller

Serving Suggestions

  • Use any of your favorite seasonings – ground cinnamon and a pinch of cardamom go with acorn squash deliciously, although you can take a savory approach as well by using a spice blend such as chili powder, Garam Masala, Cajun Seasoning, etc.
  • Place a pad of butter (about 1 to 2 tablespoons) in the center of each squash and allow it to melt.
  • Add 1 to 2 tablespoons of honey, pure maple syrup, or brown sugar to the center of each squash.
  • Create your own homemade sauce to drizzle on top of the squash. See this Roasted Acorn Squash with Bourbon Butter and Honey for example
  • Make acorn squash an entree by stuffing the squash with brown rice or quinoa, along with dried cranberries, pecans, feta cheese, apple, and/or sausage. See this Stuffed Acorn Squash with Quinoa Pears and Pecans for example.
How Many Beers Come in a Keg?

Buying a keg of beer is great for a party and much more economical than buying beers in bottles or cans. We all know that a keg holds a lot of beer, but exactly how much? The answer varies depending on where you live.

What Is a Keg?

A keg is a cylindrical container similar to a barrel usually made of aluminum. Keg sizes are not standardized and can vary between countries and breweries.

Video of the Day

U.S. Full Kegs

In the United States a full keg is also referred to as a half-barrel. A full keg contains 15.5 U.S. gallons of beer, the equivalent of 165 twelve ounce beers or 124 U.S. pints.

Other U.S. Keg Sizes

In addition to the full keg, you can also find smaller variations such as pony kegs and mini kegs. A pony keg contains 7.75 U.S. gallons or 82 twelve ounce beers. A mini keg, which is much smaller, contains 1.32 U.S. gallons or 14 twelve ounce beers.

European Keg Sizes

A European keg is typically 50 liters or 13.21 U.S. gallons which is the equivalent of 100 half liter servings. In Germany there are also 30 and 20 liter kegs.

Fun Fact

A U.S. full keg weighs about 160 pounds. So be careful before you try to lift it by yourself!

Recipe for Strawberry Daiquiri Cocktail

0

Strawberry daiquiris are a perfect, easy rum cocktail for summer. The ingredients list is short and readily available. Between the sweetness of the seasonal berries, the tart freshness of the lime, the lightness of the white rum, and the frosty chill of the ice, there's truly no better cocktail for a hot day. You don't need any fancy bar tools, just a blender! And you most certainly don't need a mix. If your strawberries are very sweet, you'll barely need much sugar, either. Ready to get started? Let's drink!

Recipe for Strawberry Daiquiri Cocktail | eHow

Video of the Day

Things You\’ll Need

  • 1 1/2 cups fresh strawberries

  • 2 tablespoons lime juice, freshly squeezed (1 to 2 limes, plus more for garnish)

  • 1/2 cup white rum

  • 2 to 4 tablespoons granulated sugar (to taste, depends on sweetness of strawberries)

  • Ice

Step 1: Gather Your Ingredients

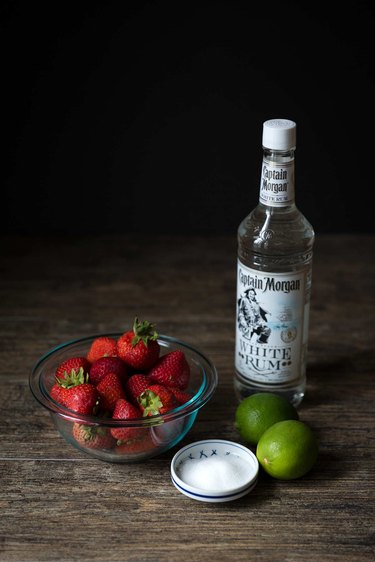
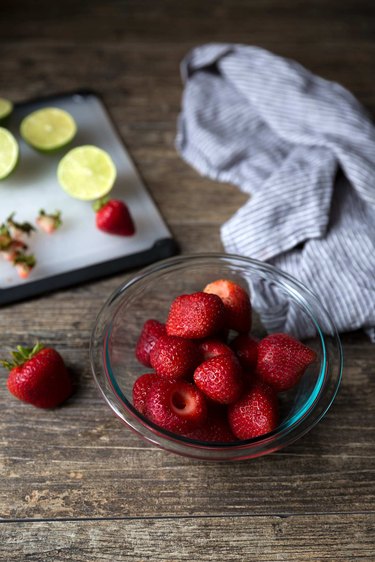
While it's not at all a requirement, it's great to use local strawberries if you can find them simply because they are often extremely sweet. You might need little to no granulated sugar if the berries are sweet enough on their own! White rum is the traditional choice here, but you could also experiment with spiced rum if you have some on hand.

Recipe for Strawberry Daiquiri Cocktail | eHow

Tip

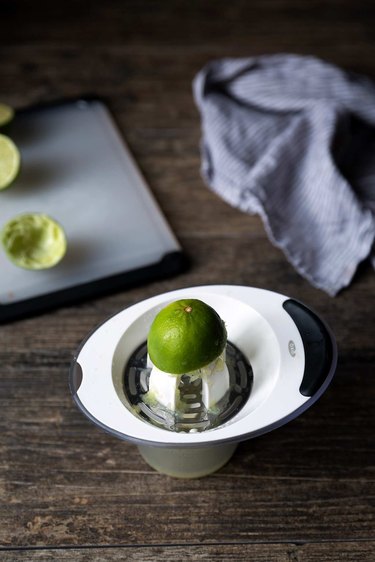
Use fresh limes with this recipe as opposed to bottled juice. Limes vary in size and juiciness, so it can take anywhere from 1 to 2 limes to get 2 tablespoons of juice. Using a citrus juicer will give you a better yield.

Recipe for Strawberry Daiquiri Cocktail | eHow

Step 2: Wash and Hull Strawberries

You don't need to chop the strawberries as they'll be going into the blender.

Recipe for Strawberry Daiquiri Cocktail | eHow

Step 3: Puree Ingredients

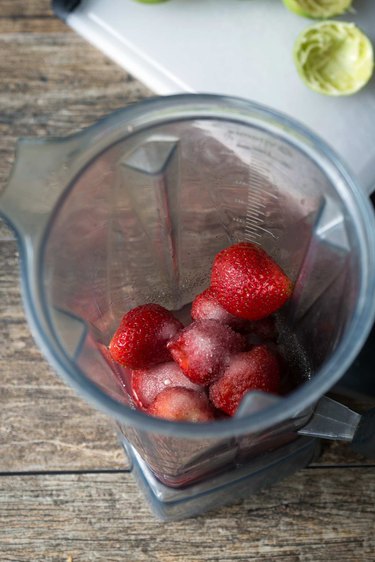
Add the strawberries, rum, lime juice, sugar, and approximately 1 cup of ice to the blender and puree until smooth. Start with less sugar and add more if needed. The same goes with the ice.

Recipe for Strawberry Daiquiri Cocktail | eHow

Step 4: Serve Immediately

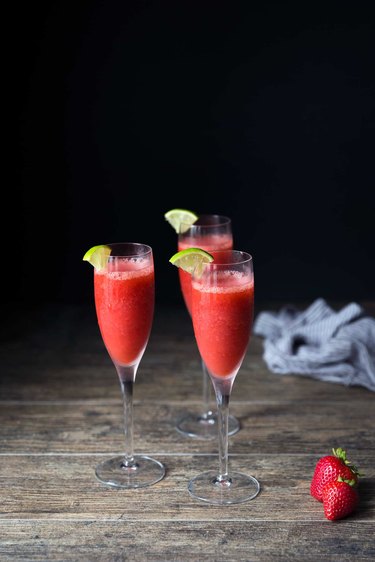
Pour into serving glasses. Garnish with a small wedge of lime. Yields approximately 4 servings.

Recipe for Strawberry Daiquiri Cocktail | eHow

Instant Pot Recipe: Baby Back Ribs

0

Sometimes you simply need to sink your teeth into a rack of tender, juicy baby back ribs. But what happens when you don't have the time to make them in a smoker, or roast them in the oven? You make them in the Instant Pot! This baby back rib recipe can be made, start to finish, in 45 minutes. Grab the recipe below.

instant pot baby back ribs

Video of the Day

Things You\’ll Need

  • 1 rack pork ribs

  • 2 tablespoons olive oil

  • 1/2 cup rib rub

  • 2 tablespoons butter, softened

  • 1/4 cup brown sugar

  • 1/2 cup honey

  • 1/2 cup apple juice

  • 1/2 cup chicken broth

  • 1-2 cups BBQ sauce

  • Instant Pot pressure cooker

  • Baking sheet

  • Foil or baking mat

Step 1: Prepare Ribs

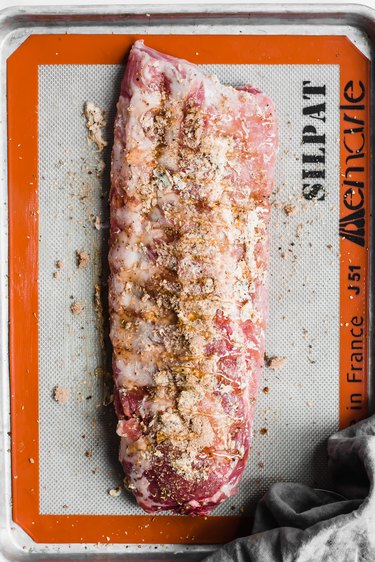
Apply olive oil to both sides. Generously coat bottom, top, and sides of ribs with rub, working the rub into the meat with your hands. Rub on butter, brown sugar, and honey to both sides.

Tip

Applying the rub the night before gives the ribs a deeper flavor. To do this, follow step one and wrap tightly in plastic wrap. Refrigerate until ready to cook.

prepare ribs

Step 2: Cook Ribs In Instant Pot

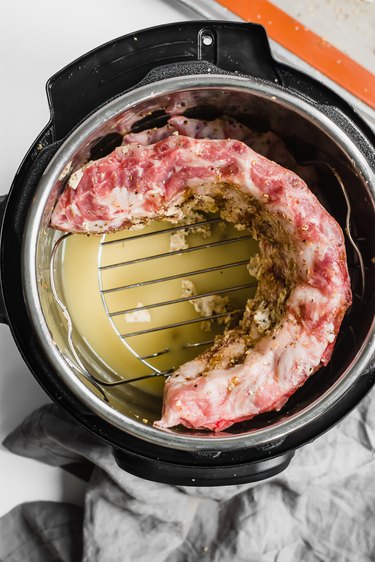
Pour broth and apple juice into the pot. Add steam rack. Place on rack so they are sitting on their side and curved along the inside of the pot. Lock the lid, seal the valve, and cook on manual high pressure for 25 minutes. Let natural release for 10 minutes.

cook ribs in instant pot

Step 3: Add BBQ Sauce & Broil

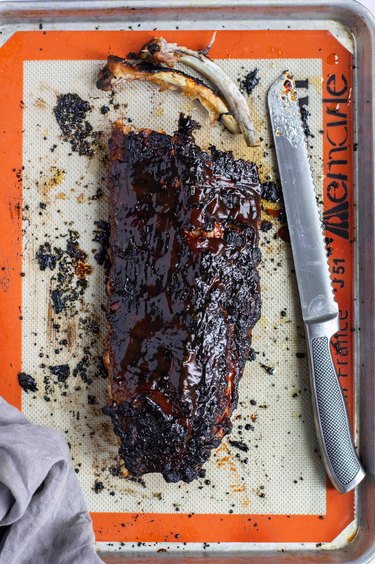
Preheat oven to broil. Remove ribs and place on baking sheet lined with foil or baking mat. Brush on BBQ sauce and broil for 5 minutes until browned on top. Serve while warm and enjoy!

bbq sauce and broil

Vegan Mac and Cheese Recipe

0

Oh, mac and cheese. If there was an award for "Most Comforting Food", this classic dish would totally win! But that doesn't mean you need to load up on dairy to enjoy it. With the right combination of ingredients, it's possible to make a vegetable-packed "cheese" sauce for vegan mac and cheese. It's an awesome way to fuel up on veggies, even if you don't eat a vegan diet. You can even make it gluten-free by using your favorite gluten-free flour and pasta.

Vegan mac and cheese

Video of the Day

Vegan Cheese Sauce

Things You\’ll Need

  • 1/2 medium cauliflower head

  • 1 1/4 cups sliced carrots (about 4 medium carrots)

  • 1/2 cup olive oil

  • 1 tablespoon flour

  • 6 tablespoons nutritional yeast

  • 2 cups non-dairy milk

  • 2 tablespoons minced garlic

  • 1 teaspoon salt

  • 1 teaspoon black pepper

  • 1 teaspoon onion powder

  • 1 teaspoon garlic powder

Vegan cheese sauce ingredients

Step 1

Pre-heat the oven to 400 degrees Fahrenheit.

Chop the cauliflower into small florets. In a large bowl, combine the cauliflower, carrots, 1/4 cup olive oil, salt, and pepper. Toss until the veggies are completely coated.

Want to boil your veggies instead? Skip to the "Tip" after Step 2.

Toss vegetables in olive oil

Step 2

Transfer the vegetables onto a greased metal baking sheet. Cook for 35 to 40 minutes or until soft, tossing halfway.

Cook cauliflower and carrots

Tip

You can also boil the vegetables. Chopped cauliflower usually cooks within 5 to 10 minutes, while carrots need about 15 to 20 minutes. Total cooking time will depend on the size of the chopped veggies.

Over high heat, bring a large pot of water to a boil. Reduce slightly and add the carrots. After about 10 minutes, add the cauliflower. Boil for another 10 minutes or until both vegetables are soft.

Step 3

While the vegetables are cooking, combine the remaining 1/4 cup olive oil and minced garlic in a small pot. Cook over low-medium heat until fragrant, about 3 minutes.

Add the nutritional yeast, flour, onion powder, and garlic powder. Mix well and continue cooking for 2 to 3 minutes.

Roux for vegan cheese sauce

Step 4

Add the non-dairy milk in 1/2 cup increments, whisking constantly. Bring to a steady simmer and heat for 5 minutes. Keep mixing to prevent clumping.

Add non-dairy milk

Tip

Make sure the milk doesn't boil. If heated too quickly, it may curdle.

Step 5

Let the vegetables and sauce cool slightly.

In a food processor, blend until creamy and smooth.

Vegan mac and cheese sauce

Step 6

Now, this is where it gets fun. Feel free to customize the sauce to your liking. Is it too thick? Add milk in 1/4 cup increments. Is it too thin? Add 1 tablespoon of flour.

Give the sauce a taste. If it isn't cheesy enough, add more nutritional yeast. You can also toss in more garlic powder, onion powder, salt, or pepper. A sprinkle of turmeric can be added for a bright orange shade. It's totally up to you.

Once you've added the necessary ingredients, blend until the consistency is just right.

Vegan cheese sauce

Tip

There's a good chance your sauce will need to be adjusted. Don't be discouraged! It's easy to adjust the sauce with extra ingredients like milk and flour. After making vegan mac and cheese a few times, you'll get the hang of how to make your ideal sauce.

Vegan Grated Parmesan Cheese

Things You\’ll Need

  • 1 cup sunflower seeds

  • 1/2 cup nutritional yeast

  • 1/4 cup flax seeds (or more sunflower seeds)

  • 1 teaspoon garlic powder

Ingredients for vegan grated Parmesan

Step 1

Combine everything in a food processor or blender.

Vegan grated Parmesan cheese

Tip

If possible, use a blender. The more compact size will make it easy for the blades to chop up the ingredients.

Vegan Mac and Cheese

To prepare the finished dish, cook 8 ounces of pasta according to the package's directions. Toss with "cheese" sauce and top with vegan grated Parmesan. If you'd like, add coconut bacon and breadcrumbs for extra crunch and flavor.

Vegan mac and cheese

Don't be afraid to experiment with this recipe. For example, you can make a sweeter sauce by ditching the cauliflower and using only carrots. You can also substitute either vegetable with soaked cashews or boiled potato.

Enjoy!

How to Keep Bean Sprouts Fresh
Things You\’ll Need

  • Plastic freezer bags

  • Cook pot

  • Bowl

  • Slotted spoon

  • Colander

... Fresh bean sprouts contain valuable nutrition.

Bean spouts can be eaten alone or to complement salads, Asian cuisine or just about any meal. Sprouts are low in calories, yet packed with protein and vitamin C, according to the International Sprout Growers Association. However, the sprouts' flavor and nutritional value can be adversely affected by poor storage. To get the most from your bean sprouts, you have to store them correctly. You can refrigerate sprouts for short-term storage or freeze them for long-term preservation.

Video of the Day

Refrigerating

Step 1

Place bean sprouts in plastic bags. The site Still Tasty advises against washing them first.

Step 2

Close the bags and place them in the vegetable crisper in your refrigerator.

Step 3

Consume refrigerated sprouts within 3 to 5 days

Freezing

Step 1

Heat a pot of water to a boil.

Step 2

Place the sprouts in the boiling water and boil for 3 minutes, as advised by Still Tasty. While they are boiling, fill a large bowl with ice cubes and water.

Step 3

Turn off the heat. Remove the bean sprouts from the water, using a slotted spoon, and plunge them immediately into the bowl of ice water to chill them.

Step 4

Drain the sprouts in a colander, place them in freezer bags, seal the bags, and place them in the freezer. Sprouts should remain fresh up to 1 year in a freezer.

Butternut Squash Lasagna Recipe

0

I was a vegetarian for 3 years and although I do eat meat now, lasagna is the one dish I still prefer vegetarian. The flavors are just so bold! This butternut squash lasagna is one of my favorite vegetarian recipes. Make a double batch — it's easy to freeze and reheat!

Butternut Squash Lasagna Recipe

Video of the Day

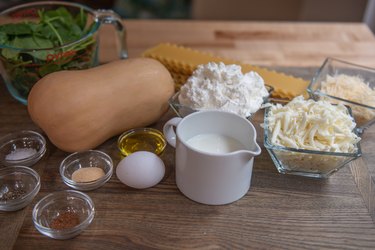
Things You\’ll Need

  • 1 medium sized butternut squash (about 6 cups, cubed)

  • 3 tablespoons olive oil, divided

  • 2 cups ricotta cheese, divided

  • ½ cup milk

  • 2 teaspoons salt, divided

  • 2 teaspoons pepper, divided

  • 1 teaspoon garlic powder

  • ½ teaspoon nutmeg

  • 4 cups spinach leaves, packed

  • 1 large egg

  • 2 cups shredded mozzarella cheese, divided

  • 1/2 cup shredded parmesan, divided

  • 8 lasagna noodles

Butternut Squash Lasagna Recipe

Step 1: Cook the squash

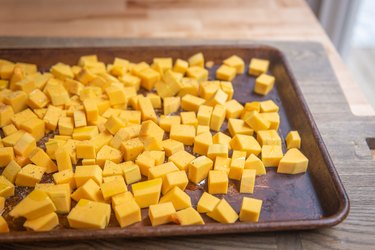
Preheat the oven to 400°F. Peel and cube the squash, and add in an even layer to a baking sheet. Drizzle with 1 tablespoon olive oil, 1/2 teaspoon salt, and 1/2 teaspoon pepper. Roast until fork tender, about 20 minutes.

Butternut Squash Lasagna Recipe

Step 2: Cook the spinach

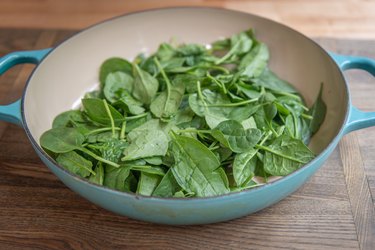
Add the spinach, 1 tablespoon olive oil, 1/2 teaspoon salt and 1/2 teaspoon pepper to a large pan over medium high heat. Cook until wilted, then remove from heat and allow to cool slightly.

Butternut Squash Lasagna Recipe

Step 3: Make the ricotta layer

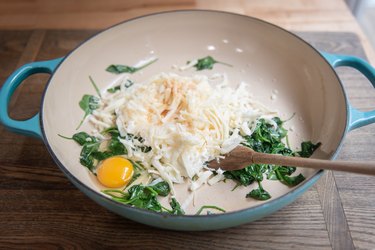
Add 1 cup of ricotta, 1 1/2 cups mozzarella, 1/4 cup parmesan, the egg, and garlic powder to the pan. Stir to combine.

Butternut Squash Lasagna Recipe

Step 4: Make the sauce

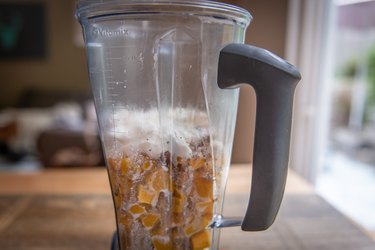
Add the cooked butternut squash, remaining ricotta, milk, 1 teaspoon salt, 1 teaspoon pepper, and the nutmeg to a blender. Blend until smooth, adding additional milk to thin to desired consistency.

Butternut Squash Lasagna Recipe

Step 5: Layer

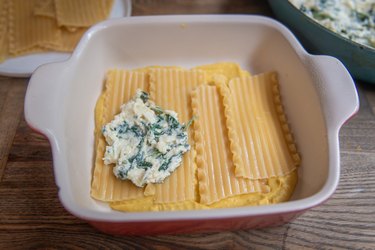
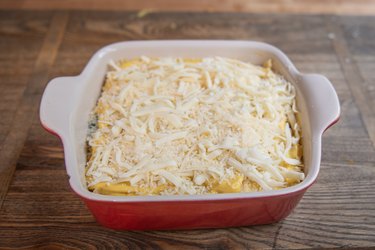
Lower oven temperature to 350°F. Spray an 8×8" baking dish with cooking spray. Starting with the sauce, layer the ingredients in the dish until all the ingredients have been used. Top with the remaining cheese.

Butternut Squash Lasagna Recipe

Step 6: Bake

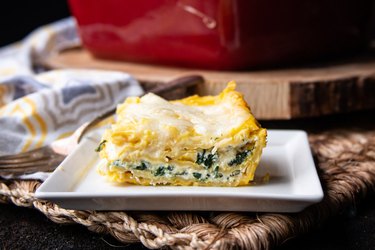
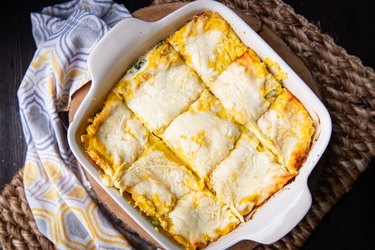
Bake uncovered until the edges start to brown and the cheese has melted, about 20 minutes.

Butternut Squash Lasagna Recipe Butternut Squash Lasagna Recipe

Step 7: Serve

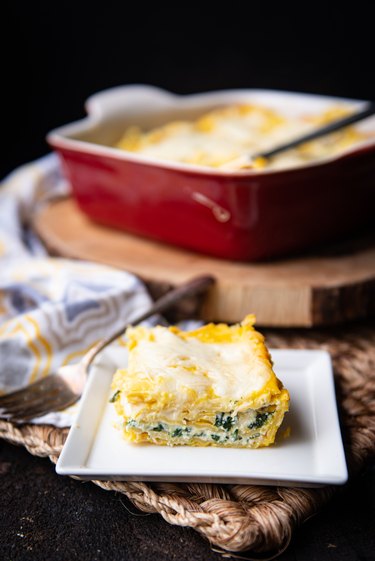
Serve warm and enjoy!

Butternut Squash Lasagna Recipe

How to Grill Cauliflower

0

If you've never grilled cauliflower, you've never really seen it's power. The versatility of this innocent little vegetable reaches full capacity when the flavors of a smokey grill come into play. Don't be afraid to play around. Add a little chimichurri or pesto. Drizzle it with a Thai peanut sauce, or maybe a some spicy buffalo sauce. You can serve it as a side dish, or chop it up and add it to tacos. You can even put it in a bun with guacamole, lettuce and tomato and have yourself a simple little veggie burger. There really is no end to what you can do with this beautifully charred little veggie steaks.

How to Grill Cauliflower

Video of the Day

Things You\’ll Need

  • 1 head cauliflower

  • 1/4 cup olive oil

  • 1 teaspoon salt

  • 1 teaspoon black pepper

How to Grill Cauliflower

Step 1: Slice

Preheat the grill to medium high. Slice the cauliflower down through the stem about 1/2 an inch thick. You should be able to get 3 to 4 steaks out of one head, depending on how thickly you slice.

How to Grill Cauliflower

Tip

You will have quite a bit of leftover florets; what is not attached to a stem will fall off. Don't let it go to waste! Try making some delicious and healthy cauliflower rice.

Step 2: Oil and Season

Brush all sides with olive oil, sprinkle with salt and pepper.

How to Grill Cauliflower

Step 3: Grill

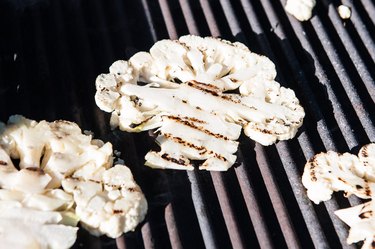
Cook until grill marks appear on both sides and the cauliflower has softened, about 3 minutes per side. If the cauliflower has grill marks to your liking, but you want it softer, move to a cold spot on the grill, or the upper grill rack and cover until cauliflower has softened.

How to Grill Cauliflower

Tip

You don't have to stop at salt and pepper, get creative! Try some Cajun spice, dried herbs, or even barbecue sauce to make it a new experience every time.

How to Grill Cauliflower

DIY Easter Basket Cupcakes

0

Here's a cupcake treat idea that will definitely get your springtime celebration hopping. Each cupcake is decorated like an Easter basket featuring a marshmallow bunny, "grass" frosting, candy eggs and flowers, and even a basket handle made of candy. These cupcakes may look too adorable to eat, but there will be an Easter parade of hungry guests ready to take a bite out of them.

easter cupcakes

Video of the Day

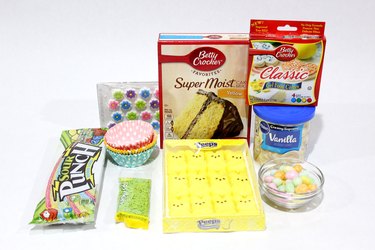
Things You\’ll Need

  • Cake mix

  • Cupcake wrappers

  • Frosting

  • Green food coloring

  • Spatula

  • Green jimmies

  • Peeps Bunny marshmallows

  • Knife

  • Wood skewer

  • Sour Punch Straws

  • Candy flowers

  • Egg-shaped jelly beans

materials

Step 1: Bake the Cupcakes

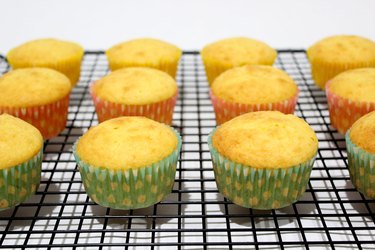
Using a cake mix or your own recipe, bake the cupcakes according to directions in festive cupcake liners. Cakes that are lighter in color, like white or yellow cake, will not show through the liner as much as darker cakes like chocolate. Fill the liners between two-thirds to three-quarters full of batter so the cake rises to just above the rim.

bake cupcakes

Step 2: Dye the Frosting

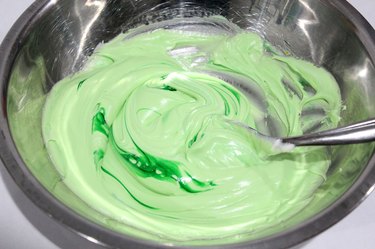
To make the frosting green so it's like grass, add a few drops of green food coloring to vanilla or buttercream frosting, and mix thoroughly. You can use your own recipe for frosting or buy a prepackaged tub from the store. Keep adding food coloring until the frosting has the shade of green you want.

Tip

Use gel food coloring, which won't add additional liquid to your frosting.

dye frosting

Step 3: Apply the Frosting

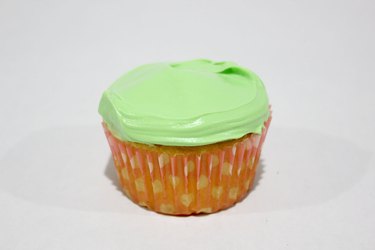
Scoop up about two tablespoons of frosting on a spatula, and spread it in a circular motion to cover the top of the cupcake.

frosting

Step 4: Sprinkle Jimmies

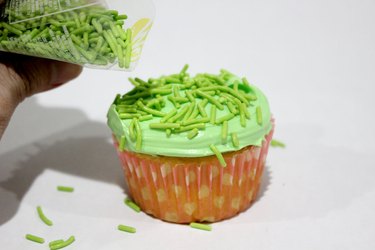
To create the fresh-cut grass look, sprinkle green Jimmies on top of the frosting. They will stick to the frosting on contact.

jimmies

Step 5: Add the Bunny

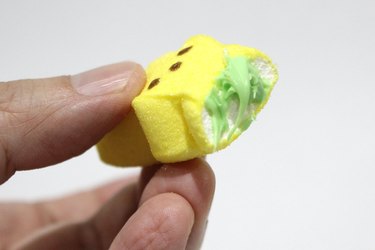
A whole bunny Peep is too tall for the cupcake, so cut the Peep at the shoulders with a knife. This way, it will look like the bunny is peeking up out of the grass.

bunny head

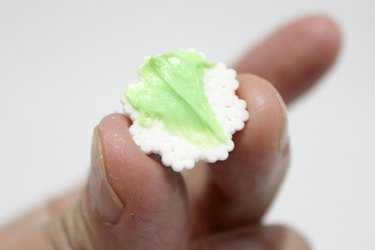
Place a dab of frosting under the Peep. This frosting will act like glue so the Peep will stay attached to the top of the cupcake, especially if there are Jimmies there that could be in the way.

dab frosting

Position the Peep bunny in the center of the cupcake, gently pressing down so the bunny stays in place.

peep bunny

Step 6: Add the Basket Handle

With a wood skewer, poke a half-inch hole on both sides of the bunny near the edge of the cupcake. Insert the skewer outward at an angle.

skewer

Insert the two ends of a Sour Punch Straw (or Red Vine licorice) into the holes you made with the skewer, following the same outward angle so the handle bows out slightly. Press down on both ends of the handle until it makes contact with the bunny ears. The bunny ears keep the handle steady, while the handle keeps the bunny firmly planted in the grass.

handle

Step 7: Fill the Basket

Now it's time to fill the basket with candy eggs and flowers. Because of all the Jimmies, there might not be enough exposed frosting to make contact with the eggs and flowers. If that's the case, place a dab of frosting on the back of them before placing in the basket.

back

The dab of frosting is like glue, and the candy holds securely.

candy flower

Continue placing jelly bean eggs all around the basket, anchoring them in the frosting. Besides being adorable and delicious, the candy also helps prop up the bunny and keep the handle aligned.

jelly beans

Lined up in a row, these cupcakes are ready to provide fun, cuteness and a sugar rush to everyone at your Easter gathering.

basket cupcakes