Home Blog Page 120

Homemade Crispy Vegan Tofu Nuggets Recipe

0

Whether you eat a vegan diet or prefer plant-based foods, you'll want to try these crispy vegan tofu nuggets. Made with marinated tofu and a tasty bread crumb coating, this recipe is perfect when you're craving finger food. Plus, compared to store-bought meatless nuggets, this version is inexpensive (and easy to customize).

homemade crispy vegan tofu nuggets

Video of the Day

Marinated Tofu

Things You\’ll Need

  • 14-ounce block extra-firm tofu, drained and pressed

  • 1/4 cup low-sodium soy sauce

  • 1 teaspoon garlic powder

  • 1 teaspoon onion powder

  • 1 teaspoon paprika

  • 1/2 teaspoon salt

  • 1/4 teaspoon ground black pepper

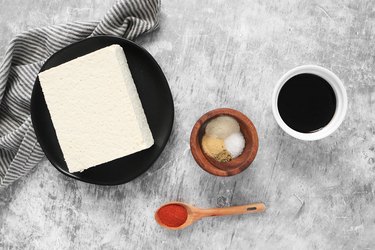
Marinated tofu ingredients

Step 1

In a small bowl, combine the soy sauce and spices. Whisk well.
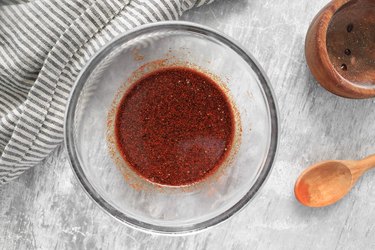
Whisk marinade ingredients

Step 2

Slice the tofu into small, bite-size squares.
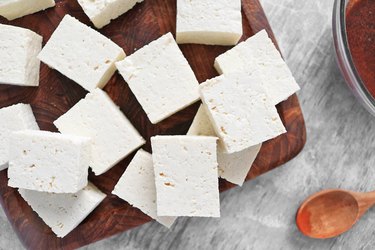
Cut the tofu

Step 3

Transfer the tofu to a dish. Add the marinade, making sure to coat each piece of tofu. Cover and marinate in the refrigerator for at least 30 minutes or overnight.
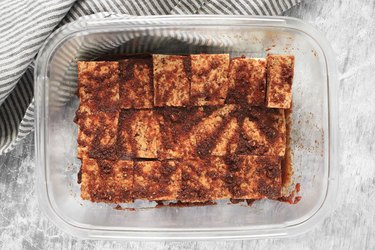
Marinate the tofu

Batter and Crust Mixture

Things You\’ll Need

  • 1 cup plain, unsweetened, plant-based milk

  • 1 1/2 tablespoons apple cider vinegar (or white vinegar)

  • 3/4 cup all-purpose flour

  • 1/4 cup cornstarch

  • 1 cup panko bread crumbs

  • 1 teaspoon garlic powder

  • 1 teaspoon onion powder

  • 1 teaspoon dried oregano

  • 1 teaspoon salt

  • 1/2 teaspoon paprika

  • 1/2 teaspoon ground black pepper

  • Vegetable or grape-seed oil (or other neutral oil)
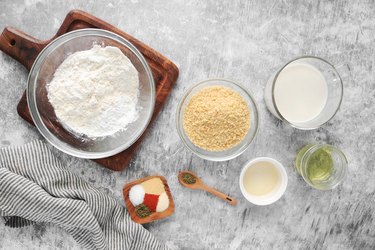
Ingredients for batter and crust mixture

Tip

You can instead use seasoned bread crumbs and skip the additional spices.

Step 1

After the tofu has marinated, prepare the batter and crust mixture.

In a small bowl, combine the milk and apple cider vinegar. Whisk well.
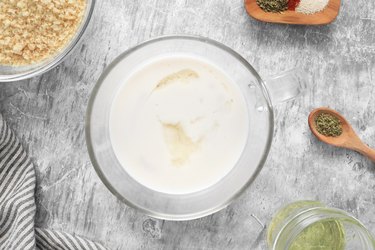
Combine milk and vinegar

Step 2

In a separate bowl, add the flour and cornstarch. Slowly add the milk while stirring until the mixture resembles thick pancake batter. Set it aside for 10 to 15 minutes.
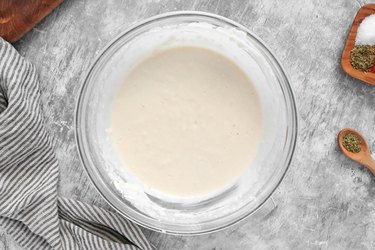
Mix batter ingredients

Step 3

Combine the bread crumbs and spices in a separate bowl or dish.
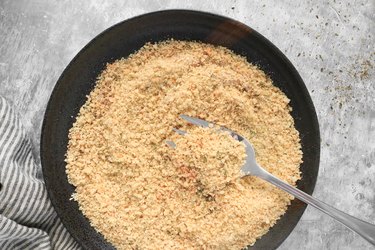
Mix bread crumbs and spices

Crispy Vegan Tofu Nuggets

Things You\’ll Need

  • Marinated tofu

  • Batter

  • Bread crumb mixture

Step 1

Using tongs, dip each piece of marinated tofu into the batter.
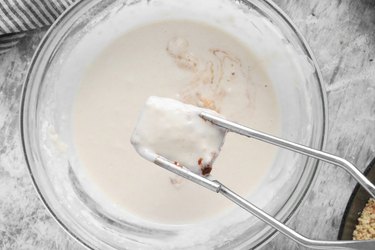
Dip tofu into batter

Step 2

Toss the battered tofu in the bread crumbs until fully coated.
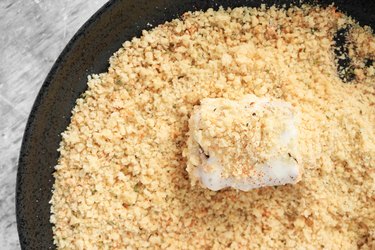
Coat with bread crumbs

Step 3

Over medium heat, add 1/4 to 1/2 inch of oil to a medium skillet. Cook the tofu until golden brown, about 2 minutes on each side. Rotate and cook the sides until golden brown if needed.

You'll likely need to work in batches. As you cook the remaining tofu, add more oil as necessary.
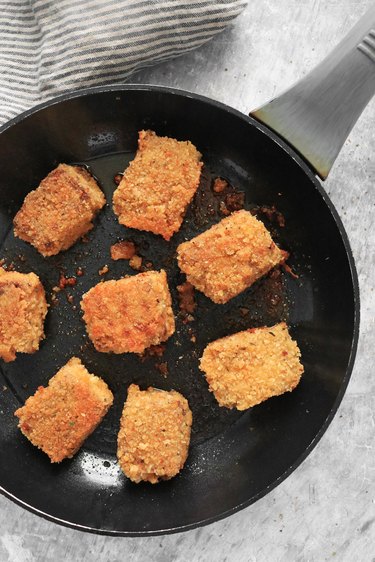
Fry crispy tofu nuggets

Step 4

Transfer the cooked nuggets to a plate lined with a paper towel.
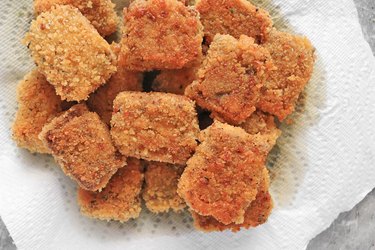
Place cooked tofu nuggets on a plate

Serve with ketchup, honey mustard or your favorite sauce. Yum!
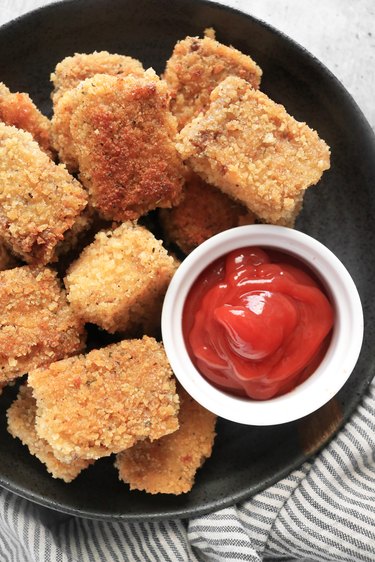
Completed crispy vegan tofu nuggets

How to Make a Tom Collins

0

Master your mixology skills with this simple cocktail recipe. A delightfully fizzy and crisp drink, the classic Tom Collins can brighten up even the coldest and dullest of days, or offer a welcome refreshment on a sweltering hot night.

tom collins cocktail garnished with lemon and cherry

Things You\’ll Need

  • Cocktail shaker

  • Ice

  • 1 1/2 ounce gin

  • 3/4 ounce freshly squeezed lemon juice

  • 3/4 ounce simple syrup

  • Strainer

  • Cocktail glass

  • Club soda

  • Lemon wedge (for garnish)

  • Maraschino cherry (for garnish)

Step 1

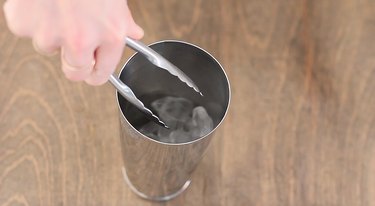
Fill a cocktail shaker with ice.

filling cocktail shaker with ice

Step 2

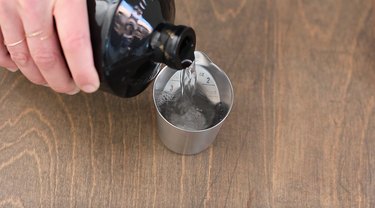
Pour in 1 1/2 ounces of gin.

meausring gin

Step 3

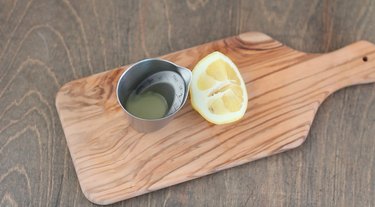
Pour in 3/4 ounces of freshly squeezed lemon juice.

freshly squeezed lemon juice

Step 4

Pour in 3/4 ounces of simple syrup.

measuring simple syrup

Step 5

Shake the ingredients together.

shaking cocktail ingredients

Step 6

Strain into an ice-filled cocktail glass and top with club soda.

adding club soda to cocktail

Step 7

Garnish with a lemon wedge and maraschino cherry.

tom collins garnished with lemon wedge and cherry

Homemade Mint Jelly Recipe

0

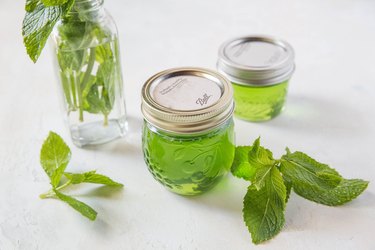
Making mint jelly at home using fresh mint is fun and fairly straight-forward. If you're new to canning, be sure to read the instructions in this post all the way through a few times to avoid any confusion during the process. If you don't use food coloring at home, feel free to skip it! The jelly will turn out a nice golden color without the use of green food coloring. Enjoy your mint jelly for months on end, or give it away as gifts to friends and family.

Jars of mint jelly Homemade Mint Jelly with Fresh Mint Image Credit: Julia Mueller

Video of the Day

Things You\’ll Need

  • 1 1/2 cups fresh mint, packed

  • 2 1/4 cups boiling water

  • 2 tbsp fresh lemon juice

  • 1 – 2 drops green food coloring, optional

  • 3 1/2 cups cane sugar

  • 1 (6-oz.) pouch liquid pectin

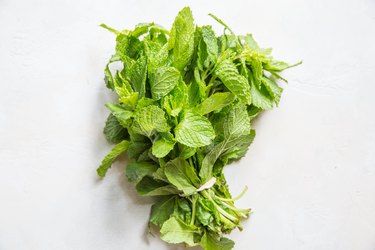
Bundle of fresh mint. Use fresh mint for homemade mint jelly Image Credit: Julia Mueller
Step 1: Sanitize the Jars

Sanitize four 8-ounce canning jars with lids. There are a few options for doing so. You can place the jars in a large pot of water on top of a steaming rack (be sure to use a rack so that the jars don't touch the bottom of the pot) and boil for 10 minutes.

You can wash the jars, dry the jars, then place just the glass portions (no lids) on a baking sheet in the oven and bake at 200° F for 10 minutes.

You can also run the jars through the dishwasher.

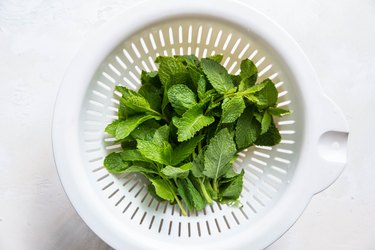
Step 2: Rinse the Mint

Wash the mint well under cool water.

Fresh mint in a collander Rinse the fresh mint leaves well. Image Credit: Julia Mueller

Step 3: Muddle the Mint

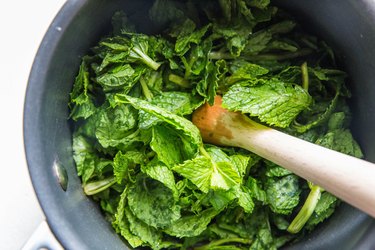
Measure out 1 1/2 cups of mint leaves (including stems), packed. Transfer the mint to a saucepan and muddle with a wood muddler or mash with a potato masher.

muddling mint in a saucepan Muddle or mash mint with a wood muddler or potato masher. Image Credit: Julia Mueller
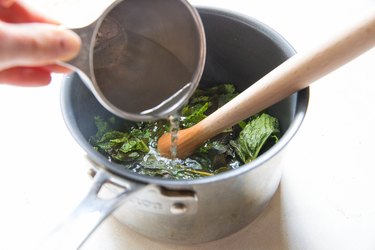
Step 4: Add Boiling Water

Pour 2 1/4 cups boiling water into the saucepan and cover. Bring mixture to a full boil on the stove top, then remove from the heat. Allow mixture to sit for 10 minutes.

Pouring boiling water into saucepan with mint Add boiling water Image Credit: Julia Mueller

Step 5: Strain the Water

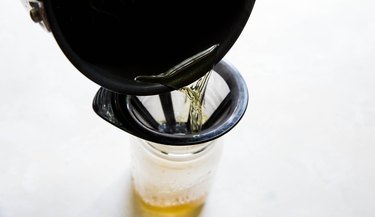
Strain the water from the mint leaves and discard the mint leaves. To do so, you can use a strainer or simply pour the liquid into a jar to separate it from the leaves. You will be using the mint-infused water to proceed.

Straining mint water Strain the water from the leaves and discard the leaves Image Credit: Julia Mueller
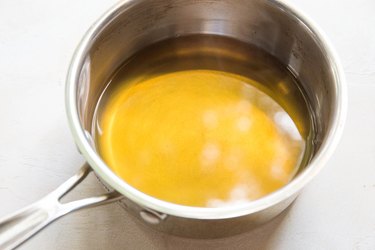
Step 6: Transfer Mint-Infused Water to Saucepan

Measure out 1 2/3 cups of the mint-infused water and transfer it to a clean sauce pan.

Note: you can use the same saucepan you used to boil the mint—just be sure there are no mint leaves left in the saucepan.

Mint water in saucepan Transfer mint-infused water to a clean saucepan Image Credit: Julia Mueller
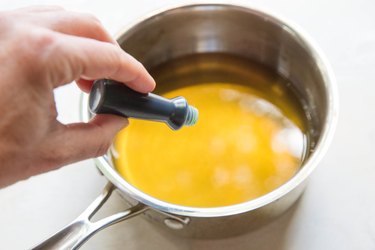
Step 7: Add Food Coloring (Optional)

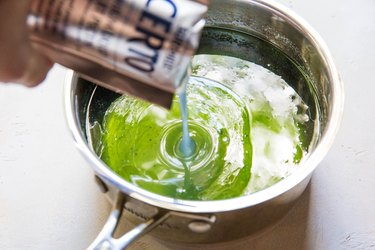
If you want your mint jelly to be green, add a small amount of green food coloring. If using water-based food coloring, you'll only need 1 drop. If using gel food coloring, you'll need between 1/8 and 1/4 tsp.

Adding food coloring to saucepan Add green food coloring if you\’d like. Image Credit: Julia Mueller
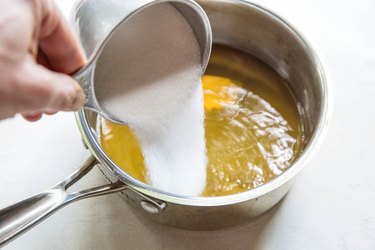
Step 8: Stir in the Sugar

Add the cane sugar and stir well. Place the pot back on the stove top and cover it with a lid. Bring to a full boil.

Pouring sugar into saucepan with mint water Stir in the sugar. Image Credit: Julia Mueller

Step 9: Add the Liquid Pectin

Once the mixture has reached a full boil, remove it from the heat and stir in the full 6-ounce pouch of liquid pectin.

pouring liquid pectin into mint simple syrup Add in the liquid pectin Image Credit: Julia Mueller

Step 10: Transfer to Sanitized Jars

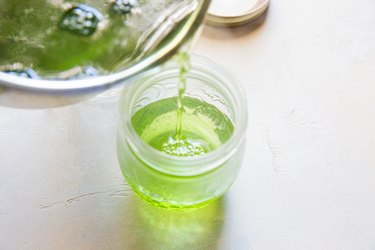
Once the liquid pectin is well-mixed in, immediately transfer the mixture to the sanitized jars, filling them up to the lip (leaving about 1/4 to 1/2 inch of space between the jelly and the very top of the jar). Seal the jars securely.

Pouring mint jelly into jars Pour mint jelly mixture into sanitized jars. Image Credit: Julia Mueller
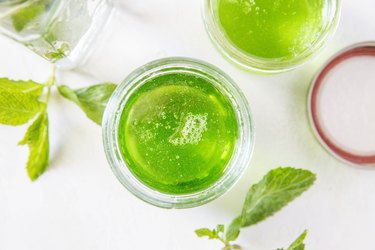
Step 11: Process the Jelly

Place a rack in the bottom of a large pot and fill the pot halfway with water. Bring it to a full boil. Use a jar holder or steady tongs to carefully lower the jars into the pot, leaving a couple inches of space between the jars. If needed, pour in more boiling water until the water is at least 1 inch above the tops of the jars. If the water isn't already boiling, bring it back to a full boil. Cover the pot and process for 10 minutes.

Remove the jars from the pot and set them on the counter or on a towel to cool. Once the jars are cooled, test that they are completely sealed by poking the center of the lid. If the lid springs back, that means the jar is not fully sealed and will need to be refrigerated in order to stay fresh. As long as the jars are fully sealed, they can be stored at room temperature in the pantry.

Open jar of mint jelly Use mint jelly with lamb Image Credit: Julia Mueller

How to Tap a Keg With a Co2 Bottle

0

Things You\’ll Need

  • Keg coupler (tap)

  • CO2 Regulator – single or dual gauge

  • Air line tubing and connectors (5/16" heavy grade plastic tubing that connects the regulator to the keg coupler)

  • Beer hose with fittings

  • Draft beer tower or dispensing valve faucet

  • Snap clamps

  • Flat head screwdriver

  • Crescent wrench

... A pump style "party tap" will dispense beer but introduces contaminants into the keg.

Tapping a keg of beer with a traditional pump style "party tap" will successfully transfer beer from a keg to numerous cups for a single day of enjoyment. However, these simple pump taps dispense beer by forcing air with its accompanying contaminants and bacteria into the keg, spoiling the beer's freshness and producing off-flavors. Tapping a keg with CO2 eliminates these problems and offers the additional benefit of keeping your unfinished keg fresh for days or even weeks, as long as the keg is kept chilled.

Video of the Day

CO2 Regulator Mounting

Step 1

... Do not use a CO2 cylinder without a regulator gauge for keg tapping.

Attach the CO2 regulator to the filled CO2 cylinder and tighten the regulator coupling nut with a crescent wrench. Do not over tighten. Close the toggle shut-off valve on the output port of the regulator; the "closed" position is typically perpendicular to the output port and the "open" position aligns the lever parallel to the port.

Step 2

... The CO2 cylinder must be secured so that it cannot fall or be tipped over.

Secure the CO2 cylinder in an upright position for safe operation.

Step 3

Slip a hose clamp over one end of the air hose and attach the hose to the regulator hose barb. Slide the clamp over the hose and regulator connection and squeeze to tighten.

Step 4

Slip a hose clamp over the other end of the air hose and attach it to the keg coupler gas inlet port. Secure the connection with the hose clamp. Lift the keg coupler handle up into the "off" position.

Keg Tapping

Step 1

Align the keg coupler with the lugs on the keg and turn it clockwise to lock it into place. Pull outward and then push down on the coupler handle until it clicks (open position). Attach the beer hose to the coupler. Attach the end of this hose to a draft beer tower with a faucet, or attach a dispensing valve to the end of the hose.

Step 2

Open the regulator toggle valve by pushing the lever down into the "on" position. Open the valve on the CO2 tank by rotating the knob counter-clockwise until it stops.

Step 3

Adjust the CO2 pressure on the regulator (top gauge on a dual gauge regulator) by turning the handle or screw beneath the dial clockwise until the gauge reads 10 to 12 psi, which is the optimal pressure for lagers and ales.

Step 4

... A faucet or valve starts and stops the flow of beer from the keg.
Draw beer by opening the faucet on the draft beer tower or the dispensing valve attached to the beer hose. Check the temperature of the beer initially and periodically during dispensing; a beer temperature of 36 to 38 degrees Fahrenheit is necessary for optimal dispensing.

Tip

Keg couplers or taps are available in six varieties; D, S, A, G, U and M are types of system keg couplers. Each is specific to a group of beers, with the D-system coupler being used for the most popular ales and lagers.

Both single and dual gauge regulators are available for use with CO2 pressured keg dispensers. The second gauge on a dual gauge unit monitors the amount of pressure, or the quantity of CO2 remaining in the cylinder.

Refer to your local yellow pages for CO2 canister filling. Search under the heading of Fire Extinguishers or Fire and Safety equipment; CO2 canister filling is available through these sources.

Beer kegs can become agitated during transportation; allow beer to settle for an hour or two before tapping. Always begin with a thoroughly chilled keg either by refrigeration or in a tub on ice to prevent foaming and beer waste.

Regulators and keg couplers are available as kits complete with necessary tubing and fittings. Single-use CO2 cartridges equipped with an integrated regulator are also commercially available.

For information on choosing the appropriate size CO2 canister for your keg needs or removing a CO2 canister, see Reference 1.

Warning

Never exceed 60 psi when setting the pressure on the gas regulator. Do not attempt to attach a CO2 tank to a beer keg without the proper keg coupler and gas pressure regulator.

Do not drop or throw a CO2 cylinder; secure the cylinder in an upright position and protect it from heat above 70 degrees Fahrenheit.

Ventilate and evacuate an enclosed area in case of leakage; breathing high concentrations of carbon dioxide gas can be deadly.

How to Make Stuffed Peppers

0

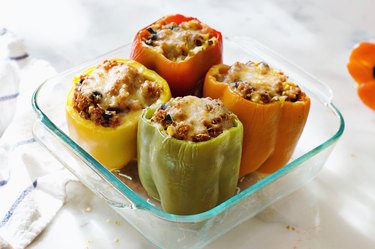
Creating a go-to dish that is healthy and satisfying is always a victory in the kitchen. And if you want to score a major win, vegetarian stuffed peppers fits the criteria for a nutritious and filling meal — plus, they take less than 25 minutes to prepare. Create this recipe as a side dish alongside the likes of cheesy enchiladas, or make it the centerpiece of your meal on its own, and you'll have a bold and savory creation that'll make you come back for seconds… maybe even thirds!

stuffed peppers

Video of the Day

Things You\’ll Need

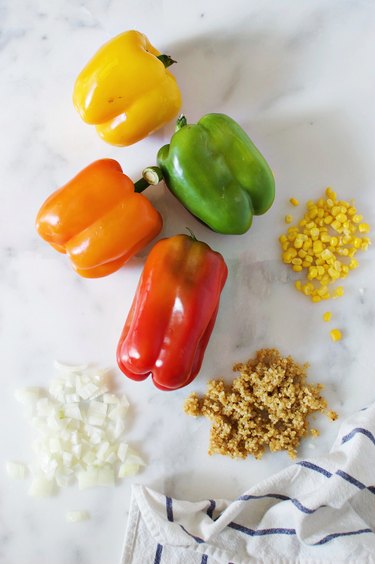
  • 4 bell peppers

  • 4 cups quinoa, cooked

  • 2 tablespoons olive oil

  • 1/2 yellow onion, diced

  • 2 cloves garlic, minced

  • 1 cup black beans

  • 1 cup corn

  • 1 cup Italian tomato sauce

  • 1 cup shredded cheese

  • Square glass baking dish

ingredients

Step 1: Prepare the Peppers

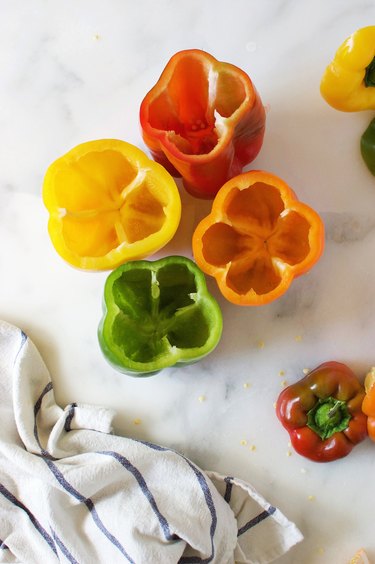
Preheat your oven to 350 degrees Fahrenheit. Cook the quinoa per the directions on the package, if it's not already prepared. Cut off the tops of the peppers, and wash out the insides, making sure to remove all of the seeds. Dry thoroughly and set aside in glass dish.

prep peppers

Step 2: Cook the Stuffing

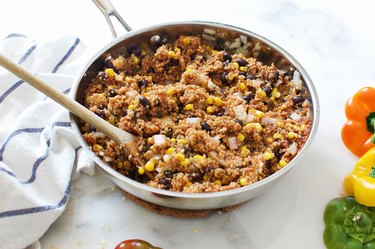
Heat the olive oil in a large skillet. Cook the onions on medium heat until fragrant. Add in the garlic, and cook for one more minute. Then, pour in the quinoa, black beans, corn and tomato sauce. Stir over low heat until warmed and mixed well.

stuffing

Step 3: Stuff Peppers and Bake

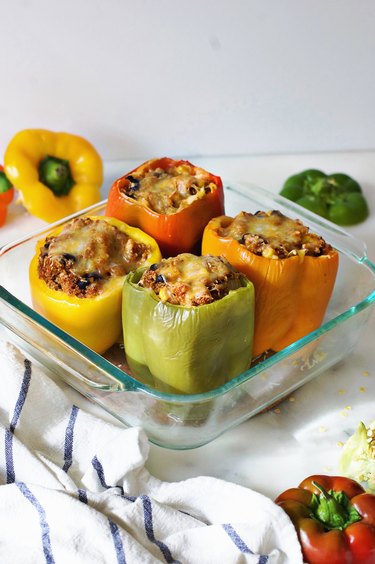
Stuff each pepper with one cup of the quinoa mixture, or until the mixture is brimming at the top of each pepper. Then, add 1/4 cup of cheese on top of each pepper. Next, pour about 1/4 cup of water into the bottom of the baking dish to help the peppers soften while baking. Cover with foil and bake on 350 degrees Fahrenheit for 30 minutes. Lastly, remove the foil and bake the dish for another 15 minutes, allowing the cheese to melt and brown. Serve while warm and enjoy!

Tip

For a vegan option, leave out the cheese or substitute with a vegan-friendly cheese.

stuffed peppers

How to Make a Classic Hot Buttered Rum

0

A hot buttered rum is very similar to a hot toddy, but what sets it apart is the addition of butter — which, in all honesty, is what makes this warm cocktail so special. Comprised of dark rum, brown sugar, butter and a few spices this cold weather beverage is a go-to for cocktail connoisseurs as soon as the temperatures drop. Over the years, this drink has encountered some lovely modifications, and the introduction of lemon zest and whipped cream only makes it more delicious. If you want to try a more classic version of this drink, simply omit the lemon zest and whipped cream. Since the weather is cooling down, now is the time to make this drink and enjoy a cozy night indoors.

How to Make Classic Hot Buttered Rum

Video of the Day

Things You\’ll Need

  • 1 stick unsalted butter, room temperature

  • 1/2 cup dark brown sugar

  • 1/2 teaspoon cinnamon

  • 1/4 teaspoon ground cloves

  • 1/4 ground nutmeg

  • 1/8 teaspoon table salt

  • 1/4 teaspoon lemon zest, optional

  • Spiced rum

  • 4 cups boiling water

  • Whipped cream, optional garnish

Tip

This recipe makes four drinks.

Step 1

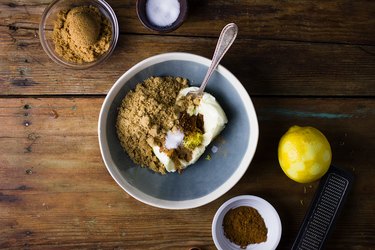
Place the stick of butter in a small bowl along with the brown sugar, all the spices, lemon zest and salt. Mash the butter with a fork until all the ingredients are well combined and a smooth paste-like texture is achieved. Store the spiced butter in the refrigerator in a sealed container until ready to use.

How to Make Classic Hot Buttered Rum

Tip

The spiced butter can be stored in the fridge for up to three weeks.

Step 2

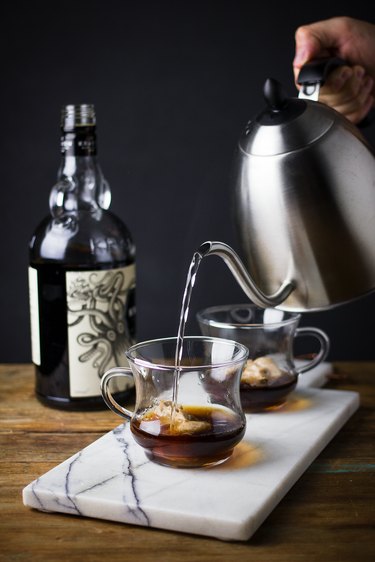
Add 1 1/2 to 2 tablespoons of the spiced butter to a cup, followed by 1 1/2 oz of spiced rum and 3/4 cup of boiling water. Use a fork or a spoon to mix the drink until the butter has completely melted.

How to Make Classic Hot Buttered Rum

Step 3

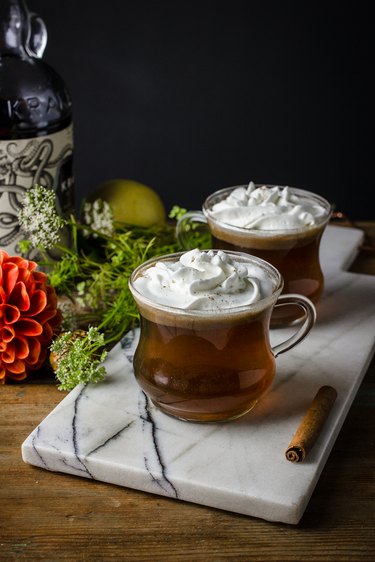
Taste and add any additional hot water or sugar, if desired. Top with whipped cream and enjoy while warm.

How to Make Classic Hot Buttered Rum

14 Ridiculously Easy & Delicious Instant Pot Recipes

0

Instant Pot Recipes 1 of 15

If you're like me, your weeknights can get a little hectic, making it tough to plan and cook different meals each evening. Luckily, that's where the Instant Pot comes in handy. From basic staples to classic favorite recipes, the Instant Pot can do it all, saving you plenty of time. Here's a list of 14 delicious recipes you can make in your Instant Pot that will change the dinner game forever.

Image Credit: Miaira Jennings Instant Pot Chicken Noodle Soup 2 of 15

Instant Pot Chicken Noodle Soup

This simple chicken noodle soup recipe will keep you warm and save you tons of time.

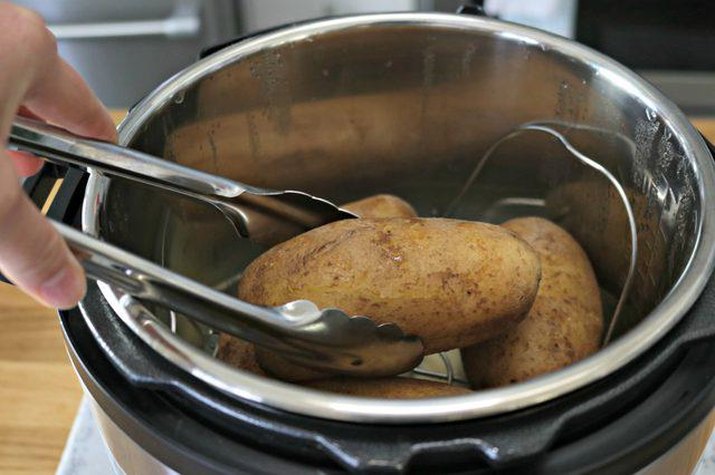
Image Credit: Abbey Rodriguez Instant Pot Baked Potato 3 of 15

Instant Pot Baked Potatoes

Traditional baked potatoes can be a bit of a hassle. This Instant Pot version cuts down on time while maintaining all the flavor.

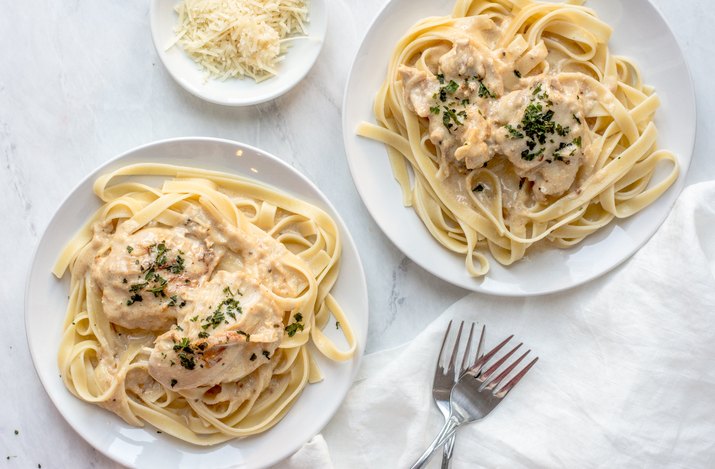
Image Credit: Jessica Kielman Instant Pot Chicken Alfredo 4 of 15

Instant Pot Chicken Alfredo

This quick and easy chicken Alfredo recipe will definitely become one of your faves.

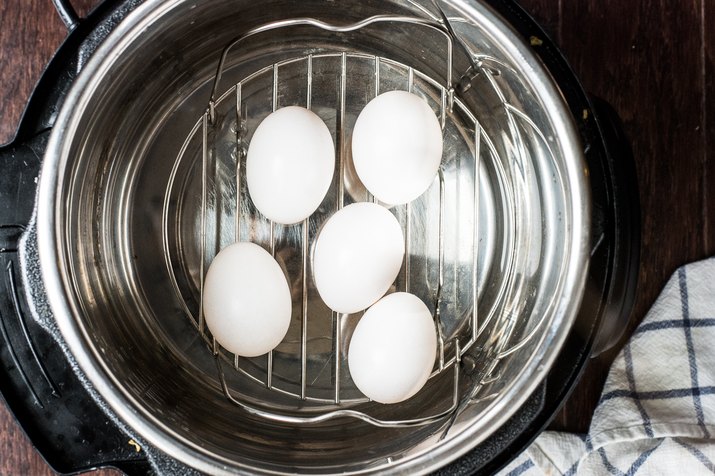
Image Credit: Abbey Rodriguez Instant Pot Hardboiled Eggs 5 of 15

Instant Pot Hardboiled Eggs

Once you follow this effortless tutorial, you'll never want to make hardboiled eggs the old-fashioned way again.

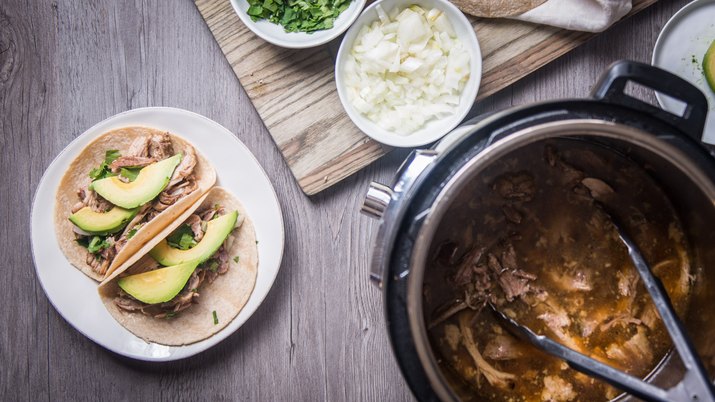
Image Credit: Abbey Rodriguez Instant Pot Pulled Pork Tacos 6 of 15

Instant Pot Pulled Pork Tacos

Taco Tuesday just got a whole lot easier with this tutorial.

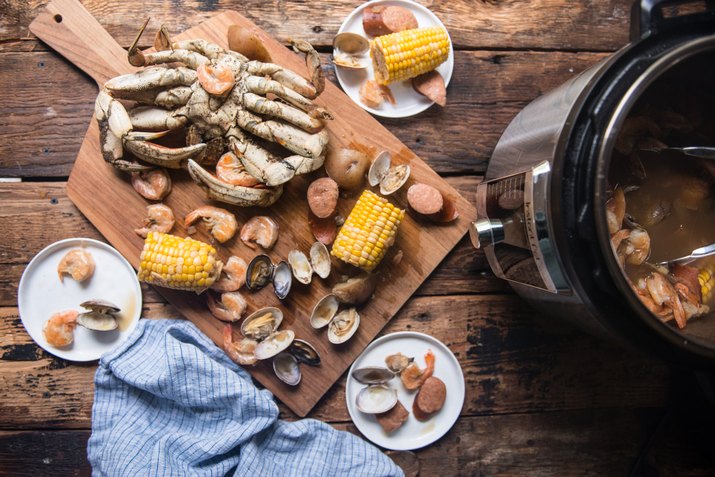
Image Credit: Jackie Dodd Instant Pot Seafood Boil 7 of 15

Instant Pot Seafood Boil

Seafood boils filled with fresh seafood, potatoes, corn, sausage and more have never been this easy. You're welcome.

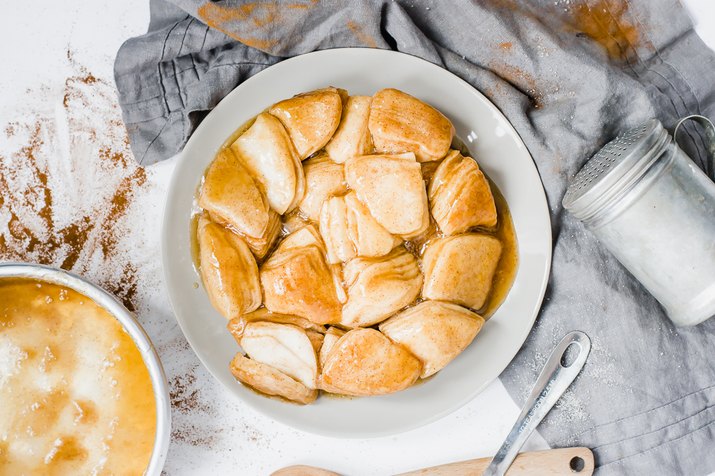
Image Credit: Jackie Dodd Instant Pot Monkey Bread 8 of 15

Instant Pot Monkey Bread

Craving an ooey-gooey sweet treat? This monkey bread recipe will take care of that sweet tooth and only takes 45 minutes to prepare!

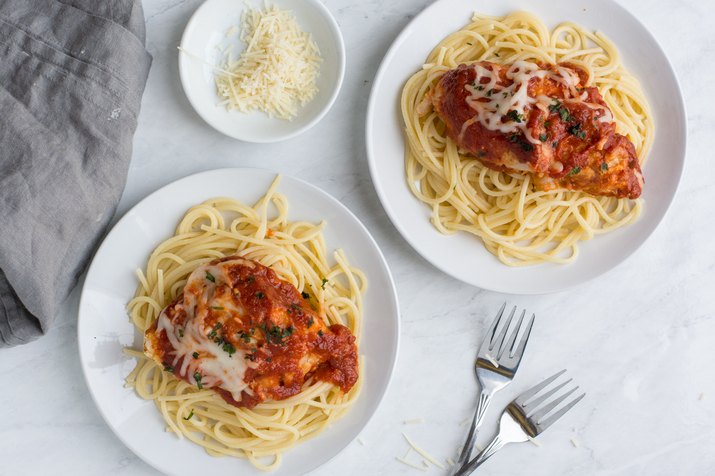
Image Credit: Abbey Rodriguez Instant Pot Chicken Parmesan 9 of 15

Instant Pot Chicken Parmesan

With this chicken parm recipe, you'll get all the flavors of the traditional dish in just a fraction of the time.

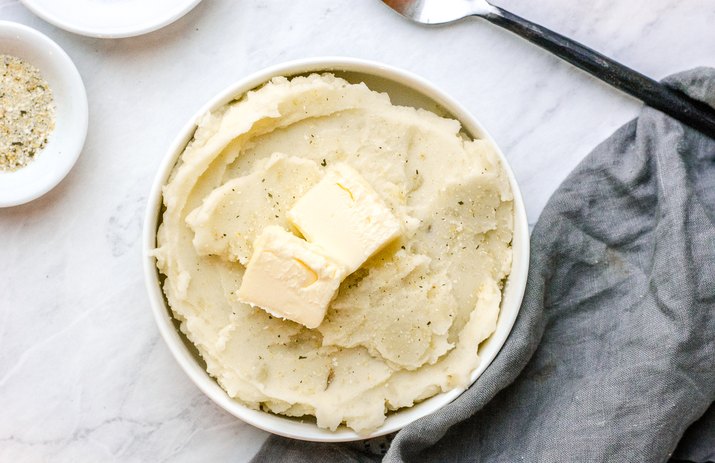
Image Credit: Abbey Rodriguez Instant Pot Mashed Potatoes 10 of 15

Instant Pot Mashed Potatoes

If you thought classic stovetop mashed potatoes were soft and creamy, you'll really love this Instant Pot version.

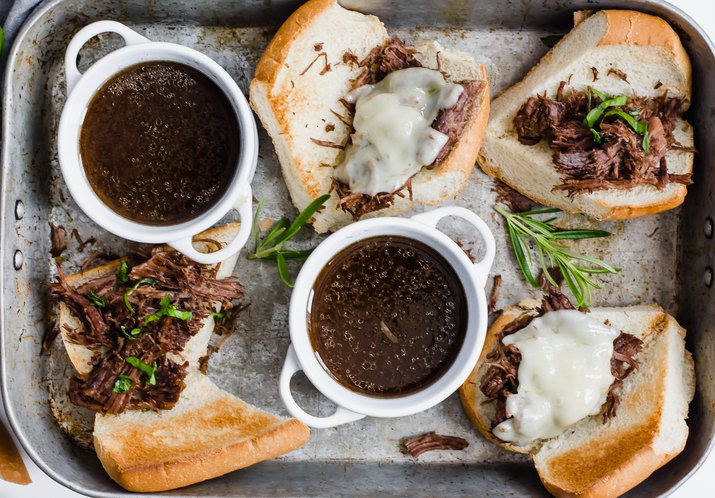
Image Credit: Abbey Rodriguez Instant Pot French Dip Sandwiches 11 of 15

Instant Pot French Dip Sandwiches

Say goodbye to the days of waiting all day for your roast to cook with this life-changing recipe.

Image Credit: Abbey Rodriguez Instant Pot Beef Stew 12 of 15

Instant Pot Beef Stew

Want a hearty stew without spending all day in the kitchen? Say no more. This tutorial is just what you need.

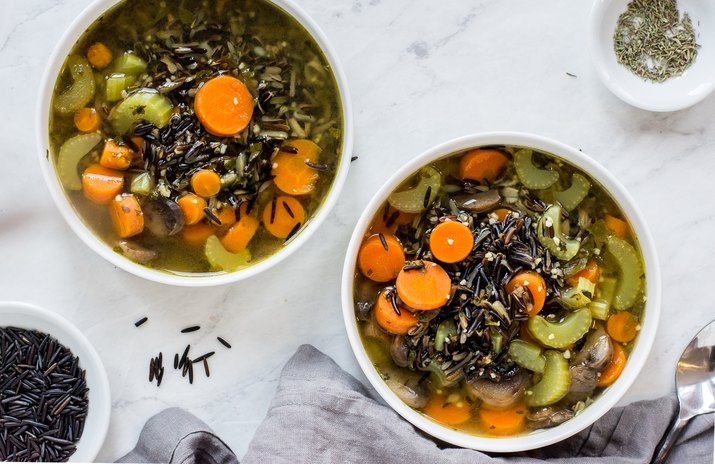
Image Credit: Abbey Rodriguez Instant Pot Wild Rice Soup 13 of 15

Instant Pot Wild Rice Soup

This healthy soup is packed with flavor, will fill you up and is easy to freeze!

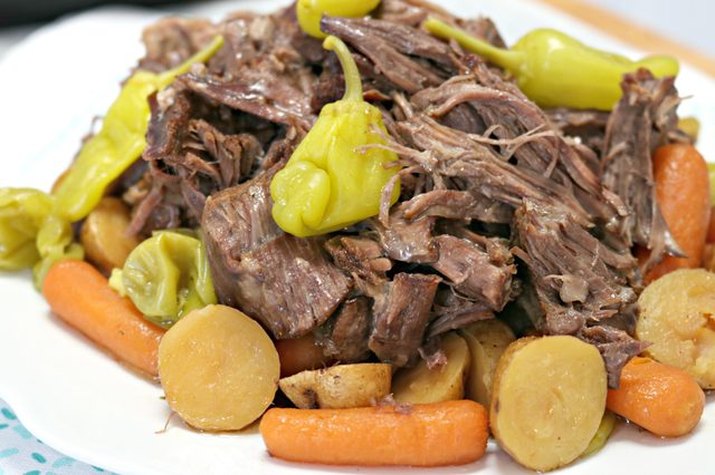
Image Credit: Abbey Rodriguez Instant Pot Mississippi Pot Roast 14 of 15

Instant Pot Mississippi Pot Roast

Say goodbye to the slow cooker and hello to the Instant Pot for this favorite pot roast recipe.

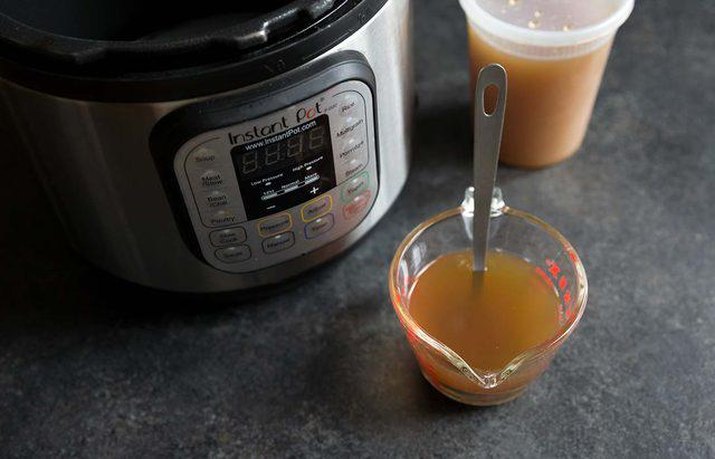
Image Credit: Jessica Kielman Instant Pot Chicken Stock Recipe 15 of 15
Instant Pot Chicken Stock Recipe

Turn 8 hours of simmer time into less than an hour of preparation with this Instant Pot chicken stock tutorial.

Image Credit: Jennifer Farley

Awesome DIY Black Panther Cake Pops & Cupcakes

0

With the release of Marvel's highly anticipated Black Panther movie, I wanted to dive into creating some sweets to celebrate Check out this easy to follow tutorial to make your very own Black Panther themed cake pops and cupcakes. They're the perfect addition to a comic book themed birthday party, baby shower and more.

Cake Pops with Piping

Video of the Day

Overhead Cupcakes

Black Panther Cake Pops

Ingredients

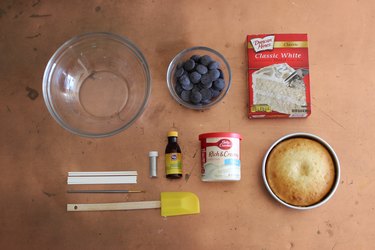
Things You\’ll Need

  • Cake mix

  • Chocolate melts

  • Lollipop sticks

  • Frosting

  • Large bowl

  • Skinny tip paint brush

  • Spatula

  • Silver luster dust

  • Pure lemon extract

Step 1: Make & Mold Cake Balls

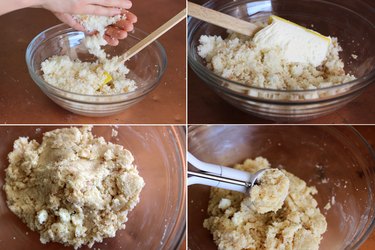
Bake your cake and crumble the cake into a large bowl. Then mix a spatula full of frosting in and roll it into balls.

Cake Pop Batter

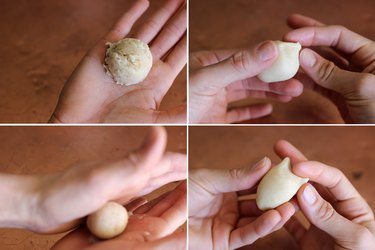
Once those are rolled, mold them into the Black Panther mask shape. Grab the corners up top and twist with your fingers to create the ears.

Mold Cake Pop

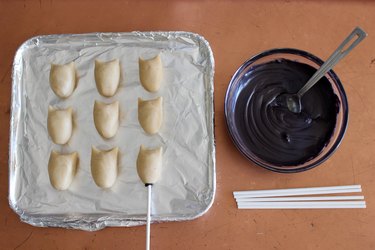
After you've molded them, dip the tip of each lollipop stick in the melted chocolate and then stick them into the bottom of each cake pop. Place them in the fridge to chill.

Lollipop Stick

Step 2: Cover Pops In Melted Chocolate

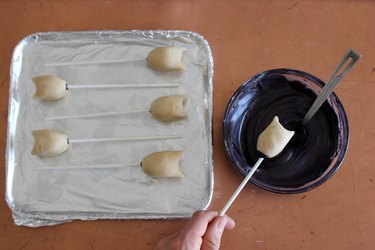
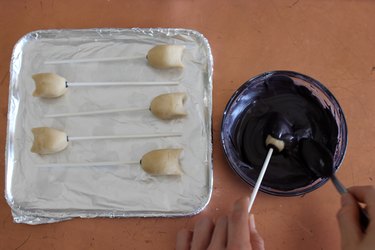
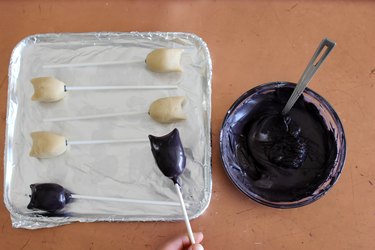
Once the pops have chilled, dip them into the melted chocolate to provide a smooth coat around each. Tap your wrists with your free hand to tap off as much excess chocolate as possible.

About to be Dipped Dip Into Chocolate

Then put them in the fridge to chill once again.

Dipped

Step 3: Add Mask Details

To give the mask some shine, mix equal parts silver luster dust and pure lemon extract to create this metallic effect. Paint the lines of the mask on with a thin brush.

Painting Final Cake Pop

Tip

If your initial lines come out a little bit too thick, simply use some water and a q tip to thin them out.

Q Tip

Step 4: Emphasize Details with Piping

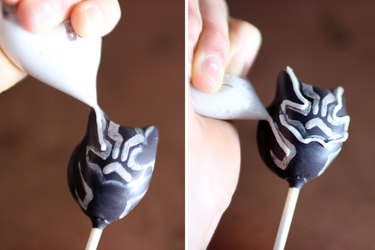
Cut the corner off a ziplock bag, fill it with frosting and use it to pipe a little extra detail along the mask lines.

Pipe Frosting On Cake Pop Frosting Single

Black Panther Cupcakes

Cupcake Ingredients

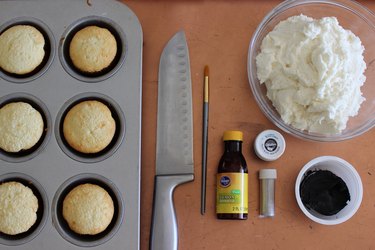
Things You\’ll Need

  • Cupcakes (homemade or boxed)

  • Frosting

  • Black molding chocolate

  • Black sprinkles

  • Silver luster dust

  • Pure lemon extract

  • Paint brush

  • Knife

Step 1: Bake Your Cupcakes

Bake the cupcakes of your choice, either homemade or boxed!

Step 2: Prep Molding Chocolate

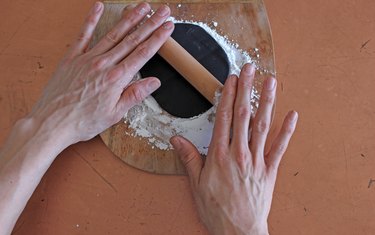
Roll out some molding chocolate and cut out small circles that will fit atop each cupcake once frosted.

Molding Chocolate Cookie Cutter

Step 3: Assemble the Cupcake

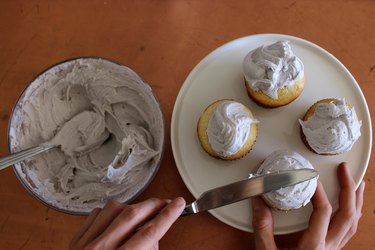
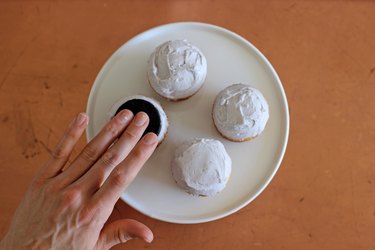
Frost your cupcakes to be fairly even at the top. Then add the molding chocolate circles on top.

Frosting Cupcakes Circle on Top

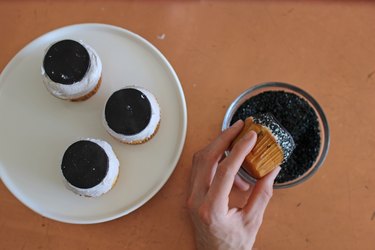
Dip the cupcakes immediately into the black sprinkles, covering the exposed frosting around the sides.

Add sprinkles

Step 4: Create the Neck Piece

With the excess rolled out black molding chocolate, cut out the shape of the spiked necklace outline with a knife.

Cut out spiked necklaces Cut out spiked necklaces

Step 5: Add Silver Luster Dust

Grab some luster dust and mix it with equal parts of pure lemon extract. Paint the mixture onto the fondant to give it the perfect metallic glow!

Add luster dust Add luster dust

Step 6: Add Necklaces to Cupcakes

Place those spiked necklaces right on top of the cupcakes and you are done! You now have the perfect sweet treats that your guests will love at your next Black Panther get together.

Complete cupcakes

I love these because they are easy for any level of baker and are not super time consuming. Happy baking!

How to Make Swirled Pumpkin Cheesecake Chocolate Bark

0

Pumpkin season is upon us, and while you may be accustomed to tasting the flavor in everything from breakfast cinnamon rolls to dessert cakes, there's probably one sweet that hasn't received the same autumn treatment: bark. Chocolate bark may be more widely known as a traditional holiday treat, but there's no reason to hold off until December. Blend coconut oil and semi-sweet chocolate together to form a base for a creamy pumpkin cheesecake swirl. Then, sprinkle a few pepitas on top for an added crunch and an even more alluring finish. It's a simple treat that puts a twist on the season's most coveted ingredient.

swirled pumpkin cheesecake chocolate bark

Video of the Day

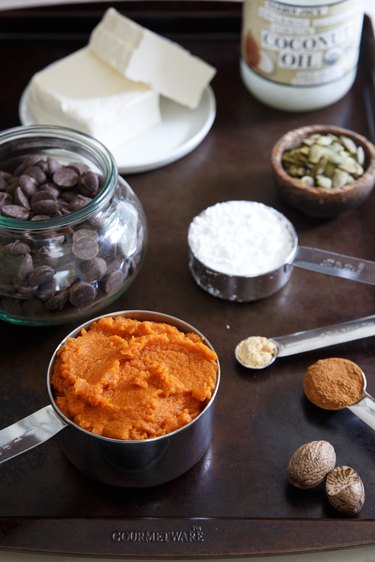
Things You\’ll Need

  • 1 1/2 cups semi-sweet chocolate chips

  • 1 tablespoon melted coconut oil

  • 2 ounces cream cheese, softened

  • 1/4 cup powdered sugar

  • 1/4 pumpkin puree

  • 1/2 teaspoon cinnamon

  • 1/4 teaspoon ginger

  • 1/8 teaspoon nutmeg

  • 2 tablespoons pepitas (optional)

pumpkin cheesecake chocolate bark ingredients

Step 1: Beat the Pumpkin Cheesecake Mixture Together

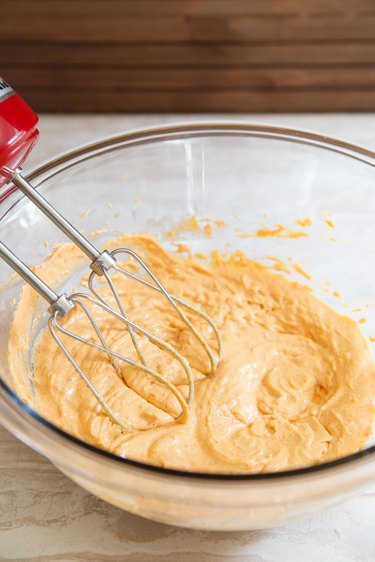
Using a handheld mixer, beat the softened cream cheese and powdered sugar together until they're thoroughly combined. Add the pumpkin puree and the spices, and beat again until everything is incorporated.

pumpkin cheesecake swirled chocolate bark

Step 2: Pour the Melted Chocolate Onto a Baking Sheet

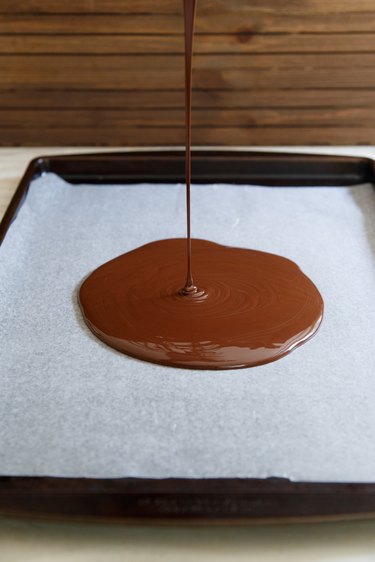
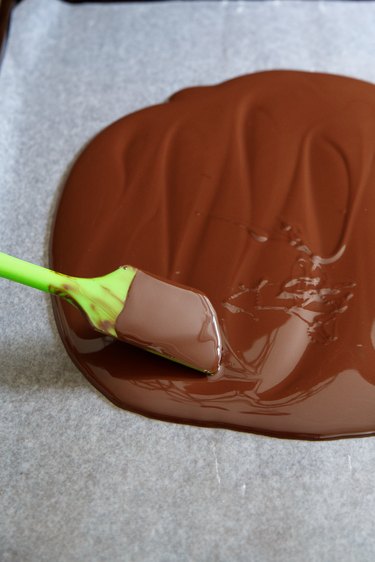
Melt the chocolate and coconut oil together, either over a double boiler or in the microwave. Stir until smooth. Line a baking sheet with parchment or wax paper, and pour melted chocolate onto the pan.

melted chocolate

Step 3: Spread the Chocolate Layer Evenly

Use a spatula to spread the chocolate out evenly into a rectangular shape that's about 1/8-inch thick.

chocolate pumpkin cheesecake bark

Step 4: Add Dollops of Pumpkin Cheesecake

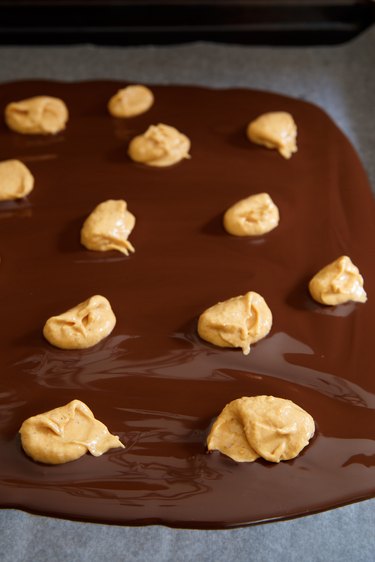
Place spoonfuls of the pumpkin cheesecake mixture on top of the chocolate.

pumpkin cheesecake

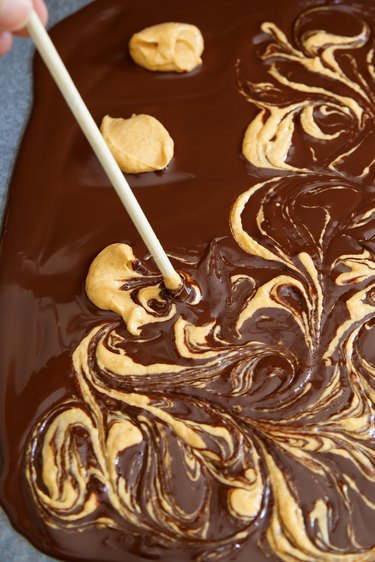
Step 5: Swirl Pumpkin Cheesecake Into the Chocolate

Using a wooden dowel, a chopstick or a knife, swirl the pumpkin cheesecake mixture into the chocolate in a figure-8 pattern. Then, if using the optional pepitas, sprinkle them on top of the bark. And if you really want to go all out, you could opt for chopped up Halloween candy instead. Your creativity is the limit!

pumpkin cheesecake swirl

Step 6: Chill, Set and Break Into Pieces

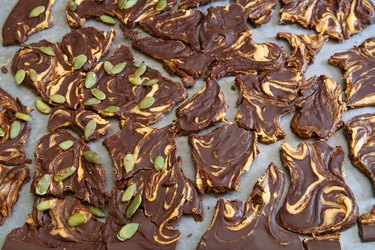
Place the baking sheet in the refrigerator to set for at least 30 minutes. Once firm, break the bark into pieces and place them on a plate to serve.

swirled pumpkin cheesecake chocolate Halloween bark

Candy Cane Sugar Cookies Recipe

0

Candy cane sugar cookies are the perfect recipe for your holiday festivities. The red and white frosting is a cheerful classic for Christmas, and it also makes these cookies look gorgeous and taste delicious. They stay fresh for a long time, making them perfect sweet treat to prepare in advance during the busy holiday season.

These Candy Cane Sugar Cookies are the perfect Christmas treat!

Video of the Day

Make the Dough

Things You\’ll Need

  • 6.7 ounces (190 grams) unsalted butter, at room temperature

  • 6 ounces (170 grams) granulated sugar

  • 1 large egg

  • 1 teaspoon vanilla bean extract

  • 10.6 ounces (300 grams) all-purpose flour

  • 1/2 teaspoon baking soda

  • 1/4 teaspoon baking powder

  • 1/2 teaspoon salt

Place the butter and sugar into the bowl of a stand mixer fitted with the beater attachment. Alternatively, you could also use hand-held electric beaters for this step. Beat on medium speed until the mixture is light and fluffy, about 5 minutes. Pause mixing to scrape down the bottom and sides of the bowl. Add in the egg and vanilla bean extract. Beat for one more minute until combined. Set the mixer speed to medium-low. Add in the flour, baking soda, baking powder and salt. Beat until just combined. The dough should be soft and fluffy.
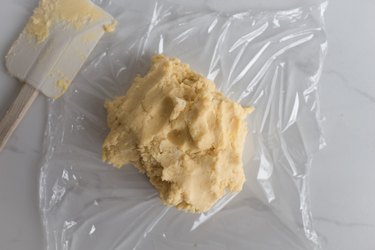
Remove the dough from the bowl. Form it into a disc and cover it with a layer of plastic wrap. Chill in the refrigerator for at least 1 hour, or until firm.

Set the dough onto a piece of plastic wrap and chill until firm.

Tip

If you wish to prepare the dough in advance, simply store it in the freezer for up to 1 month before using.

Bake the Cookies

Things You\’ll Need

  • Rolling pin

  • Baking tray

  • Non-stick parchment paper

  • Candy cane cookie cutter

Pre-heat the oven to 340 Fahrenheit (170 Celsius). Line a large baking tray with non-stick parchment paper. Set aside.

Remove the firm dough from the refrigerator and place it onto a lightly floured work surface. Using a lightly floured rolling pin, roll the dough out until it roughly reaches a thickness of a 1/4 inch (.63 centimetres). Then, use the candy cane cookie cutter to cut out as many shapes from the dough as possible. Set the candy canes onto the baking sheet, allowing enough distance for spreading. Knead any scraps together, then re-roll the dough and cut out as many shapes from the remainder as possible.

Place the candy cones onto the baking sheet, allowing room for spreading

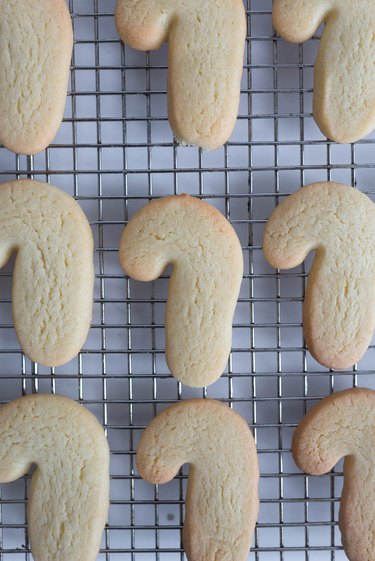
Transfer the baking tray to the oven. Bake for 10 to 12 minutes or until the cookies are golden around the edges, slightly puffed and the centers are just firm. Let the cookies cool on the baking tray for 10 minutes, before carefully setting them out and onto a wire rack to cool completely before icing.

Bake until just golden then set the cookies onto a wire rack to cool.

Make the Icing

Things You\’ll Need

  • 1 pound (450 grams) powdered sugar

  • 8 tablespoons water

  • 3/4 teaspoon vanilla bean extract

  • 1/4 teaspoon salt

  • Red food dye

Place the powdered sugar, water, vanilla bean extract and salt into a large mixing bowl. Whisk until well combined and smooth. The mixture should flow like lava but be thick enough to retain its shape.

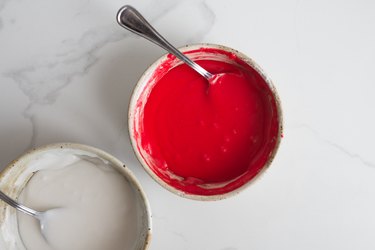
Divide the icing between two bowls. Use a few drops of red food coloring to dye one of the icing portions a bright shade of red.

Divide the icing between the bowls.

Tip

If the mixture is too thin, add another tablespoon of powdered sugar or if the mixture is too thick, add another tablespoon of water until the desired consistency is reached.

Decorate

Things You\’ll Need

  • 2 disposable piping bags

  • 2 small piping tips, e.g. Wilton Round Tip No. 3

Fit the piping bags with small decorative tips and add the icing into each. Snip off the bag tips.

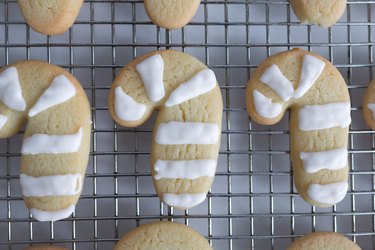
To ice the cookies as traditional candy canes, begin to color block small portions of the cookies with the white icing. Then use the red icing to fill in the spaces to form candy cane stripes.

Color block the cookies with the white icing.

You can also decorate the cookies however you desire; they look particularly gorgeous with spots and stripes. To do this, simply cover the cookie with the red icing and then use the white icing to pipe out your desired patterns.

Let the cookies sit at room temperature until the icing has set, about 4 hours.

Decorate the cookies then let the icing set until firm.

Serve

Once the cookies have set, you can serve and enjoy them at home, or package them in a cute box and send to loved ones. They make for gorgeous and heart-felt Christmas gifts.

The cookies will keep in an air-tight container for up to 2 weeks. Store them in a cool dark place or the refrigerator.

These Candy Cane Sugar Cookies are delicious and make for wonderful Christmas gifts.