Home Blog Page 12

Common Juice Bar Products

... Juice bars serve products focusing on fresh fruits and vegetables.

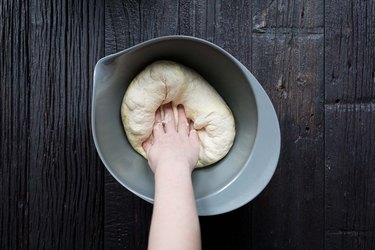
A juice bar focuses on providing customers with fresh juice that is free additives. Such establishments do not sell alcohol, only healthful beverages and various healthful concoctions filled with an abundance of vitamins. Juice bars can be freestanding or attached to restaurants and fitness centers.

Video of the Day

Fruit and Vegetable Juices

The No. 1 item at a juice bar is the juice drink itself. These types of juices typically start with a common base, such as apple, orange or pineapple juice. Then, the juice bar baristas mix the base ingredients with different combinations of fruits and vegetables, including regular fruits such as strawberries, blueberries and bananas; tropical fruits such as mango and papaya; and vegetables such as beets, celery, carrots, spinach and kale. Often juice bars offer additions to drinks, for example, spirulina and wheat grass juice.

Smoothies

Juice bars may also offer smoothies. Typically, a juice bar barista can make a smoothie by blending a juice drink with a thick dairy product or dairy substitute, such as yogurt or almond milk. Smoothies as an offering encourage more people to come into a store because the drinks are a more substantial and filling alternative to a juice drink.

Juice Shots

A juice shot is typically a 2 oz. to 4 oz. drink filled with ingredients that have many vitamins and minerals. Juice shot options may include wheat grass shots, barley grass shots and blue-green algae shots.

Tea and Coffee

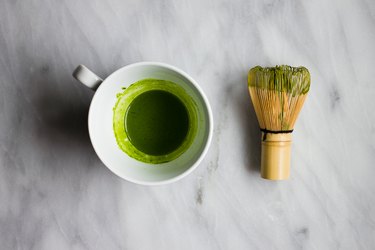
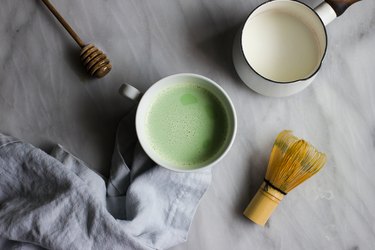
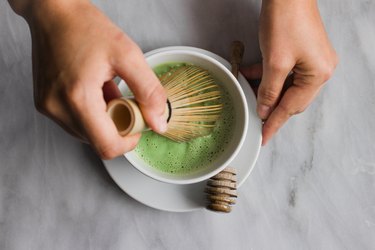
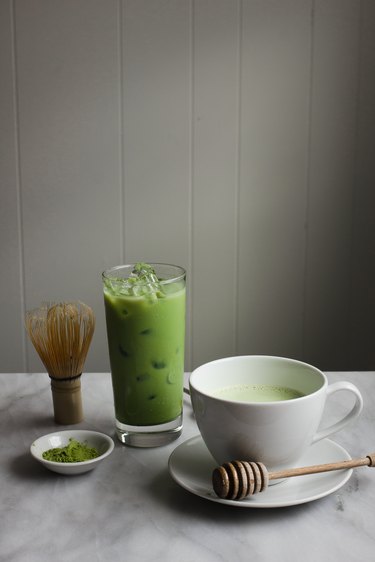
Tea and coffee are often readily available at juice bars. Coffee may be available in a small or wide variety of bean types and flavors, while the tea selection typically comprises decaffeinated herb teas such as chamomile and caffeinated varieties such as green tea, black tea, white tea and red tea.

What Can Be Used as a Substitute for Shortening in Sugar Cookies?

0

... Butter can be substituted for shortening in most cookie recipes.

One of the most common questions facing any cook or baker is how to substitute for a missing or unavailable ingredient. Some substitutions are easy, others can be quite difficult. In the case of cookie making, substituting one fat for another is not usually troublesome. Depending on the substitute you choose, you may not need to adjust the recipe much at all.

Video of the Day

What Shortening Does

The shortening in sugar cookies works together with the sugar to create a light, crispy texture. As the sugar is creamed into the shortening, the corners of the sugar crystals leave small gouges in the room-temperature fat. Over a period of a few minutes, the creaming process creates tens of thousands of tiny air pockets in the fat. When the cookies are baked, the baking powder or baking soda in the recipe will create small amounts of carbon dioxide, which will seep into these small air pockets and expand them, making the cookies light and crisp.

Substitute Butter

Butter can be substituted for the shortening in most cookie recipes. Butter will improve the flavor of most cookies, but can be more difficult to work with than shortening. If you live in a warm climate, butter will tend to soften and produce cookies that spread too much. This can be prevented by chilling the dough before putting it on the cookie sheets. Butter also contains a percentage of water, while shortening is pure fat. This will not matter except in large-volume recipes, where the flour might need to be increased slightly.

Substitute Margarine

Margarine is very similar to shortening in its makeup, since both are manufactured from vegetable oils. Simply replace the shortening with an equivalent quantity of margarine, and the recipe will need no further adjustment. Be sure when purchasing margarine for baking that you do not select a soft, spreadable margarine, which is high in water content and unsuitable for baking. It is best to choose a non-hydrogenated margarine that is trans-fat free, to avoid any health problems.

Other Fats

Highly refined lard can be used in place of shortening in many cookie recipes, though some brands will leave a faint hint of pork in the flavor. Some manufacturers produce a butter/margarine blend in varying proportions, which also works well for baking. Coconut oil can be purchased in solid form similar to shortening under the name copha, though it is hard to find in the United States. A less common alternative, still popular in some Amish and Mennonite communities, is to use purified chicken fat for light, crisp cookies.

8 Heart-Healthy Oatmeal Recipes to Try If You\’re Over 50

0

Homemade steel cut bowl of oatmeal in blue bowl 1 of 9

Growing older comes with more wisdom and experience, but it can also come with potential health troubles. For instance, the risk for heart disease increases tremendously after 45 to 50 years of age. Since oats reduce cholesterol and are loaded with vitamins, they can naturally decrease chances of heart disease, among other health issues. Here are 6 simple oatmeal recipes that are not only great for your health, but also taste amazing!

Image Credit: bhofack2/iStock/GettyImages Oatmeal Protein Muffins 2 of 9

Oatmeal Protein Muffins

These oatmeal muffins are low in sugar and packed with protein from ingredients including nut butter, flaxseed and chia seeds. Simply add a few chocolate chips or banana chips into the mix for a sweeter taste!

Image Credit: Charity Curley Mathews Baked Oatmeal 3 of 9

Baked Oatmeal

Looking for a quick and nutritious breakfast or brunch option? This baked oatmeal recipe checks off both categories. It tastes great, is packed of vitamins and can easily be customized with toppings like fruit or nuts.

Image Credit: Julia Mueller Bruleed Oatmeal 4 of 9

Bruleed Oatmeal

If you're in the mood for something sweeter than the traditional bowl of oatmeal, you'll want to try this brûlėed oatmeal recipe. You'll wish you tried this caramelized treat sooner!

Image Credit: Kristan Raines Overnight Oatmeal 5 of 9

Overnight Oatmeal

Deliciously creamy and chilled oatmeal that's ready when you wake up? It doesn't get much better than that. This easy recipe for overnight oatmeal will save yourself lots of time in the a.m.

Image Credit: Julia Mueller Protein-Loaded Sweet Potato & Oatmeal Mini Casserole 6 of 9

Protein-Loaded Sweet Potato & Oatmeal Mini Casserole

If you're often racing the clock in the morning, these sweet potato and oatmeal mini casseroles are just what you need. Prepare them ahead of time and pop them in the microwave to start your day on a satisfying, protein-filled note!

Image Credit: Kevin Curry Spiced Apple Oatmeal Cookies 7 of 9

Spiced Apple Oatmeal Cookies

Oatmeal is a classic breakfast option, but it also makes a fantastic component to a number of delicious desserts including these spiced apple oatmeal cookies. Topped with a smooth brown butter icing, these cookies will melt in your mouth.

Image Credit: Julia Fain Microwave Old-Fashioned Oats 8 of 9

Microwave Old-Fashioned Oats

When you want the benefit of old-fashioned oats, but want them in a jiffy, why not try microwaving them. Super easy, super fast, super delicious.

Image Credit: Susan Schmitz/iStock/Getty Images Energizing Maca Oatmeal 9 of 9

Energizing Maca Oatmeal

After a workout, this is the ideal meal: oatmeal spiked with super foods including maca, which will give you a boost of energy. Plus, it'll keep you full for at least 5 hours!

Image Credit: LEAFtv

How Long Can a Lemon Be Safe in Water?

0

Glass of Water Use lemon slices to make lemon-infused water. Image Credit: Duncan Smith/Photodisc/Getty Images

Lemon and water is a natural pairing that makes water all the more delicious. This lightly flavored beverage is simple to create and can easily and safely be made in advance and stored in your refrigerator to have on hand. Store your lemon-infused water in a pitcher and enjoy the refreshing beverage whenever you want it.

Video of the Day

Lemon Water Storage Basics

To get the longest storage time out of lemon and water, refrigerate it. When kept at 40 degrees Fahrenheit or lower, lemon-infused water is safely stored for up to three days. Always use proper hygiene when making lemon water to prevent cross contamination, including washing your hands and using clean utensils. Cut lemons into slices or wedges and gently squeeze them before adding to a pitcher. Fill the pitcher with cool tap or filtered water, cover and refrigerate until ready for use.

Cleaning the Lemons

Lemons are typically coated with a thin layer of food-safe wax and other preservatives to help prevent the growth of mold and fungus during storage. Because of this, it is important you thoroughly clean a lemon before adding it to water or use organic lemons when using them to infuse water. Use a produce brush to thoroughly scrub the lemon under running water to remove its wax or pour just-boiled water over a lemon before scrubbing to more easily remove the film covering it. You can also peel the lemon.

Refilling Lemon Water

Because sliced lemons will keep for up to three days in the refrigerator, you can refill your water pitcher during this time period to make more lemon water. While the subsequent refills will not be as flavorful as the original, allowing the water to steep for longer will create a similar effect. Add more lemon slices to boost the flavor, but make sure you replace all the lemon slices and start again once three days from the original infusion have passed.

Lemon Water Tips

Store lemon-infused water in a tightly sealed glass or plastic jug, water bottle or other storage container with a lid. Allow lemon and water to sit, refrigerated, for at least two hours before serving for the most flavor. When making lemon-infused water, avoid using any lemons that are discolored, have soft spots or other indications of spoilage, as this can create off-tasting lemon water that will not last as long when stored refrigerated.

How to Make Sugar Cookies From Scratch

0

These soft and delicious sugar cookies are easy to make, just follow the recipe – no short cuts! Plan ahead and allow time for the butter to come to room temperature on its own. Resist the temptation to roll out the dough before it has sufficient time in the refrigerator. Cut out in shapes for any festive occasion and decorate with icing and sugary sprinkles or simply dust with powered sugar.

Snowflake shaped sugar cookies on a plate

Video of the Day

Ingredients

  • 1 cup (2 sticks) unsalted butter, room temperature
  • 2 cups sugar
  • 2 large eggs
  • 2 teaspoons almond extract
  • 4 cups sifted all-purpose flour
  • 1 teaspoon baking powder
  • 1/2 teaspoon salt

Directions

Cream together butter and sugar in an electric mixer until pale and fluffy. Add eggs and almond extract, beat 3 minutes.

Creaming butter and sugar adding egg creamed butter, sugar, eggs and almond extract

Measure flour, baking powder and salt in a separate bowl.

Tip

Spoon flour into a measuring cup until over-full. Draw a straight knife edge across the top of the cup to scrape away the excess flour.

Measuring flour

Sift flour mixture into creamed butter, sugar and eggs and beat on low speed until smooth.

Sifting dry ingredients into the mix

Divide dough into four sections, shape into disks and wrap in plastic wrap. Chill a minimum of 2 hours, overnight if possible.

dough wrapped and ready to refrigerate

Unwrap a disk of dough, cover with another sheet of plastic wrap and roll to a thickness of 1/4 inch, slightly less for a crisper cookie.

rolling out the dough

Peel away the plastic wrap, lightly dust surface with flour, dip cutter in flour and cut out desired shapes. Transfer cookies to a baking sheet lined with parchment paper. Roll out scraps, and repeat once. Repeat this process with the other disks of dough.

Tip

Work in small batches and keep the dough as cold as possible until placing in the oven. Store prepared cookies waiting to be baked in the refrigerator.

cutting out the cookies

Bake in an oven preheated to 325 degrees for 5 minutes, gently rotate the baking sheet and continue to bake for 5 more minutes or until lightly browned on the edges.

cookies in the oven

Enjoy!

milk and cookies

Want to top off your cookies with the best sugar cookie icing ever? With a few simple ingredients you'll be on your way! Follow our favorite recipe.

Sugar cookie icing recipe.

Homemade Pizza Dough Recipe

0

Did you know that pizza dough is very easy to prepare at home? You probably already have most (if not all) of the ingredients already available in your pantry. Homemade pizza is an incredibly fun weekend meal, and this is a simple recipe that actually has several applications. In addition to pizzas, you could use this for things like flatbread and calzones! Let's get started.

Homemade Pizza Dough Recipe | eHow

Video of the Day

Things You\’ll Need

  • 1 packet, or 2 1/4 teaspoons active dry yeast (instant yeast may be substituted)

  • 1 cup warm water (105-115 degrees F)

  • 2 1/2 cups all-purpose flour

  • 1 teaspoon granulated sugar

  • 1 teaspoon kosher salt

  • 2 tablespoons extra virgin olive oil, plus more for greasing the bowl

Step 1: Dissolve Yeast in Water

Gather your ingredients. Whisk the yeast into the water and let sit for about 5 minutes to dissolve. If you're substituting instant yeast, skip this step.

Homemade Pizza Dough Recipe | eHow

Step 2: Add Dry Ingredients to a Food Processor

Place the flour, sugar and salt in a food processor (add the instant yeast here if substituting). Pulse to combine.

Homemade Pizza Dough Recipe | eHow

Step 3: Add Liquid Ingredients

With the machine running, add the water and olive oil.

Homemade Pizza Dough Recipe | eHow

Step 4: Remove from Food Processor

Once the dough comes together, remove from the food processor. It will be sticky, but should still easily form a ball. If the dough feels wet, you can kneed in an extra 1/2 – 1 tablespoon flour on a lightly floured surface or bowl.

Homemade Pizza Dough Recipe | eHow

Step 5: Place in a Large Bowl

Lightly grease a large bowl (at least double the size of the dough) with olive oil or an olive oil cooking spray. Cover with plastic wrap. Optionally, you can grease the top of the plastic wrap as well, but this shouldn't be necessary if the bowl is very large.

Homemade Pizza Dough Recipe | eHow

Step 6: Let Dough Double in Size

Let the dough double in size. This should take approximately one hour.

Homemade Pizza Dough Recipe | eHow

Step 7: Punch Down the Dough

"Punch the dough" is a baking expression; you can be gentle. Press down the dough to deflate it.

Homemade Pizza Dough Recipe | eHow

Step 8: Use or Store

Roll out the dough according to recipe instructions, or seal in plastic wrap and store in the refrigerator for up to two weeks. If making a thin crust pizza, the dough can be divided in half to prepare two pizzas.

Looking For Pizza Recipes?

Be sure to check out some of my other pizza recipes:

  • Homemade Pizza Sauce
  • Cast Iron Skillet Pizza
  • Homemade Frozen Pizza

Homemade Pizza Dough Recipe | eHow

How to Make a Matcha Latte

0

The vibrant green color of a matcha latte is unmistakable. Its gorgeous hue comes from its main ingredient, matcha, which is made up of whole, dried green tea leaves that have been ground into a very fine powder. Luckily for you, this drink is more than just a pretty color. In addition to being a pleasure to look at, matcha is packed with antioxidants and delivers a wonderful dose of caffeine without the drowsy crash of coffee. This drink is traditionally made with water, but it also tastes great with milk, as well as other dairy alternatives, so be sure to play around with this recipe to find what suits your tastes best.

How to Make a Matcha Latte

Things You\’ll Need

  • 1 teaspoon high quality matcha powder

  • 2 teaspoons hot water, just under boiling

  • 1 cup milk, or other milk alternative

  • 1/2 teaspoon vanilla extract, optional

  • 1 teaspoon honey, or other type of sweetener, to taste

  • Small sifter

  • Bamboo whisk

  • Small saucepan

How to Make a Matcha Latte

Step 1

Sift 1 teaspoon of matcha powder into a large cup.

How to Make a Matcha Latte

Step 2

Add 2 teaspoons of hot water to the matcha powder, and whisk until smooth and no lumps remain.

How to Make a Matcha Latte

Tip

You can also use a small wire whisk instead of a bamboo whisk.

Step 3

Warm milk (or the milk alternative of your choice, such as soy milk or almond milk) in a saucepan just until steaming, then stir in the vanilla and pour the mixture into the cup. If adding a sweetener, mix in 1 teaspoon of honey until dissolved.

How to Make a Matcha Latte

Tip

Want to make an iced matcha latte? Skip warming the milk, and use cold milk instead. If using honey to sweeten your drink, make sure to mix it in right after step two. Once the honey is incorporated, stir in the milk and the vanilla, then pour over ice.

Step 4

To create a foamy top, place the bamboo whisk in the cup, and begin to whisk in a zigzag motion for 30–45 seconds, or until frothy.

How to Make a Matcha Latte

Step 5

Whether making an iced or hot matcha latte, taste the finished drink, adding more sweetener if desired.

How to Make a Matcha Latte

How to Freeze Kaffir Lime Leaves

0

Things You\’ll Need

  • Colander

  • Towel

  • Storage bags or containers

...

Kaffir lime, a citrus fruit frequently used in Asian cuisine, is not the same as a traditional lime. The limes are small and have a dark green, bumpy rind. The leaves and peels are fragrant and used in flavoring dishes. The fruit itself is bitter, acidic and considered inedible, although it is not dangerous in any way. Stored improperly, the leaves can go bad quickly, and dried leaves tend to have less flavor. Freezing the leaves works well.

Video of the Day

Step 1

...

Rinse the kaffir leaves off well in a colander.

Step 2

...

Place the wet leaves on a clean paper or linen towel and pat them dry. They must be completely dry before freezing.

Step 3

...

Put the dry leaves in an airtight freezer-safe container, like a storage bag or small plastic container. If you are packaging them in a freezer bag, squeeze as much air out of the bag as possible before sealing.

Step 4

...

Seal the container completely and place it in the freezer. The leaves will stay flavorful for up to a year.

How to Keep a Pie Crust From Bubbling While Baking

0

Things You\’ll Need

  • Fork

  • Scissors

  • Parchment paper or aluminum foil

  • Pie weights or dry beans or uncooked rice

Fruit pastries and quiches Prick pie crust with a fork to keep it from bubbling. Image Credit: Ablestock.com/AbleStock.com/Getty Images

Getting a pie crust just right — so that it's flaky, tender and holds the pie filling in place — takes time and attention to detail. When a crust bakes, air that occurs naturally in the ingredients — namely pure butter — expands in the oven heat. This can cause the layers to bubble up, which weakens the crust and makes for a messy presentation.

Video of the Day

Step 1

Prick the entire bottom surface and sides of the pie crust with a dinner fork to keep it from bubbling, a technique known as docking. Turn your fork in various directions as you prick the crust, spacing the sets of holes approximately 1 inch apart. Use this technique when baking the pie filling and crust together at the same time, such as you might do with a pumpkin pie. For covered fruit pies, such as cherry or blueberry, make slits in the top crust to let out the steam as the pie bakes.

Step 2

Place your pie crust or tart shell in a baking dish if you plan to pre-bake it, a technique known as blind baking. Cut a piece of parchment paper or aluminum foil, which won't burn in the oven, the same size as your pie crust or tart shell and gently place it on top of the dough.

Step 3

Set pie weights — usually ceramic or metal balls — on top of the parchment paper or foil to keep the crust from bubbling while it bakes. Use a heaping handful of dry beans or dry rice instead of pie weights to accomplish the same task.

Step 4

Bake the pie crust or tart shell for about 15 minutes in an oven preheated to 400 degrees Fahrenheit.

Step 5

Check the crust after the initial baking time. If the parchment paper or foil releases without sticking to the crust, and the crust feels dry, carefully remove the parchment paper or foil and the weights.

Step 6

Prick the bottom and sides of the shell with a dinner fork and let it continue baking until it turns golden brown and done, which could take an additional five to 10 minutes. Check the crust every minute or so to ensure that it doesn't burn.

Tip

Blind bake your pie crust or tart shell if you're using a filling that won't be baked, such as the case with some fruit tarts, or if the delicate filling requires a very short baking time, such as with custard-filled pies.

Blind baking can also be used with moist pies, such as peach or berry, to prevent a soggy crust. Add your filling at the point when you remove the pie weights.

You can buy pie weights for your kitchen gadget collection at specialty kitchen retailers.

How to Decipher the Date Codes on Natural Ice Beer

... Natural Ice is a Busch beer

Natural "Natty" Ice is a beer under the brand Natural, which is owned by Anheuser-Busch. Because Natural is part of the Busch family it carries the same date code as other Busch beers. Even though beer is a perishable product it is not required to have a shelf life date. Most companies use a "born on" or "freshness" date so that consumers can get an idea of how old the beer is. While old beer will not make you sick it won't taste good. A typical refrigerated beer will taste fresh for about four to six months past the freshness date.

Video of the Day

Step 1

Read the first through seventh digits as one unit. This is the shipping date in the format of DD/MM/YY. Remember that Busch keeps its beers on the shelf for 180 days.

Step 2

Overlook the next four digits. These numbers are brewery codes and internal information.

Step 3

Read the next set of three codes separated by dashes to indicate the brand of beer and the type of containers purchased. Many people have confused the last code with the freshness date, believing their beer was expired because the two-digit number at the end of this code is always "07."

The first two digits is this set of code are for the brand of beer. The next three digits are for the type and amount of containers in the case. For example, 043 stands for a six-pack of 16 ounce beer. The last two digits are always "07."