Home Blog Page 118

Easy Way to Quickly Pickle Onions

0

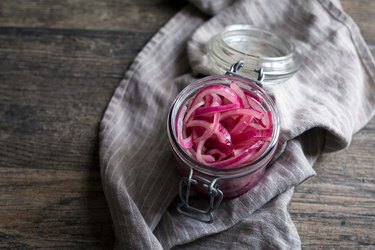
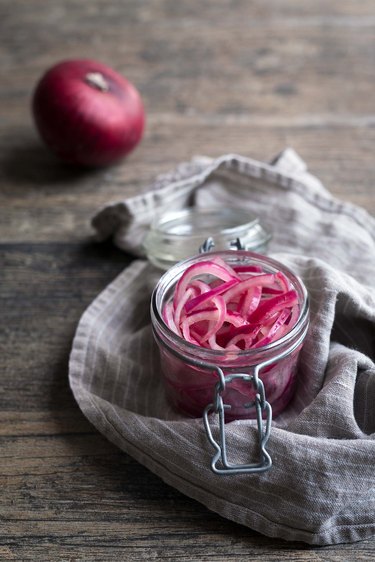
Pickled onions are a fantastic condiment. Whether you're serving them on sandwiches, tacos, pasta, or whatever else you choose, they add so much to a dish: a slightly sweet acidity, crunchy texture, and a bright, vivid color. What's not to love? This version needs to sit for only 30 minutes for the flavors to come together. Once ready, it lasts for weeks in the refrigerator and can be used in countless ways.

How to Pickle Onions

Things You\’ll Need

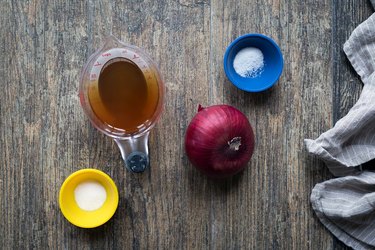
  • 1 small red onion

  • 3/4 cup white wine vinegar or apple cider vinegar

  • 1/2 teaspoon kosher salt

  • 3/4 teaspoon granulated sugar

Step 1: Gather your ingredients and tools.

Red onions are typically used for pickling mainly because they turn such a vibrant jewel-toned color when pickled. You can technically use other onions (shallots would also work). Aim for a small onion that weights approximately 5 ounces. You'll also need a container with a tight fitting lid, as well as a colander.

How to Pickle Onions

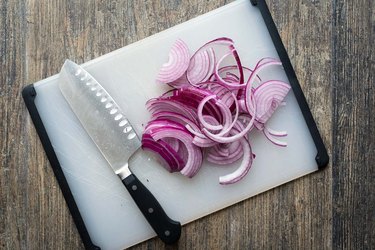
Step 2: Slice onions into half moons.

Pickled onions are typically cut into half moons since these are easy to serve on things like sandwiches. However, you could also go for rings or even a large dice, which works well on pasta.

How to Pickle Onions

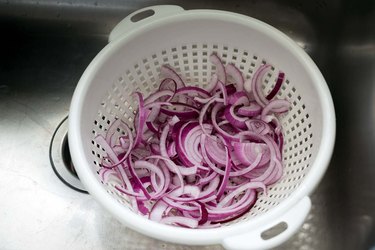
Step 3: Rinse with boiling water.

Bring 3 cups of water to a boil. Place a colander in the sink and add the onions. Pour the boiling water on top (this will par-cook the onions and remove some of their bite).

How to Pickle Onions

Step 4: Combine ingredients.

Add the vinegar, salt and sugar to a container with a tight-fitting lid, whisking to combine. Add the onions.

How to Pickle Onions

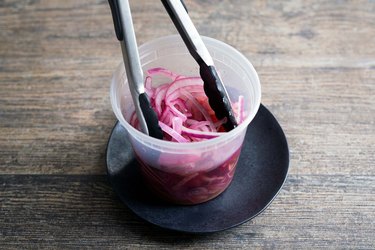
Step 5: Let rest.

Close the lid, and allow to sit for 30 minutes before serving.

How to Pickle Onions

List of French Fruits

0

More than half of France's agricultural land is devoted to cultivation. France's northern regions experience the most cultivation and productivity rates. The southern regions of France, however, exhibit ideal environments for fruits and vegetables. Fruit cultivation and production has direct effects on France's wine production, as most locally and domestically grown fruits are used in wine making. The region of Brittany is made popular for vegetable cultivation while Burgundy maintains a high reputation for wine making. Provence is known for its ideal environments, perfect for fruits, olives and lavender fields. France's large-scale fruit production consists mainly of pears, apples, grapes and cherries.

Apples

France produces more than 1 million tons of apples per year. The apple varieties grown in France include the golden, Granny Smith and red chief apples. These varieties have been cultivated within the region for more than 50 years. Newer varieties such as pink lady and honey crunch as well as organic varieties such as Juliet and choupette have also been introduced. More than half of the apples produced are exported to other European and oversea nations. The remaining half is used for jams and spread production commonly used in French cuisine. These jams and spreads are sold domestically and exported. Apple trees are most abundant in Normandy, where apple cider production also occurs.

Video of the Day

Cherries

Today, there are as many as 400 wild cherry trees growing in many regions in France. Cherry cultivation is abundant in the south, particularly in the Loire Valley. Cherries grown in this region are primarily used for Guignolet, a French cherry liqueur. Cherry trees are also grown in Provence primarily for export and for jams and spreads.

Pears

Along with apples and cherries, France produces a large-scale production of pears. Pears in France are used for export, jams and spreads, and for the production of Perry, an alcoholic drink made primarily with fermented pears. Pears are closely cultivated with apples and often both fruits are produced within the same region. There is a variety of wild pear species within the southwestern regions of France. Passe Crassane is a popular French pear that is usually enjoyed and used in French cuisine during the winter months.

Grapes

France is considered the number one wine producer around the world. More than 7 billion bottles of wine are produced by the country. It has the second largest wine vineyard in the world, with Spain's vineyard area being the largest. France cultivates an extensive and impressive variety of grapes, some of which are exported while others are produced specifically for wine making. More than 800,000 hectares are devoted to this fruit. The most cultivated grape in France is the Merlot variety, which is specially used for wine making and for blending wine flavors. Other popular grape varieties include the Syrah, Grenache and Ugni Blanc. Grape cultivation tends to be most prominent in southern regions of France, such as Bergerac and Bordeaux.

How to Cook Dried Beans in a Slow Cooker

0

For something that seems so easy, there has always been debate about how to bring dried beans back to life. After years of trial and testing, it turns out that soaking your beans overnight does very little to help you cook them. For such a long step, it only save about 20 minutes of cooking time, and some believe it even makes the beans less flavorful. More flavor and one less step? That's the method for me. Just bring the beans to a boil, then make sure to add a 1/4 teaspoon baking soda to the slow cooker and that soaking step is entirely unnecessary. It's a good thing since we have enough to do without spending time on things we just don't need to do.

How to Cook Dried Black Beans in a Slow Cooker

Video of the Day

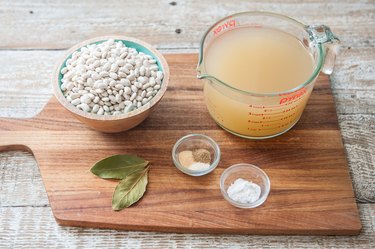
Things You\’ll Need

  • 1 pound dried beans of any variety (Great Northern, Pinto, or Black preferred)

  • 5 cups chicken or vegetable broth (or water)

  • 1/4 teaspoon baking soda

  • 1 teaspoon garlic powder

  • 1 teaspoon onion powder

  • 1 teaspoon celery salt

  • 1/2 teaspoon salt

  • 2 bay leaves

How to Cook Dried Black Beans in a Slow Cooker

Step 1: Boil

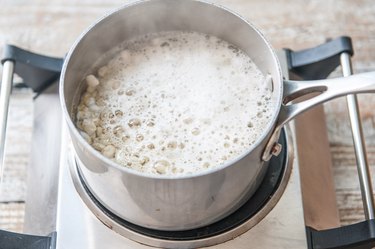
This step eliminates the need for soaking. Soaking overnight versus just bringing the beans to a boil only decreases cooking time by about 20 minutes, not enough of a difference to warrant the extra step and time. Add the beans to a pot, cover with 4 inches of water. Bring to a boil, remove from heat. (If using kidney beans, boil for ten full minutes.)

How to Cook Dried Black Beans in a Slow Cooker

Warning

IMPORTANT: All dried beans have a toxin called lectin (specifically phytohemagglutinin_)_. Some beans, like kidney beans, are extremely high in lectin and can be toxic if not cooked properly. If you're using a high lectin bean you MUST boil for ten minutes to remove the toxins. If you're using a low lectin bean like great northern and pinto, boiling isn't as necessary, the lectin levels are not toxic .

Step 2: Drain

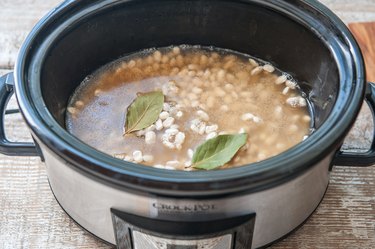
Drain the beans and add to the slow cooker along with the remaining ingredients. Cook on low for 8 hours. Start to check the beans after about 5 hours. Bean cooking time will depend on the type of bean, the size, and how long ago the beans were dried.

How to Cook Dried Black Beans in a Slow Cooker

Step 3: Store or Serve

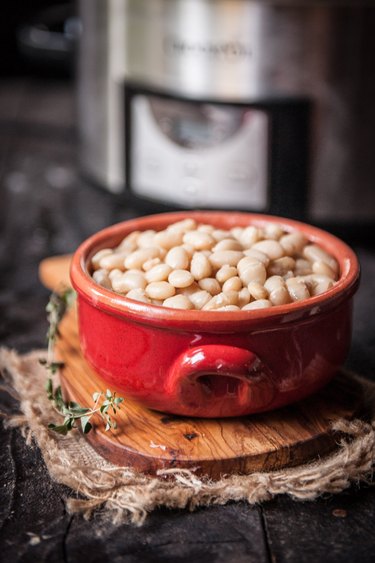
Remove the bay leaves, drain, and store in an air tight container, or serve warm. Beans freeze well, don't be afraid to make a large batch and freeze more for later.

Tip

Don't skip the baking soda! It helps soften and cook the beans, especially those that have been stored a long while and are especially tough.

How to Cook Dried Black Beans in a Slow Cooker

Easy to Make Unicorn Poke Cake Recipe

0

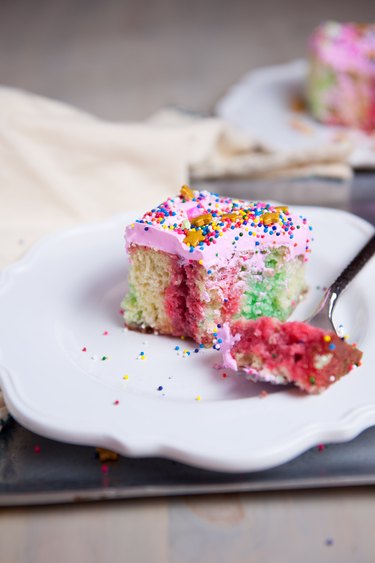
There really isn't a more adorable dessert you can make that's as easy as this one. Sure, you can wait for a kid's party. But what about grown ups?! We like sprinkles, and cake, and pink whipped cream as much as the next guy. How about just deciding that Tuesdays are Unicorn Cake Day and using that as an excuse to make this recipe this week?

Unicorn Poke Cake

Watch the Video!

Things You\’ll Need

  • White cake (store bought or homemade)

  • 4 colors of Jell-O (red, blue, green, yellow)

  • Whipped cream

  • Pink food coloring

  • Lots of sprinkles

Step 1: Bake a white cake

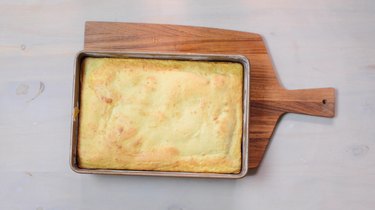
Bake a white cake in a 9×13 pan according to directions. Allow to cool for 20 minutes.

Unicorn Poke Cake

Step 2: Poke Holes

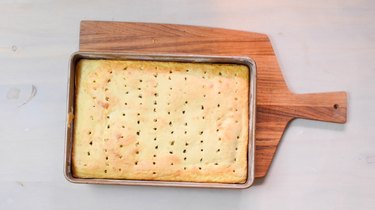
Using a wooden spoon or a chopstick, poke several holes, very close together across the entire cake.

Unicorn Poke Cake

Tip

Spray the chopstick or wooden spoon with cooking spray to keep it from getting covered in cake!

Step 3: Prepare the Jell-O

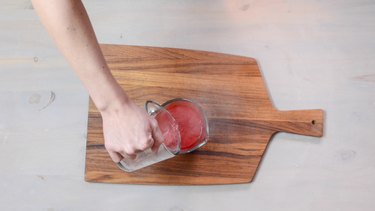
Add each color of Jell-O to a different measuring cup with a spout (this can be done one at a time). Pour one cup of boiling water over the Jell-O, stir until well combined. Repeat for all colors.

Unicorn Poke Cake

Step 4: Pour the Jell-O Over the Cake

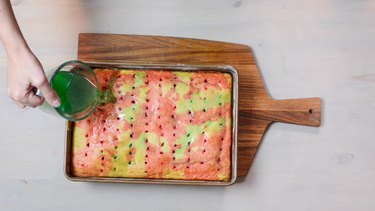
One at a time, pour the Jell-O colors over the cake into various holes, well spaced out over the cake. Cover the entire cake.

Unicorn Poke Cake

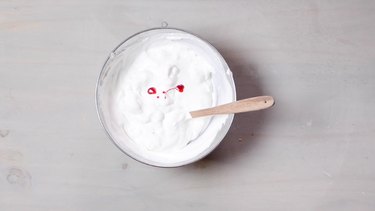
Step 5: Color the Whipped Cream

Add a few drops of pink food coloring to the whipped cream, adjust color depending on preference.

Unicorn Poke Cake

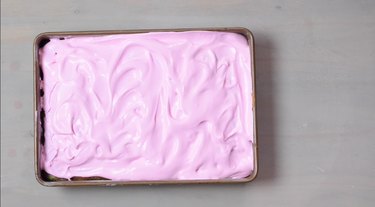
Step 6: Frost the Cake

Frost the cake with the whipped cream

Unicorn Poke Cake

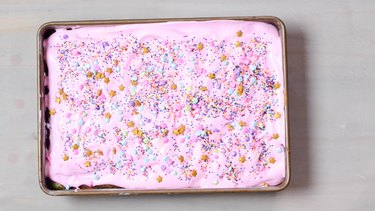
Step 7: Add Sprinkles

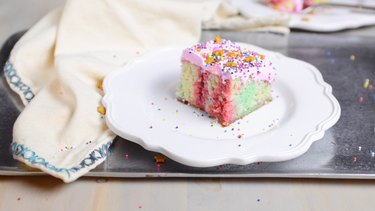
Add a lot of sprinkles to the cake. Refrigerate until ready to serve.

Unicorn Poke Cake Unicorn Poke Cake

How to Store Grape Juice

0

Things You\’ll Need

  • Jars with tight fitting lids

  • Freezer bags

  • Canning jars, with lids and rings

  • Water bath canner

Breakfast foods and beverages

Grape juice made from fresh grapes can be stored in a variety of ways. You can freeze the juice or you can "can" it for later use. Either way, saving the juice for the future is an easy way to preserve the harvest of fresh grapes. Once stored, you can have grape juice ready to drink anytime and not have to run to the store to purchase bottled or concentrate.

Video of the Day

Step 1

Refrigerate fresh grape juice in jars with tight fitting lids in the refrigerator for 5 to 7 days. The juice will begin to ferment if left longer.

Step 2

Freeze fresh grape juice by pouring the juice into zipper type freezer bags and sealing. Label the bags with contents and the date. Place the bags into the freezer with the zipper top upright. This will prevent spilling if the seal is not complete. The juice will keep up to one year in the freezer. If desired, to protect from freezer burn, double bag the juice.

Step 3

Can fresh grape juice by filling canning jars to 1/4 inch from the top with juice. Place the canning lids on the top of the jars and secure with the canning rings. Process the jars in a boiling water bath for 10 minutes. Remove the jars from the water bath and allow to cool. Check the tops for proper sealing. This can be determined by pressing the center of the lid. If the lid does not move, the jar is sealed properly.

Tip

Place fresh grape juice into ice cube trays and freeze. Check the trays after 30 minutes and insert a toothpick into the center of each section of the tray. This will make a quick grape juice pop snack.

You can also turn grape juice into wine by adding sugar and yeast and allowing the juice to ferment for 45 to 60 days. Figure on two pounds of sugar for every gallon of grape juice use. One package of wine yeast will make up to 5 gallons of wine.

How to Refill a Heineken Mini Keg

Things You\’ll Need

  • Drill

  • Mini-keg relief bung

  • Home brew

  • 1/3 cup corn sugar

  • 1 cup boiling water

... Keep the beer flowing by refilling your Heineken mini keg.

The popular 5L Heineken mini keg is most often thrown away after one use – the common belief is that the mini keg cannot be reused. Home brewers, however, can take advantage of this mini keg to create a convenient kegerator for prepared home brew. Easy to transport, you can then share your home brew with friends almost anywhere.

Video of the Day

Step 1

Empty your Heineken mini keg completely and drill a hole (1 inch in diameter) in the top of the keg. Pour 5L of prepared home brew into the keg through the hole — make sure to leave an inch of air between the home brew and the top of the mini keg for pressurization.

Step 2

Prime your keg. Add 1/3 cup of corn sugar dissolved in boiling water to the home brew in the keg. Stop the hole with a mini-keg relief bung. This will keep any air from entering the keg and will prevent excessive pressure from accumulating while the home brew pressurizes.

Step 3

Allow the keg to pressurize for three days in a cool location, away from sunlight. Before serving, chill the keg for several hours and then use the built-in plastic tap to pour your home brew.

8 Peach Perfect Recipes for Summer

0

Looking for new ways to savor this sunny, fuzzy summer stone fruit? From ice cream sandwiches to peach preserves, here are eight scrumptious ways to enjoy this succulent seasonal fruit before they're all gone.

Fresh Cut peaches

Video of the Day

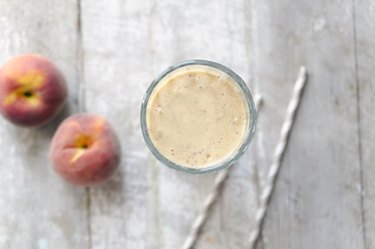
1. Sugar-Free Peaches and Cream Smoothie

This sugar-free peaches and cream smoothie is a bright way to start off your busy mornings, or try it as a pick-me-up in the middle of the afternoon. The delicate sweetness of this smoothie is derived entirely from one beautifully juicy and ripe peach.

Overhead shot of sugar-free peaches and cream smoothie. No additional sugar is needed in this guilt-free treat. Image Credit: Jennifer Farley

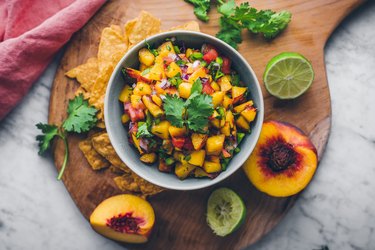
2. Peach Salsa

The sweet and spicy combination of peaches and jalepeños is near perfection in this easy homemade peach salsa recipe. With just a few simple ingredients, you'll have the perfect summer snack for any occasion.

Peach Salsa Recipe

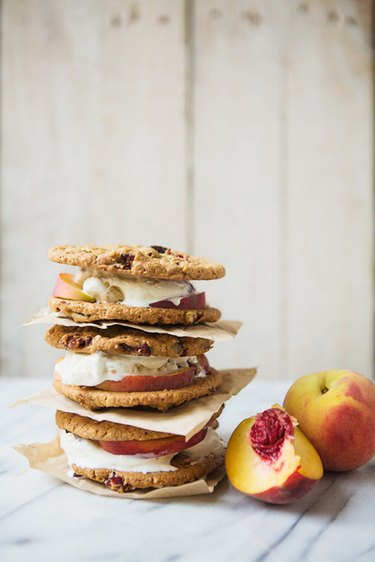
3. Peaches and Pecan Bourbon Ice Cream Sandwiches

Satisfy your sweet tooth by biting into one of these incredibly rich and toothsome peaches and pecan bourbon ice cream sandwiches. Homemade no-churn salted-pecan bourbon ice cream and succulent peach slices are deliciously sandwiched between two chewy oatmeal cookies.

Stack of peaches and pecan bourbon ice cream sandwiches. It takes only 1 hour for this frozen treat to set in the freezer. Image Credit: Shaina Olmanson

4. Peach Sangria

This refreshing peach sangria recipe is perfect for brunch, a backyard cookout and any other summertime get-together. Learn how to make it in just a few easy steps!

Peach Sangria Recipe

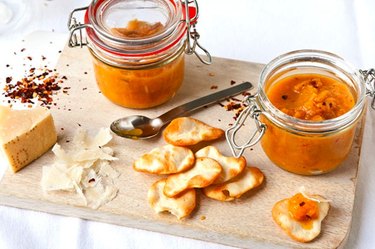
5. English Peach and Ginger Chutney

Brighten up tired old appetizers and dishes with a spread of this amazing English peach and ginger chutney. This mildly sweet and tangy chutney pairs wonderfully with pork chops, lamb or chicken, or you can spread it on crostinis and sandwiches. With such a wide array of possibilities, your taste buds won't get tired.

Jars of English peach and ginger chutney on wooden board with Parmesan and chips. This chutney complements a wide variety of flavors. Image Credit: Sala Kannan

6. Mini-Tortillas With Ricotta Cheese and Grilled Peaches

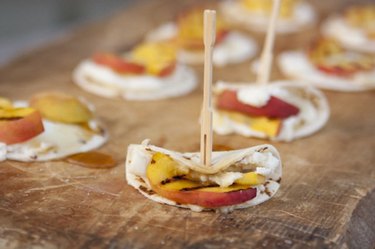
These mini tortillas with ricotta cheese and grilled peaches may be just the easy snack or dessert option you're looking for. Velvety, light ricotta or ​requesón ​– a Portuguese and Brazilian cheese — is spread on a flour tortilla and drizzled with dark corn syrup, then finished with a juicy grilled peach.

Mini-tortillas with ricotta cheese and grilled peaches atop wood cutting board. Try out this surefire crowd-pleaser at your next BBQ! Image Credit: Yvette Marquez

7. Peach Tea

Freshly brewed homemade peach tea is a naturally sweet beverage option for your next summer brunch of barbecue. While this tea is already delicious on its own, those who prefer additional sweetness can try honey, stevia or coconut sugar for a healthier alternative to regular sugar.

Glass and pitcher of peach tea. Sip on peach iced tea to cool down and relax in summer. Image Credit: Kris Robertson/Demand Media

8. Peach Bellini

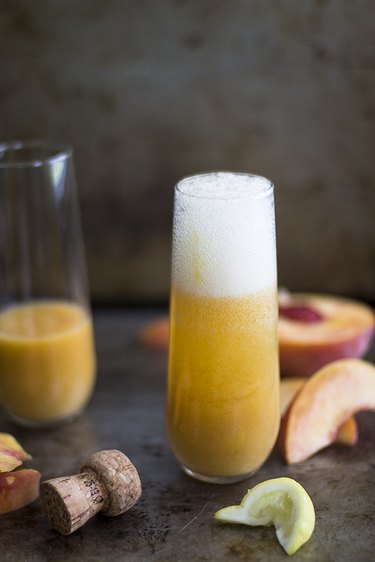
Ahh, the peach bellini — a classic cocktail invented in the 1930s or '40s by Harry's Bar in Venice, Italy. Transport yourself to another time and place and discover this beautiful cocktail's timelessness by recreating it at home. With just four ingredients and a food processor, you'll soon delight in the charms of this light and sweet, bubbly cocktail.

Peach bellini in a stemless champagne glass. Peach bellinis are a sophisticated alternative to the standard mimosa. Image Credit: Leigh Ann Chatagnier

9. Peach Preserves

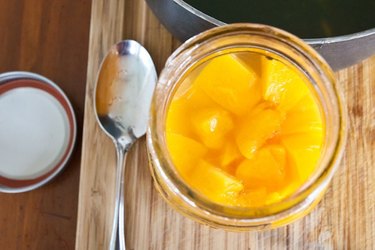
Revel in the flavors of summer, even during the deepest winter, by preparing some peach preserves before the season ends. Peach preserves are deceptively simple to make and can for long-term storage. Make several batches now to give away as Christmas presents for a truly special gesture your loved ones will appreciate.

Peach preserves in a jar. Plan ahead to savor your homemade peach preserves into winter. Image Credit: Laura Beth Drilling/Demand Media

10. Peach Crisp

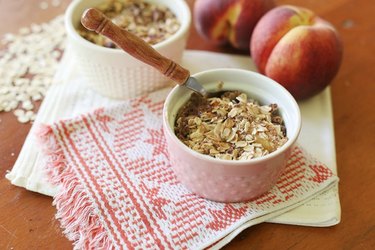
Just like bananas, overripe peaches are excellent to bake with. Instead of tossing that mushy, overripe peach in the trash, make a mouthwatering peach crisp. The peach filling slightly caramelizes as it bakes underneath a crunchy oat-and-brown sugar streusel. Top it off with a scoop of ice cream, and you've got yourself a lovely simple dessert.

Two peach crisps in white ramekins. A comforting peach crisp is perfect after a hearty dinner. Image Credit: Sarah Vantassel/Demand Media

How to Cook Butter Beans

0

...

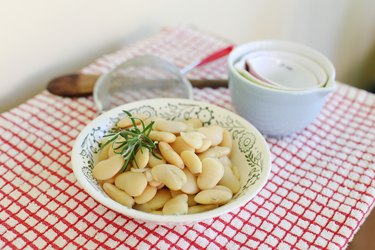
Butter beans are sold fresh, dried, canned or frozen. The canned kind are ready to eat, but other forms of butter beans need to be cooked before they can be consumed. Cook butter beans on the stove, in a pressure-cooker or in a slow-cooker. They're best cooked for a long time at a low temperature or for a short period at a high temperature to preserve their shape.

Video of the Day

Dried Butter Beans

...

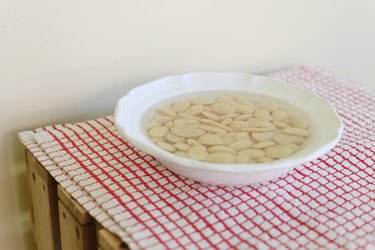
Dried butter beans require soaking before they can be cooked. Soak the beans in cool water for a minimum of five hours and as long as eight hours or overnight. Ensure that the beans are fully submerged. The longer they soak, the softer and creamier they'll be. Do not use the soaking liquid to cook the beans, as sugars — which produce gas when consumed — are released by the beans into the liquid.

Fresh and Frozen Butter Beans

...

Fresh or frozen butter beans do not require soaking before cooking. Fresh beans only need to be rinsed to remove debris and cooked as is. Defrost frozen beans before cooking. Both fresh or frozen butter beans still require fairly long cooking times — as long as an hour on the stove.

Stove-Cooked Beans

...

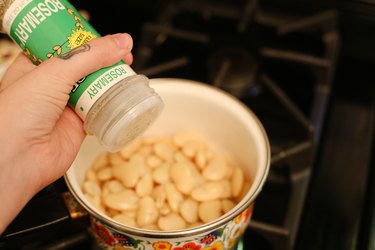
Soaked and fresh beans require simmering for about 60 minutes on the stovetop and need a lot of liquid to develop their soft, creamy texture. Use a 1-to-3 ratio of beans to liquid, such as stock or water. Add dried spices, chopped aromatics, and fats or pieces of seasoning meat, such as bacon or salt pork, at the beginning of the cooking process. Add salt after the first 10 minutes of cooking, once the skins have softened, to give it a chance to penetrate. Add acids, such as tomatoes or vinegar, at the end of the cooking time, as they can prolong cooking times.

Slow-Cooker Beans

...

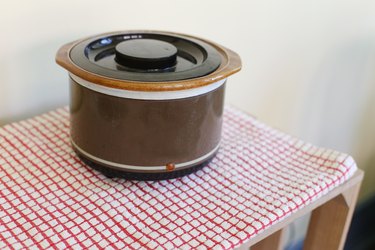
A slow-cooker cooks beans at a controlled temperature and requires very little attention. Use plenty of liquid — at least a 3-to-1 ratio of liquid to beans — and avoid adding acids until the end of the cooking period. On the low setting, fresh butter beans will cook in roughly four hours, while soaked dried beans will be ready in five to six hours.

Pressure-Cooked Beans

...

Pressure-cookers use high temperatures to quickly soften and cook beans. Because too high of a temperature can lead to mush, pay close attention to pressure settings and cooking times. Add seasonings, including salts and cured meats, at the beginning and acids after the beans are fully cooked. Use a 4-to-1 ratio of liquid to beans, and clamp on the lid securely before placing it over heat. Never fill a pressure- cooker more than 2/3 of the way full, and if you hear sputtering, remove the pressure-cooker from the heat and check the valve, as it is likely clogged. Dried beans need to be soaked before cooking in a pressure-cooker. Dried, large butter beans that have been soaked for 12 hours will be ready in four to seven minutes.

Canned Butter Beans

...

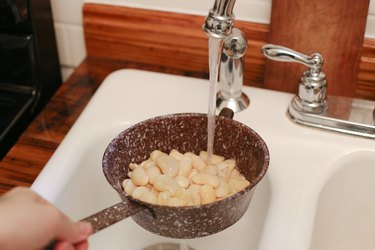
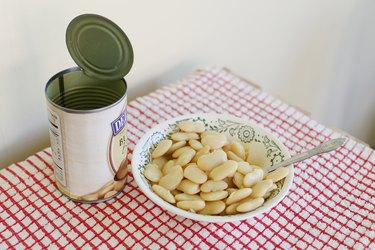
Canned butter beans are ready to eat and do not require further cooking, although many people at least heat up the beans before consuming them. Drain butter beans into a colander and rinse them under cool water to remove the canning liquid, and use the canned beans as you would cooked beans. They will not hold up well to long cooking times, however, and are more prone to disintegration when cooked at high temperatures. Heat up canned beans on the stove or at a low setting in a slow- cooker. Canned beans do not need much added liquid and can be eaten as soon as they are warmed through, around 10 minutes on medium heat on the stove. Season canned beans as you like and at any time during cooking.

How to Make a Wine Spritzer

0

When the weather is hot, no cocktail is more refreshing than a wine spritzer. It's a wonderful option to serve a larger party of guests, or an easy option for a single drink after a long day. While this recipe yields one beverage, it's very simple to scale up. Simply use the ratio of 3 parts wine to 1 part club soda, and combine the ingredients in a large pitcher filled with ice! It doesn't get any easier.

How to Make a Wine Spritzer | eHow

Video of the Day

Things You\’ll Need

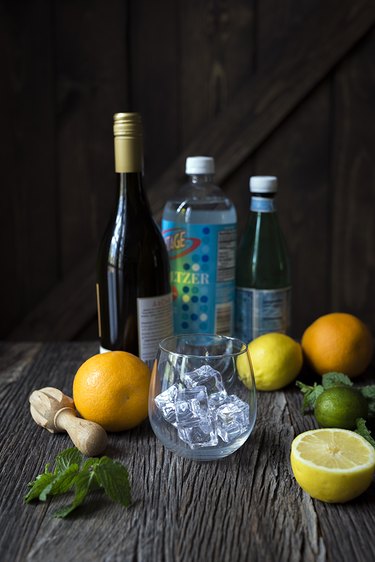
  • 3 ounces fruity white wine, chilled (recommended: Sauvignon Blanc or Riesling)

  • 1 ounce club soda, chilled

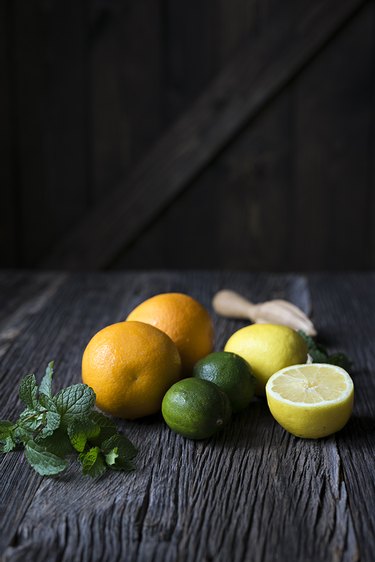
  • 1 fresh citrus wedge (lemon, lime or orange)

  • Ice

  • Optional: 1 to 2 leaves fresh mint

How to Make a Wine Spritzer | eHow

Step 1: Gather Your Ingredients

This is such a simple spring/summer drink, and you don't need to get fancy. A fruity wine with citrus notes will work best. Something sweet but not cloying. New Zealand Sauvignon Blancs are always a safe bet.

How to Make a Wine Spritzer | eHow

Tip

Any type of citrus will work, but one way to choose is to see if the wine you're using has specific citrus notes. The bottle might specify details, or you can taste it.

How to Make a Wine Spritzer | eHow

Step 2: Combine the Ingredients

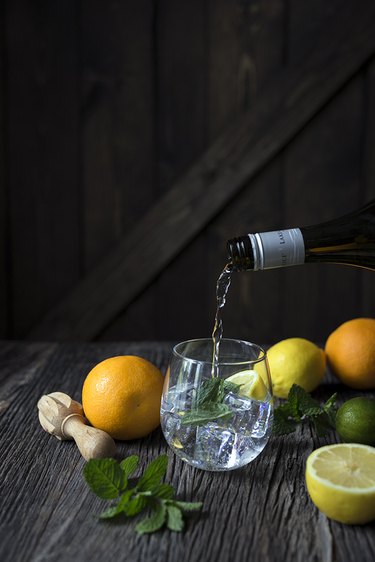
In a large glass, combine the wine, club soda, ice, citrus, and 1 to 2 leaves fresh mint, if using. Serve immediately.

How to Make a Wine Spritzer | eHow

DIY "Moss" Bunny Cookies

0

Around springtime, one home decor accessory you might see in homes is manicured moss figures of rabbits, pigs or other animals. In the spirit of these verdant topiaries, here are some adorable bunny sugar cookies that look like they're covered with moss. The moss may look real, but it's actually made of graham cracker crumbs. When dyed with green gel coloring, the smaller crumbs take on a vivid hue while a few larger crumbs remain brown. The result is a very natural-looking, faux moss covering for the cookies.

moss bunny cookies

Video of the Day

Things You\’ll Need

  • 4 cups of flower

  • 1/3 cup of corn starch

  • 1/2 teaspoon of salt

  • 1 cup unsalted butter

  • 1 cup sugar

  • 2 eggs

  • 1 teaspoon vanilla extract

  • Bunny cookie cutter

  • Graham crackers

  • Zip lock bag

  • Rolling pin

  • Green gel food coloring, two shades

  • Vodka

  • Confectioner's sugar

  • Meringue powder

  • Squeeze bottle dispenser

  • White fondant

  • Candy decorating pens

  • Edible adhesive

materials

Step 1: Sift Dry Ingredients

Sift four cups of flower, 1/3 cup of corn starch and half a teaspoon of salt. Blend the ingredients with a whisk.
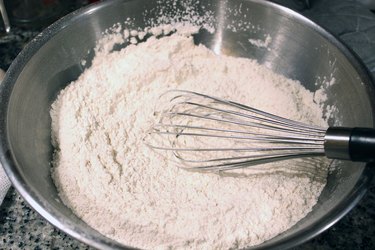
flour

Step 2: Mix Butter and Sugar

In a stand mixer, mix one cup of unsalted butter and one cup of sugar on medium speed for about five minutes.
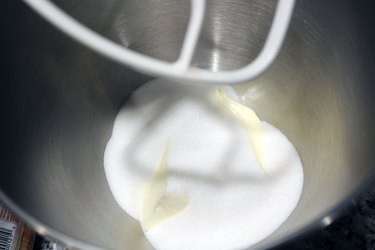
sugar

Step 3: Add Eggs

Add two eggs one at a time and mix. Then add a teaspoon of vanilla extract.
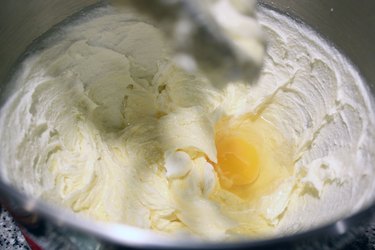
eggs

Step 4: Mix in Dry Ingredients

Mix in the dry ingredients, adding about a third at a time to avoid having a cloud of flour cover your kitchen. The flour mixture will disappear and the dough will come together into one buttery lump.
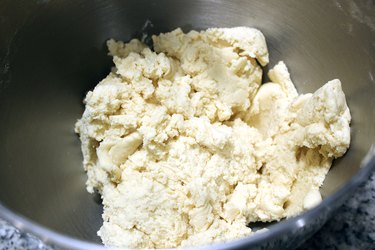
dough

Step 5: Wrap & Refrigerate

Wrap the cookie dough in plastic wrap and refrigerate overnight.
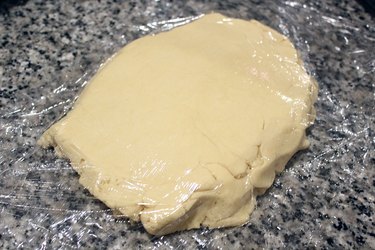
cookie dough

Step 6: Roll the Dough

Remove the cookie dough from the refrigerator for about 20 minutes to soften slightly. Spread some flour on your work surface as well as your rolling pin, and flatten the dough to about a quarter inch.
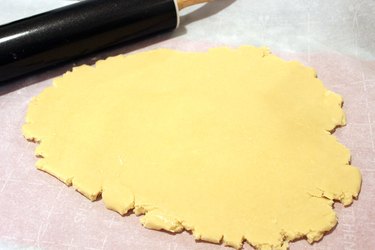
rolled dough

Step 7: Cut Out the Shapes

With a bunny cookie cutter, cut out the shapes.

cookie cutter

Step 8: Bake

Place cookies on a silicone mat on a cookie sheet. Bake according to the instructions in your recipe. I baked mine for 12 minutes at 375° F. Let cool.

silicone mat

Step 9: Crush Graham Crackers

Place about 10 graham crackers in a zip lock bag. Crush them with a rolling pin until they resemble sand. If you prefer, you can also pulverize them in a food processor.
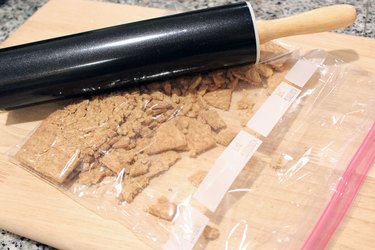
crush crackers

Divide the graham crackers in two, placing one half in a bowl for now.
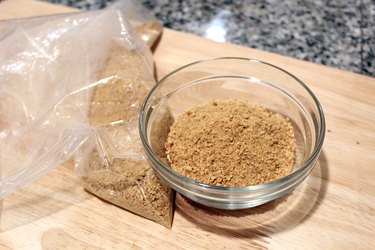
graham crackers

Step 10: Prepare Dye

To mimic the variegated look of moss, I selected two different shades of green gel food coloring. The gel is thick and difficult to mix in with the graham cracker crumbs, so stir about a half teaspoon of coloring with a tablespoon of vodka to make it more liquid. Don't worry, the alcohol will dissipate.
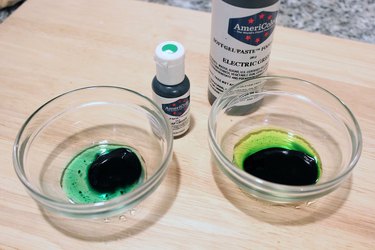
dye

Step 11: Dye the Graham Cracker Crumbs

Pour one of the shades of green food coloring into the zip lock bag with the graham cracker crumbs. Mix it all around, squeezing the bag from the outside. Add more dye if necessary to reach the color you want. Notice how some of the larger crumbs do not absorb the dye. These brown bits give the fake moss a realistic look.
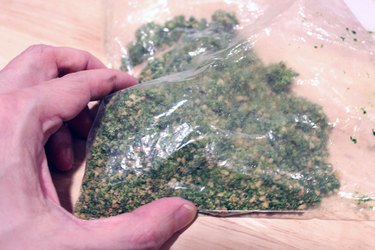
dyed crumbs

Move the dyed crumbs to one side of the bag and place the second half of the crumbs on the other side.
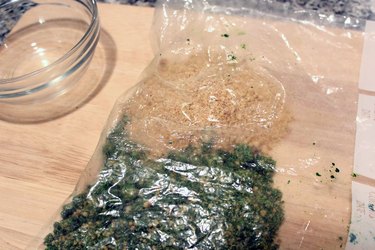
cracker crumbs

Add the second shade of gel food coloring to the plain graham cracker crumbs and mix the color in to that section. Then mix both halves of the graham cracker crumbs together.
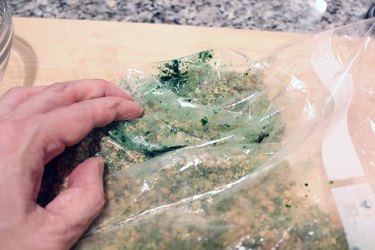
dyed cracker crumbs

To dry the graham cracker crumbs and remove any residual vodka, pour the crumbs onto a baking dish and heat in an 180-degree oven for 30 minutes.
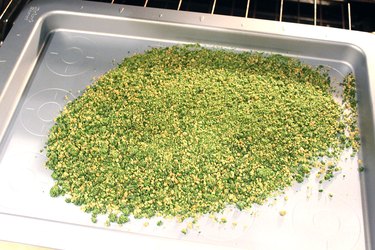
baked crumbs

Step 12: Mix Royal Icing

Royal icing will be the glue that holds the graham cracker moss to the cookies. The great thing about royal icing is that it dries very hard, so your moss isn't going anywhere. If you don't use store-bought, you can mix four cups of confectioner's sugar, three tablespoons of meringue powder and five tablespoons of warm water in a stand mixer for about eight minutes. The icing will be thick with stiff peaks.
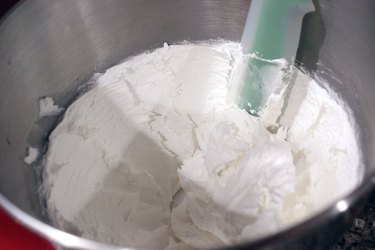
royal icing

Step 13: Dye the Royal Icing

Using the same two shades of green food coloring as we used for the graham crackers, dye the royal icing, mixing a few drops at a time until you achieve the desired green. I recommend using a knife to stir the icing as we'll use it later to test the consistency.
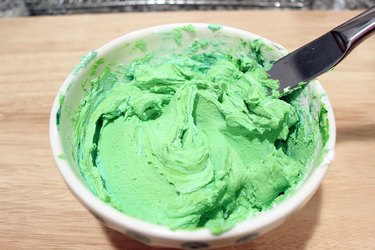
dye icing

Step 14: Thin the Icing

Now we'll need to thin the royal icing so it can flood, i.e., cover the cookies. Stir in a half teaspoon of water at a time until the icing has the consistency of a thick milkshake. For this project, I made what is called "20 second icing," meaning that when you run the knife across the bowl of icing, the line you created with the knife will disappear in 20 seconds. Pour the royal icing into a squeeze bottle, either by spooning it in or with a funnel.
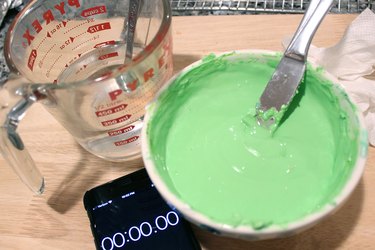
thinned icing squeeze bottle

Step 15: Shape Fondant

Our bunnies may look rustic covered with moss, but they are very natty wearing their bow ties. To make the bow ties, start by rolling a piece of white fondant between two sheets of parchment paper until it is very thin.

rolled fondant

With a sharp knife or pizza cutter, cut small rectangles of about a half inch by one and a half inches.

rectangles

Pinch the middle of the rectangles to create a bow tie shape.

bow tie shape

Step 16: Draw Polka Dots

Decorate the bow ties with polka dots using candy decorating pens. A set of pens comes in different colors so you can also vary the color of the dots.

polka dots

Assembling the Cookies

Step 1: Apply Royal Icing

Royal icing is usually applied to cookies in two steps — first with a thicker icing around the edge, and then with a runnier icing to flood the middle. I decided to keep the outline and inside icing the same consistency, as I wanted them both equally liquid to hold on to the moss. Squeeze a line of royal icing around the perimeter of the cookie. Do not go all the way to the edge. I leave about an eighth of an inch all around.

outline

Squeeze more royal icing within the outline. It doesn't have to fully cover the cookie, as it is runny and will fill in naturally.

flood cookie

Use a toothpick to help spread the icing evenly.

toothpick

Step 2: Cover With "Moss"

Sprinkle the green graham cracker crumbs over the cookie. I like to completely cover the cookie with the crumbs to make sure the moss goes to the edges. Gently press down on the crumbs so they get locked into the royal icing.

moss covering

Shake off any excess crumbs. If you see any "bald" spots, sprinkle more crumbs over those areas and press gently in place.

moss bunnies

Place the cookies on a cooling rack or cookie sheet and allow the icing to harden overnight.

bunny cookies

Step 3: Add the Bow Ties

The texture of the graham cracker crumbs makes it difficult for embellishments like our bow ties to adhere. The secret is edible adhesive, which you can find in the baking aisle at crafts stores. With a clean brush, apply a layer of edible adhesive to the back of each bow tie.

edible adhesive

Place the bow tie between the head and the body of the bunny and press down gently to adhere it to the cookie.

bow tie

These whimsical cookies are the epitome of springtime happiness.

moss bunny cookies