Rice is one of the most widely consumed foods on the planet, and archaeological evidence has people eating it (and even cultivating it) as far back as 9,400 years ago. So, the history of attempting to prepare perfectly cooked, sumptuously fluffy rice is a long one. After all, rice may be but a simple grain cooked with only water, but it's notoriously finicky. It requires the exact right ratio of rice to liquid and a precise cook time.
Video of the Day
Fortunately, history has arrived at a point when there are plenty of quality rice cookers on the market. The best rice cookers turn out a perfect finished product every time, without the need to obsessively re-check the pot on the stove. And they do it whether you're making white, jasmine, brown, basmati, long-grain, sticky or some other type of rice.
What to Consider When Purchasing a Rice Cooker
Capacity: How many people do you prepare rice for? Do you just serve a little as a side, or do you put a big heap on each plate as the base of the meal? Rice cookers usually define their capacity in uncooked rice, and most types of rice double to triple in volume once cooked. Many compact rice cookers make 1.5, 2 or 3 cups of uncooked rice. Then there are lots of rice cookers in the range of 4 to 10 cups uncooked, and some that make more. Smaller ones suffice if you make rice for one or two people, while a 4- to 8-cup capacity is good for families, and a 10- to 15-cup capacity makes enough for the family and guests.
Price: As is typical of kitchen appliances, rice cookers retail at a wide range of prices. You can buy them for as little as about $20, there are many to choose from in the $100 to $250 range, you can spend $500 or $600 on a high-end model, and there are even luxury rice cookers that go for over $1,000. Your budget is an important consideration, and you don't have to buy an expensive rice cooker to get a good one, though it may be more basic than pricier models.
Functions: While the name makes them sound limited, some rice cookers cook more than just rice. If you only want to prepare various types of rice in your machine, you can spend less. But if you want an appliance that makes other grains like oatmeal, quinoa and bulgur, that's doable too. And you can find rice cookers with other capabilities, like steaming vegetables. Many have a keep-warm function, which is nice. Some of the best rice cookers also have what's called "fuzzy logic technology," which lets the appliance adjust the cook time and temperature based on factors like the humidity and whether the right amount of water was added.
Cooking Speed: If you're looking for the convenience of a rice cooker, you presumably want one that delivers delicious results in a reasonable amount of time. With any quality rice cooker, white rice should be ready in under an hour. This includes a 15-minute period of steaming after the cooking is completed; most appliances recommend this step.
Ease of Cleaning: Anyone who's made rice in a pot on the stove—and especially anyone who's burned it—knows that cleanup after cooking rice isn't one of the more enjoyable ways to spend time in the kitchen. Fortunately, there are rice cookers with removable, nonstick, dishwasher-safe pots and lids. These make the cleanup process after preparing rice much less of a hassle.
These considerations can help you choose the right rice cooker for your needs.
The Best Overall Rice Cooker
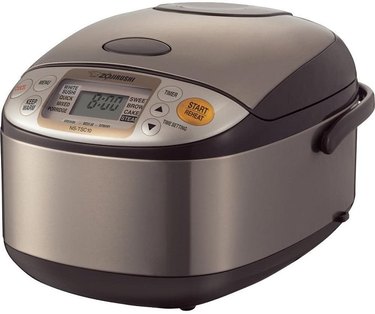
Zojirushi 5.5-Cup Micom Rice Cooker and Warmer
$149.99 at Amazon
Zojirushi is one of the best-known names in rice cookers, and you really can't go wrong with any of its models. But this one has a great price point for what you get, and it has a mid-size capacity good for a broad range of consumers. It also has a sleek, attractive, stainless steel design.
This appliance consistently turns out perfectly cooked, fluffy rice of all varieties. The thick, dishwasher-safe inner pot does a good job conducting heat evenly. Its user-friendly LCD control panel has a clock, a countdown timer and foolproof settings for different types of rice and even mixed grains. Fuzzy logic technology protects your rice against human error and other external factors. An automatic keep-warm setting holds your finished rice at a proper temperature without overcooking it, and it goes so far as to offer an extended keep-warm and reheating cycle. The retractable cord is a nice touch, too.
Oh, and this rice cooker does lots more than just cook rice. For example, it'll steam veggies (it comes with a steamer basket) and even bake a cake.
At a Glance:
- Capacity: 5.5 cups (uncooked)
- Size: 14" x 10.1" x 8.5"
- Fuzzy Logic: Yes
- Induction Heating: No
- Keep-Warm: Yes
- Dishwasher-Safe Pot: Yes
The Best Budget Rice Cooker
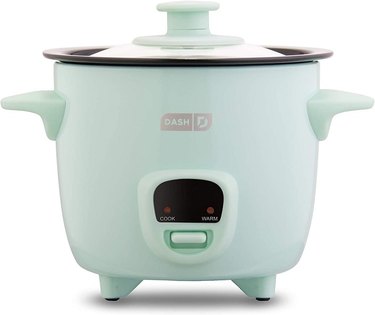
Dash 2-Cup Mini Rice Cooker
$24.99 at Amazon
If you're looking for relatively small quantities of rice cooked perfectly in minimal time—and if you want a cute rice cooker available in six different colors—this is a smart pick. But, best of all is its price. This is a very affordable option, and while you don't get anything fancy, it's compact, reliable, practical and more versatile than you might expect.
Between its budget-friendliness and its small footprint, this is an ideal rice cooker for dorm rooms and younger people just starting to outfit their own kitchens. It's useful, as it readily handles oatmeal, soups, pasta, quinoa and more. And it's all basically done with the touch of a button—typical of the simplicity Dash kitchen appliances are known for—making it well suited to people without much cooking experience.
At a Glance:
- Capacity: 2 cups (uncooked)
- Size: 8.3" x 6.5" x 16"
- Fuzzy Logic: No
- Induction Heating: No
- Keep-Warm: Yes
- Dishwasher-Safe Pot: Yes
The Best Compact Rice Cooker
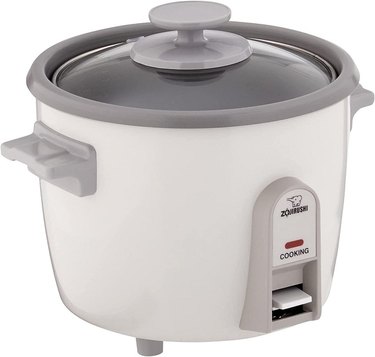
Zojirushi 3-Cup Rice Cooker
$44.99 at Amazon
For kitchens with minimal countertop and storage space, or for anyone who just wants a small, simple, high-quality rice cooker, turn again to the trusted name Zojirushi. This model is about as small as rice cookers get, but it can still turn out up to 6 to 9 cups of cooked rice, depending on the type. And it does work well for many varieties of rice.
This one is also as user-friendly as rice cookers get. It comes with a measuring cup (as almost every rice cooker does) and has convenient markings inside the pot to guide water levels. This appliance has only a single switch, which you flick to start cooking your rice. You can watch it cook through the glass lid with a stay-cool knob (if you're into that sort of thing) and when the rice is done, the indicator light goes off and the switch clicks back into its off position. An automatic keep-warm function maintains the rice's temperature. And there's never any burnt rice on the easy-to-clean nonstick pot, which is nice, as this pot is not recommended to go in the dishwasher.
At a Glance:
- Capacity: 3 cups (uncooked)
- Size: 7.5" x 9.1" x 7.5"
- Fuzzy Logic: No
- Induction Heating: No
- Keep-Warm: Yes
- Dishwasher-Safe Pot: No
The Best High-End Rice Cooker
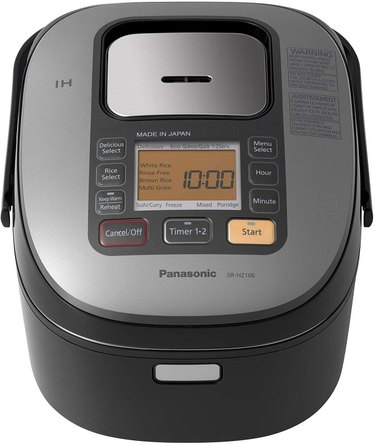
Panasonic 5-Cup Japanese Rice Cooker
$439.95 at Amazon
If you take your rice really seriously, and if you regularly prepare different varieties of rice and rice for different purposes—including specialized preparations like sushi or congee—this Panasonic rice cooker has your name on it. Assuming you're also willing to shell out for it.
Easily set this model for whatever you're making, and the 13 pre-programmed settings let you cook lots more than just rice. You can use this appliance as a slow cooker, steamer (it comes with a steaming basket), to make quinoa and more.
When you buy a higher-end rice cooker, you should be getting one that uses induction heating, as this one does. This method is ideal for cooking rice. And though you'll wait a few minutes longer with this rice cooker, it's well worth it for the consistently exceptional results, thanks in part to the seven-layer inner pan with a diamond coating. The LCD display screen is easy to read, the controls are all user-friendly and the removable nonstick insert is a breeze to clean. There's an automatic shut-off function to prevent overcooking, and the automatic keep-warm function maintains your rice's temperature for up to 12 hours.
At a Glance:
- Capacity: 5 cups (uncooked)
- Size: 15.5" x 9" x 10.5"
- Fuzzy Logic: No
- Induction Heating: Yes
- Keep-Warm: Yes
- Dishwasher-Safe Pot: No