Home Blog Page 115

Addictive Homemade Coffee Caramels Recipe

0

Homemade salted caramels are given a delicious and distinct flavor by the addition of espresso and vanilla. Not only are these caramels smooth, smoky, chewy, buttery and rich, but they are also so simple to make…. and very addictive!

Homemade coffee caramels

Video of the Day

Things You\’ll Need

  • 2 cups heavy cream

  • 1 1/2 tablespoons finely ground espresso powder

  • 1 3/4 cups granulated sugar

  • 1/2 cup light brown sugar

  • 6 tablespoons unsalted butter

  • 1 1/4 cups light corn syrup or liquid glucose

  • 1 teaspoon vanilla bean extract

  • 1/2 teaspoon sea salt

  • 1/2 cup whole espresso beans (for decorating)

  • 9 x 13 rimmed baking tray

  • Waxed parchment paper, cut into 3 inch / 7 centimeter squares

Approximately yields 70-90 caramel candies.

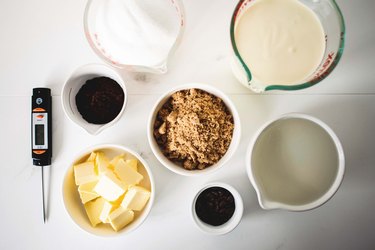
Step 1: Measure All Ingredients

Begin by measuring and prepping all the ingredients.

Ingredients measured and ready for use.

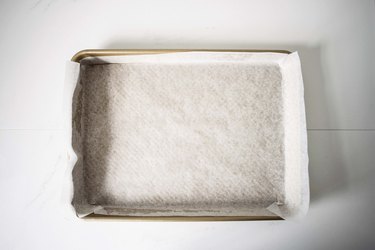
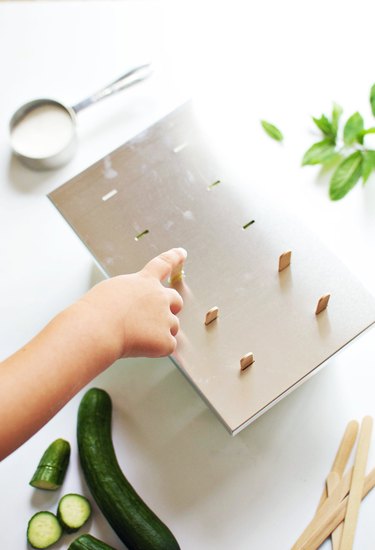
Step 2: Prepare the Baking Tray

Lightly grease and line the bottom and sides of a 9 x 13 inch / 22 x 33 centimeter rimmed baking tray. Add the parchment paper and lightly grease it with oil and set aside.

A greased and lined rimmed baking tray.

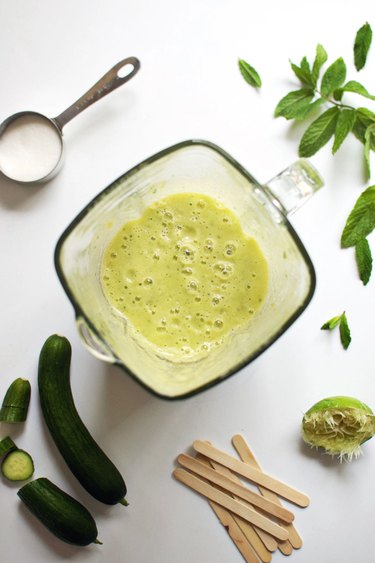
Step 3: Add Ingredients to a Saucepan

Place the cream, espresso powder, sugars, butter and corn syrup in a large heavy saucepan.

Ingredients in a large heavy saucepan.

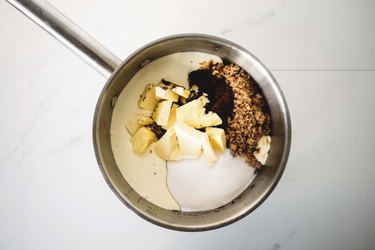
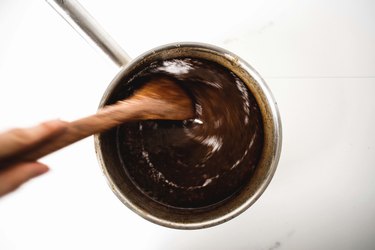
Step 4: Heat Ingredients

Bring the mixture to a light boil over medium-high heat, stirring until the sugar and butter has dissolved.

Stirring the mixture.

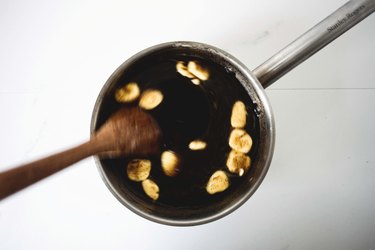
Step 5: Attach thermometer

Reduce the heat to medium and cook, stirring occasionally, until the caramel is thick, bubbling and has reached a temperature of 250 Fahrenheit / 120 Celsius.

Bubbling and thick caramel mixture in a heavy saucepan.

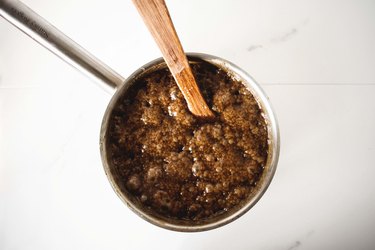
Step 6: Add the Extract and Salt

Remove the caramel mixture from the heat, and immediately stir in the vanilla extract and salt.

Stirring in the vanilla extract and sea salt.

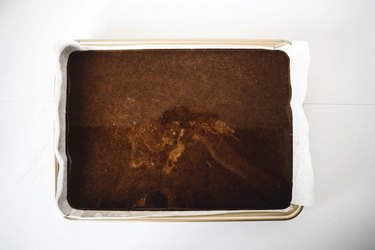
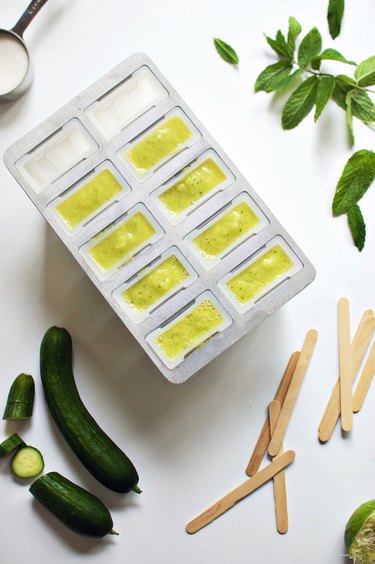
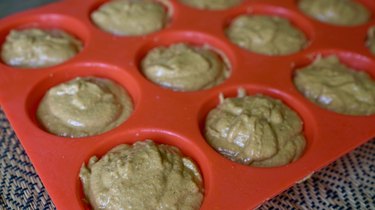
Step 7: Pour Mixture Into the Prepared Tray

Pour the caramel mixture into the prepared tray, and let stand to cool, uncovered, at room temperature for at least 8 hours and up to one day.

Hot caramel poured into the prepared rimmed baking tray.

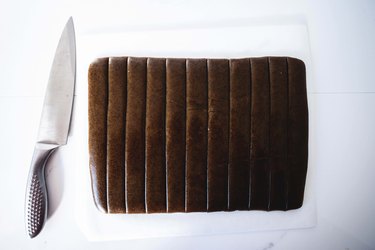
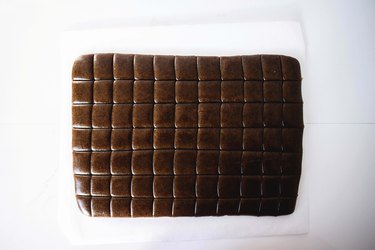
Step 8: Slice Into Squares

When the caramel has cooled completely, remove from the baking tray and slice into 1 1/4 inch / 3 centimeter squares. Set the squares aside on a sheet of lightly greased parchment paper.

Caramel sliced lengthwise. Caramel sliced into even squares.

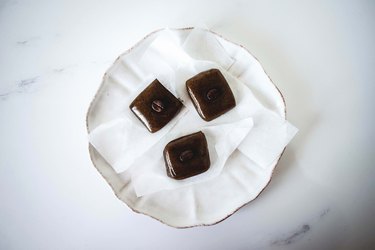
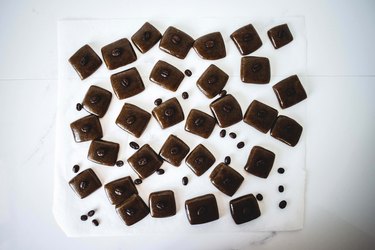
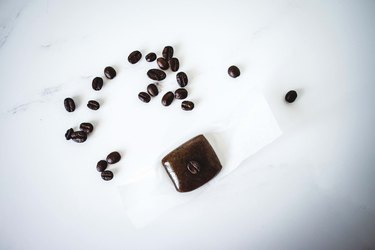
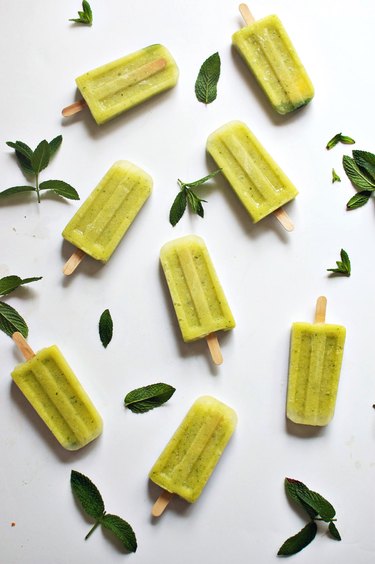
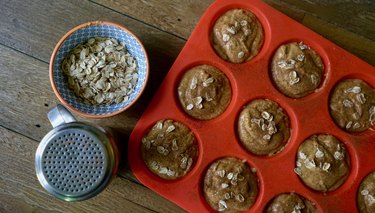
Step 9: Add Espresso Beans

Decorate the caramels by lightly pressing an espresso bean into the center of each square.

Caramel squares studded with espresso coffee beans.

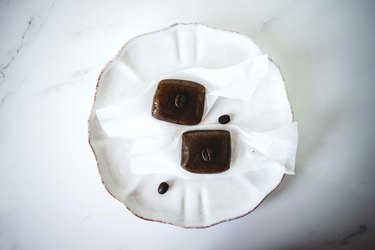
Step 10: Wrap and Store

Wrap each coffee caramel in a piece of waxed paper or place between layers of waxed parchment paper in an airtight container.

Coffee caramel on a piece of waxed parchment.

Serve and enjoy! The caramels are best stored at room temperature and can be kept for up to one month.

Caramels ready to be eaten and enjoyed.

Chicken Pot Pie Pasta Recipe

0

For an easy weeknight meal, make this chicken pot pie pasta. It features the same heartiness of chicken pot pie — minus all the work! By replacing the pie crust with quick-cooking noodles, you can make a comforting dish that's hard to resist. Plus, from the sauce to the vegetables, you can customize this recipe based on what you have on hand. All you need to do is cook, mix and enjoy.

Chicken pot pie pasta

Video of the Day

Things You\’ll Need

  • 2 cups egg noodles, uncooked (see options below)

  • 2 cups frozen mixed vegetables

  • 1 cup celery, chopped

  • 1 medium yellow onion, diced

  • 3 garlic cloves, minced (or 1 1/2 teaspoons jarred minced garlic)

  • 1 pound boneless, skinless chicken breasts or thighs

  • 2 to 2 1/2 cups chicken broth

  • 1 cup heavy cream

  • 2 tablespoons unsalted butter

  • 2 tablespoons all-purpose flour

  • 1 teaspoon dried sage

  • 1 teaspoon dried oregano

  • Salt and pepper, to taste

  • 1 tablespoon olive oil

Chicken pot pie pasta

Tip

If you'd like to use a different type of pasta, or if your pasta requires more than 10 minutes to cook, prepare it separately. You can add the pasta in the last step, just before serving.

Step 1

Pat the chicken breasts dry and season with salt and pepper. Cut into 1-inch cubes.

Cut chicken

Step 2

Warm oil in a large skillet over medium-high heat. Add the chicken, stirring frequently to ensure even cooking. Cook until it's no longer pink and reaches an internal temperature of 165 degrees Fahrenheit. Place the chicken on a plate and set aside.

Cook chunks of chicken

Step 3

In a large skillet or pot, melt 2 tablespoons butter over medium heat. Cook the onions and celery until the onions are translucent, about 5 to 7 minutes.

Cook onions and celery

Step 4

Add the minced garlic, flour, sage, oregano, salt and pepper. Cook for 30 seconds, stirring occassionaly to coat the vegetables in flour.

Stir in spices and flour

Step 5

Add 2 cups chicken stock and heavy cream. Bring to a boil, then reduce to a simmer.

Add chicken stock and heavy cream

Step 6

Add the egg noodles and simmer for 7 to 9 minutes. Stir well to ensure even cooking. If necessary, slowly add another 1/2 cup chicken broth to make sure there's enough liquid to cook the noodles. Once the noodles are ready, add the chicken and simmer for 5 minutes.

Add noodles and chicken

Tip

You can mix in a dollop or two of sour cream to make the dish extra creamy.

Step 7

Finally, add the frozen vegetables. Simmer for 5 minutes or until heated through, stirring occassionally.

Add frozen vegetables

Tip

If you cooked the pasta separately, add it to the skillet now. Stir well to coat the pasta in sauce.

The sauce will thicken as the pasta cools. To serve, sprinkle with Parmesan cheese, breadcrumbs or fresh herbs of your choice.

Chicken pot pie pasta

Halloween Spirits

... 1 of 9

Overview

No Halloween party is complete without the allure of mysterious potions. Pick your poison and get ready for some seriously-out-there shots. Note: Alcohol optional, creativity required and squealing inevitable.

Image Credit: Dave Johnson ... 2 of 9

Brain Hemorrhage Shots

Like the real thing, a brain hemorrhage shot is not to be taken lightly. Sprinkle two packets of unflavored gelatin over one cup of cold water in a pan. Let sit for approximately 5 minutes, and then heat until the gelatin is fully dissolved. Let cool, then add 1 c of peach schnapps. Pour into 1 ounce shot glasses and let sit until the gelatin is about like egg whites. Now for the fun. Fill an eye dropper with Bailey's Irish Crème and gently poke it into the gelatin; dispense slowly. Repeat with a drop or two of grenadine.

Image Credit: Dave Johnson ... 3 of 9

Frogs in Formaldehyde

Everyone remembers the stink in middle school biology on dissection day. Not to worry, these adorable frogs carry no stench! Per the directions on the previous slide, take the unflavored gelatin and replace the schnapps with vodka (or water if serving to kids). Pour into baby food jars and refrigerate until it partially sets. Insert gummy frogs with a toothpick and serve!

Image Credit: Dave Johnson ... 4 of 9

Specimen Cups

If this doesn't get a squeal or two out of your guests, nothing will. This totally gross but completely edible specimen cup is a simple mix of 6 ounces of lemon gelatin and 2 tablespoons of mango gelatin dissolved in 2 cups of boiling water. For an adults only party, add 2 cups vodka (or cold water for kids). You wouldn't want your guests to get dehydrated, now would you?

Image Credit: Dave Johnson ... 5 of 9

Jelly Monsters

These googly-eyed monsters are the perfect blend of silly and sweet. Dissolve 6 ounces package of orange gelatin in 2 cups of boiling water. For an adults only party, add 2 cups vodka (or cold water for kids). Use clean kitchen shears to cut gum drops in half. Push a candy eyeball into each half and place them on the gelatin once they're partially set. Let set fully before adding gel icing mouths and pearlized sprinkle teeth.

Image Credit: Dave Johnson ... 6 of 9

Vodka Gummy Worms

Here's a Halloween take on the traditional drunk gummy bears. Soak these gummy worms in a mason jar full of vodka and refrigerate them for a few hours. Check periodically for taste and drain when up to your standards; the longer they sit, the more alcohol the worms will absorb and expand!

Image Credit: Dave Johnson ... 7 of 9

Glow-in-the-Dark Goodies

Liven up a party with glow in the dark frog and worm cups. Using tonic water to give them the glowing effect, dissolve 6 ounces of blue gelatin. Add 2 cups of gin. Soak gummy worms and frogs in tonic water for an hour, then drain. Place worms when the gelatin is the consistency of egg whites and set the frogs on top when the gelatin holds its shape. Turn on the black light and watch them glow!

Image Credit: Dave Johnson ... 8 of 9

Body Buffet

If plastic body parts litter your front lawn and house this time of year, you'll love this simple-to-make body parts buffet. Pour a half-inch layer of gelatin mixed with your favorite clear liquor into a baking dish and let it set about 20 minutes or until fairly firm. With light force, stick gummy body parts on top. Slightly warm the rest of the gelatin and slowly submerge the candies. Allow to set, then cut into rectangles. Serve, and watch your guests squirm.

Image Credit: Jerri Farris ... 9 of 9

FrankenJello

These adorable Frankensteins are perfect bite-size treats for ghouls and ghosts. Pour your lime gelatin mixture into a 9 by 13 baking dish and let it set over night. Right before you're ready to serve, cut out rectangles and decorate with licorice knobs and black gel icing. The gel icing can get a little runny if it sits on the gelatin too long, so decorate right before serving.

Image Credit: Jerri Farris

Cauliflower Baked Ziti Recipe

0

Cauliflower baked "ziti" is a clever spin on the traditional (and tasty) pasta dish. Since the cauliflower replaces the ziti, the recipe is ideal if you are trying to limit refined carbohydrates or simply eat more vegetables. It's also perfect for gluten-free diets — or if you ran out of pasta. You can even make it vegetarian by omitting the ground meat or using your favorite meatless sauasage crumbles. Thanks to the gooey mozzarella and fragrant basil, you won't even miss the pasta in this cauliflower baked ziti recipe.

Cauliflower baked ziti

Video of the Day

Things You\’ll Need

  • 1 medium cauliflower head, chopped into florets

  • 1 pound ground turkey, chicken or beef

  • 2 cups marinara or pasta sauce

  • 1 medium yellow onion, diced

  • 2 garlic cloves, minced (or 1 teaspoon jarred minced garlic)

  • 1 1/2 cup ricotta

  • 4 eggs, lightly beaten

  • 1 teaspoon dried parsley

  • 1 teaspoon garlic powder

  • 4 tablespoons fresh basil, thinly sliced

  • 16-ounce mozzarella log

  • 1/2 cup grated Parmesan cheese

  • Olive oil

  • Salt and pepper

Ingredients for cauliflower baked ziti

Step 1

Preheat the oven to 400° Fahrenheit.

Line a large baking sheet with parchment paper. Pat the cauliflower florets with a paper towel to remove excess moisture. In a large bowl, toss the florets with olive oil, salt, pepper and garlic powder.

Toss cauliflower with oil, salt and pepper

Step 2

Place the cauliflower florets on the baking sheet in an even layer.

Roast cauliflower florets

Step 3

Roast for 20 to 23 minutes or until fork tender and slightly golden brown.

Roast cauliflower florets

Tip

Since every oven is different, it's important to closely watch the cauliflower. Take extra care to avoid overcooking it, which can make it mushy.

Step 4

While the cauliflower is roasting, prepare the meat. In a large skillet over medium-high heat, warm 1 tablespoon oil. Cook the meat and onion until the meat is no longer pink and the onion is translucent, about 5 to 7 minutes. Use a spatula or spoon to break up the meat and drain once cooked. Add the garlic and cook for 30 seconds.

Cook ground meat and onions

Step 5

Reduce the oven temperature to 350° Fahrenheit. In a bowl, combine the ricottta and eggs. Add the dried parsley and mix until blended together.

Mix the ricotta, eggs and parsley

Step 6

Slice half the mozzarella log into cubes.

Cut mozzarella into cubes

Step 7

Cut the remaining mozzarella into thin slices.

Slice mozzarella

Step 8

In a large stainless steel bowl, combine the roasted cauliflower, cooked ground meat, ricotta-egg mixture, sauce and 2 tablespoons basil.

Combine baked ziti ingredients

Tip

Use a slotted spoon to transfer the meat to the bowl. This will help further drain any grease.

Step 9

Mix until the ingredients are thoroughly combined.

Mix cauliflower baked ziti ingredients

Step 10

In a large casserole dish, add half the cauliflower mixture. Add the mozzarella cubes in an even layer.

Layer mozzarella

Step 11

Spread the remaining cauliflower mixture on top. Add the mozzarella slices and Parmesan cheese.

Add mozzarella and Parmesan cheese

Step 12

Bake for 25 to 30 minutes or until the cheese is bubbly and golden brown. Garnish with the remaining basil and serve.

Cauliflower baked ziti

How to Make Waldorf Salad

0

Warm weather always brings out my desire to eat lighter and healthier. I start craving more fresh foods with the temperature rising, and I love having recipes that I can prepare in advance. Waldorf Salad is the perfect dish to make ahead of time and have in the fridge ready for lunches (or light dinners) all week long. This recipe would also be a perfect go-to recipe for entertaining or a picnic in the park!

Waldorf Salad

Video of the Day

Things You\’ll Need

  • 2 bone-in chicken breasts

  • 1 tablespoon olive oil

  • 1 tablespoon kosher salt

  • 1 teaspoon black pepper

  • 2 stalks of celery, diced

  • 1 cup of grapes, sliced in half

  • 1/2 cup toasted walnuts

  • 1/4 cup Greek yogurt

  • 1/4 cup mayonnaise

  • 2 green onions, sliced thin

  • 1 tablespoon fresh parsley, chopped

  • 1/4 cup fresh-squeezed orange juice

  • 1 teaspoon orange zest

  • 1 teaspoon kosher salt

  • 1/2 teaspoon black pepper

Tip

This recipe makes around 6 to 8 servings of Waldorf Salad. Double this recipe to feed a crowd.

Step 1: Prepare the Chicken Breasts

Preheat oven to 425 degrees F. Season chicken breasts with the olive oil, salt, and black pepper. Bake for 45 minutes or until the internal temperature of the chicken is 180 degrees. Let the chicken cool and remove the skins. Cut the meat off of the bone into small bite size pieces and place inside a large bowl.

Tip

You can alternatively use a store-bought rotisserie chicken, but I highly recommend roasting the breasts yourself for flavor!

Step 2: Make the Dressing

Combine the Greek yogurt, mayo, green onions, parsley, orange juice, zest, salt and pepper and whisk to combine. Set aside.

Waldorf Salad Ingredients

Step 3: Combine All the Ingredients

Mix together chicken, grapes, celery, walnuts, and dressing and stir to combine.

Mixing the Waldorf Chicken Salad

Step 4: Serve

Serve Waldorf Salad immediately or refrigerate up to one week. Serve as a sandwich or over a bed of lettuce.

Chicken Waldorf Salad

This Waldorf Salad is perfect for embracing the warm weather seasons!

What Happens When You Forget to Put Eggs in the Brownie Batter?

0

Close-up of a pile of two chocolate brownies on a plate Accidentally eggless brownies Image Credit: Stockbyte/Stockbyte/Getty Images

Eggs play an important role in baking. They're used in brownies, cakes, cookies and muffins, and perform several important functions in the baking process. While it's possible to bake brownies without eggs successfully, they need to be replaced with something else that can perform the same function. Omit the eggs from the brownie batter without a proper substitute and what you'll have is a sad batch of brownies.

Video of the Day

Eggless Outcome

Imagine the scenario where with chocolate on your mind and very little time, you hurriedly mixed the brownie batter and plopped it in a pan. Ten minutes later when the timer rang, you pulled them out of the oven, your happy anticipation instantly turning to bitter disappointment. And, then it hit you: You forgot the eggs. To understand why these brownies that were supposed to be soft and chewy are instead flat and hard requires a little research into the function of eggs in baking.

Eggs as Emulsifier

Emulsifier is another word for binder and because eggs are both fat (yolks) and protein (whites), mixing them into brownie batter helps them bind the fat ingredients with other ingredients. In other words, eggs bind oil to water, and keep them from separating while they bake. It works because the protein in eggs is composed of both amino acids that attract water and amino acids that repel it. The water-attracting amino acids bind with the water-based liquid ingredients, and the water-repelling amino acids bind with the oils.

Eggs as Leavening Agent

During the process of binding, another important reaction in the making is called leavening. As the eggs are thoroughly mixed into the batter, often 1 at a time, the water-repelling amino acids in the eggs bind with air to create air bubbles. The water-attracting amino acids bind with the rest of the ingredients, creating a structure that holds the air bubbles in place. During baking, heat causes the air bubbles to expand and pop while the batter surrounding the air bubbles remains intact. The trapped, expanding air causes the brownies (or cake or cookies) to rise, creating a structure that is light and fluffy in proportion to the number of eggs used. Brownies tend to be more dense than cake because they use fewer eggs.

Egg Substitutes in Baking

Back to the idea of intentional eggless baking, perhaps you're out of eggs or maybe an egg allergy has you searching for alternatives. The substitute used will depend on the particular function. In making brownies, the eggs function as both an emulsifier and a leavening agent. In this case, the correct egg substitute will probably be a blend of ingredients. Alternative emulsifiers are ground flax, arrowroot powder, soy lecithin, pureed bananas or other fruit, silken tofu or vegetarian gelatin. The best leavening alternatives are baking soda or baking powder. But don't add more of these if the recipe already includes them. Instead opt for a dairy replacement like yogurt or buttermilk, or a commercially made egg replacement.

How to Make Homemade Chocolate Turtles

0

... 1 of 8

Overview

Sometimes the simplest things are the most delicious. This is definitely true of the turtle, an uncomplicated candy that thrives on aesthetic imperfection for character and can easily be altered based on the tastes of the lucky recipient. Caramel, nuts and chocolate form the backbone of this sweet treat, but any nut or dried fruit can be added for personalization. This custom delicacy is perfect for your sweetie, best friend or even as a hostess gift.

Image Credit: Cranberry Cashew Turtles ... 2 of 8

What You\’ll Need

To make six large turtles you'll need: A baking sheet; parchment paper; 1/2 cup dried cranberries; 1/2 cup dark chocolate chips; 1/2 cup caramel; a teaspoon.

Image Credit: Supplies ... 3 of 8

Cashew Base

Line your baking sheet with parchment paper, then make clusters of 7-8 cashews one inch apart.

Image Credit: Step 1 ... 4 of 8

Add Caramel

Heat your caramel in the microwave in 30 seconds spurts, stirring in between, until melted. Spoon the caramel over the nut clusters making sure it touches all of them liberally.

Image Credit: Step 2 ... 5 of 8

Add Cranberries

Before the caramel cools, sprinkle it with a blanket of 7-8 cranberries in an even layer. Add more or fewer depending on turtle size.

Image Credit: Step 3 ... 6 of 8

Add Chocolate

In a glass bowl, heat the dark chocolate chips in the microwave in 30 second bursts, stirring in between to maintain temper — this keeps the chocolate from getting too hot. Do this until all the chocolate is melted and there are no lumps. Spoon onto the turtle and spread evenly on the top with the back of your spoon.

Image Credit: Step 4 ... 7 of 8

Make a Heart

For an extra-special touch, make hearts out of your dried fruit. Sort through the dried cranberries for the best round bits — you will see that some of the cuts are tops and some are the middle ring of the cranberry. The tops are the ones you want. Take two dried cranberry tops and squeeze the sides together to form a heart. Add this to the top of your turtle before the chocolate cools.

Image Credit: Step 5 ... 8 of 8

Set In the Fridge

Place your baking sheet in the refrigerator for 10-15 minutes or until all the layers are completely set. Remove and gently lift them off of the parchment paper, place in baking cups and your treats are ready to enjoy!

Image Credit: Step 6

These Cucumber, Pineapple and Mint Popsicles are Summer on Sticks

0

Eating a juicy, fruity popsicle in a warm summer breeze is one of life's simple pleasures. It's a satisfying way to cool down after a day spent in the sun, and this combination of cucumber, pineapple and mint tastes crisp and refreshing. You only need six simple ingredients to make your own version of these popsicles, and you'll say goodbye to store-bought cold treats after one bite!

cucumber pineapple mint popsicles

Video of the Day

Things You\’ll Need

  • 2 cups fresh pineapple, sliced

  • 1 cup Persian cucumbers, sliced

  • 3-4 fresh mint leaves

  • 1 cup coconut water

  • 1/4 cup granulated sugar

  • 1 lime, juiced

  • Popsicle mold

  • Popsicle sticks

things you\'ll need

Step 1: Blend the Ingredients

Put the pineapple, cucumbers, mint, coconut water, sugar and lime juice in a blender. Mix until smooth, or for about 1 minute.

blend the ingredients

Step 2: Pour the Mixture into Molds

Pour the juice mixture into the molds, filling to the top line of each mold so the popsicles will be level.

pour mixture into molds

Step 3: Insert the Popsicle Sticks

To keep the popsicle sticks from floating around in the molds, soak them in warm water for 5–10 minutes before inserting. Then, place the lid on the mold and insert the sticks, making sure they are straight and even.

insert the popsicle sticks

Step 4: Freeze the Popsicles

Place the filled molds in the freezer for at least 6 hours. When they are firm and ready to be removed, run the bottom of the mold under warm water for about 20–30 seconds. Gently grip the handles and pull upward to get a clean popsicle. Enjoy!

Tip

If the popsicles still won't budge, place them in a warm water bath for 1–2 minutes until they loosen. Leftover popsicles should be placed in a sealed bag or container.

cucumber pineapple mint popsicles

Easy to Make, No-Mess Healthy Blender Muffin Recipes

0

Do you like to make healthy, home-baked muffins but aren't so crazy about the cleanup? Give blender muffins a go. These types of recipes require less cleanup than traditional muffins, as the ingredients can be tossed into a blender to create an easily pourable batter. Simply fill your muffin cups, bake, and enjoy without destroying your diet or your kitchen! Here, we feature two recipes that are free of both refined sugar and wheat: 1) pumpkin and oat flour-based muffins and 2) nut butter banana-based muffins. You can put your own spin on these recipes by easily customizing some of the ingredients, flavorings, and toppings/mix-ins. And, no, you won't be needing one of those high-end, super-powered blenders — any old one will do. So grab yours and get started!

pumpkin maple blender muffins

Video of the Day

Pumpkin Maple Oat Flour Muffins

Fresh-baked pumpkin maple oat blender muffins topped with oats and cinnamon

Things You\’ll Need

  • 2 cups old fashioned or quick cooking rolled oats

  • 1 1/2 teaspoons baking powder

  • 1/2 teaspoon baking soda

  • 1 cup pumpkin puree

  • 2 eggs room temperature

  • 1 cup plain yogurt

  • ¼ cup maple syrup

  • ¼ cup coconut sugar

  • 1/2 teaspoon maple extract (or vanilla)

  • 1/8 teaspoon salt

  • 2 to 3 teaspoons pumpkin pie spice (depending on your flavor intensity preference)

  • Optional toppings: oats, cinnamon, nutmeg, cinnamon-coconut sugar blend, chopped nuts of your choice, chocolate chips, coconut flakes.

Step 1

Preheat oven to 400 degrees. Pour oats into blender and blend into a fine to medium grind flour. This should take about a couple minutes.

Pouring oats into blender.

Step 2

Add baking powder and baking soda and blend into the oat flour until well combined.

Oats blended into flour

Step 3

Add the rest of the ingredients and blend into a batter.

Adding ingredients into blender for pumpkin oat flour muffins

Scrape down the sides as needed to make sure all the wet ingredients are incorporated.

Batter for pumpkin oat flour blender muffins

Step 4

Coat a 12-mold muffin pan with cooking spray and pour in batter.

Batter in muffin pan for pumpkin oat flour blender muffins

Tip

Oat flour baked goods tend to stick, so even if you’re using nonstick bakeware like silicone, we recommend that you still coat with cooking spray or use baking liner cups. Remember, you want easy cleanup!

Step 5

If desired, top with one or more of the following: oats, cinnamon, nutmeg, cinnamon-coconut sugar blend, chopped nuts of your choice, chocolate chips, coconut flakes.

Pumpkin oat blender muffins topped with oats and cinnamon

Step 6

Reduce heat to 350° F and bake for about 15 minutes or until an inserted toothpick comes out clean.

Step 7

Allow to cool for about 20 minutes before removing to a baking rack.

Fresh-baked pumpkin oat blender muffins topped with oats and cinnamon Fresh-baked pumpkin oat blender muffins topped with oats and cinnamon

Enjoy plain or with grass fed butter.

Fresh-baked pumpkin oat blender muffin with grass-fed butter

Nut Butter Banana Muffins

Peanut butter banana blender muffins topped with chocolate chips

Things You\’ll Need

  • 1 cup nut butter of your choice. We used peanut butter because it pairs perfectly with banana.

  • 2 medium sized bananas (the riper, the sweeter)

  • 2 large eggs, room temperature

  • 1 teaspoon vanilla extract (or almond extract if using almond butter for extra almond-y flavor!)

  • 1 teaspoon baking soda

  • 1 teaspoon apple cider vinegar

  • 2 tablespoons maple syrup or honey

  • ⅛ – ¼ teaspoon salt, depending on the salt content of your nut butter

  • Optional toppings: chocolate chips, peanut butter chips, raisins or other dried fruits, chopped nuts

Step 1

Preheat oven to 400 degrees. Throw all ingredients into the blender and blend well into a smooth, pourable batter. Yep, it's that easy!

Adding ingredients to blender for peanut butter banana blender muffins

Step 2

Pour into greased muffin pan, filling molds nearly to the top. These muffins are on the dense side with just a bit of rise, so you can fill the molds slightly more than you would a regular wheat flour muffin batter. For more info about how to increase rise, read the tip at the end of the article.

Pouring batter into muffin cups for peanut butter banana blender muffins

Step 3

If desired, top with: chocolate chips, peanut butter chips, raisins or other dried fruits, fresh or frozen berries, chopped nuts

Topping peanut butter banana blender muffin batter with chocolate chips

Step 4

Turn down oven temperature to 350 degrees and bake 15 minutes or until toothpick comes out clean. Once baked, remove from the oven and allow to cool before removing from the tray. Makes 12 smallish but dense and flavorful muffins.

Fresh-baked peanut butter banana blender muffins topped with chocolate chips

Tip

Just a few notes about airiness and rise. Both of these gluten-free batters yields a moist, dense muffin with less rise and general fluffiness than traditional wheat flour muffins. That said, expect to see your muffins rise considerably in the oven, but deflate a bit once removed and cooled. This is totally normal. For an fluffier muffin with more lift, try adding an extra egg (or egg white) and/or bumping up the baking soda to a full teaspoon. It’s also important that you don’t leave out the yogurt, as an acidic ingredient is necessary for the baking soda to do its job. You also don’t want to let your batter sit around after blending the ingredients, as it will lose its rising power with time.

Nut butter banana muffins with almond butter and topped with blueberries 
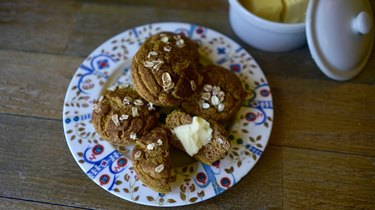
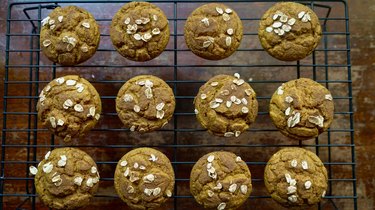
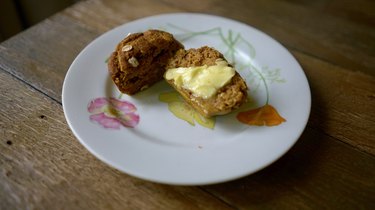
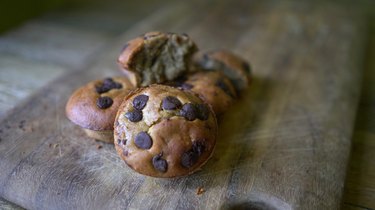
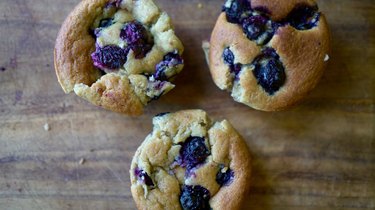
Nut butter banana muffins made with almond butter and topped with blueberries Image Credit: Maya Marin

Happy healthy, hassle-free baking!

Fajita Stuffed Chicken Breast Recipe

0

Are you not sure what to make for dinner? Try these fajita stuffed chicken breasts. Not only do they offer a tasty twist on standard chicken fajitas but they're easy to make. You can also customize the final dish by adding your favorite toppings, like guacamole or salsa. Pair it with brown rice or quinoa or enjoy it on its own. No matter how you serve it, this recipe will surely hit the spot.

Fajita stuffed chicken breast recipe

Video of the Day

Things You\’ll Need

  • 3 or 4 large chicken breasts, boneless and skinless

  • 2 medium bell peppers, deseeded and sliced

  • 1/2 medium yellow or red onion, sliced

  • 2 tablespoons fajita seasoning

  • Juice of 1/2 lime plus more for garnish

  • 1 cup cheddar or Mexican-blend cheese, shredded

  • Brown rice, guacamole, salsa and/or sour cream for serving

  • Chopped cilantro for serving

  • Oil for cooking

Ingredients for fajita stuffed chicken breast

Step 1

Preheat the oven to 375°F and grease a baking dish. Meanwhile, in a large skillet, warm 1 tablespoon oil. Add the sliced peppers and onions and cook until tender, about 5 to 7 minutes. Remove from the heat and let cool.

Cook peppers and onions

Step 2

Pat the chicken breasts dry. Place the chicken on a cutting board and then slice widthwise, taking care to avoid cutting all the way through. You should be able to "open" the chicken breast like a book. Repeat with the remaining chicken breasts.

Slice chicken breast in half widthwise

Tip

If your chicken breasts are very thick, pound them slightly with a meat mallet.

Step 3

Add about 2 tablespoons of cheese to one side of the chicken breast. Add a handful of sliced peppers and onions.

Add cheese, peppers and onions

Step 4

Close the chicken breast, pushing the stuffing inside. Sprinkle fajita seasoning on top of the chicken and then repeat on the other side. To make this step easier, sprinkle some seasoning on the cutting board and pat the chicken on top.

Repeat with the remaining chicken breasts and set aside any leftover cheese.

Close chicken breast and add fajita seasoning

Step 5

In a bowl, combine the remaining fajita seasoning, peppers and onions. Toss well until combined.

Toss leftover peppers and onions with fajita seasoning

Step 6

In the skillet you used to cook the peppers and onions, add 1 to 2 tablespoons of oil. Sear the chicken breasts for about 2 to 3 minutes or until browned. Carefully flip and sear for another 2 to 3 minutes. It's OK if some of the peppers or onions fall out; simply add them to the baking dish in the next step.

Sear chicken breasts until browned

Step 7

To the greased baking dish, add the stuffed chicken breast and seasoned peppers and onions. Top with leftover shredded cheese.

Bake fajita stuffed chicken breast

Step 8

Bake for 15 minutes or until the cheese is melted and bubbly and the internal temperature of the chicken reaches 165°F.

Drizzle with lime juice and top with chopped cilantro if desired. Serve with brown rice, salsa, guacamole and/or sour cream.

Completed fajita stuffed chicken breasts