Home Blog Page 112

How to Make Drizzle Icing From Frosting in a Can

Things You\’ll Need

  • Canned frosting

  • Glass measuring cup

  • Small saucepan

  • Spoon

  • Microwaveable bowl

  • Waxed paper

  • Milk or water

  • Icing knife

Eggnog bundt cake 
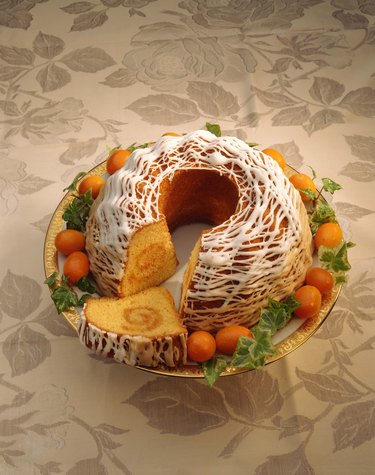
Drizzling thinned frosting on cakes produces a light, lacy effect. Image Credit: Jupiterimages/Comstock/Getty Images

Standard cake icings are made with a combination of butter, powdered sugar, milk and flavorings. Called buttercream frostings, their flavors and colors can be changed with different extracts and artificial food coloring. Buttercream icings are also available premade and are generally sold in small resealable tubs in the baking section of the grocery store. Like homemade frosting, canned icing can be thinned to produce a glaze that can be spread more thinly or drizzled on cakes and other desserts. The glaze takes on a less fluffy consistency and produces a shinier icing that lends itself well to decorating with candies, nuts and small fruit.

Video of the Day

Stove-top Instructions

Step 1

Remove the lid and inner liner from the can of frosting and spoon the contents out into a small saucepan.

Step 2

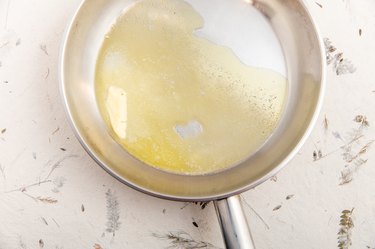
Place the saucepan over low to medium heat and stir the frosting until it starts to thin, which should take about 2 to 3 minutes.

Step 3

Test for thinness by drizzling a small amount of the frosting off the end of a spoon onto waxed paper or a small dish.

Step 4

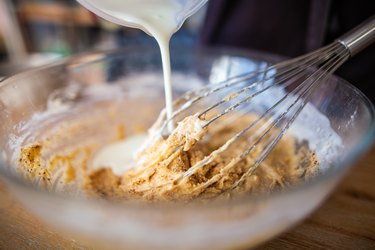
Add milk 1 drop at a time while stirring if the frosting still does not drizzle properly and repeat the waxed paper test.

Step 5

Remove the pan from the heat when the icing reaches the desired consistency and drizzle the icing immediately on the cooled cake, cookies or pastry.

Microwave Instructions

Step 1

Line the bottom of the microwave or turntable with a paper towel and remove the lid and inner liner from the container of frosting.

Step 2

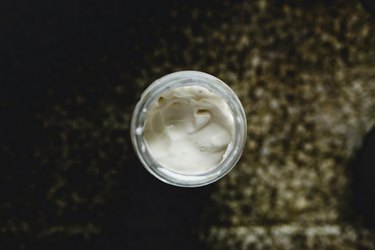
Spoon about 1/3 cup of frosting into a microwaveable bowl and heat on "High" for 5 to 10 seconds. Increase the heating time to 10 to 20 seconds to microwave 2/3 cup of frosting.

Step 3

Stir the frosting and drizzle over the cake or pastry.

Tip

If adding food coloring to canned frosting before thinning, it's best to use the gel form of coloring sold in tubes, as liquid coloring may thin the frosting too much.

Warning

If heating the opened frosting can in a microwave, be sure it is microwave-safe and that there are no metal parts, such as aluminum foil from an inner seal, left on the rim. Microwaving aluminum foil creates flashing and may start a fire.

Use canned frostings labeled as "rich and creamy," and avoid any labeled "whipped."

Canned frosting thinned in a microwave may be too thin and sink into the surface of the cake after 24 hours if it is spread too thinly. Refrigerating the cake may prevent his by hardening the glaze more quickly.

Beachy Blue Summer Smoothie Bowl Recipe

0

Smoothie bowls are a delicious and healthful way to start the day. Don't let the blue color of this smoothie bowl fool you — there is nothing artificial involved. Using blue spirulina or blue pea flower powder, you can whip up a gorgeous smoothie or smoothie bowl the whole family will enjoy all summer long. The only difficult part about making a blue summer smoothie bowl is deciding which toppings to use!

blue smoothie bowl with fresh fruit, shredded coconut and pumpkin seeds Beachy Blue Summer Smoothie Bowl Recipe Image Credit: Julia Mueller

Video of the Day

Things You\’ll Need

  • 2 large ripe bananas, frozen

  • 1 cup frozen mango

  • 6 ounces plain vanilla or blueberry yogurt

  • 2/3 cup unsweetened almond milk

  • 1 tbsp blue spirulina or blue pea flower powder

  • 1 ripe kiwi, peeled and sliced

  • 1/4 cup fresh mango, chopped

  • 1/4 cup fresh blueberries

  • 1 tbsp raw pumpkin seeds

  • 1 tbsp unsweetened shredded coconut

Step 1

Add the frozen bananas, mango, yogurt, unsweetened almond milk and blue spirulina to a high-powered blender. Blend until completely smooth.

Smoothie ingredients in a blender 
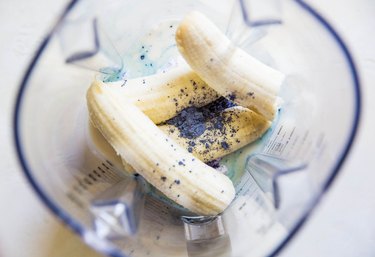
Add smoothie ingredients to a blender and blend Image Credit: Julia Mueller

Tip

The smoothie must be very thick in order for the toppings to stay afloat, so be sure your bananas and mango are frozen prior to using them in the smoothie. If you don't have frozen fruit, add 2 cups of ice (or more), until desired thickness is achieved.

Step 2

Pour the thick blue smoothie into a large bowl. Use any fresh fruit, nut, seed, granola and/or nut butter you like for the toppings. We used sliced kiwi, fresh mango, blueberries, pumpkin seeds, and shredded coconut.

Dig in with a spoon, and enjoy!

Blue smoothie bowl with fruit and seeds on top 
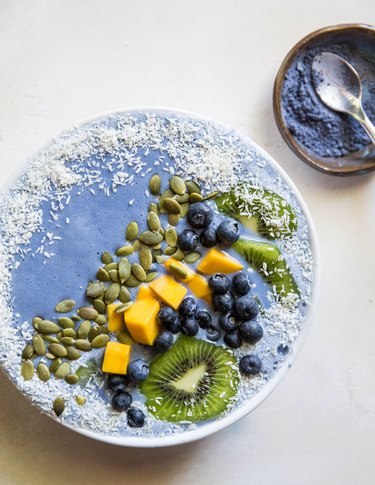
Pour blue smoothie into a bowl and top with fruit, nuts, and/or seeds. Image Credit: Julia Mueller

Health Benefits of Blue Spirulina and Blue Pea Flower

Just like green spirulina, blue spirulina is a superfood. It is a great source of B vitamins, which helps boost your energy. It also contains chlorophyll, which aids with digestion and regular bowel movements. Because blue spirulina is also a good source of vegan protein, it helps add a nutrient boost to your smoothies or smoohie bowls, making them a more complete meal.

As an alternative to blue spirulina, you can use blue pea flower powder. Similar to green tea, blue pea flower is high in antioxidants, which help detoxify your body, lower inflammation, and prevent disease.

Blue spirulina in a serving dish 
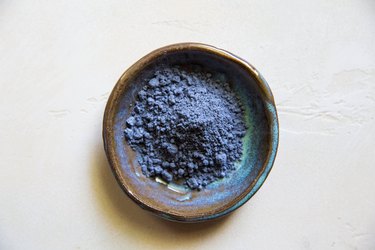
Blue spirulina is a superfood and great for natural coloring. Image Credit: Julia Mueller

How to Warm Up Apple Dumplings

0

You don't have to sacrifice that comforting feeling that comes from biting into a warm, gooey apple dumpling just because you're warming up leftovers. Although the microwave is generally the fastest way to heat things up, it's not always the best method. Choose your warming technique based on your appliances, the amount of time you can wait and the desired consistency of the warmed apple dumpling.

Oven Reheating

Warm the apple dumplings in the oven for the added benefit of browning the crust to renew the slightly crisp exterior while heating the inside, giving the dumplings a texture that's similar to freshly baked. Place the dumpling — or dumplings — in an oven safe dish, and bake for approximately 10 to 15 minutes at 350 degrees Fahrenheit.

Video of the Day

Toaster Oven Reheating

Like a tiny oven, the toaster oven warms leftover baked goods to freshly baked perfection. As an added bonus, it provides gentle, even heating that's well suited to warming and reheating baked goods. Set the toaster oven to 350 F and, once it's hot, add the apple dumpling. Heat for approximately 10 to 15 minutes, until the dumpling is warm throughout. To avoid inadvertently burning the outside of the pastry, check on the dumpling every few minutes until it's finished.

Using the Microwave

Although the oven and toaster oven provide browning in addition to heating, you can warm the dumpling up fastest in the microwave. The crust on the exterior won't regain any crispness, so only warm it this way if a slightly soggy dumpling dough won't matter — for example, if you plan to serve the apple dumpling with a warm sauce or cream over the top. Set your microwave to 75 percent power to avoid drying the dumpling out as it warms. Warm the dumpling for 2 to 5 minutes, depending on how hot you like it.

Reheating Frozen Apple Dumplings

If you've baked and frozen your apple dumplings ahead of time, you can use the same methods for reheating and warming them. As a general rule, thaw the frozen dumplings in the refrigerator overnight. Alternatively, defrost the dumplings in the microwave for approximately 5 minutes using the defrost setting. If you're reheating frozen apple dumplings, bake them in an oven or toaster oven set to 350 F. Use a covered baking dish, which helps prevent the dumplings from drying out. In general, plan for the dumplings to take at least twice as long — roughly 20 to 30 minutes — as they would if you warm thawed apple dumplings.

10 Hacks to Make Box Cake Mix Taste Even Better

0

You may love the taste of homemade cake, but boxed cake mix is just so convenient. Using a mix doesn't mean your cake is destined to be dry or flavorless. Think of a store-bought mix as a basic starting point, or a culinary blank canvas. Then get experimenting — your kitchen probably already holds the ingredients you need to take your cake to the next delicious level.

10 Hacks to Make Box Cake Mix Taste Even Better

Video of the Day

1. Swap Oil for Melted Butter

Is there anything that melted butter can't improve? Yeah, that's a no. Butter gives dry cake mix that homemade, straight-from-Grandma's-kitchen flavor. So leave oil out of the recipe and use melted butter instead. The swap shouldn't change the cake's texture much but will improve its taste.

Melting fat

2. Add Buttermilk

Buttermilk adds a creamy tang to a basic boxed cake mix. Bring that complexity to your dessert by using buttermilk in place of all or some of the water. If you don't have buttermilk on hand, make a substitute by combining a spoonful of lemon juice with a cup of milk. Let the mixture sit for five minutes before measuring out what you need for your cake mix.

Pâtisserie : Mélanger une préparation à gâteau

3. Stir in Pudding Powder

Boxed mixes tend to produce cakes that are almost too light and airy. To give your cake a denser texture, try adding a packet of instant pudding mix to the cake. No need to follow the directions on the pudding package. Just add the powder right into the cake mix before adding wet ingredients.

Mixing vanilla pudding

4. Add Extra Egg Yolk

Egg yolks add creamy fat to your cake mix. It's no wonder they make such a delicious addition. Add two extra yolks to the mix to get optimal results. This tweak yields a cake that's moist and rich.

Woman hands breaking egg to separate  egg-white and  yolk

5. Use Hot Water

When the back of the box calls for water, you probably fill the measuring cup from the tap without thinking much about temperature. But using hot water is best, especially if you're making a chocolate cake. The heat will bloom any cocoa powder in the mix, intensifying the chocolate flavor.

Hot and Refreshing Drink

6. Swap Coffee for Water

Craving mocha cake? Use hot coffee instead of water when making chocolate cake from a mix. The finished cake should have a distinctive mocha flavor. Another option: Make instant espresso and add the hot espresso to give the cake an even more intense coffee flavor.

Coffee dripping while brewing coffee

7. Use Soda

Want to simplify your life? Forget measuring out oil and cracking eggs. One of the absolute simplest ways to prep a boxed cake mix is to use just two ingredients — the mix and a can of soda. Experiment with different combinations, like cherry cola with chocolate cake or lemon-lime soda with vanilla.

USA, New Jersey, Jersey City, drink cans in a row

8. Or Sub Milk for Water

No buttermilk, soda or coffee available? You can still do better than adding plain water to your cake mix. Swap in your favorite kind of milk to give the cake a little creaminess. The higher the fat content of your milk, the richer the finished cake will be. You might even try using chocolate milk!

Empty mixing bowl, eggshells and milk

9. Experiment With Mayonnaise

Okay, hear us out: Mayonnaise may actually be the perfect complement to your boxed mix. It should make your cake incredibly moist and tender, but no one will be able to taste the secret ingredient. If it's your first time adding mayo to the mix, start with just one big spoonful; if you like the results, try adding a little more the next time you make a cake.

High Angle View Of Mayonnaise In Jar On Table

10. Layer, Layer, Layer

Take your cake to another level (literally) by adding layers! Simply bake two or three box mix cakes in round or square pans, then stack them with a layer of sweet frosting in between each layer of moist cake for a more professional look and taste. More layers equals more frosting, which equals more deliciousness.

Vanilla sponge cake with cream and white chocolate decorate. Sliced piece of cake on white plate. Served on wooden table.

How to Make Mini Pie Shells in a Muffin Tin

0

Things You\’ll Need

  • 2 9-inch store-bought pie crusts or pie dough

  • 4-inch cookie cutter or cup

  • Muffin tin

  • Cooking spray

  • Parchment paper

  • Dried beans or rice

  • Fork

Man preparing dough with rolling pin, close-up You can turn any pie dough into a miniature treat. Image Credit: Push/Digital Vision/Getty Images

Make miniature pies for a whimsical take on a favorite dessert. You don't need any special equipment, just your favorite pie crust and a muffin tin. Make pies bite-sized by using a miniature muffin tin, all you need to do is adjust the baking time. Before you add your filling, bake the pie shells for a few minutes to ensure that your miniature crusts keep their shape. This process, known as blind baking, prevents the crust from becoming soggy from wet fillings. It's also used for fillings that don't require baking, like custards and cream pies.

Video of the Day

Step 1

Roll out the pie dough as you would normally, whether you're making it from scratch or using store-bought crusts.

Step 2

Cut circles from the pie crust using a 4-inch round cookie cutter or cup (For mini muffin tins, use a 3-inch cookie cutter). Two 9-inch crusts should be enough for 12 muffin cups, with some dough leftover.

Step 3

Coat the muffin tin liberally with nonstick cooking spray.

Step 4

Press each pie crust circle into a muffin tin cup. Place the muffin pan in a refrigerator, and allow the crusts to cool for five to 10 minutes. Allowing the crusts to cool will help them keep their shape while they're baking.

Step 5

Cut out 4-inch squares of parchment paper and press them into the pie crusts. Fill each muffin cup with dried beans or uncooked rice. Push the beans or rice right up against the parchment paper to prevent the sides from collapsing.

Step 6

Bake the miniature crusts at 425 degrees F for six minutes. Remove the beans and parchment paper and lightly puncture the bottom of the crust with a fork to allow steam to escape.

Step 7

If the pie filling must be cooked, bake the crusts for an additional minute. Scoop the filling into the crusts and bake them according to recipe directions. If you're not baking the filling, bake the empty crusts for an additional three to four minutes, or until the crusts are lightly golden brown.

Step 8

Allow the crusts to cool completely before removing them from the muffin tin to prevent breaking. If you're having difficulty removing the crusts, run a butter knife around the edge of the crust to loosen it from the pan.

How to Bake Eggs in Bell Peppers

0

Everyone loves brunch, right? And hosting a brunch gathering is even better. Everyone needs a good recipe to please a crowd, and this is especially easy when you have something that's both simple and delicious. This recipe is exactly that—an egg baked to perfection in a bell pepper with chorizo and cheese. Not only is the vessel edible, which is great, but the flavors mix together very well and the overall dish makes for a beautiful presentation.

Final #2 Final Image Credit: Kristan Raines

Video of the Day

Things You\’ll Need

  • Olive oil, for brushing

  • 2 large bell peppers (any color)

  • 4 eggs

  • 1/2 cup cooked chorizo, or soy chorizo

  • Shredded Mexican cheese

  • Salt and pepper, to taste

  • Chopped chives, for garnish

  • Large baking dish

  • Tin foil

Step 1

Heat oven to 375° F. Cut each bell pepper in half from top to bottom. Hollow them out completely by removing seeds and stem.

Hollowed Pepper Step 1 Image Credit: Kristan Raines

Step 2

Place the bell peppers on a baking sheet, cut side down, and brush/rub with oil. Roast the bell peppers until slightly softened, about 15 minutes.

Roast Step 2 Image Credit: Kristan Raines

Tip

To add even more flavor to this dish try using an infused oil, like one with garlic or basil, when brushing the bell peppers.

Step 3

Remove the bell peppers from the oven and flip them over. Fill each pepper with 1 1/2 to 2 tbs of cooked chorizo, and a light sprinkling of cheese. Press the filling down slightly and carefully add one large egg to each bell pepper. Then season with salt and pepper.

Cover the baking dish with foil and place back in the oven for an additional 30 to 35 minutes, or until the egg whites are set and the yolk is still a bit runny.

Fill Peppers Step 3 Image Credit: Kristan Raines

Tip

It helps to crack the egg into a small dish before adding it to the bell pepper. This will give you a little more control as opposed adding them straight from the shell.

Step 4

Once the peppers are cooked to your liking, remove from the oven, garnish with freshly chopped chives and enjoy right away!

Final #1 Step 4 Image Credit: Kristan Raines

How to Freeze Peaches With Lemon Juice

Things You\’ll Need

  • 5 medium peaches

  • Water

  • Large stockpot

  • Stove

  • Slotted spoon or frying spider

  • Large bowl

  • Ice

  • Cutting board

  • Knife

  • Quart sip-top freezer bag

  • Quarter of a cup fresh, squeezed lemon juice

  • 2 to 3 tbsp. granulated white sugar (optional)

  • Paper towel

  • Permanent marker

  • Freezer

... Make peaches last all year by freezing them in lemon juice.

You can freeze peaches with lemon juice to protect their bright color until they are thawed. A large peach harvest can leave a tree owner with too many peaches to use right away. Frozen fruits that are properly prepared and sealed will keep in the freezer for up to a year. Freezing peaches with lemon juice extends the life of the fruit by preventing oxidation over the long freeze. Thawed peaches can be added to a cobbler or pie or simply eaten plain.

Video of the Day

Step 1

Place the whole, clean peaches into a large stockpot and add enough water to cover them completely.

Step 2

Remove the peaches and place the stockpot of water on the stove on medium-high heat until it reaches a rapid boil.

Step 3

Lower the peaches into the boiling water for just under a minute using a slotted spoon or frying spider.

Step 4

Move the scalded peaches to a large bowl that is half full of ice and water to quickly stop the cooking and chill the peach.

Step 5

Place the peaches on a cutting board and slice them into eight equally sized wedges. Remove and discard the pits along with any bruised or rotten sections of the peaches.

Step 6

Slide the segmented peaches into the bottom of a quart size zip-top freezer bag and add the lemon juice. Sugar can be added at this stage to sweeten the fruit and balance the sour lemon juice.

Step 7

Squish the sides of the plastic bag to thoroughly mix the ingredients before forcing out as much air as possible and sealing the bag securely.

Step 8

Wipe down the outside of the bag with a paper towel and write the date the peaches are being frozen. This date will help you use the peaches that are the oldest first and prevent you from using any that have gone bad after a year.

Step 9

Lay the bag of peaches and lemon juice flat in the coldest part of the freezer to quickly freeze so that it can be stacked vertically or horizontally. Make the date labels visible if possible.

Tip

Thawed, sweetened peaches can be dumped into a pre-baked pie shell and warmed in an oven for a few minutes to make an easy dessert.

How to Dry Spinach at 170 Degrees

Things You\’ll Need

  • Knife

  • Drying tray or cookie sheet

  • Oven

  • Air-tight container

... Use dried spinach for up to a year.

Drying food through dehydration, a common method of preservation, is one way to preserve fresh spinach. If stored properly, dried spinach lasts up a year. During this time you can add it to salads or rehydrate it in hot water for use in recipes. Although dehydrators are useful appliances if you dry food frequently, an oven also works well for removing moisture from food.

Video of the Day

Step 1

Buy fresh spinach at a farmer's market or supermarket. Wash it with cold water to remove any soil or pesticide and cut off the stems.

Step 2

Spread the spinach out in a single layer on a drying tray or cookie sheet.

Step 3

Put the spinach in an oven set to 170 degrees Fahrenheit.

Step 4

Leave the spinach in the oven for about six hours and turn the temperature down to 130 degrees Fahrenheit for the last hour. The spinach is dry when brittle.

Step 5

Remove spinach from the oven and let it cool.

Step 6

Put the dry spinach in air-tight containers and store in a cool, dark place.

Tip

To rehydrate dry spinach, put it in hot water with a small amount of lemon juice for about 15 minutes.

Can You Refreeze Baked Pies That You Have Made With Frozen Fruit?

0

Woman Holding Rhubarb Pie Most fruit pies freeze well, even if they\’re made with previously frozen fruit. Image Credit: Alexandra Grablewski/Lifesize/Getty Images

Fresh-baked pies are a welcome complement to any meal, but getting them to the table can be time-consuming. Before the finished pie can go into your oven the pastry must be made, rolled and cut, and the filling must be both prepared and — often — cooled. Preparing several pies at once and freezing them for later use is one way to simplify the process. Pies can be frozen either baked or unbaked, even if you're working with previously-frozen fruit.

Video of the Day

Re-Freezing Ingredients

Many cooks and bakers are reluctant to re-freeze ingredients that have previously been frozen and thawed. There are two primary reasons for this. One is that freezing and re-thawing creates the possibility of microbial activity, and with it the risk of foodborne illness. A second is that repeated freezing and thawing cycles can cause food's texture to deteriorate. Food safety is seldom a concern in the case of pies made with frozen fruit, because any molds or bacteria are subsequently killed by the baking process. Texture is a non-issue as well, because baking the fruit has a larger impact that re-freezing.

Baking with Frozen Fruit

When fruit is frozen the water contained within its cells expands, rupturing some of the cell walls. When the fruit is thawed juices escape from these damaged cells, making frozen fruit juicer than fresh. Bakers must compensate for that by either draining and concentrating the juices, or by thickening them with starches such as cornstarch or flour. Cooked fillings made with frozen berries are more problematic, because cornstarch and flour release some of the moisture from the pie filling after they're frozen and thawed. Tapioca starch and commercial gelling products are more suitable choices for those pies, and can be ordered from baking supply shops or online vendors.

Freezing Baked Pies

Remove your pies from the oven, and let them cool completely before you freeze them. To avoid condensation, they should be frozen uncovered or loosely covered, then bagged or wrapped individually once they're fully frozen. You can remove the frozen pies from their pans if you wish, or leave them in the pan to protect them from accidental damage. A pie that's well-wrapped in airtight packaging should retain its flavor and quality for four to six months in your freezer. To reheat a pie, return it to its pan and let it stand for one hour at room temperature. Bake it at 350 or 375 degrees Fahrenheit until fully heated and bubbling, usually 35 to 50 minutes.

Freezing Baked vs. Unbaked Pies

Whether you choose to freeze your fruit pies baked or unbaked is largely a matter of personal preference. Fruit pies frozen unbaked have a fresher fruit flavor than fully-baked pies, which after reheating leave the fruit tasting thoroughly cooked. On the other hand, fruit fillings often have time to soak into the bottom crust before an unbaked pie is fully frozen. When baked, those pies will have a soggy, doughy crust. Fully baked pies are less likely to be soggy, because the crust is fully cooked and the filling fully thickened before they go into the freezer.

Sheet Pan Beef & Broccoli Recipe

0

This sheet pan beef and broccoli is a healthier alternative to takeout. Not only is it baked instead of fried, but it features a homemade marinade too. Simply combine the sauce ingreidents, marinate the beef and broccoli and bake! Serve with rice or noodles for a tasty weeknight meal.

Sheet pan beef and broccoli recipe

Video of the Day

Things You\’ll Need

  • 1 1/4 pounds steak, thinly sliced

  • 4 to 5 cups broccoli florets

  • 1/3 cup low-sodium soy sauce

  • 2 teaspoons fresh ginger, grated

  • 4 teaspoons minced garlic

  • 4 tablespoons brown sugar, maple syrup or honey

  • 2 teaspoons sesame oil

  • 2 tablespoons rice vinegar

  • 1/2 teaspoon ground black pepper

  • Seasme seeds, for garnish

  • Chopped scallions, for garnish

Ingredients for sheet pan beef and broccoli

Tip

Slice the steak into small, bite-sized pieces.

Step 1

In a large bowl, combine the soy sauce, ginger, garlic, brown sugar, sesame oil, rice vinegar and black pepper. Whisk until the brown sugar is fully dissolved.

Whisk marinade ingredients

Step 2

Toss the sliced beef in the marinade. Cover and let sit in the refrigerator for 20 to 30 minutes.

Marinate the beef

Step 3

Preheat the oven to 425°F. Line a large baking sheet with parchment paper (or lightly grease with oil). Transfer the beef to the sheet in an even layer. Reserve the marinade.

Place beef on baking sheet

Tip

You'll likely need to use more than one baking sheet.

Step 4

Toss the broccoli in the leftover marinade. Let sit for 10 minutes.

Marinate the broccoli

Step 5

Transfer the broccoli onto the baking sheet(s), making sure everything is laid out in an even layer. Pour any leftover marinade over the beef and broccoli.

Add broccoli

Step 6

Bake for 12 minutes or until the beef is cooked and no longer pink.

Bake the beef and broccoli

Garnish with sesame seeds and chopped scallions. Enjoy!

Sheet pan beef and broccoli