Sometimes, the little things make the biggest difference, and this is especially true with bubbly drinks! Whether you're looking for a refreshing soda, to zhuzh up your spring water or make your glass of sauvignon blanc dance, a sparkling water maker is exactly what you need. But which one should you choose? While most will automatically point to SodaStream, other brands in the space are pushing the boundaries.
Video of the Day
Although it might seem like all sparkling water makers are the same, they aren't. It's in your best interest to do some research before adding one to your online shopping cart.
What To Consider When Purchasing a Sparkling Water Maker
Carbonation Access: The first bit of research is to visit nearby grocery or big-box stores to check if they stock your soda maker's CO2 cylinder. While you could easily place an online order, some people might prefer to load up during their weekly grocery run.
Replacement Bottle Availability: Another factor to consider is how easy it is to source replacement carbonating bottles, as some plastic containers aren't dishwasher-safe and can be easily damaged. So, be sure to check the availability of replacement parts. You can opt for glass carbonating bottles but expect to pay more for this premium feature.
Design: One of the biggest factors to consider is design. If you don't find your sparkling water maker aesthetically pleasing, you're bound to hide it in the cupboard where it will never be used. Size is equally important as counter space is always limited, no matter which household you come from.
Power Source: It may come as a surprise to some old-schoolers, but there are sparkling watermakers that require electricity. You can still opt for a simple unit, but you'll miss out on the latest features.
Now, let's dive into our top sparkling water makers for 2022.
The Best Sparkling Water Maker for Beginners
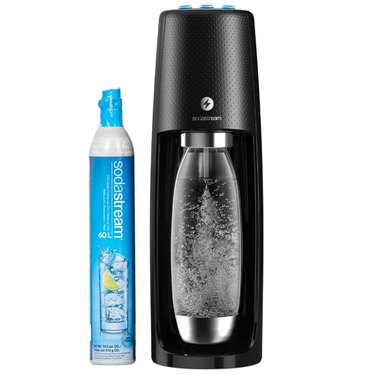
SodaStream Fizzi One Touch Sparkling Water Maker
$99.99 at Walmart
It shouldn't come as a surprise that SodaStream makes the best overall machine. As the name implies, there are three buttons, each indicating the level of carbonation. This easy system means there's no learning curve to using this product. Simply load up the machine with the SodaStream CO2 cylinder, plug it in, add the BPA-free carbonating bottle, and push one button for the exact level of carbonation you desire.
With SodaStream, you are also reusing CO2 cylinders, which means you're creating less waste. Each CO2 cylinder is estimated to produce 60 liters of fresh, sparkling water. The machine measures 6 inches long, 10.83 inches wide and 17.32 inches tall, making it relatively compact. The Fizzi One Touch Starter Kit comes with a CO2 cylinder, a 1-liter bottle and a 3-year warranty.
The Most Versatile Sparkling Water Maker
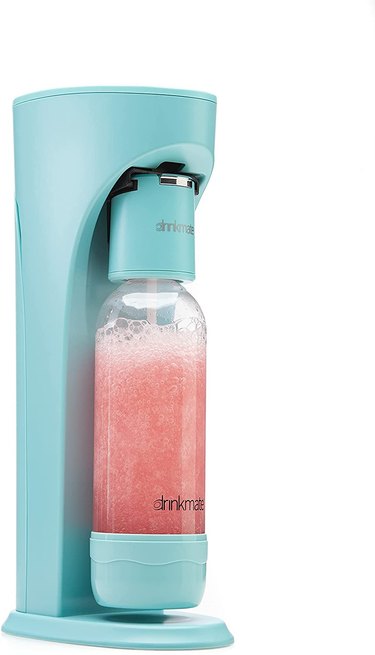
Drinkmate Sparkling Water and Soda Maker
$85.99 – $89.99 at Amazon
Whether you're loading juice, ice tea, coffee, wine, cocktails, flat soda or beer, the Drinkmate handles them all! It's also available in four colors: Classic White, Matte Black, Royal Red and Arctic Blue, allowing you to select a sparkling water maker that blends in with your kitchen's color palette.
The Drinkmate uses a CO2 cylinder that can produce an estimated 60 liters of fizzy liquids and is compatible with other brands. It also offers a reusable, 1-liter carbonating bottle, which is made from BPA-free plastic. However, unlike the SodaStream, the CO2 cylinder isn't included with the entry-level purchase.
It's also not electrically operated and just uses simple push-button carbonation. Size-wise, it's 8 inches long, 5 inches wide and 16 inches tall—making it more compact than its main competitor. The Drinkmate comes with a 2-year manufacturer's warranty for added peace of mind.
The Most Design-Forward Sparkling Water Maker
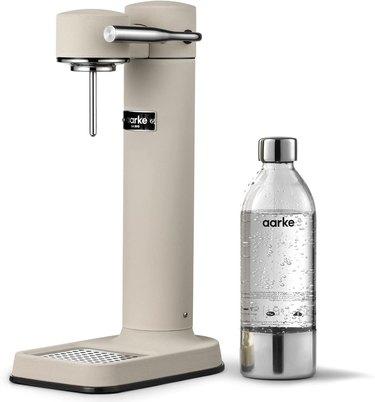
aarke Carbonator III Premium
$219.00 -$457.23 at Amazon
Stylish, slim and sophisticated, the aarke Carbonator III is minimalism at its best. Utilizing stainless steel, you won't find any plastic fittings on this sparkling water maker. As the name indicates, this is the third version of the aarke Carbonator, and it now has a new internal safety valve system and a new CNC-machined, stainless steel precision nozzle.
It also comes with a glass carbonator bottle that isn't interchangeable with older models, which is a shame due to the high price tag. The unit is focused on design, striving to be the most compact sparkling water maker with a drip tray seamlessly integrated into the base.
There are no external power sources needed, and it can integrate with the 60-liter CO2 cylinder offered by SodaStream. According to aarke's website, you can also use the new 80-liter canister, but don't expect it to yield more than 60 liters.
The Carbonator III is available in seven premium color options (prices vary between finishes): steel, copper, matte black, white, gold, black chrome and sand. The dimensions of the aarke are 10.24 inches long, 5.91 inches wide and 16.14 inches high. The unit comes with a one-year warranty.
The Best Old-School Sparkling Water Maker
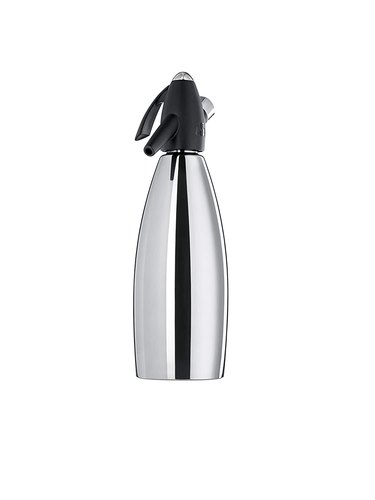
iSi Stainless Steel Soda Siphon
$66.99 at Amazon
If you're looking to wow your friends with your bartending skills, then the iSi Soda Siphon is perfect with its elegant, stainless steel bottle. And it's easy to use! Using smaller CO2 cylinders, it can fizz up to 1 liter of water at a time—the same amount of liquid that the carbonating bottle can hold.
The iSi Soda Siphon comes with strict user instructions, requiring that you fill it to the correct level, don't over-pressurize it and keep it clean. Also, the CO2 cylinders have to be disposed of, meaning it's a less eco-friendly option than other products on this list.
Once perfected, you will enjoy nicely fizzed drinks in no time. But honestly, this is all about the show—if you're looking for a "daily driver," choose another product. The dimensions of the iSi Soda Siphon are 3.5 inches long, 3.5 inches wide 12.25 inches high. The CO2 cylinders are not included and will have to be replaced more often due to their small size. At Walmart, they cost $7.50 for a 10-pack.
The Most Innovative Sparkling Water Maker
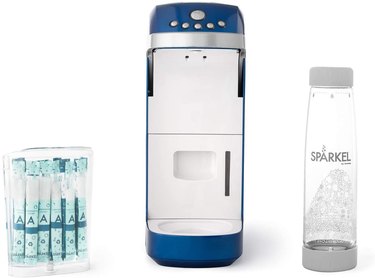
Spärkel Beverage System
$119.99 at Amazon
If finding CO2 cylinders is something you'd like to avoid altogether, the Spärkel Beverage System is perfect for you. Rather than using pressurized CO2, this product produces sparkling water by combining packs they call A+B, which are citric acid and baking soda.
You get to select how much fizz you want in your drink from five settings, and the machine combines the exact amount from each pack. The unit is available in seven colors, giving you some room to customize your look. Also, you can carbonate anything you please, including real fruit bits, so there's no need to reach for the mixing solution.
It comes with ten carbonators and a 25.4-ounce carbonating bottle, which is dishwater safe. While you might be tempted to add the ingredients yourself when running low on supplies, the manufacturer warns that you need to stick with their packs.
There are a few drawbacks to this unit. Fizzing at the higher levels on the machine may require up to four minutes of waiting, and it also uses a power source. Unlike any of the other products on the list, the CO2 travels from the bottom of the bottle. But this sparkling water maker is blazing a new trail in a segment that has remained static for decades. The dimensions are 10 inches long, 5.65 wide and 15 inches high, and it comes with a one-year warranty.