Home Blog Page 103

How to Pickle Green Beans in a Crock

Things You\’ll Need

  • 1-gallon crock

  • Mixing bowl

  • Heavy plate

  • Slotted spoon

  • Knife

  • 4 lbs. green beans

  • 1/2 gallon water

  • 1/3 cup salt

  • 1/2 cup vinegar

  • 15 cloves garlic

  • 15 sprigs dill

  • 30 peppercorns

beans in colander

Green beans are among the many vegetables that hold up well to the process of pickling. Green beans are usually fresh-pack or heat-process pickled, although it is also possible to preserve them with the non-stove method of fermentation pickling. This process can take between one and three weeks. You may choose to rinse pickled green beans before cooking to dilute the salty, spiced flavor. Eat them fresh from the brine as snacks or use them in stews or casseroles where they'll lend their distinct flavor to the other ingredients.

Video of the Day

Step 1

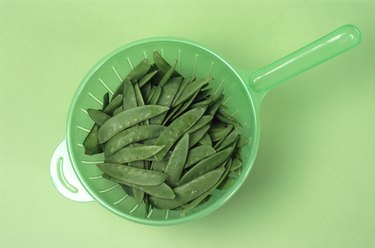
Prepare the green beans for pickling. Sort through them to make sure you are only pickling ripe, healthy beans without blemishes. Wash them thoroughly and trim them to a consistent length (3 to 4 inches).

Step 2

Mix the brine by combining the water, salt and vinegar in a bowl.

Step 3

Place half of the dill, garlic and peppercorns on the bottom of the crock. Pack the green beans on top of the spices.

Step 4

Lay the remaining spices on top of the green beans and pour the brine into the crock until all the beans are covered. Place a heavy plate on top of the beans and spices to keep them submerged under about 2 inches of brine.

Step 5

Store the crock in an area where the temperature is about 70 degrees Fahrenheit. Check the crock daily to see if any white scum has formed on top of the brine, and remove scum with a slotted spoon.

Step 6

Watch for bubbles rising from the beans. This shows fermentation is occurring. The pickling process is complete when the bubbles stop, which usually takes between one and three weeks.

Step 7

Store the beans in the crock in your refrigerator or a cool area (38 degrees Fahrenheit) for up to three weeks after they are pickled. You can store them longer by canning them in jars in their brine.

Tip

Make sure the room where the crock is stored during fermentation doesn't get too warm. Temperatures above 80 degrees Fahrenheit can cause the beans to get too soft.

Warning

Check the consistency of the green beans during fermenting and discard any that become soft or slimy. They can spoil the rest of the batch.

How to Make Chestnut Flour

0

Things You\’ll Need

  • Filtered water or spring water

  • Nut-milk bag or cheesecloth and fine-mesh sieve

  • Rubber spatula

  • Food dehydrator and nonstick drying sheet

  • Parchment paper and sheet pan (optional)

  • Spice grinder

Making chestnut flour requires finesse. Unlike other nut flours, such as almond, that you can simply grind into a coarse meal and call it a day, you have to coax chestnuts into a fine flour from start to finish. But when you process chestnut flour to a dry, silky consistency, you can use it in dishes too refined for coarse, mealy flours, such as gnocchi, crepes and clafoutis.

Peeling and Preparing

Step 1

Slice each chestnut in half vertically, from the pointed tip to the rounded bottom. A sharp, heavy chef's knife works best. Work in 1-pound batches of unshelled chestnuts.

Video of the Day

Step 2

Bring a few quarts of water to a boil in a large pot; you need enough water to cover the chestnuts by at least 1 inch. Add 1 pound of halved chestnuts to the boiling water.

Step 3

Blanch the chestnuts for 7 1/2 minutes and drain them in a colander under cold running water. Let the nuts drain in the colander for a few minutes and transfer them to a bowl.

Step 4

Drop the chestnuts from their shells into a separate bowl. Extract the nuts that don't fall out readily with the tip of a paring knife.

Step 5

Cover the chestnuts with filtered water or spring water and let them soak for 10 to 12 hours.

Processing

Step 1

Transfer the chestnuts and the water to a blender or food processor. Process the chestnuts until smooth; work in batches, if necessary.

Step 2

Scrape the pureed chestnuts from the blender to a nut-milk bag set over a bowl. You can also pour the chestnut puree into a sieve lined with two or three layers of cheesecloth set over a bowl.

Step 3

Let the chestnut milk drain into the bowl for about 5 minutes; then press the solids using a rubber spatula. Wring the remaining chestnut milk from the bag or cheesecloth. Store the chestnut milk in an airtight container for up to three days in the refrigerator.

Step 4

Scrape the chestnut pulp onto a nonstick drying sheet and spread it in an even layer, no thicker than 1/4-inch thick, using a spatula. Dry the pulp in a food dehydrator for 24 hours at 105 degrees Fahrenheit.

Alternatively, spread the chestnut pulp in an even layer on a sheet pan lined with parchment paper. Dry the pulp in the oven on the lowest setting for 24 hours or until it's completely dry; use a towel or oven mitt to keep the oven door propped open about 1 inch.

Step 5

Transfer the dry chestnut pulp to a spice grinder and process it into a fine powder. Store chestnut flour in the refrigerator for up to three days.

Tip

Replace up to 20 percent of the wheat flour in any recipe with chestnut flour.

Copycat Starbucks Lemon Loaf Cake Recipe

0

This is a recipe in need of bookmarking. Brunch invite? Break out the lemon cake. Backyard barbecue? It's a perfect dessert. Breakfast for overnight guest? Coffee and lemon cake it is. With a light lemony flavor and the perfect coffee shop icing, it's perfect any time of day. It's also a great excuse to eat cake for breakfast, and that's something we could all use.

Copycat Starbucks Lemon Loaf Cake Recipe

Video of the Day

Things You\’ll Need

  • 2 tablespoons lemon zest

  • 3/4 cup granulated sugar

  • 2 tablespoons butter, softened

  • 3 large eggs, room temperature

  • 1 teaspoon vanilla extract

  • 1 teaspoon lemon extract

  • ¼ cup lemon juice (1 large lemon)

  • 1/3 cup buttermilk

  • 1/3 cup vegetable oil

  • 1

    ¾ cups all purpose flour

  • ½ teaspoon

    baking soda

  • ½ teaspoon baking powder

  • 1 teaspoon salt

Copycat Starbucks Lemon Loaf Cake Recipe

Step 1: Zest, Sugar and Butter

Add the zest, sugar and butter to a stand mixer. Mix on high for 3 to 5 minutes. This will help release the lemon oils in the zest for a bigger lemon flavor.

Copycat Starbucks Lemon Loaf Cake Recipe

Step 2: Add Eggs and Vanilla

One at a time, add the eggs, the lemon extract, and the vanilla, beating well between additions.

Copycat Starbucks Lemon Loaf Cake Recipe

Step 3: Add Remaining Wet Ingredients

Add the lemon juice, buttermilk, and oil, beating until well combined.

Copycat Starbucks Lemon Loaf Cake Recipe

Step 4: Add Dry Ingredients

Sprinkle with flour, salt, baking powder and baking soda. Stir until just combined–do not over mix.

Copycat Starbucks Lemon Loaf Cake Recipe

Step 5: Bake

Grease a 9 inch loaf pan (flour as well if cakes tend to stick to your loaf pan), and spread the batter into the pan in an even layer. Bake at 350°F for 40-45 minutes.

Step 6: Make Icing

Add the 2 cups powdered sugar, 3 tablespoons buttermilk and 1 teaspoon lemon extract in a large bowl. Beat with a hand mixer until well combined. It will be very thick–this will allow it to sit on top of the loaf instead of running down the sides.

Copycat Starbucks Lemon Loaf Cake Recipe

Step 7: Cool and Ice

Allow the cake to cool completely before removing from the pan. Ice the top of the cake, allow to icing to set before slicing.

Copycat Starbucks Lemon Loaf Cake Recipe

Tip

Want to make it super moist? Just brush all sides with simple syrup! Combine equal parts hot water and sugar, then brush onto the cake with a pastry brush.

Step 8: Slice and Serve

Copycat Starbucks Lemon Loaf Cake Recipe Copycat Starbucks Lemon Loaf Cake Recipe

Golden Milk Turmeric Tea Recipe

0

Golden milk turmeric tea, also known as golden milk latte, is a popular beverage in the wellness community. It features a generous dose of turmeric and ginger, resulting in a spicy drink with potent anti-inflammatory properties. The beverage also contains ground black pepper, which increases the bioavailability of turmeric. (In other words, it helps your body soak up the goodness of turmeric!) Here's how to make this deliciously comforting beverage.

Golden milk turmeric tea

Video of the Day

Things You\’ll Need

  • 1 1/2 cups non-dairy milk

  • 1 teaspoon ground turmeric

  • 1/2 teaspoon ground ginger

  • 1/2 teaspoon ground cinnamon

  • 1/4 teaspoon ground black pepper

  • 1 tablespoon maple syrup or honey

Tip

For best results, use a creamy non-dairy milk like coconut milk. You can also add 1 teaspoon of coconut oil if using a thinner non-dairy milk.

Ingredients for golden milk turmeric latte

Step 1

In a small pot or saucepan, combine all the ingredients. Bring to a boil, then reduce to a simmer.

Combine golden milk ingredients

Step 2

Heat for 5 to 8 minutes, whisking frequently, or until the ingredients are fully combined. Let cool until slightly warm before pouring into your mug.

Heat golden milk turmeric tea

Depending on your taste buds, you might need to adjust the ingredients. For example, you may prefer a lighter turmeric taste or a stronger ginger flavor. You can also add more sweetener, if needed.

Golden milk turmeric tea

Although golden milk latte is often enjoyed warm, you can also drink it cold. Simply shake the drink in a martini shaker with ice, then pour over ice cubes. Garnish with cinnamon or coconut whipped cream, if desired.

Golden milk turmeric tea

Is Spinach With White Dots Good to Eat?

0

Person preparing spinach Spinach should be vibrant and green — never spotted. Image Credit: Image Source/Digital Vision/Getty Images

If your spinach has white spots on it, there could be a number of reasons — and none of them are good. White spots indicate bacteria, fungus or rot, so if your spinach has them, you should throw it away. Though you should always wash your spinach before you eat it, if the spots have already appeared, it's beyond saving.

Video of the Day

Avoid the “Rust”

One particularly common problem affecting spinach is white rust, a fungus. This fungus appears on spinach leaves first on their lower sides, then on their tops. It looks like white blisters on the surface, and though they start small, they grow and consume the leaf. White rust develops in cool, moist environments, like after a rain fall, when water collects on the leaf and makes it hospitable for spores.

Cercospora Spots

Another common blight on spinach plants is cercospora, a fungal disease. Cercospora, which also affects leafy plants like Swiss chard, looks like small white spots across the surface of the leaf — a single leaf may have a dozen or more spots, or just a few. These tiny spots, which have a dark ring around them, grow and eventually turn gray as the fungus matures.

Steer Clear of Bacteria

A variety of other fungal diseases can cause white spots to form on your spinach, and so can bacteria. Bacterial spots are slightly different in appearance from fungal diseases, but they are just as bad for you to eat — they mark where bacteria has entered and eaten away at spinach, leaving the plant necrotic and withered. Bacteria spots are identifiable not only by their irregular shape, but by the way the rest of the leaf withers and dies — the leaf appears frayed and visibly damaged, particularly around the edges, where bacteria frequently enters.

Eating Spinach Safely

You should never eat spinach with white spots, but even if your leaves have no apparent traces of bacteria or fungus, you should wash them before eating. Always wash your hands with warm soap and water before opening a bag of spinach, and thoroughly rinse the spinach leaves in cool, clean water. This washes away not only dirt residue and germs, but also any remnants of the pesticides and fungicides commonly used to prevent white spots from forming.

Easy to Make Corn Casserole Recipe

0

Corn is one of my favorite vegetables, and although I love it on it's own, this casserole just might be my absolute favorite way to enjoy it. I grew up having corn casserole at every Thanksgiving and Christmas meal and still look forward to it every single year. The texture is fluffy, the top gets the most beautiful golden color, and the taste of butter runs throughout. It simply doesn't get much better than that. You, and anyone else you serve this casserole to, will become fans of this easy recipe at first bite!

Easy to Make Corn Casserole

Video of the Day

Things You\’ll Need

  • 8.5 oz. box cornbread mix, (2)

  • 2 cans corn (drained)

  • 2 cans cream of corn (not drained)

  • 8 oz. sour cream

  • 1 cup melted salted butter, (2 sticks)

Easy to Make Corn Casserole

Step 1

Preheat your oven to 350 degrees. Combine all ingredients into a large bowl and fold together until well combined.

Easy to Make Corn Casserole

Step 2

Pour the corn mixture into a greased casserole dish and spread evenly.

Easy to Make Corn Casserole

Step 3

Cover the casserole with aluminum foil and bake for 30 minutes covered, and then remove the cover and bake for another 30 to 45 minutes uncovered until the center of the casserole is firm and the edges are golden.

Easy to Make Corn Casserole Easy to Make Corn Casserole

Can You Substitute Mascarpone With Anything Else?

close-up of a portion of tiramisu on a plate Mascarpone cheese is a main ingredient in tiramisu. Image Credit: George Doyle/Stockbyte/Getty Images

Mascarpone originated in Italy and it is a thick, creamy cheese made from cream and citric or acetic acid. If you cannot locate mascarpone cheese in your grocery store, several everyday ingredients can stand-in for the hard to find cheese. You can also make it at home in lieu of purchasing it in the grocery store.

Video of the Day

Substitutions

If you are out of mascarpone or simply cannot find it in a grocery store, use a mixture of cream cheese, heavy whipping cream and sour cream instead. Mascarpone is a very rich, full-fat cheese; do not use low-fat ingredients in your substitution. Low-fat cream cheese, sour cream or half and half will result in a poorly tasting concoction that may ruin your recipe. If you're concerned about fat content and calories, use full-fat ingredients and eat a smaller serving.

Homemade

If you can't find mascarpone cheese in your grocery store, make your own. Mascarpone cheese requires only two ingredients — whipping cream and lemon juice. For every two cups of whipping cream, use one tablespoon of fresh squeezed lemon juice. Heat the cream in a double boiler until it reaches 190 degrees Fahrenheit. Stir the lemon juice into the cream and maintain at 190 degrees F for five minutes. The cream will begin to curdle, or separate. Remove it from the heat and cool for 20 minutes. Pour the mixture into a sieve lined with four layers of cheese cloth. Cover the sieve with plastic wrap and refrigerate for 24 hours. Once strained, the mixture in the sieve is your mascarpone cheese.

Uses

Mascarpone cheese is famously used in desserts such as tiramisu, cannoli and cheesecake. It is also used in savory dishes like risotto. Added to alfredo sauce, mascarpone adds richness and depth of flavor. Use it instead of butter in pasta dishes or to thicken sauces. Mascarpone may be used as a topping for fresh fruit or cakes as well.

Price

In areas where mascarpone is readily available, it can be expensive. Substituting the cream cheese, whipping cream and sour cream mixture or making mascarpone cheese yourself is extremely cost-effective. Make a test batch to sample before using it in a recipe for a special occasion or get-together to make sure you are happy with the results.

How to Make Glaze for Cakes

Things You\’ll Need

  • 1-1/4 cups heavy cream

  • Large saucepan with lid

  • 12 ounces semi-sweet or bittersweet chocolate

  • Grater

  • Wooden spoon

  • Mixing bowl

  • 1 cup confectioners sugar

  • Sifter

  • 3 tbsp. fruit juice (like lemon or berry)

  • 1 teaspoon vanilla extract

  • Whisk

  • 3 tbsp. heavy cream

  • 1 tbsp. light corn syrup

  • 1/2 tsp. vanilla extract or seeds from a 1/4 of a vanilla bean

... Glazes are often used on bundt cakes, which are hard to frost.

Making frosting from scratch can be a frustrating and time-consuming experience. A lot of practice is needed to create the right consistency and texture, for which many home bakers may not have the time. Homemade glaze is a fast alternative to frosting, and can be prepared using less ingredients. Some glazes require only three ingredients and don't always need to be cooked. Decorating with glaze is also easier, as it is poured on top. This creates the glaze finish as it cools.

Video of the Day

Chocolate Ganache Glaze

Step 1

Pour 1-1/4 cups of heavy cream into the saucepan. Turn the burner onto medium heat, stirring often.

Step 2

Chop or grate chocolate into tiny pieces. The smaller the pieces the better they will melt.

Step 3

Remove the pan from the heat when it begins to boil and sprinkle the chocolate pieces on top of the cream. Quickly put the lid on the pan.

Step 4

Wait for 5 minutes, then take off the lid and stir until chocolate mixture is smooth. If the chocolate doesn't fully melt, place the pot back onto the stove and heat on low heat until it does.

Step 5

Pour over cakes for a glaze.

Fruit Glaze

Step 1

Sift 1 cup of powdered sugar into a large mixing bowl.

Step 2

Whisk the fruit juice into the sugar.

Step 3

Stir until all lumps are removed. Add more juice if the glaze is too thick and more sifted sugar if it is too thin.

Step 4

Pour over prepared cake.

Vanilla Glaze

Step 1

Sift 1 cup of powdered sugar into a mixing bowl.

Step 2

Add 3 tbsp. of heavy cream, corn syrup and vanilla; stir until blended and shiny. If it is too thick, add 1 tsp. of cream at a time until it becomes smooth.

Step 3

Spoon glaze over cake. If it isn't dripping on its own, encourage it with the back of a spoon.

Tip

Frozen fruit can be cooked until softened, then strained to make fresh juice for glaze.

Cake should be warm when glazed, as it will help the glaze easily fall over the cake.

These glazes are versatile and can be used interchangeably on any kind of cake.

14 Slow Cooker Recipes for Easy Weeknight Meals

crockpot stuffing 1 of 15

Easy Slow Cooker Recipes

The 1970s was a hip decade for fads. Bell bottoms, disco fever and… slow cookers. Get your dinner groove on with these fun, creative ways to cook your favorite dishes. From the traditional to the exotic, you'll be surprised how fresh ingredients make slow cooker recipes hip again for the 21st century. Set it and forget it!

Image Credit: Demand Media Bowl of mac and cheese and beer 2 of 15

Beer Mac & Cheese

You know you've made it in life when you start preparing mac & cheese with real, freshly grated Cheddar. Whether it's for a holiday, or just a happy day, the slow cooker can help give a big kid twist to this classic dish.

Image Credit: Demand Media Pulled chicken sliders 3 of 15

Chipotle Beer Chicken Sliders

Slow cookers are perfect for keeping shredded meats juicy. Juicy shredded meats are perfect for sliders– it's a match made in appetizer-turned-meal heaven!

Image Credit: Demand Media bowl of BBQ meatballs 4 of 15

BBQ Meatballs

A good meatball is hard to come by. Help keep freshly-cooked meatballs warm or dress up frozen meatballs with the ease of the slow cooker. Homemade BBQ sauce adds another special touch to this perfect party appetizer.

Image Credit: Sarah Vantassel/Demand Media plate of baked potatoes with toppings 5 of 15

Baked Potatoes

Sometimes you just don't want to turn on the oven. These quick and easy steps for baking potatoes in the crockpot will keep your kitchen cool and you tastebuds happy.

Image Credit: Sarah Vantassel/Demand Media stuffing in a crock pot 6 of 15

Crockpot Stuffing

When the craving for comfort food comes to call, this trusty dish will smell heavenly after a long day at the office. Cooking time is short, so use a crockpot with a timer or set it while you prepare the rest of your dinner.

Image Credit: Katy Jane Conlin/Demand Media bowls of white bean beer & ham soup 7 of 15

White Bean Beer & Ham Soup

The beauty of this bean recipe is two-fold– not only do the northern beans add a hearty texture lost to peas, but the hours spent in the slow cooker marries the flavors of the ham and beer to perfection. Use a store-bought spiral ham or prepare the ham yourself.

Image Credit: Jackie Dodd bowl of jalapeno beer cheese dip 8 of 15

Jalapeno Beer Cheese Dip

A challenge to making a spicy dip is just that– making the dip spicy. Let the slow cooker be your guru as it helps the jalapenos soften at their own speed, unleashing the flavors within!

Image Credit: Demand Media bowl of beef brisket 9 of 15

Beef Brisket

Few things are more unpleasant than dry brisket. Save yourself the heartache of wasting gobs and gobs of BBQ trying to save shoe leather– use the slow cooker to achieve melt-in-your-mouth perfection.

Image Credit: Laura Beth Drilling/Demand Media plate of rump roast and potatoes 10 of 15

Rump Roast

The same rules of brisket also apply to rump roast. Slow = tender. The best part of this method is that you can toss in whatever veggies you like and enjoy a full meal in one!

Image Credit: Barbara Smith/Demand Media pulled pork sandwich on kaiser roll 11 of 15

BBQ Pulled Pork

As part of a clever 1987 advertising campaign, the National Pork Board declared pork to be "The other white meat." So it must be true, right? For that fall-off-the-bone kind of juiciness and flavor, stew your pork in a slow cooker.

Image Credit: KatyJane Conlin/Demand Media plate of corned beef and cabbage 12 of 15

Corned Beef & Cabbage

Let the luck of the Irish be with you year-round. With the slow cooker doing the hard work for you, you can sit back, relax and sip on some sweet Irish cream.

Image Credit: Kyria Abrahams/Demand Media bowl of irish stew 13 of 15

Irish Stew

Properly cooked lamb is ubiquitous with flavor and comfort. Stay warm with both on a cold winter's day. Pairs well with Irish Soda Bread.

Image Credit: Julia Mueller plate of oxtails and vegetables 14 of 15

Crockpot Oxtails

Oxtails are an underrated piece of meat with a lot of flavor potential. The convenience of the slow cooker can turn even the greenest chef into a Caribbean cuisine guru. Don't forget the butter beans and rice!

Image Credit: Kris Robertson/Demand Media dish of dulce de leche 15 of 15

Dulce de Leche

Dulce de leche is a creamy caramel that's great over ice cream, pastries or even on its own. Traditionally stirred over stove top, make your own Latin American treat with half the effort by using this smart slow cooker shortcut.

Image Credit: Kyle OConnor/Demand Media

How to Combine Coffee, Cocoa & Maple Syrup for Hormone Balance

Things You\’ll Need

  • 1 tsp. pure cocoa

  • 1 tsp. grade B organic maple syrup

  • Cup or mug

  • Spoon

  • Freshly brewed coffee

... Mixing coffee with cocoa and maple syrup may help balance hormones.

Keeping your hormones balanced is one of the most vital things you can do to keep your health in check. Hormones control many of the body's most important functions, such as blood pressure, metabolism and insulin. A mixture of coffee, cocoa and maple syrup has been shown to help keep your hormones balanced. A study done by Harvard Medical School shows that coffee may have anti-cancer properties and reduce the risk of diabetes. Cocoa beans are a good source of flavonoids, which are antioxidants. Maple syrup is rich in manganese and zinc, which are good for your heart and immune system.

Video of the Day

Step 1

Mix 1 teaspoon of pure cocoa powder and 1 teaspoon of grade B organic maple syrup in the bottom of a cup or a mug. Mix until the cocoa powder and maple syrup form a thick paste.

Step 2

Fill up the cup with hot, freshly brewed coffee. With a spoon, mix until the drink is frothy.

Step 3

Drink the coffee, cocoa and maple syrup mixture to regulate the stress hormone cortisol. Drink this Cobalamin, or vitamin B12, mixture first thing in the morning so your body is relaxed and stress free for the remainder of the day.

Tip

Be sure to use only grade B maple syrup as this is the only syrup that is bottled straight from the tree and goes through no processing. This mixture is also shown to aid people with osteoporosis.