Home Blog Page 102

Orange Creamsicle Layer Cake Recipe

0

It would be hard to find a human alive today that doesn't have a great childhood summer memory of an orange creamsicle. Those delicious cream popsicles covered with a layer of orange were always a favorite with everyone I knew. This orange creamsicle layer cake is built around those same flavors and will always be a crowd pleaser!

Orange Creamsicle Layer Cake Recipe

For the Cake:

Things You\’ll Need

  • 1 cup unsalted butter, at room temperature

  • 1 ¾ cup granulated sugar

  • 4 large eggs, at room temperature

  • 2 teaspoons vanilla extract

  • ½ cup, plus ¼ cup orange juice concentrate, thawed and divided

  • ¾ cup whole milk

  • 2 ¾ cups all-purpose flour

  • ¼ cup cornstarch

  • 2 teaspoons baking powder

  • 1 teaspoon baking soda

  • 1 teaspoon salt

For the Frosting:

Things You\’ll Need

  • 1 ½ cups butter, room temperature

  • 8 oz cream cheese, room temperature

  • 1/3 cup orange marmalade

  • 2 teaspoon vanilla extract

  • ¼ cup heavy cream

  • 1 lbs confectioners sugar

Orange Creamsicle Layer Cake Recipe

Prepare the Cake

Step 1

Preheat oven to 350°F. Add the butter and sugar to the bowl of a stand mixer. Beat on high until well combined.

Orange Creamsicle Layer Cake Recipe

Step 2

One at a time, add the eggs, then the vanilla. Beat well between additions.

Orange Creamsicle Layer Cake Recipe

Step 3

Add the milk and 1/2 cup orange juice concentrate, beating until well combined.

Orange Creamsicle Layer Cake Recipe

Step 4

Add the flour, cornstarch, salt, baking powder and baking soda. Stir until just combined.

Orange Creamsicle Layer Cake Recipe

Step 5

Add to two 9-inch cake pans that have been greased and floured. Bake until the top springs back when lightly touched, about 30 minutes.

Then remove from oven and allow to cool before removing from pans.

Orange Creamsicle Layer Cake Recipe

Step 6

Brush the cooled cake layers with the remaining orange juice concentrate.

Orange Creamsicle Layer Cake Recipe

Prepare the Frosting

Step 1

Beat the butter until well creamed. Add the cream cheese and beat until well combined.

Orange Creamsicle Layer Cake Recipe

Step 2

Add the marmalade, vanilla and heavy cream. Beat until well combined.

Orange Creamsicle Layer Cake Recipe

Step 3

Add the powdered sugar. Slowly build up speed and beat until well combined.

Orange Creamsicle Layer Cake Recipe

Frost the Cake

Step 1

Frost the cake, adding frosting between the layers.

Orange Creamsicle Layer Cake Recipe

Step 2

Slice and serve!

Orange Creamsicle Layer Cake Recipe

Bacon, Cheese & Peppers Breakfast Biscuits Recipe

0

There are few better things to enjoy during a delicious morning meal than a perfectly-baked, buttery, golden biscuit. And in this recipe, the perfect biscuit is made even better. Spicy jalapeño, sharp cheddar and smoky bacon combine to elevate this biscuit to a whole new level. It's amazing on its own or as part of a killer breakfast sandwich. With a batch of these, breakfast simply can't go wrong.

Feature 1

Video of the Day

Things You\’ll Need

  • 2 cups self-rising flour

  • 6 tbs very cold unsalted butter, cubed

  • 1/2 cup + 3 tbs cold buttermilk, plus a bit extra for brushing

  • 1 large jalapeño, deseeded and chopped

  • 2 oz shredded sharp cheddar cheese, plus a bit extra for sprinkling

  • 6 strips of cooked bacon, chopped

  • large bowl

  • pastry blender

  • rolling pin

  • 2'' biscuit cutter

  • baking sheet

  • parchment paper

  • pastry brush

Step 1

Preheat oven to 425° F. Line a baking sheet with parchment paper and set aside. Place flour and butter in a large bowl and using a pastry blender, cut the butter into the flour until it becomes the size of small peas.

Step 1

Tip

If you don't have a pastry blender, simply rub the cubed butter between your fingers until the butter breaks up into small pea-sized pieces.

Step 2

Add the shredded cheese, jalapeño and bacon, tossing a few times in the flour and butter mixture to coat.

Step 2

Step 3

Drizzle the buttermilk over the flour mixture, tossing the flour mixture with a fork as you pour. Once all the buttermilk has been added, gently knead the dough a few times until a shaggy dough forms.

Step 3

Step 4

Turn dough onto a lightly floured surface with all purpose flour. Roll or pat the dough into a 6" x 9'' rectangle. Cut rectangle into thirds and stack on top of one another.

Step 4

Step 5

Roll the stacked pieces into a 5" x 8" rectangle that is about 3/4" thick. Use a 2" biscuit cutter to cut out 8-9 biscuits, gathering and reshaping scraps as necessary.

Step 5

Tip

Dip the biscuit cutter into some flour in between cuts to reduce sticking.

Step 6

Place the biscuits on the prepared baking sheet, with 1" spacing between them. Brush the tops with a little buttermilk and a light sprinkle of cheese.

Step 6

Step 7

Bake the biscuits for 14-16 minutes, or until lightly golden. Remove from oven and serve immediately. Enjoy!

Feature 7

How to Make Long Island Iced Tea Jello Shots

0

If you're a fan of mixed drinks, you've likely had your fair share of Long Island iced teas. But have you ever had it in the form of jello shots? Made with four different liquors and fresh lemon juice, these shots are the epitome of a party treat. One batch makes about 16 shots, but you can easily double or triple the recipe.

Long Island iced tea jello shots

Video of the Day

Things You\’ll Need

  • 2 cups cola (any brand)

  • 1 cup cold water

  • 1/4 cup gin

  • 1/4 cup tequila

  • 1/4 cup vodka

  • 1/4 cup light rum

  • 4 tablespoons fresh lemon juice (from 1 lemon)

  • 2 packets unflavored gelatin (.25 ounce each)

  • Small lemon wedges (optional)

  • Vegetable oil

Ingredients for Long Island iced tea jello shots

Tip

One mini liquor bottle (50 milliliters) is about 1/4 cup.

Step 1

Before starting, lightly grease condiment containers or small plastic cups with vegetable oil. This will help the jello shots slide out easily.

To prepare the lemon juice, squeeze one lemon until you have about 4 tablespoons of juice. Set aside.

Squeeze the lemon

Step 2

Add the cola to a small pot and sprinkle the gelatin on top. The cola will fizz and foam; this is normal. Place the pot over low heat.

Add the gelatin to the cola

Step 3

Heat until the gelatin dissolves, about 3 to 5 minutes. Whisk frequently to break up the foam and prevent the gelatin from settling. If the mixture starts to boil, reduce the heat.

Heat and whisk cola

Step 4

After 5 minutes, the cola should be free of foam. Remove the pot from the heat. Add lemon juice, water and all four liquors. Mix well.

Add lemon juice, water and liquor

Step 5

Let the mixture cool slightly. Transfer into a heat-safe cup with a spout, so it's easier to handle. Pour into the greased containers.

Pour into individual containers

Tip

To make jello shots in fun shapes, use a silicone mold. You can also pour the mixture into a greased baking dish, then slice the jello into cubes. The total number of shots will depend on the size of your containers.

Step 6

Cover the shots and chill for at least 4 hours, or until set. Garnish with lemon wedges and enjoy!

Long Island iced tea jello shots

Pezzetti Coffee Maker Instructions

... Pezzetti coffee makers are simple, easy to use stove top espresso makers.

Pezzetti stove-top coffee makers make espresso nearly as strong and flavorful as dedicated pump-driven espresso machines. Pezzetti espresso makers come in a variety of sizes, ranging from a single cup to large 14-cup espresso makers. Making espresso in a Pezetti, or any other stove top espresso maker, is simple.

Video of the Day

Water Resevoir

To make coffee in a Pezzetti espresso maker, unscrew the base from the top. If you have recently made espresso and are making an extra cup, run the espresso maker under cold water to cool it. In some cases, internal pressure can make the lower water reservoir hard to remove. Place the top under your arm for more leverage, wedging the handle between your body and arm while twisting the base. Fill the lower reservoir with water to just below the safety valve. Do not fill past the safety valve.

Add Coffee

Put the filter funnel in the reservoir base. If you are grinding your own beans, grind enough beans to a fine, espresso powder to fill the basket. If you are using pre-ground coffee, be sure to use an espresso grind to get the full flavor of the beans. Experiment with the amount of coffee to adjust the taste of your espresso. One technique is to mound the coffee up and compress it slightly to make a strong cup of espresso. Be sure to clean all coffee from around the lip to allow a tight seal between the base and top.

Attach Top and Brew Coffee

Clean the coffee powder from the lip of the basket and reservoir. Screw the top onto the base. Hand-tighten the base, but make a tight seal between the gasket and the base. Place the pot on the stove over a medium-high heat. Your Pezzetti pot will gurgle while brewing. The coffee is done when you hear the steam hissing through the internal column and no more coffee is being made. Remove the pot from the heat and wait a minute or two to allow the pressure to subside before serving.

What If an Avocado Is Brown in the Middle?

0

Avocado halves Even if the surface has browned, the flesh underneath could be green. Image Credit: Stockbyte/Stockbyte/Getty Images

Avocados don't last long once they've been cut open, and even an avocado with ripe, vibrant green flesh can turn brown and unpleasant-tasting in just a few hours. If your avocado is brown in the middle, it may be too late for you to save. Taking a few proactive steps after you cut your next avocado will make it last longer and maintain its fresh flavor and distinct color.

Video of the Day

Enzymes and Oxidation

Avocados contain enzymes that react with oxygen. This is why an avocado can stay ripe and fresh for days before you cut it open, but deteriorates in mere hours after you do. Once the oxygen comes in contact with the avocado's flesh, the oxidation process starts. Fortunately, oxidation affects the exposed flesh before the flesh underneath. This is why when you remove the pit, the flesh underneath hasn't yet turned brown. Scrape off the outermost layer of flesh and you may find that underneath, it's still green and delicious.

Bruises and Ripening

If an avocado has brown spots in the middle as soon as you cut it open, this is likely bruising. Similar to other fruits, like bananas, an avocado can develop bruises if it is handled indelicately. You can simply carve out and discard these spotted parts and eat the parts that are still green. If you cut open an avocado and the flesh is brown throughout, simply throw it away — it has overly ripened and will taste unpleasant

The Taste

While you can skim off a layer of brown flesh and eat the green underneath, if an avocado is brown in the middle, your best bet is to throw it away. The oxidation process actually spoils the avocado's flesh, so eating a brown avocado is akin to eating a rotten apple. The difference isn't just an aesthetic one — if the flesh is brown, your avocado will likely have a rancid odor and taste.

Preservation Tips

At room temperature, it takes a few hours for the oxidation process to turn the inside of your avocado brown, but a little citrus juice can make it last considerably longer. After you cut your avocado, rub any exposed flesh with lemon or lime juice. Place it in a plastic bag and squeeze out any excess air, then seal and refrigerate it for about two days. An alternate solution is to immerse your avocado in water. When you hold your head underwater, you don't get any oxygen — the same is true for your avocado. To keep your avocado flesh green and tasty for days without exposing it to citrus juice, submerge it in water and keep it cold. If you've used your avocado to make a bowl of guacamole, for example, pour about ½ inch of water onto the top before sealing and refrigerating the bowl, then pour it off before eating.

DIY Beach Cupcakes

0

Cowabunga! Nothing says paradise like lounging on the sand under a palm tree with waves lapping on the shore. And even if you can't get to the ocean, these cupcakes decorated with an idyllic beach scene will certainly put you in the tropical spirit. They're perfect for your summer party or luau, so grab your flip flops and sunglasses, and head to the kitchen.

beach cupcakes

Video of the Day

Things You\’ll Need

  • Cupcakes

  • Frosting

  • Blue icing color

  • Vanilla wafers

  • Green jelly fruit slices

  • Pretzel sticks

  • Green candy melts

  • Sour belts

  • Gummy bears

  • Sour balls

materials

Step 1: Bake Cupcakes

Using your own recipe or a boxed cake mix, prepare the cupcakes. I recommend light-colored cupcakes like these confetti ones so that the color does not show through the paper liners.

bake

Step 2: Prepare the Frosting

Whip up a homemade batch of buttercream frosting or purchase a pre-packaged tub at the supermarket. I made my own batch of frosting because it tastes better, and it pipes really well from a piping bag. The recipe for buttercream frosting is very basic: mix two sticks of butter (1 cup) with 3 cups of confectioner's sugar; then add two tablespoons of heavy cream and one teaspoon of vanilla.

frosting

Add 2-3 drops of blue icing color to the frosting, and mix it until you get a uniform light blue color. Icing color is available in the baking aisle at supermarkets and crafts stores.

blue color

Step 3: Make the Sand

For the sand, we'll be using vanilla wafers. Place the wafers in a sealable plastic bag, and crush them with a rolling pin until they are a fine consistency.

vanilla wafers

Step 4: Create the Beach

Spread a thin layer of frosting all over the top of the cupcake with a knife or spatula.

frosting top

Spoon the crushed vanilla wafers over half of the cupcake. Gently pack the "sand" into the frosting with the back side of the spoon to help it adhere.

beach

Step 5: Add the Ocean Waves

Place the frosting in a piping bag, and squeeze out the frosting onto the blue side of the cupcake in a wavy pattern. I used an open star piping tip to create the waves.

waves

Tip

Add extra blue icing color to half of the frosting, and place the darker frosting in the piping bag alongside the lighter one. The result will be a two-toned frosting.

Step 6: Make the Palm Trees

For the palm fronds, cut some green jelly fruit slice candies lengthwise into three or four sections.

fruit slice

Join the sections at the tips into a spiral shape. The candies are sticky, so they will adhere to each other on their own.

spiral

Heat some green candy melts in the microwave, checking and stirring the contents at 30-second intervals until it is melted and creamy. This will be the "glue" for the palm trees and other cupcake elements.

candy melts

The tree trunk will be a pretzel stick. Dip both ends of the pretzel stick into the melted green candy.

pretzel stick

Poke one end of the pretzel stick into the center of the palm fronds. Press firmly so that the pretzel stick goes through each of the jelly candy sections. Make a palm tree for each of your cupcakes, and place them in the refrigerator for about half an hour so that all the candy hardens.

palm trees

Once hardened, insert the trunks of the palm trees into the sandy side of the cupcakes. The ends that go into the cupcake have been dipped in candy melts, which create a barrier to the moisture from the cupcake. Otherwise, the pretzel sticks can become soggy and fall over.

trees

Step 7: Add the Lounge Chairs

Sour belts make the perfect lounge chairs for the beach, as they are colorful and have a natural curve to them. Cut the sour belts into 1 1/2-inch pieces.

sour belts

Place a dab of candy melt on the back of the sour belt.

dab

Rest the sour belt against the pretzel stick, using the candy melt as glue to adhere the two parts.

chaise

Step 8: Add the Bears

Place a dab of candy melt on the backs of the bears.

back of bear

Position the bears on the lounge chairs, letting the candy melt act as the glue.

bear

Tip

Place a sour ball on the opposite side of the pretzel stick to help support it and keep it from tilting.

Good thing the bear is sitting under the palm tree, or he would get sunburnt.

beach cupcake

How to Make Stuffed French Toast

0

You'll be the MVP of brunch anytime you whip up this sinfully delicious yet remarkably easy stuffed French toast recipe featuring an oh-so-gooey chocolate hazelnut filling. Why, you ask? Because, first of all, French toast. And, second, chocolate for breakfast. Duh.

breakfast tray with stuffed french toast, bacon and orange slices

Things You\’ll Need

  • 2 slices of bread

  • Cookie cutter (optional)

  • Desired filling such as chocolate hazelnut spread

  • 2 eggs

  • 1/2 cup milk

  • 1/4 teaspoon ground cinnamon

  • 1 teaspoon vanilla extract

  • 1 tablespoon unsalted butter

  • Powdered sugar and maple syrup (optional)

Step 1: Add Fun Shapes to Your Bread

Although this step is optional, you can elevate your French toast by using a cookie cutter to cut your bread into fun shapes like hearts, stars or flowers. Trust us, it's way more impressive this way!

cutting bread into heart shapes

Step 2: Spread on a Tasty Filling

Spread a generous amount of filling onto one slice of bread. We used chocolate hazelnut spread (nom nom!) as the filling in this recipe, but you could use cream cheese and sliced strawberries, peanut butter and bananas, or any other flavor combo that you love.

spreading chocolate filling onto bread

Step 3: Crimp the Edges

Place the other slice of bread on top and crimp the edges with the tines of a fork. Be sure to turn the bread over and crimp the other side, too.

crimping the edges of the bread

Step 4: Whisk the Ingredients Together

In a bowl, whisk together the eggs, milk, cinnamon and vanilla extract.

whisking the egg mixture

Step 5: Prep the Pan and Bread

Add a pad of butter to a hot sauté pan. Dip the stuffed bread in the egg mixture and allow the excess to drip off before placing the stuffed bread in the pan.

dredging stuffed bread browning both sides of the stuffed toast

Step 6: Wait for a Golden Hue

Brown both sides of the stuffed French toast until evenly golden and then remove from pan.

two heart shaped slices of stuffed french toast

Dust a little powdered sugar on top, pair with delicious sides like crispy bacon and fresh fruit, and surprise your favorite peeps with a gourmet breakfast in bed!

boy holding breakfast tray with stuffed french toast

10 Must-Try Hacks for Delicious Homemade Cocktails

0

Cocktails are to drinking what cooking is to eating: They're how you take a handful of ingredients and turn them into a unified (and tasty!) whole. Some skew sweet and some skew tart, but most aim for a balanced, refreshing flavor. Making your own craft cocktails is a great way to up your hospitality game, and it's a rewarding hobby in its own right. Here are a double handful of tips to get you started.

Cocktails in glasses on tray

Video of the Day

1. Use Jam for Flavor and Color

A well-balanced cocktail has enough sweetness to balance out tart and astringent ingredients, and that sweetness doesn't necessarily need to come from fruit juice or simple syrup. One innovative way to bring sweetness, flavor and color to your cocktail creations is through jams, jellies and preserves. When you're testing out your newest cocktail idea, reach into your pantry or fridge for a jam with compatible flavors. Don't overthink it; it can be as simple as stirring a small spoonful into a dry sparkling wine.

Assortment of Brunch Cocktails, Including Bloody Mary and Mimosas Jams and jellies and color, flavor and a sweet element to your cocktails. Image Credit: Vicki Jauron, Babylon and Beyond Photography/Moment/GettyImages

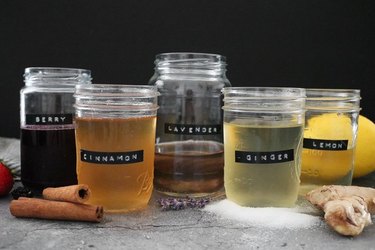
2. Make Simple Syrup

The bartender's sweetener of choice isn't sugar, because even the finest sugar is slow to dissolve in a cocktail shaker. Instead, bartenders use a liquid sweetener called simple syrup, and it lives up to the name. To make your own, just bring a cup each of water and sugar to a boil, then pour it into a clean bottle or mason jar and refrigerate it until you need it. To elevate your cocktail game, infuse the water with flavors — spices, herbs, fruit, even vegetables — to bring something unique to the mix. Just be sure to label the bottles diligently.

Simple Syrup

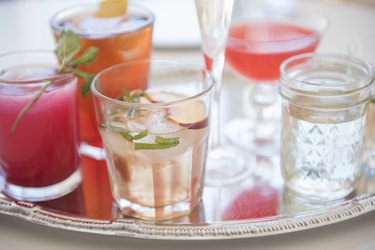
3. Make Special Ice Cubes

The taste of a cocktail is the most important thing, but its look is pretty significant as well. One way to up the visual appeal of your creations is with custom-crafted ice cubes. Fill the ice cube tray's cavities with berries, fresh herbs, pieces of fruit or edible flower blossoms, then freeze them and use them in compatible cocktails. For something subtler and more universal, make crystal-clear cubes: Start with distilled water and then boil and cool it twice, to remove excess oxygen, before freezing.

Flowers and fruit frozen in ice-cubes 
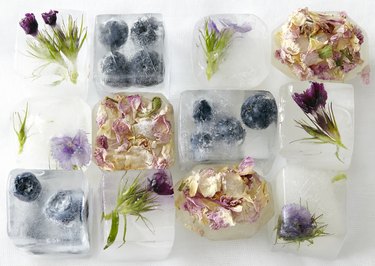
Freeze herbs, flowers, berries or fruit into your ice cubes for a decorative element. Image Credit: Debby Lewis-Harrison/Cultura/GettyImages

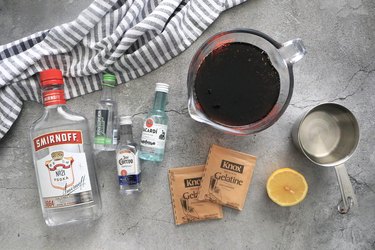
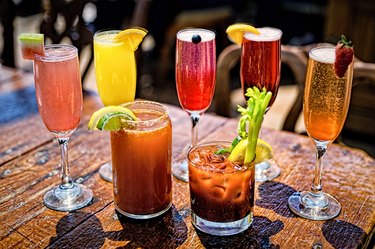
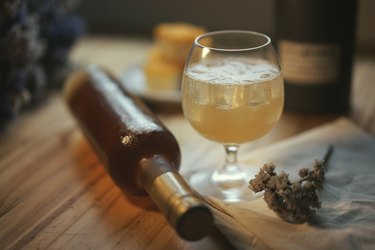
4. "Upcycle" Leftover Wine

The very notion of "leftover wine" is a frequent social-media joke, but in real life it happens pretty often. Those day-after remainders will lose some of their distinctive flavors, but they're still perfectly useful as an ingredient. Sangria and similar wine-based punches are the go-to for wine, but you can certainly think outside the pitcher. Wine lends body, acidity and a refreshing astringency to cocktails, helping you balance out sweet and fruity flavors from other ingredients. Once you've tried it, you may buy extra wine just to have the leftovers!

Summer Sangria Part 2 
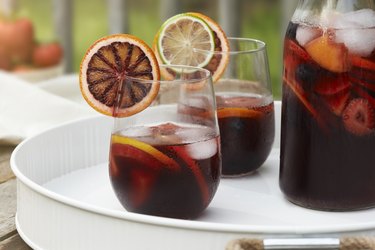
Sangria and punches are common ways to use up wine, but it works in cocktails as well. Image Credit: Brandon Marsh Photography/Moment/GettyImages

5. Infuse Your Booze

Flavored liquors have become a big part of the bar scene, opening the door to all sorts of new cocktails and variations on older ones. That doesn't mean you need to buy dozens of different vodkas or other spirits, because you can make your own. Fill clean, sterile bottles with your flavoring of choice — anything from crushed peppercorns to fresh herbs to citrus peel — pour in the spirit, and wait a few weeks. Voila! Now you're ready to create your own custom versions of your favorite drinks.

Bottle filling and preparation of traditional liqueur based on anise and moonshine with aromatic herbs, (herbero). 
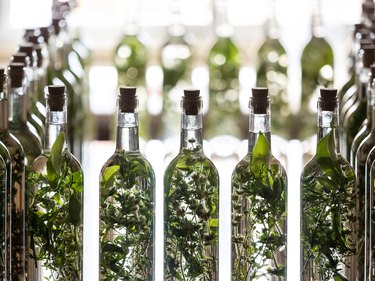
Infuse herbs, fruit, spices or other flavoring elements into your liquor to create unique cocktails. Image Credit: Jose A. Bernat Bacete/Moment/GettyImages

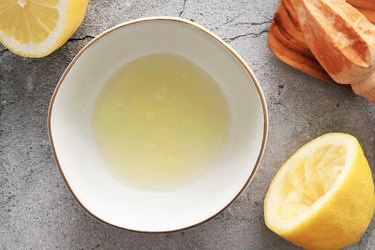
6. Make DIY Sour Mix

Cocktails, in their way, are the bartending equivalent of cooking: You can never go wrong having better, fresher ingredients. One of the most useful ingredients to keep behind your bar is a good sour mix, a key ingredient in many classic cocktails. The commercial product is easy to buy, but its flavors are blunted by preservatives and processing. To make your own, juice enough lemons and limes to make two cups of juice (you can play with the proportions to suit the flavor to your taste) and then combine it with two cups of your simple syrup. That's it, you're done!

Slices of yellow lemons and green limes 
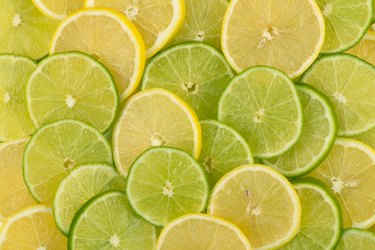
Homemade sour mix has a brighter, fresher flavor than the store-bought kind. Image Credit: Sergey Yakovlev/500px Prime/GettyImages

7. Grow a Cocktail Garden

Another way to have better, fresher ingredients is to grow your own. Lemons and limes are out of reach in most climates, but even apartment dwellers can grow cocktail-friendly herbs including rosemary, basil, lemon verbena or lemon balm, and of course mint. If you have a bit of space in your backyard, you could add a few canes of raspberries or blackberries, black currants (the main ingredient in cassis) or red currants, and strawberries or blueberries. Once you've got them, the potential uses and combinations are limited only by your imagination.

Two Moscow Mules 
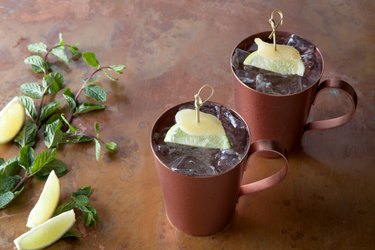
Mint is most traditional, but many common herbs lend an interesting note to custom cocktails. Image Credit: mitchellpictures/E+/GettyImages

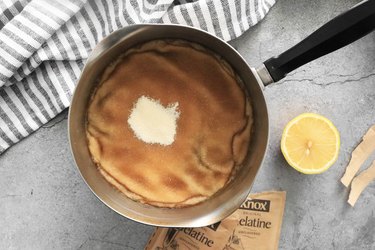
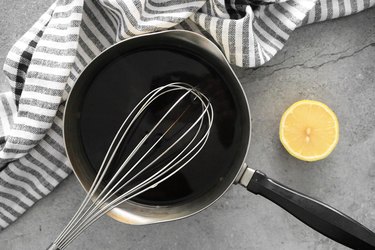
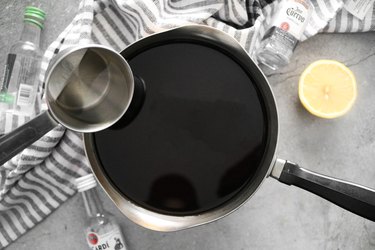
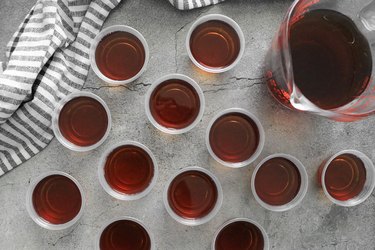
8. Make Your Own Grenadine

Many drinks use grenadine for its bold splash of color, but the supermarket version is usually an artificial simulation. The real thing is made from pomegranate juice ("​grenade​" is the French word for pomegranate), which gives it a more natural color and a rich, tangy flavor. It couldn't be easier to make, coming together in exactly the same way as simple syrup. Just heat a cup of pomegranate juice and a cup of sugar to a simmer, until the sugar is completely dissolved, then pour it into a sterile bottle or mason jar.

Europa, Austria, Wien, Naschmarkt, geoeffneter Granatapfel 
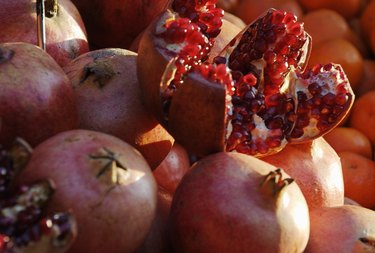
Grenadine from fresh pomegranate juice brings new life to traditional cocktails. Image Credit: sodapix/F1online/GettyImages

9. Make DIY Bitters

Bartenders everywhere rely on dashes of commercially prepared bitters to bring subtle notes of herb and spice to their cocktails, and the real innovators go beyond that to make their own bitters. DIY bitters are within the reach of any home enthusiast: All you need is high-proof alcohol, a few clean mason jars, and a stash of flavoring ingredients. Dried fruits, toasted nuts, dried citrus peel, spices and a variety of fresh or dried herbs can all be used to create the flavors. Bitterness comes from esoteric ingredients you can order online, like gentian or cinchona bark, or you can clean and roast a few dandelion roots (yes, dandelion!) to give your concoction a similar "edge" if you want it.

cocktail with a reclining bottle and sprig of herbs in the foreground A dash of homemade bitters can take a familiar cocktail to a whole new place Image Credit: skaman306/Moment/GettyImages

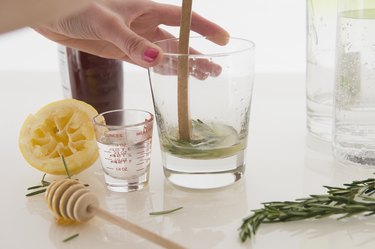
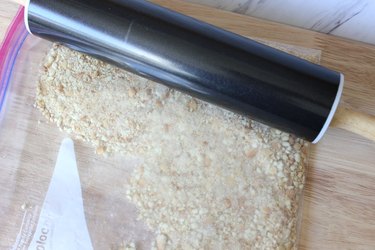
10. Improvise for Missing Equipment

Improvised and DIY ingredients are a big part of the craft cocktail experience, but don't overlook improvised tools. Don't have a muddler for crushing herbs and spices? Use the handle of your rolling pin or a large wooden spoon. Don't have a shaker? Use a mason jar. If you're missing your cocktail strainer, a tea strainer or the lid of your mason jar will work. A chopstick makes a decent substitute for a bartender's long mixing spoon, and if you don't have a jigger for measuring ingredients you can dig out that set of measuring spoons from your kitchen (2 tablespoons make an ounce, if you're wondering, and 3 teaspoons make a tablespoon).

Woman making cocktail

How to Roast Anaheim Peppers

Things You\’ll Need

  • Baking sheet

  • Cooking spray

  • Oven

  • Tongs

  • Paper bag

  • Kitchen gloves

Anaheim peppers, also called New Mexico peppers, are a type of chile pepper that rate medium to hot on the spicy scale. The long, thin peppers can be green or red in color, and grow mainly in the Southwest and in California. The skins of Anaheim peppers are most often removed before they are used in cooking. Roasting the peppers makes them easier to skin and brings out the robust flavor.

Step 1

Coat a baking sheet with cooking spray so the Anaheim peppers do not stick to the pan.

Video of the Day

Step 2

Place the peppers on the baking sheet, several inches apart.

Step 3

Turn the oven to the broil setting and put the baking tray in the oven or broiler.

Step 4

Use cooking tongs to turn the peppers every few minutes, to ensure that the entire pepper will become roasted. The long, slender shape of the Anaheim pepper means the peppers will cook fairly quickly.

Step 5

Remove the peppers from the oven when all sides are blackened. Cooking times vary depending on the size of the pepper. Fifteen minutes may be all that's needed for a medium-sized Anaheim pepper.

Step 6

Put the roasted Anaheim peppers in a paper bag and let them steam for 10 to 15 minutes.

Step 7

Peel the blackened skins away from the peppers. The steaming process makes it easy to remove the skins with your hands. Protect your hands from the oils of the chile peppers by wearing kitchen gloves.

Tip

You can also roast Anaheim peppers on an outdoor grill. The technique of turning the pepper for even cooking remains the same, but you may need to check them more frequently when cooking over an open flame.

Can You Eat Maitake Mushrooms Raw?

0

Fungus on tree Maitake were currency in medieval Japan. Image Credit: Jupiterimages/Photos.com/Getty Images

Maitake, Japanese for "dancing mushroom," grows wild in forests, usually springing from the dead roots of trees, such as oak. Maitake clusters reach 30 pounds or more, and their flared gray to brown clusters resemble the fluffed feathers of a sitting hen, hence their English nickname, "hen of the woods."

Video of the Day

Eating Raw Maitake

It's perfectly safe to eat maitake raw. Young maitake are tender throughout their leaf-like lobes and bodies, and you can consume all of them. As they age, maitake becomes tough and fibrous, and only the uppermost lobes remain soft and readily edible. Maitake have a woodsy, spicy taste. Crumble and sprinkle them into salads. Dry or freeze unused portions and add them to soups or steep them in hot water to make maitake tea.

Nutritional and Medicinal Value of Maitake

Maitake are low in fat and cholesterol, rich in B vitamins, potassium, fiber and complex sugars. Early animal studies imply that maitake extract may stimulate immune function, has anti-tumor effects, lowers blood sugar levels and improves insulin. A 2010 Japanese study suggests maitake potentially induces healthy ovulation in women with insulin-stressed fertility problems. Maitake figures prominently within traditional Chinese folk medicine and is revered for its ability to bolster circulation and lower blood pressure.

Wild Versus Cultivated Maitake

To cultivate maitake at home, purchase ready-to-grow maitake kits. After the maitake kit fruits for the first time, bury it in dirt. In temperate weather zones the fungus continues to yield clusters, especially in the summer to early fall. Cultivated clusters seldom grow to more than a few pounds. Wild maitake clusters occasionally grow to 30 or more pounds, a perk for those who treasure maitake and use it for multiple purposes.

Storing and Using Maitake

Mushrooms are highly perishable and begin to degrade soon after harvesting. Wrap them in moist paper towels and plastic wrap. Make holes in the plastic wrap to allow air circulation. Check the paper towels periodically and moisten them if they begin to dry out. Maitake keep for up to two years when frozen. Cut into desired portion sizes and store them in an airtight container or a sealable freezer bag. To dry maitake, place slices in a dehydrator set at 125 degrees Fahrenheit or in your oven set at the lowest temperature. The average drying time is approximately four hours.